How to Sew a Blanket Stitch
The blanket stitch is one of the most simple sewing techniques to create a beautifully finished edge, and I use it for a number of my craft projects. Today I’ll be showing you the easy steps so you can add this to your sewing basket of skills!
One of the reasons I love this stitch for craft projects is that it finishes the edges of fabric in such a pretty way with so little effort. The supplies are minimal, and the results speak for themselves. Let’s dive in…

Disclosure: This is not a sponsored post, and I have received no compensation for sharing anything that follows. Some links within this blog may be affiliate
links, and I might earn a commission if you make a purchase through that link. This usually amounts to cents, not dollars, and helps to support the projects featured on this blog. I only recommend products from companies that I have found to be trustworthy. Read my full disclosure here.
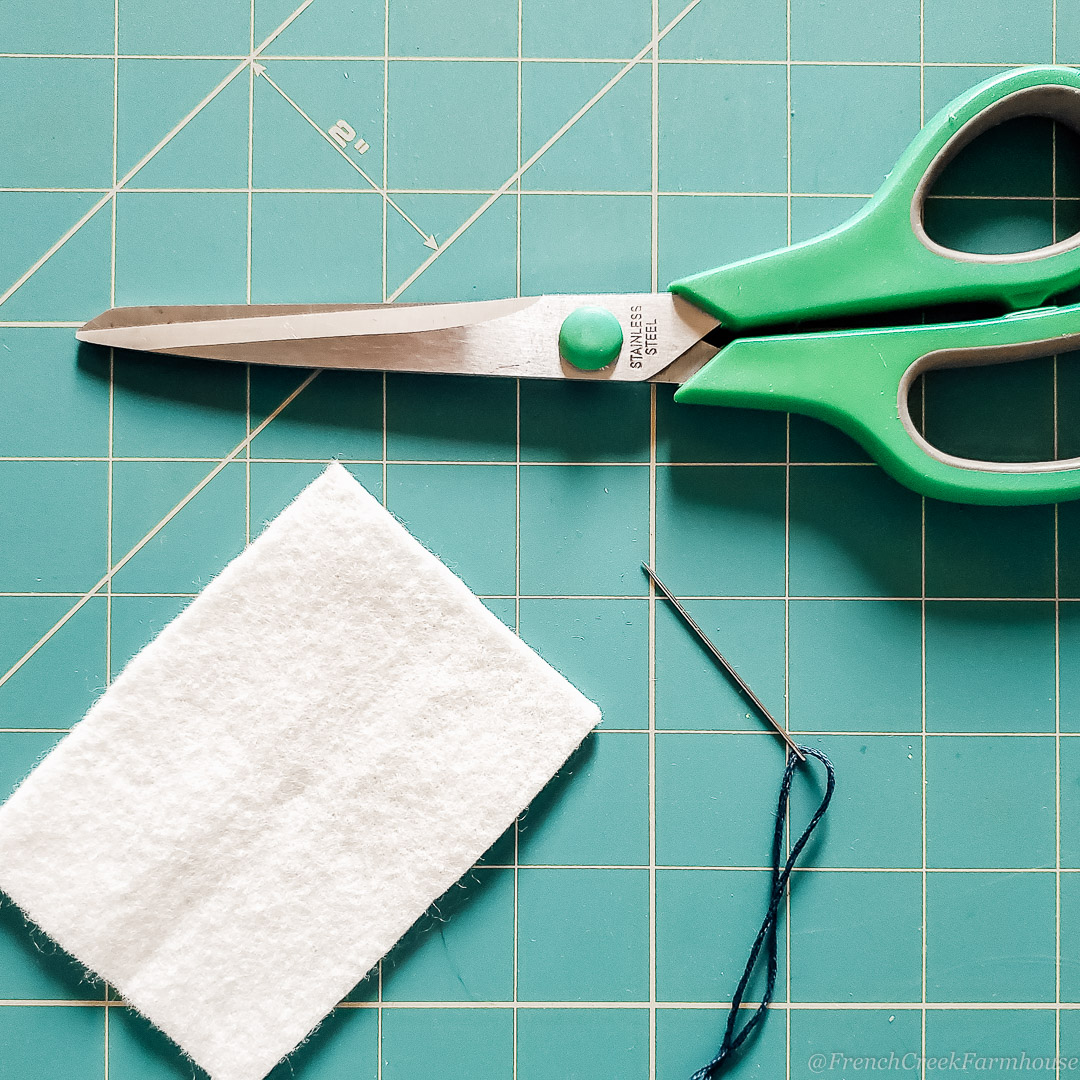
SUPPLIES
You only need four supplies to complete a project with a blanket stitch. For this tutorial, I’ll be using a piece of scrap felt, and I think it’s the best way to learn this technique. This stitch is truly ideal for thicker fabric, like felt, and you’ll see it used on many felt projects.
Gather these items to begin:
- A scrap of felt
- Embroidery floss (For most projects, I use floss that is the same color as my fabric, but for this demonstration, I’m using a contrasting color so that the stitch is easily visible)
- Embroidery needle (This is different from a regular sewing needle because it has a longer eye for threading larger materials)
- Scissors
STEP BY STEP
1. Begin your project by cutting a length of embroidery floss that is approximately the same distance as from your elbow to your fingertips. You can certain use other lengths, but this is generally the way to gauge thread length for hand-sewing projects because that length is the easiest to work with at one time.
2. Thread your needle, and put a knot at one end of the thread.
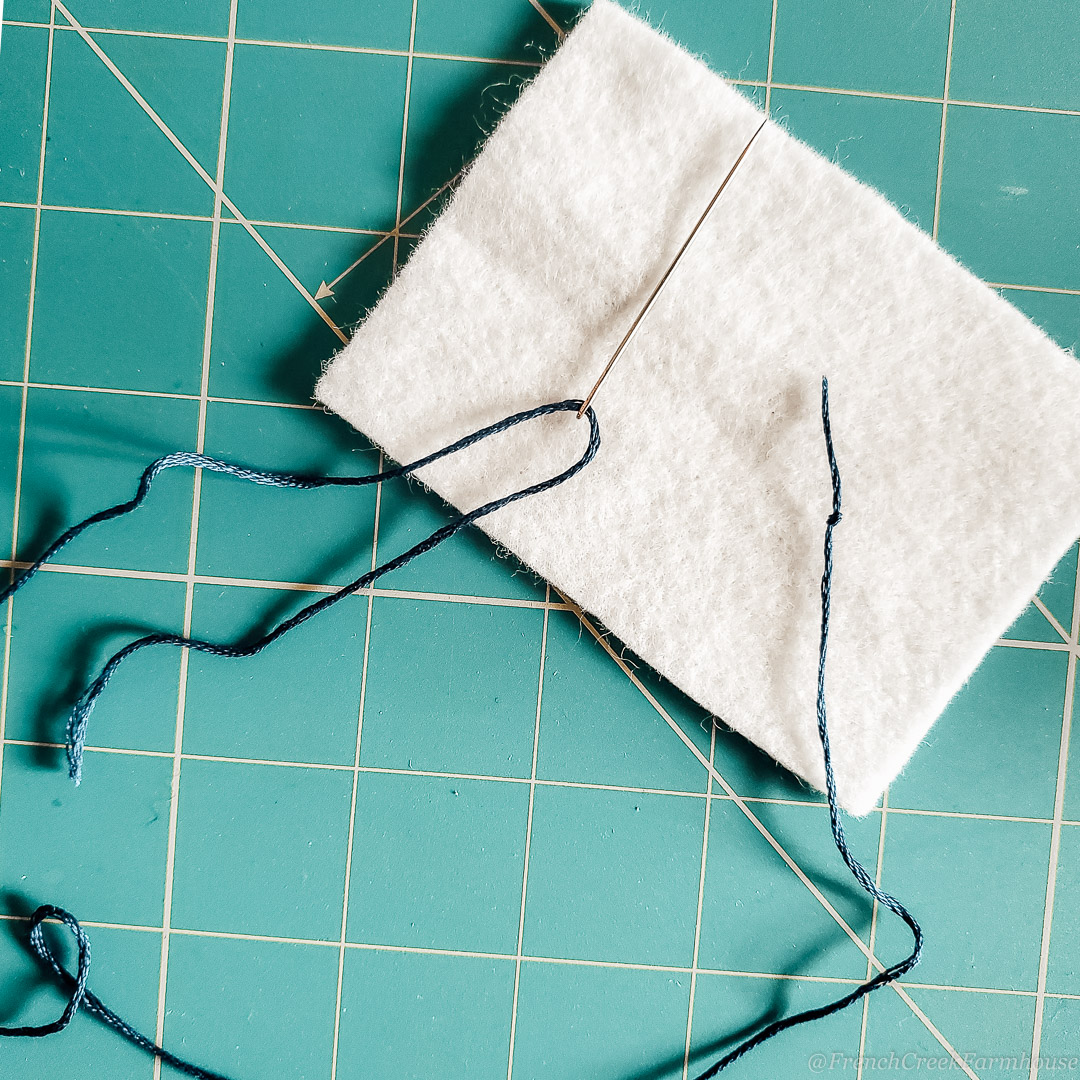
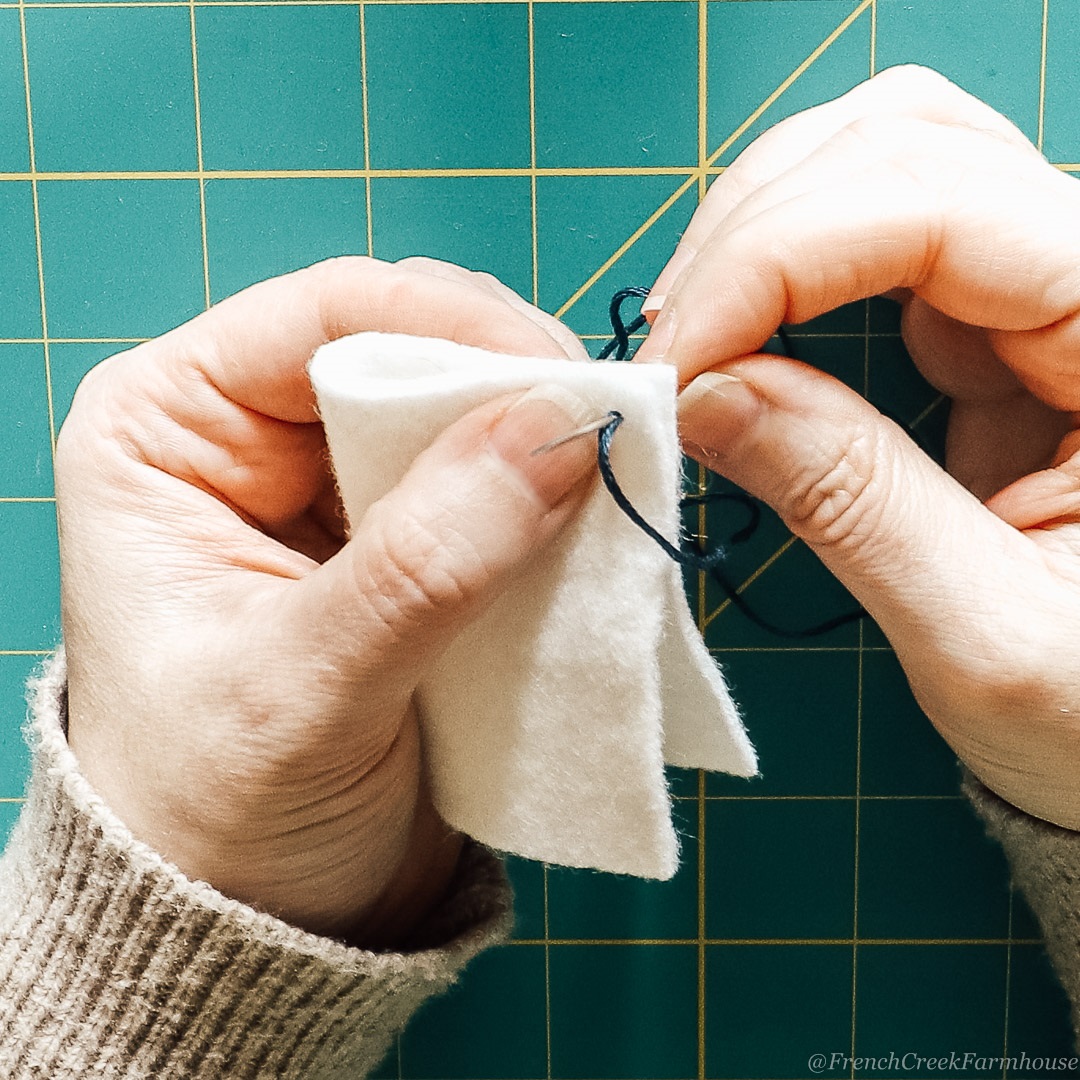
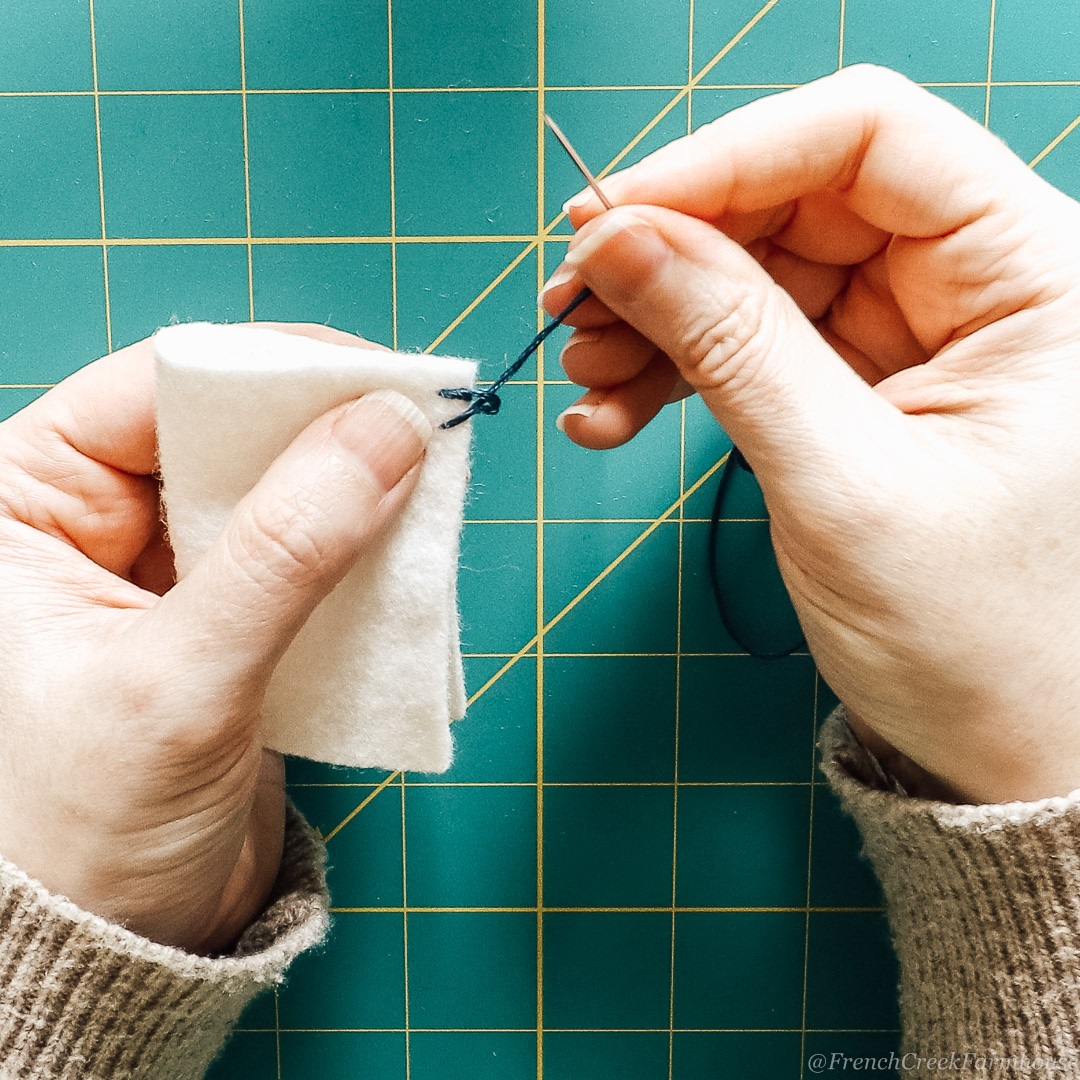
3. Fold your piece of felt in half so that the edges meet each other evenly. Every single stitch of the blanket stitch will have your needle coming from the bottom, up toward the top. Begin by anchoring your thread between the layers so that the tail is hidden.
 |
| Start your first stitch between the two layers of fabric |
 |
| Tuck the tail between the layers to keep it hidden |
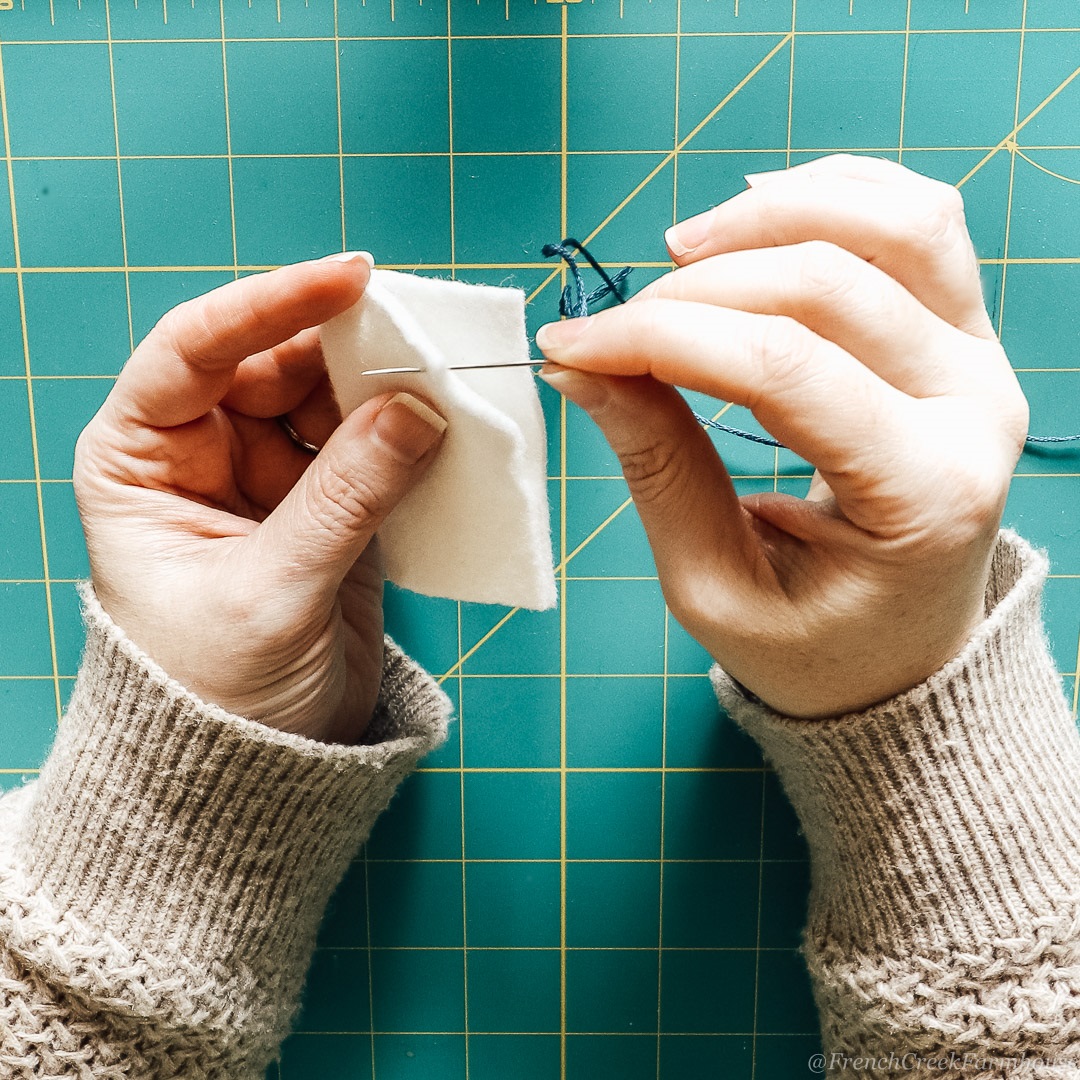
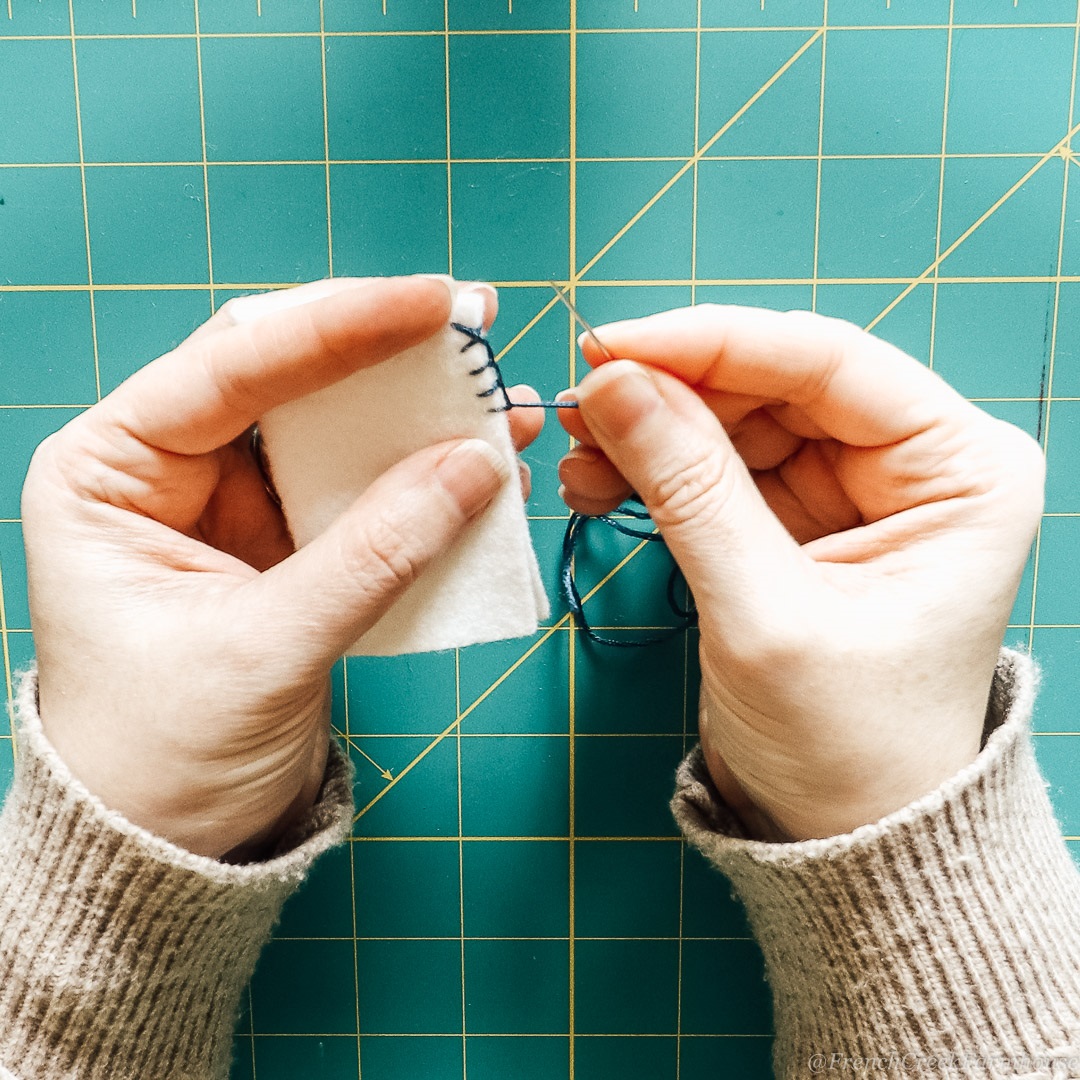
4. Lock that stitch in place by making a full stitch through the same hole. But don’t pull the stitch tight! Leave a little loose loop, and push your needle through that loop to create the first blanket stitch.
 |
| Lock the first stitch by pushing the needle through the same point in the fabric |
 |
| The needle should emerge from the same point where you started |
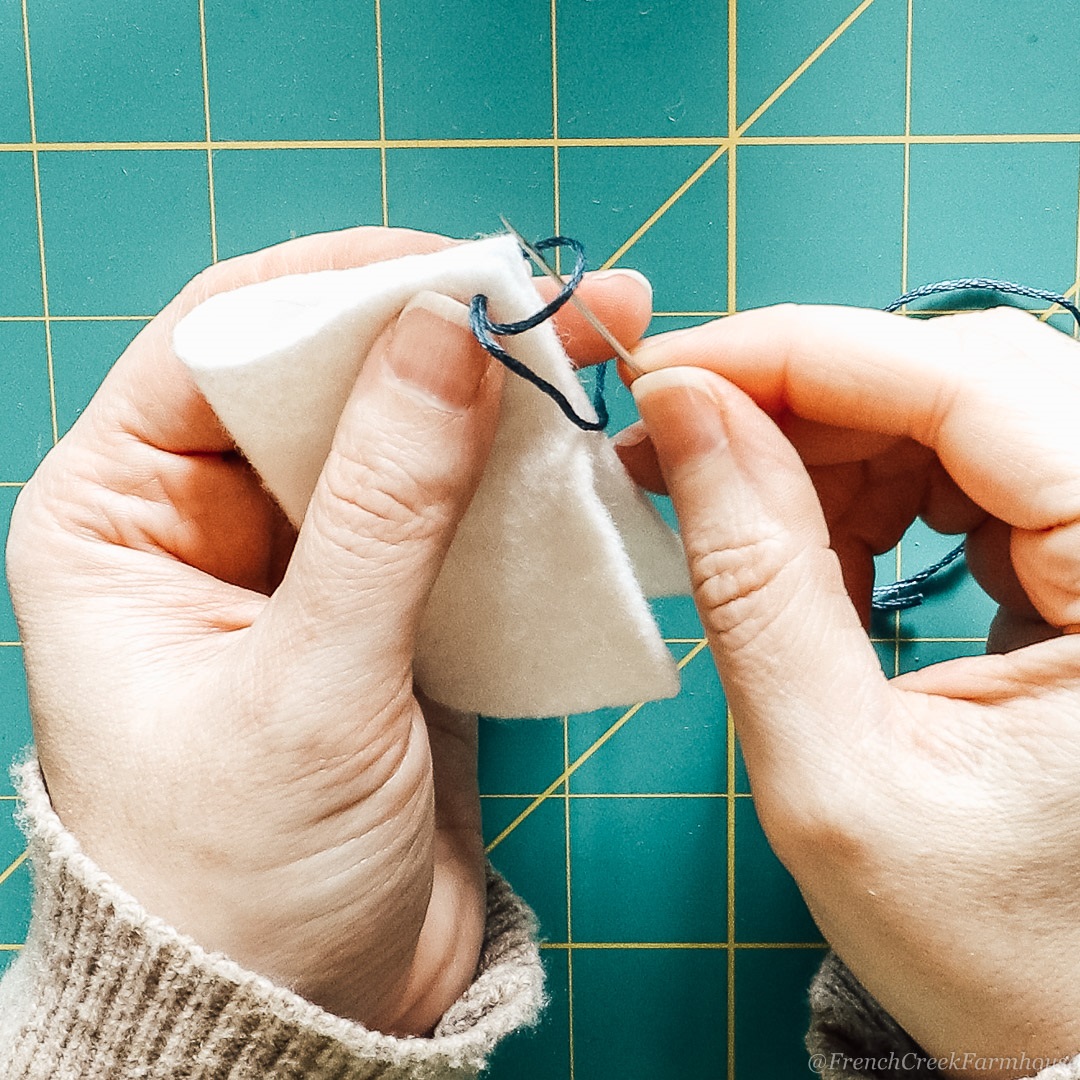 |
| Leave a small loop, then push the needle up through it to create the first blanket stitch |
5. The key to a beautiful blanket stitch is to make sure each stitch is evenly spaced–both over from the stitch before it, and along a straight line from the edge. As you’re practicing this skill, it might be helpful to use a piece of washi tape to maintain spacing.
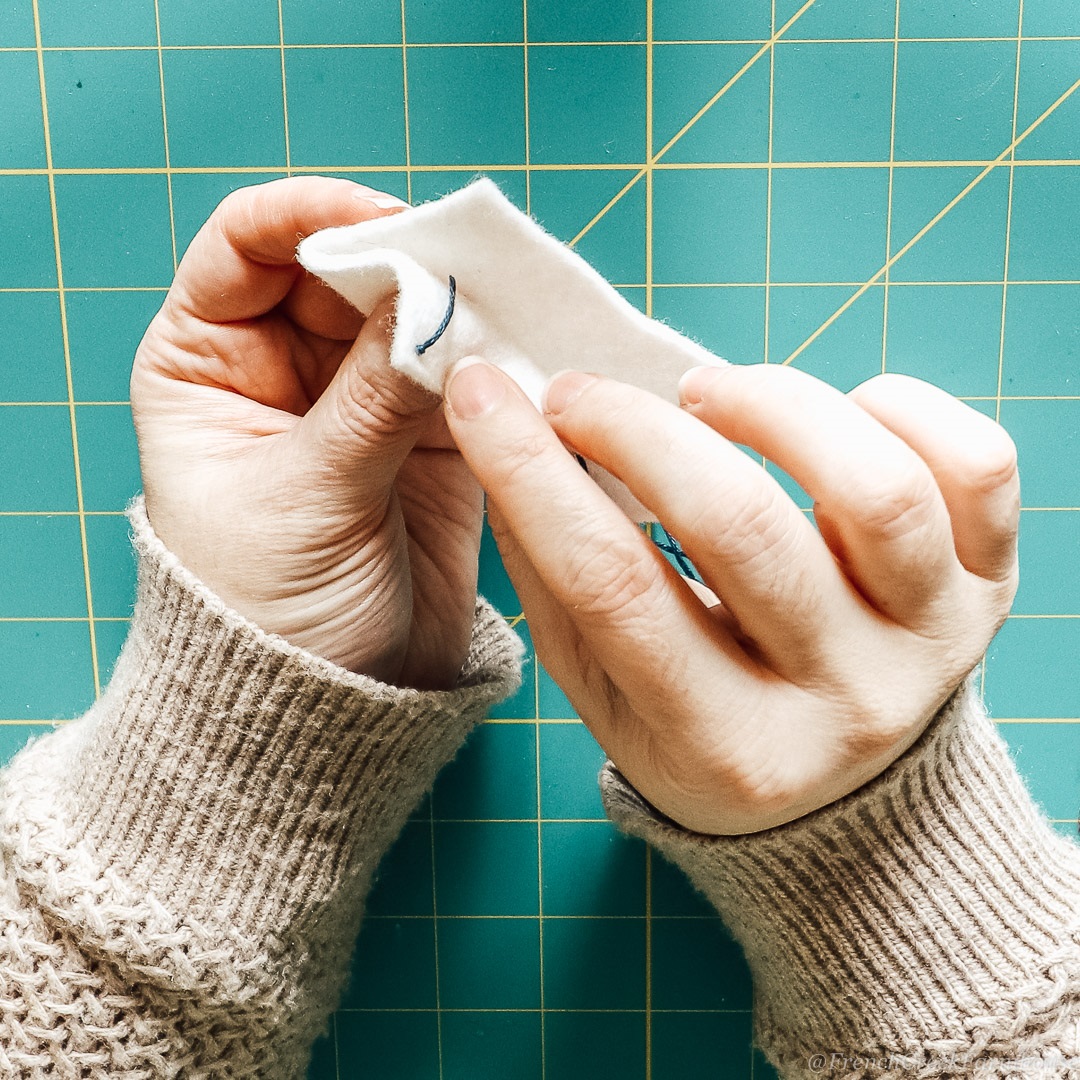
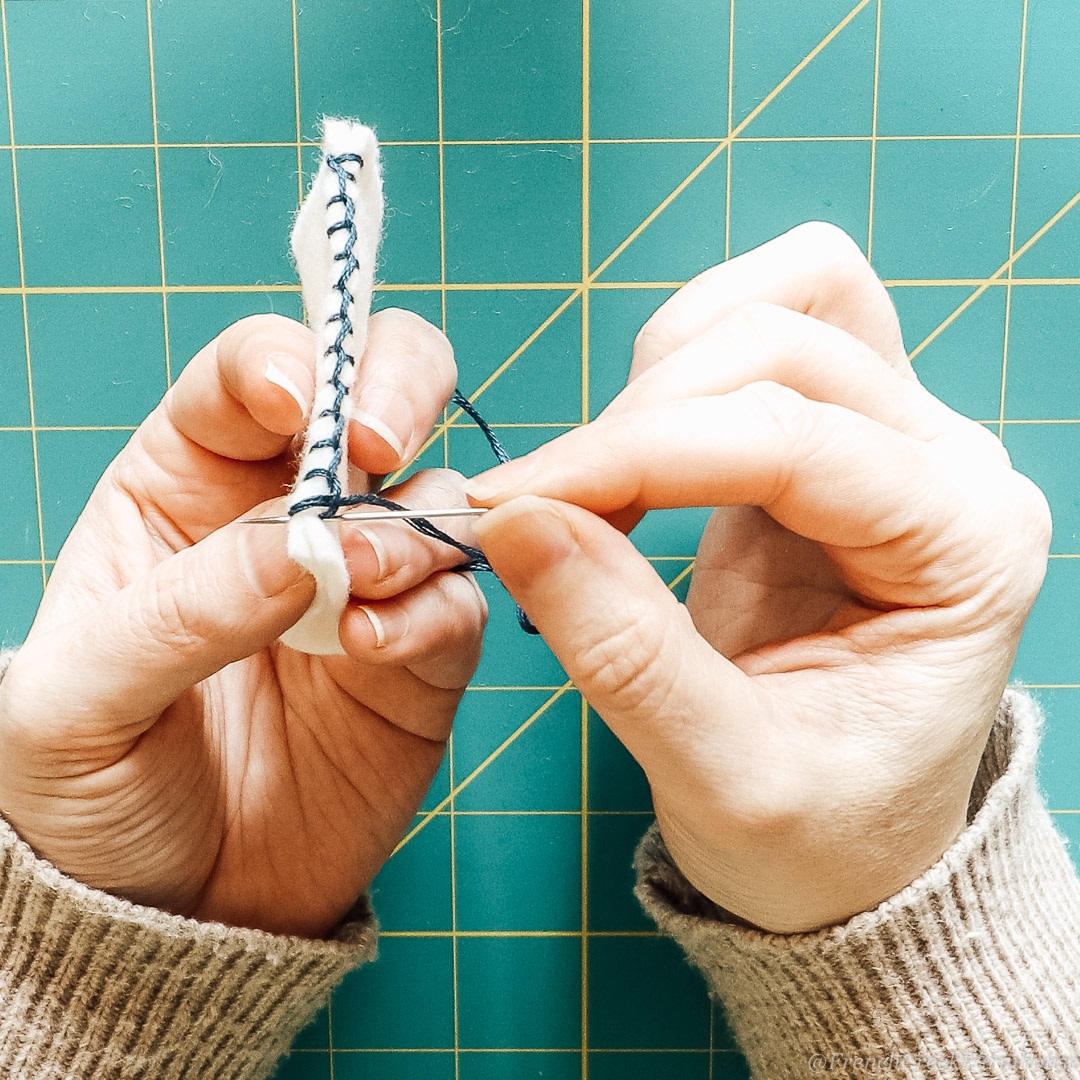
6. To make the second stitch, move your needle over by your desired stitch length, and insert the needle, again, from the back toward the front.
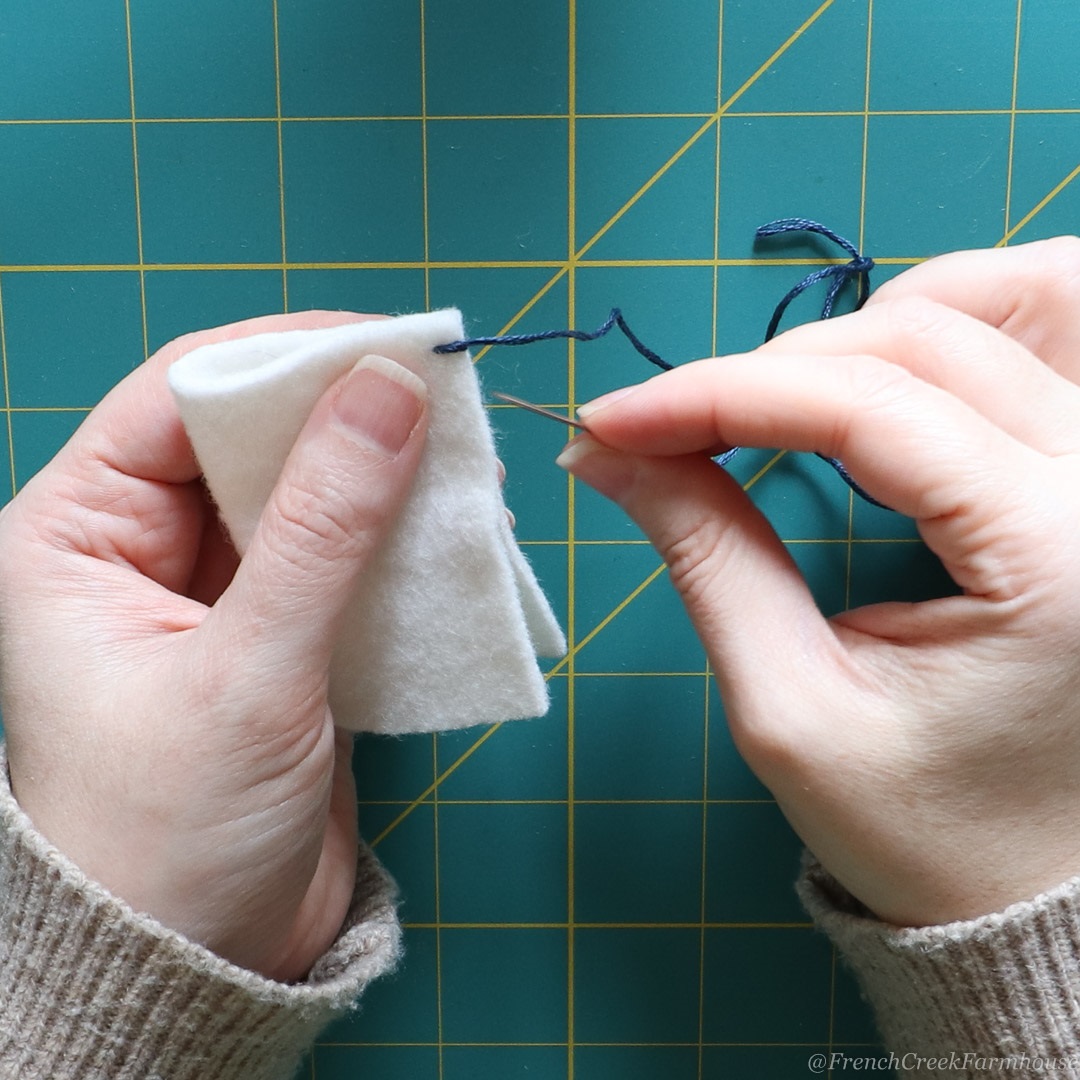 |
| Keep your stitches evenly spaced throughout |
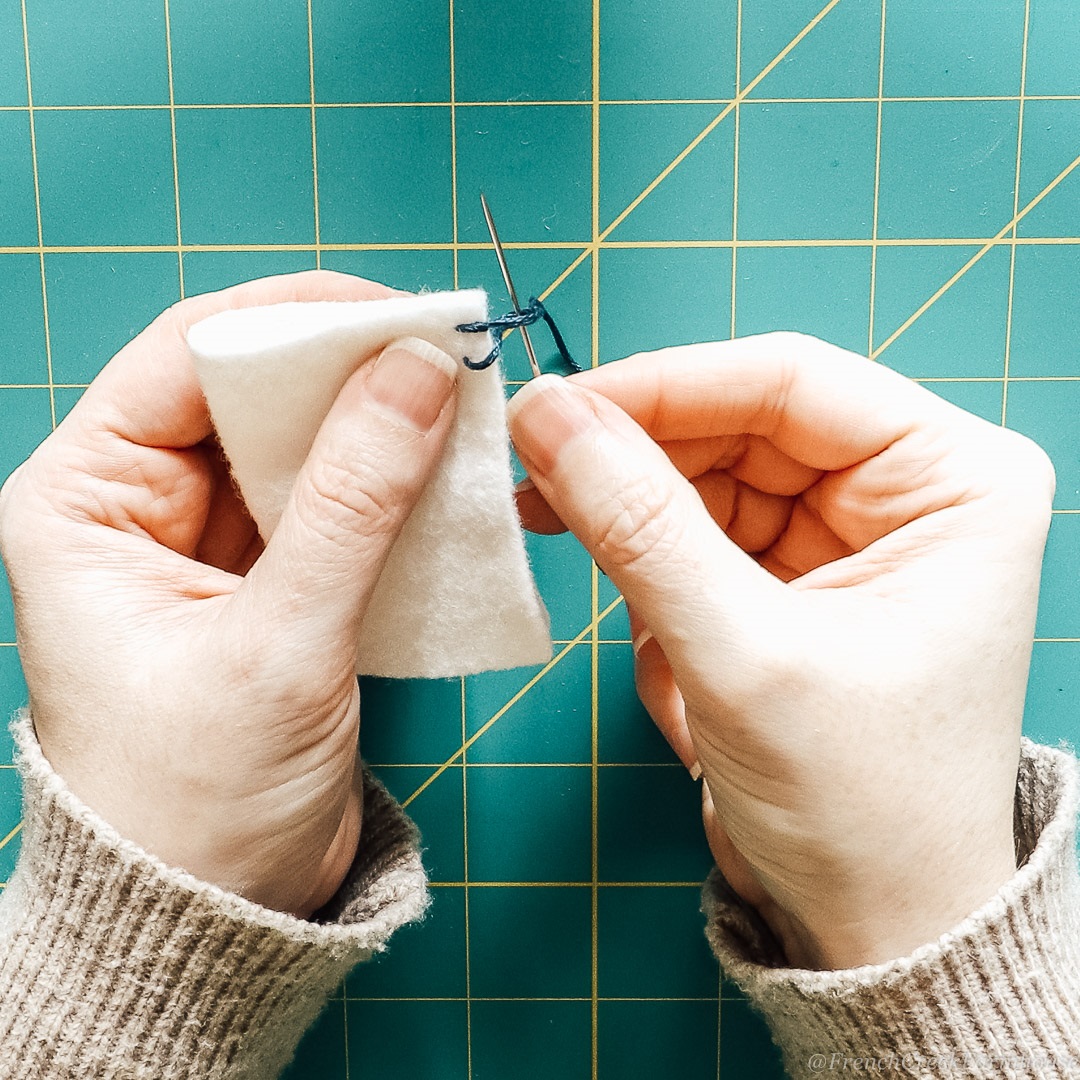
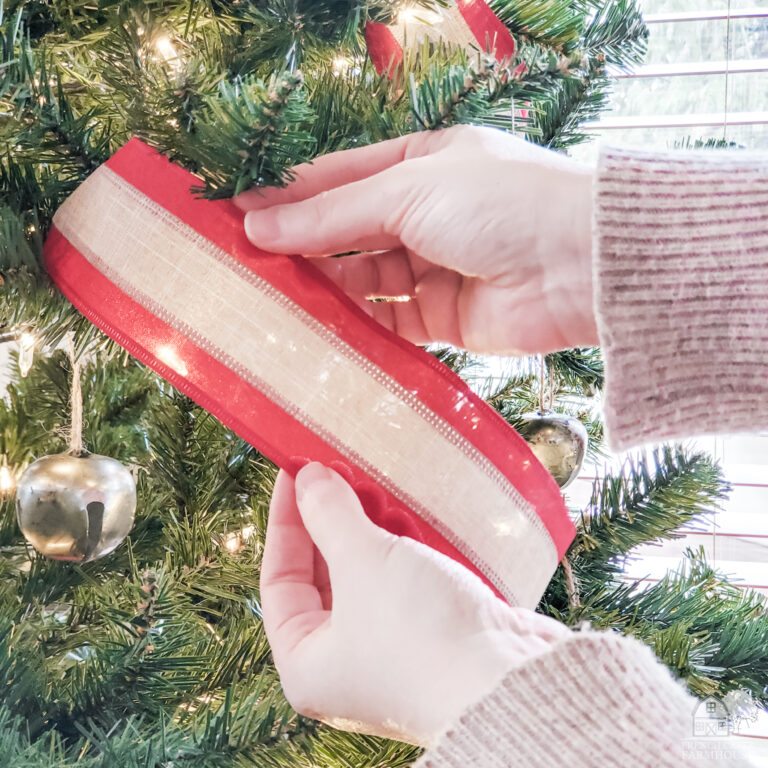
7. What defines a blanket stitch is always this next step. Just like in step 4, insert the needle through the loop, then pull tight. Make sure you maintain the same tension for each stitch so that the spacing stays even throughout your project.
 |
| Create each blanket stitch by locking the thread through a tiny loop |
 |
| Keep the tension even for each stitch |
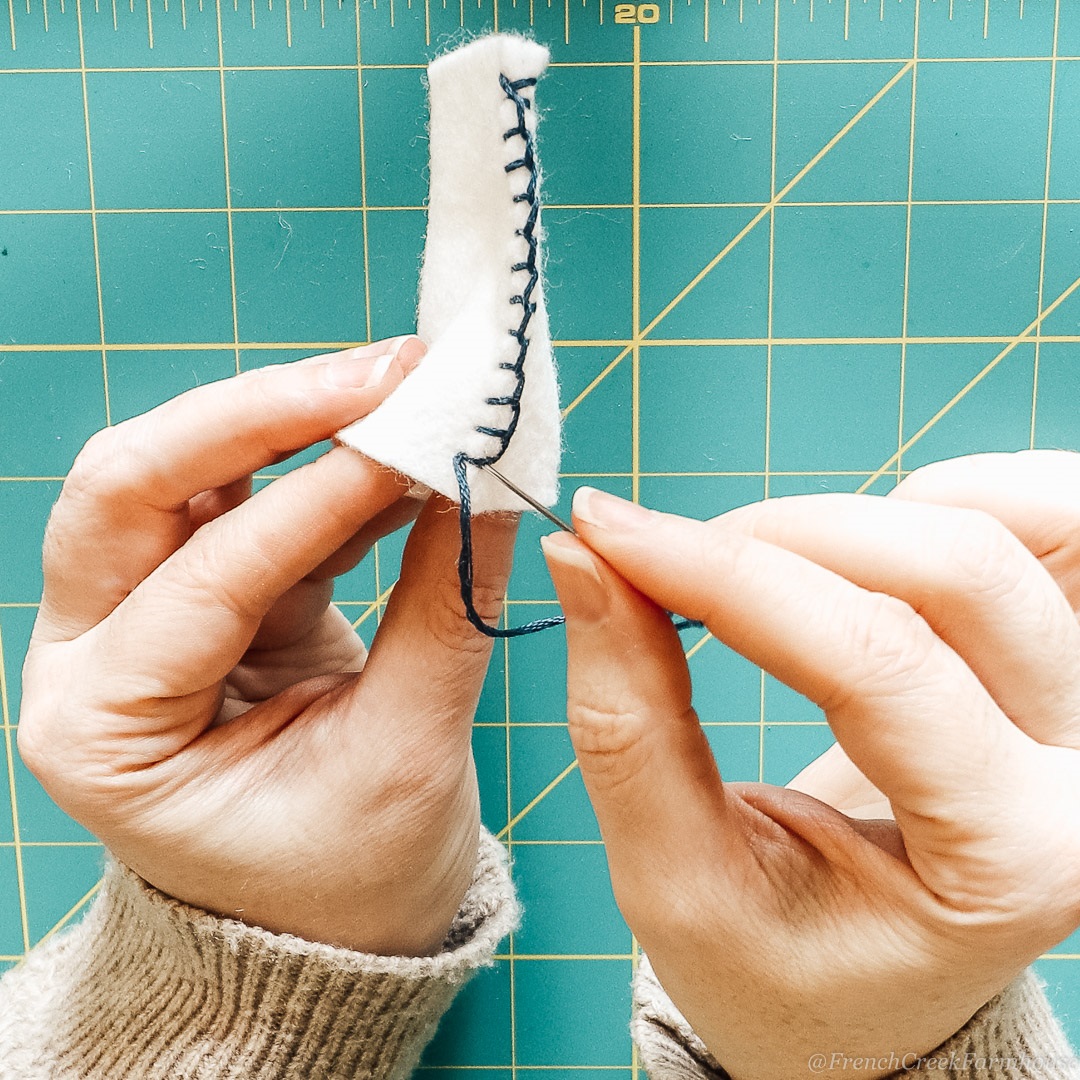
8. Continue this stitch, pushing your needle from back to front, leaving a loop, then locking the stitch by pushing the needle through the loop and pulling to tighten. You’ll start to see the pattern emerge as you accumulate more stitches.
 |
| With more stitches, you’ll begin to see the pattern |
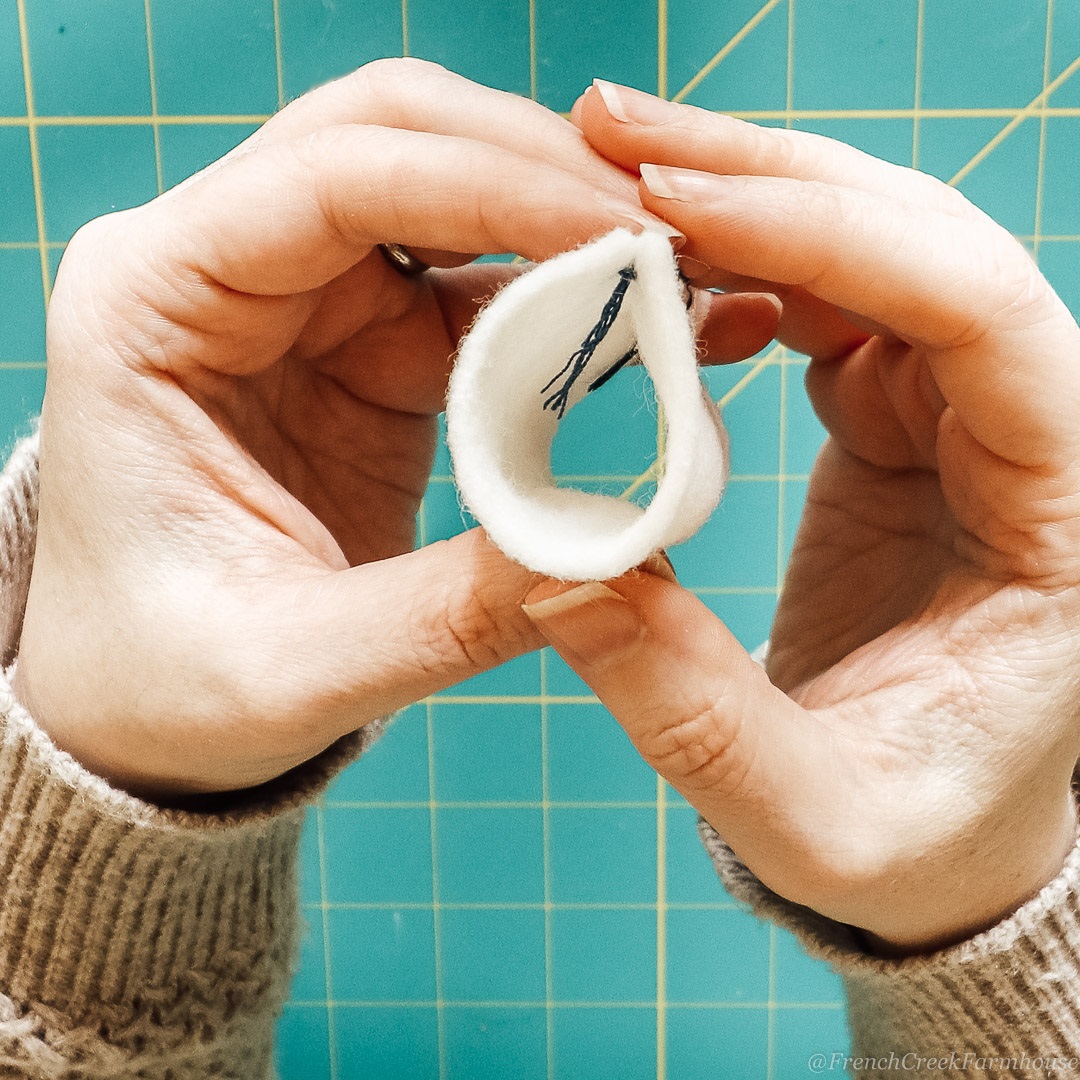
9. When you come to the end, reinsert the needle through your last stitch to secure the thread. Then, push the needle down between the layers to hide the tail. Trim your excess thread, and you’re finished!
 |
| Lock the final stitch by pushing the needle back through the previous stitch |
 |
| Insert your needle downward between the pieces of fabric |
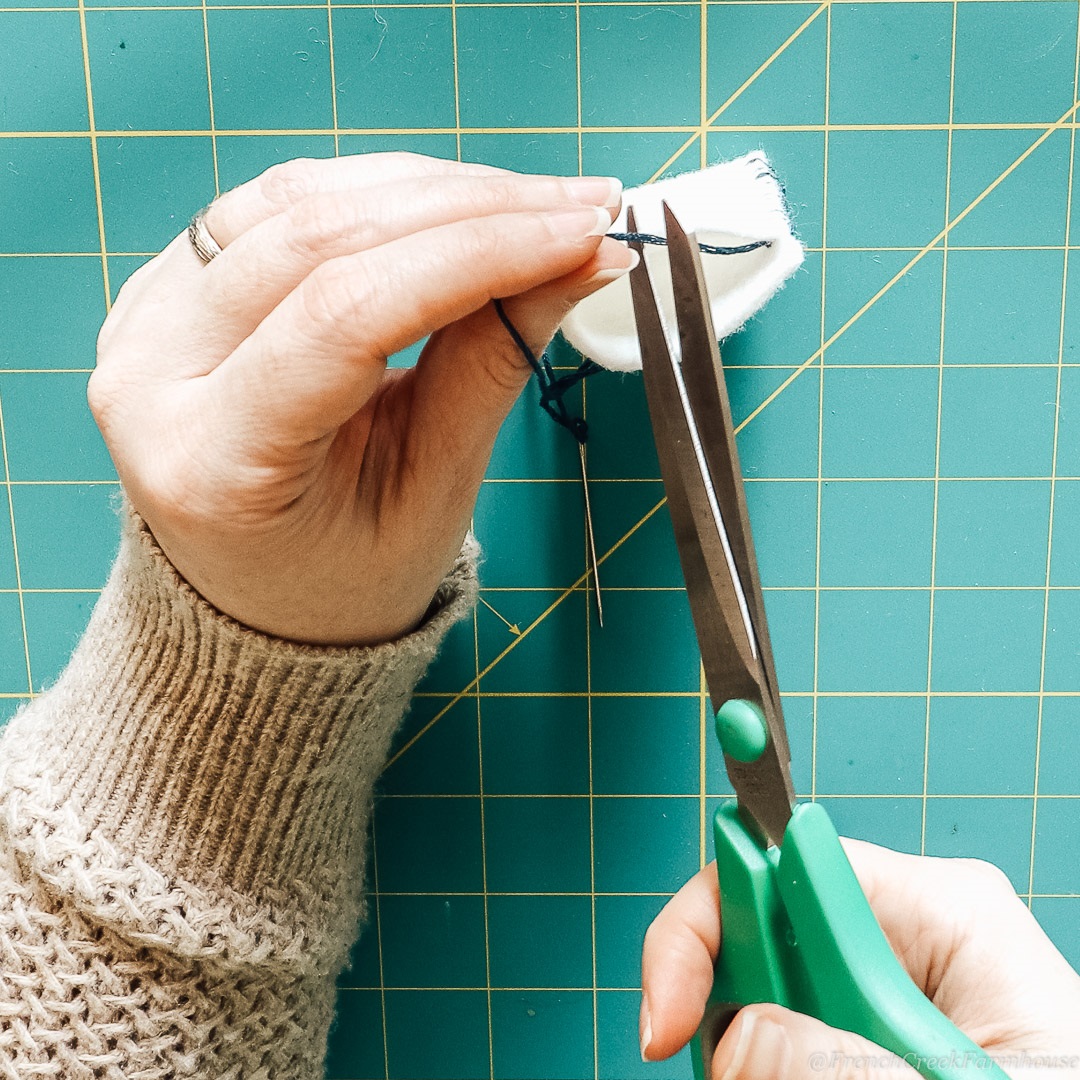 |
| Trim the excess thread |
 |
| This keeps your thread ends hidden inside |
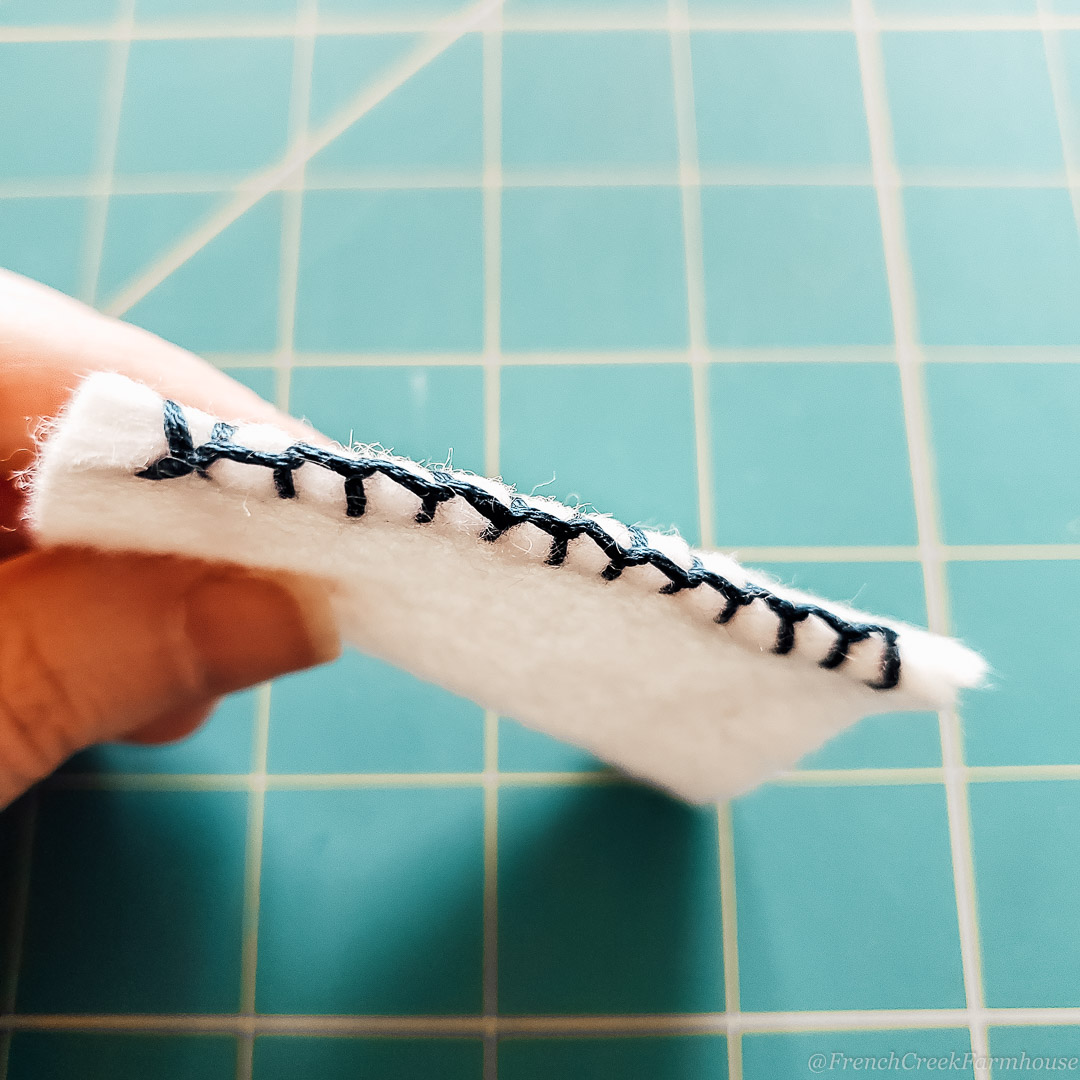 |
| The blanket stitch |
This stitch is such a simple one to learn, and it’s a truly great skill to add to your crafting know-how.
Once you have the hang of it, try out some of these great projects:


It's an easy stitch to learn — especially with such a great tutorial!
Aw, thank you so much, Patty! xo
Wonderful tutorial I will be referring my students to your post. Pinned.
Have a great weekend,
Kippi
Wow, Kippi! Thank you so much for that! xo
Great tutorial, Love using this when making felt creations!
Isn't it a great one? I use it all the time and I love how simple it is! xo
I can never get it right, thanks for the tutorial! Pinned
I'm so glad I could help, friend! Would love to see what you make! xo
This was such a great tutorial and easy to follow. I don’t sew much any more, but I will definitely hold on to this if I need it down the road! Pinning. Thanks for linking up.
Shelbee
http://www.shelbeeontheedge.com
I'm so glad it was useful, Shelbee! xo
This is much easier than I thought it would be to sew a blanket stitch. I can really use this tutorial for several projects. Thanks for sharing it at #HomeMattersParty
Oh that makes me so happy! Thank you so much, Donna! xo
I love a blanket stitch and this is great tutorial, clear and consise. Thanks for sharing at Tuesday Turn About Link Party 35. So happy to have you.
Thank you so much, Carol! I'm so glad you enjoyed it! xo
Hey Kristi,
Thank you for the awesome tutorial. Your photos are so clear and crisp – I love them. I also have a guide on all the basic hand sewing stitches https://hellosewing.com/basic-hand-sewing-stitches/but my photos look dull compared with yours. You are able to find something interesting in the most mundane scene. I simply love your photos and was wondering whether you can share a trick or two how to make mine better
Hi Helen, Thank you so much for the kind words! I'm certainly not an expert in photography, so my biggest tip is truly just practice. Honestly, for every photo I share, there are so many more that I don't. I try to take photos from lots of angles and to not be afraid of experimenting. Aside from that, a great camera and high quality lens doesn't hurt, and I always make an effort to shoot in natural lighting (overhead/artificial lighting is the enemy! haha!). Hope those tips help! xo
A great guide for beginners, I especially like how you show the neat start and finish.
Sometimes I blanket stitch this way and sometimes I go in the opposite direction, I have no idea why! It's completely random!
Thank you so much for sharing this! You're right–for every technique, there seem to be multiple ways to go about it. Glad this was helpful! xo
I use this stitch a lot, especially when I'm working with felt.
Thank you for sharing the tutorial at The Really Crafty Link Party. Pinned.
Isn't it the best? So simple, yet looks so pretty! xo
A totally great tutorial! I am pinning this to be able to use with my daughter who wants to learn to sew.
That is the best news I've heard today, Kristen! How great that you can help her learn! xo
You do tutorials like me! Great detail, girl! thanks for sharing at TTA! We love having you each week!
Blanket stitch is such a useful stitch, and probably the one I use most for repairs! Thank you for sharing these excellent step by step instructions with the Hearth and Soul Link party.
I love this stitch, and I'd forgotten how to do it. THANK YOU for such a good tutorial!
Thanks for joining the Grace at Home party at Imparting Grace. I'm featuring you this week!
I want to try this on a pillow. It's such a pretty stitch. I'm going to have to pin this one for sure. Thank you!