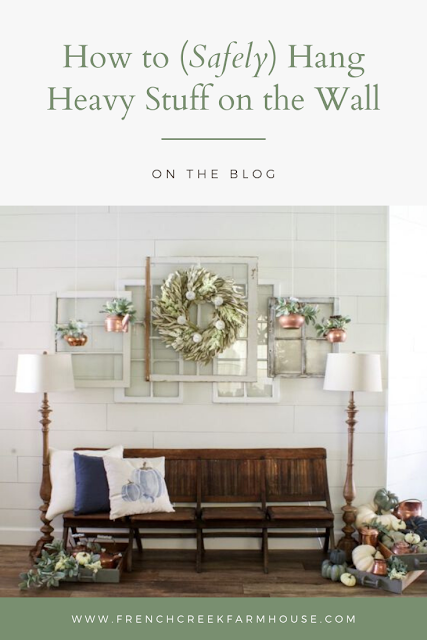
How to (Safely) Hang Heavy Stuff on a Wall
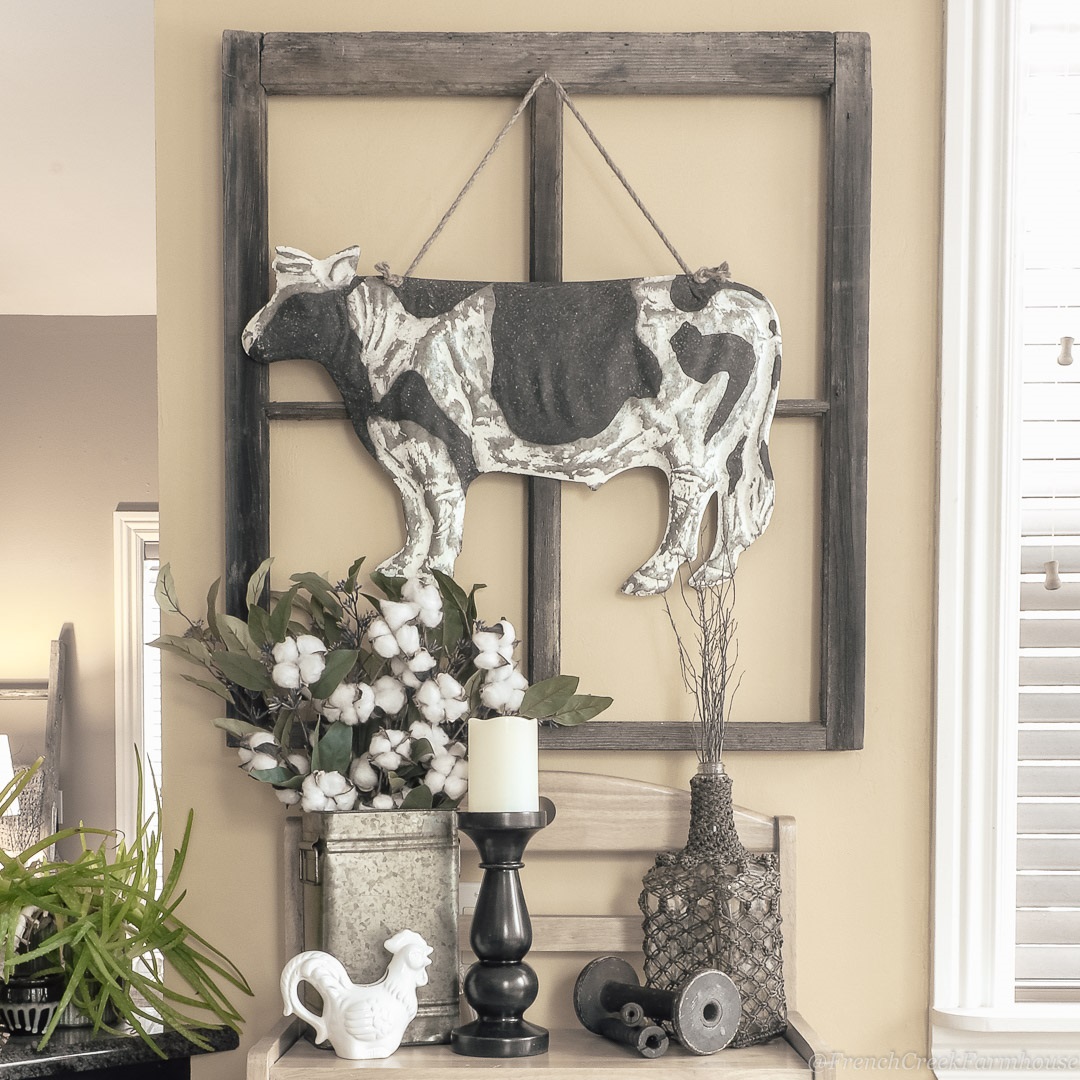
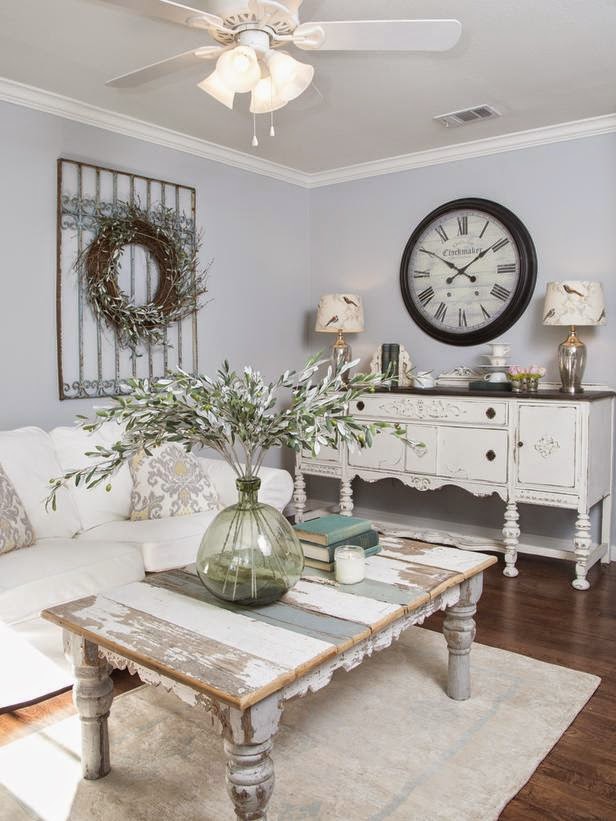
It’s no secret, I’m quite fond of vintage farm and industrial decor. Old windows, antique doors, shutters, and more have found their way into our home, and they all make me swoon. But they’re also quite heavy to hang on the wall, and no one would want to deal with the aftermath of something crashing to the ground. Or worse, onto your head!
If I’m being honest, this is darn near a phobia for me. The idea of something falling off the wall and onto one of us (or an animal) makes my hands sweat just thinking about it. And we do live in an earthquake prone area, so I’m extra cautious about this sort of thing.
Living in a fixer upper, we already have a heap of projects to tackle on an ever-growing list, so repairing holes in walls or dents in floors? Nope. Don’t need it on my list! Plus, who wants to see that gorgeous stained glass window, or cool old farm find, they treasure-hunted after years of searching come crashing to the ground?! That’s just heartbreaking.
So let’s get on with it…here are my tips and tricks for safely and securely hanging heavy decor on the wall.

Disclosure: This is not a sponsored post, and I have received no compensation for sharing any of these supplies. Some links to products that follow may be affiliate links, and I might earn a commission if you make a purchase through that link. This usually amounts to cents, not dollars, and helps to support the projects featured on this blog. I only recommend products from companies that I have found to be trustworthy. Read my full disclosure here.
What does is weigh?
 |
| Source: Cotton Stem |
Before you set out to hang something on the wall, you really need to have an idea of what it weighs so that you can choose the best option for hanging your piece safely. After all, safety is the key here!
One way to do this is with your good ol’ bathroom scale. Start by weighing yourself (lock the bathroom door…make sure no one can possibly see this most classified piece of information). Make a note of the number (destroy all evidence as soon as the project is completed!). Then, stand on the scale again, but this time make sure you’re holding the heavy item you plan to hang (feel really good about the previous number you wrote down because it’s a whole lot less than this number!). The difference between the two numbers is the weight of the item.
This method works great, unless the item is too big or awkward to lift. In that case, this little gadget might work better for you.

Secure to Stud
 |
| Source: Buckets of Burlap |
The best option when hanging something on the wall is always to find a stud. Lucky for me, I’m married to one…but that’s not the kind of stud I’m talking about here.
Studs are the upright supports inside your walls to which drywall (aka sheetrock) or other wall finish materials are attached. Typically, these are 2×4 wood boards, but newer homes might use steel framing, especially on firewalls. Studs are generally spaced every 16″ (up to 24″, at most) within the wall.
To find a stud, this tool is my go-to resource. I love it, and would never want to be without one considering how much decorating and DIYing I do. Also, this model that I use will locate electrical wiring within your wall, too, so you won’t have to worry about encountering any shocking surprises. (Remember, we’re all about safety, here!)
When using a 2″ threaded screw, a stud will easily support up to 100 pounds of weight. But sometimes (in my case, most of the time) studs aren’t located in just the right spot for your decor. Let’s talk about some other options…
Anchors
 |
| Source: Little Yellow Wheelbarrow |
When you don’t have a stud located in just the right spot, a drywall anchor can fix that for you. That said, whenever possible: use a stud. Even if it means only one screw is hitting a stud, and you use anchors for the rest, it’s always going to be better than no stud at all. (I’m sure there’s an inappropriate joke hidden in there, but let’s get back to the point, people!)
Anchors work by securing themselves to the backside of the wall. You start by installing the anchor in the wall, then, when you attach the screw to the anchor, it pops open inside the wall space…”anchoring” itself. Creative name, right?
There are two types of anchors that I recommend, even though there are more on the market. These are the two types that I’ve found work best and minimize long-term damage when you want to change something later.
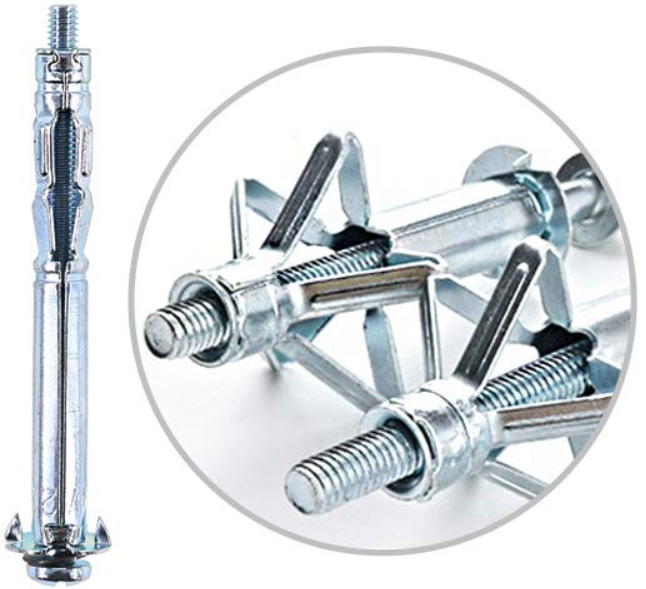 |
| Molly Bolt |
If the item you’re hanging is very heavy, a molly bolt is your best bet. Mollys are made of metal, and the largest ones can hold up to 50 pounds. They also allow you to remove the screw from the wall, as needed, while leaving only the small anchor exposed, but flush with your wall. This is great if you want to change your decor for, say, Christmas and then put it back after the holidays.
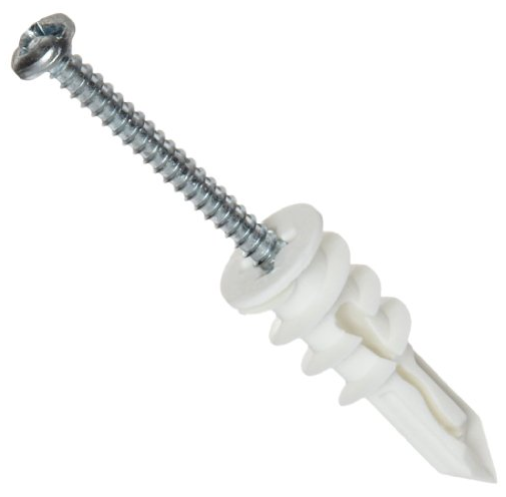 |
| Plastic Anchor |
A similar option is a plastic anchor. Some people still call these “mollys”, but technically, they aren’t the same as their metallic cousin. These do work the same way as a molly, but are not as solid. If your item is less heavy, they’re a good choice, and I use them quite often. This is the only brand I use, and they come in a variety of sizes to match your project needs.
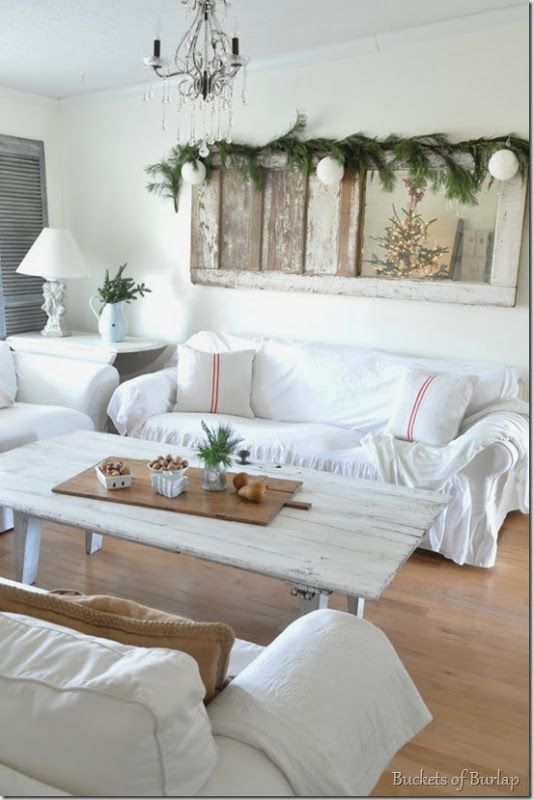
French Cleats
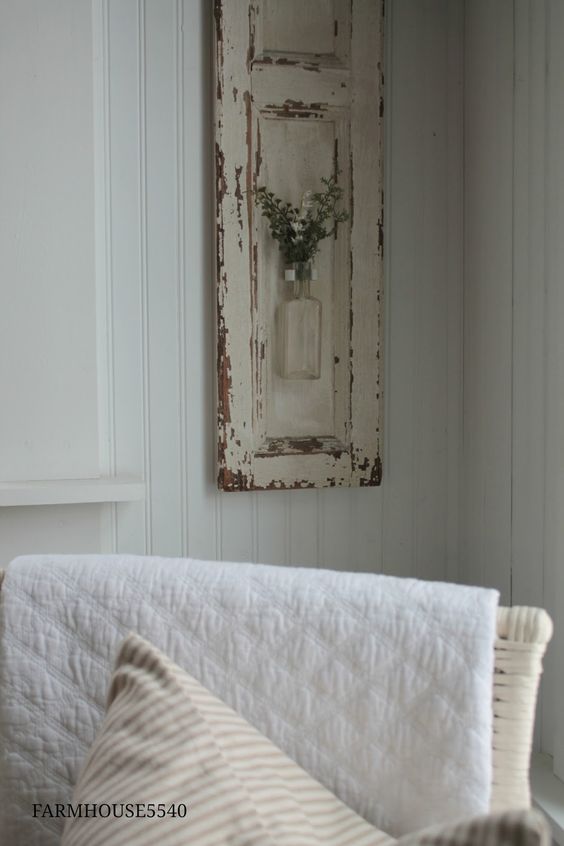 |
| Source: Farmhouse 5540 |
Whenever I’m hanging something that’s very heavy, I always use a french cleat. This is, by far, my favorite option for heavy items because I know they’re going to be safe and secure.
The 30″ cleat, for example, can hold up to 300 pounds! There’s really an option for any size item, and this is the brand I trust and use in our home.
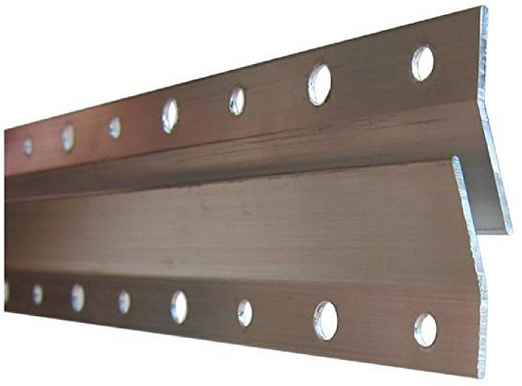 |
| French Cleat |
When you use a french cleat, you’ll be combining this piece of hardware with one or both of the above options (studs and anchors).
If you’re hanging a window, door, or shutter on your wall, this is, in my opinion, the best way to do it when you’re focused on safety. It also works for mirrors, pictures, nesting boxes (like the one I just added to our entryway), and so much more.
The bonus is that your item is also definitely going to be level on your wall forever. The other bonus is that one person can easily hang something very heavy without any help!
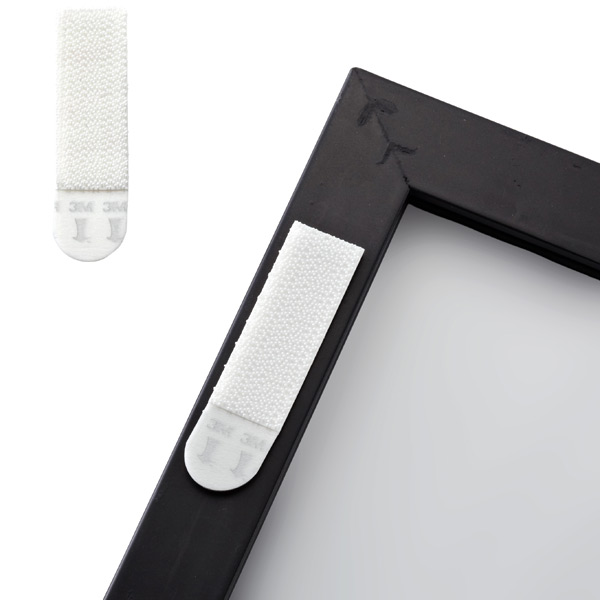
Command Strips
 |
| Source: The Decorating Dork |
Let’s say the thing you want to hang on the wall isn’t all that heavy. Or, maybe you don’t want to put a hole in the wall. Maybe you’re not even sure you’ll like the piece where you plan to hang it.
You have options, mis amigos!
These strips are everywhere in our home. For starters, I change our decor quite often, and believe it or not, I don’t enjoy spackling and repainting all the time. Also, there are times when I want to test out an idea, before I put holes in the wall, to make sure I’m going to be happy with it.
The product basically works like velcro–but it’s easily removable. This is a great choice if you’re in an apartment, rental, or dorm, too. They come in several sizes to match the weight of your item, and the large size will support up to 16 pounds!
 |
| Command Strips |
I hear a lot of people say that these strips don’t work for them, and I can tell you with a good amount of confidence that it’s because they aren’t applying them correctly. I have used these to hang some moderately heavy items (like decorative shelves, picture ledges, etc) for extended amounts of time (i.e. literally years) without a single problem.
The letterpress tray I used in our entryway for over a year-and-a-half was mounted using these strips, and it was still totally solid when I finally took it down this month to put up my nesting box. That said, these aren’t intended to be a permanent solution, and there are weight restrictions to consider.
Read and follow all of the directions on the package, and you’ll be very happy!
I hope you’ve found some new ideas for hanging heavy stuff on your walls so that you can enjoy your decor and never have to worry about safety! Have you tried any of these ideas? I’d love to hear about it. Drop me a note in the comments below and tell me what you’ve hung on your wall!


Great post full of inspiration and tips. Thanks for sharing at TFT!
Thank you so much for stopping by, Amber! xo
Thank you this helpful info. I’m wanting to use a door as a picture frame. Your helpful ideas helped me. Have a blessed day!!
Hanging heavy items makes me a little nervous. Thanks for the tips.
Happy New Year,
Kippi
I'm so glad you enjoyed it, Kippi! May your decor always stay firmly secured to your wall, my friend!! xo
These are super great tips and items for hanging heavy items on your walls. Love the photos and that you featured some of our blogging buddies! I so happy to linked-up at Tuesday Turn About, and even more delighted to feature you at tomorrow's party! Hope to see your there each week via myweeabode.com !
Oh my goodness, Julie–what an honor! Thank you so much! xo
Oh my goodness, Kristi, so much wonderful information and SO BEAUTIFUL! Thank you so much for sharing with us at the TFT party! I've pinned and will be featuring your awesome post this week on the party!!
Looking forward to see what else you have to offer!
Happy New Year!
Theresa
Wow, Theresa! Thank you for the love! I will be sure to stop by this week!! xo
I am a visual artist that regularly hangs art, but needed to hang a ceramic piece that was extremely heavy and had no idea how to do it!
Your excellent article gave me exactly what I needed to know.
Thank you!
So wonderful to hear that, Patrick! Thrilled that this helped you! 🥰