Sweet & Simple Burlap Bow
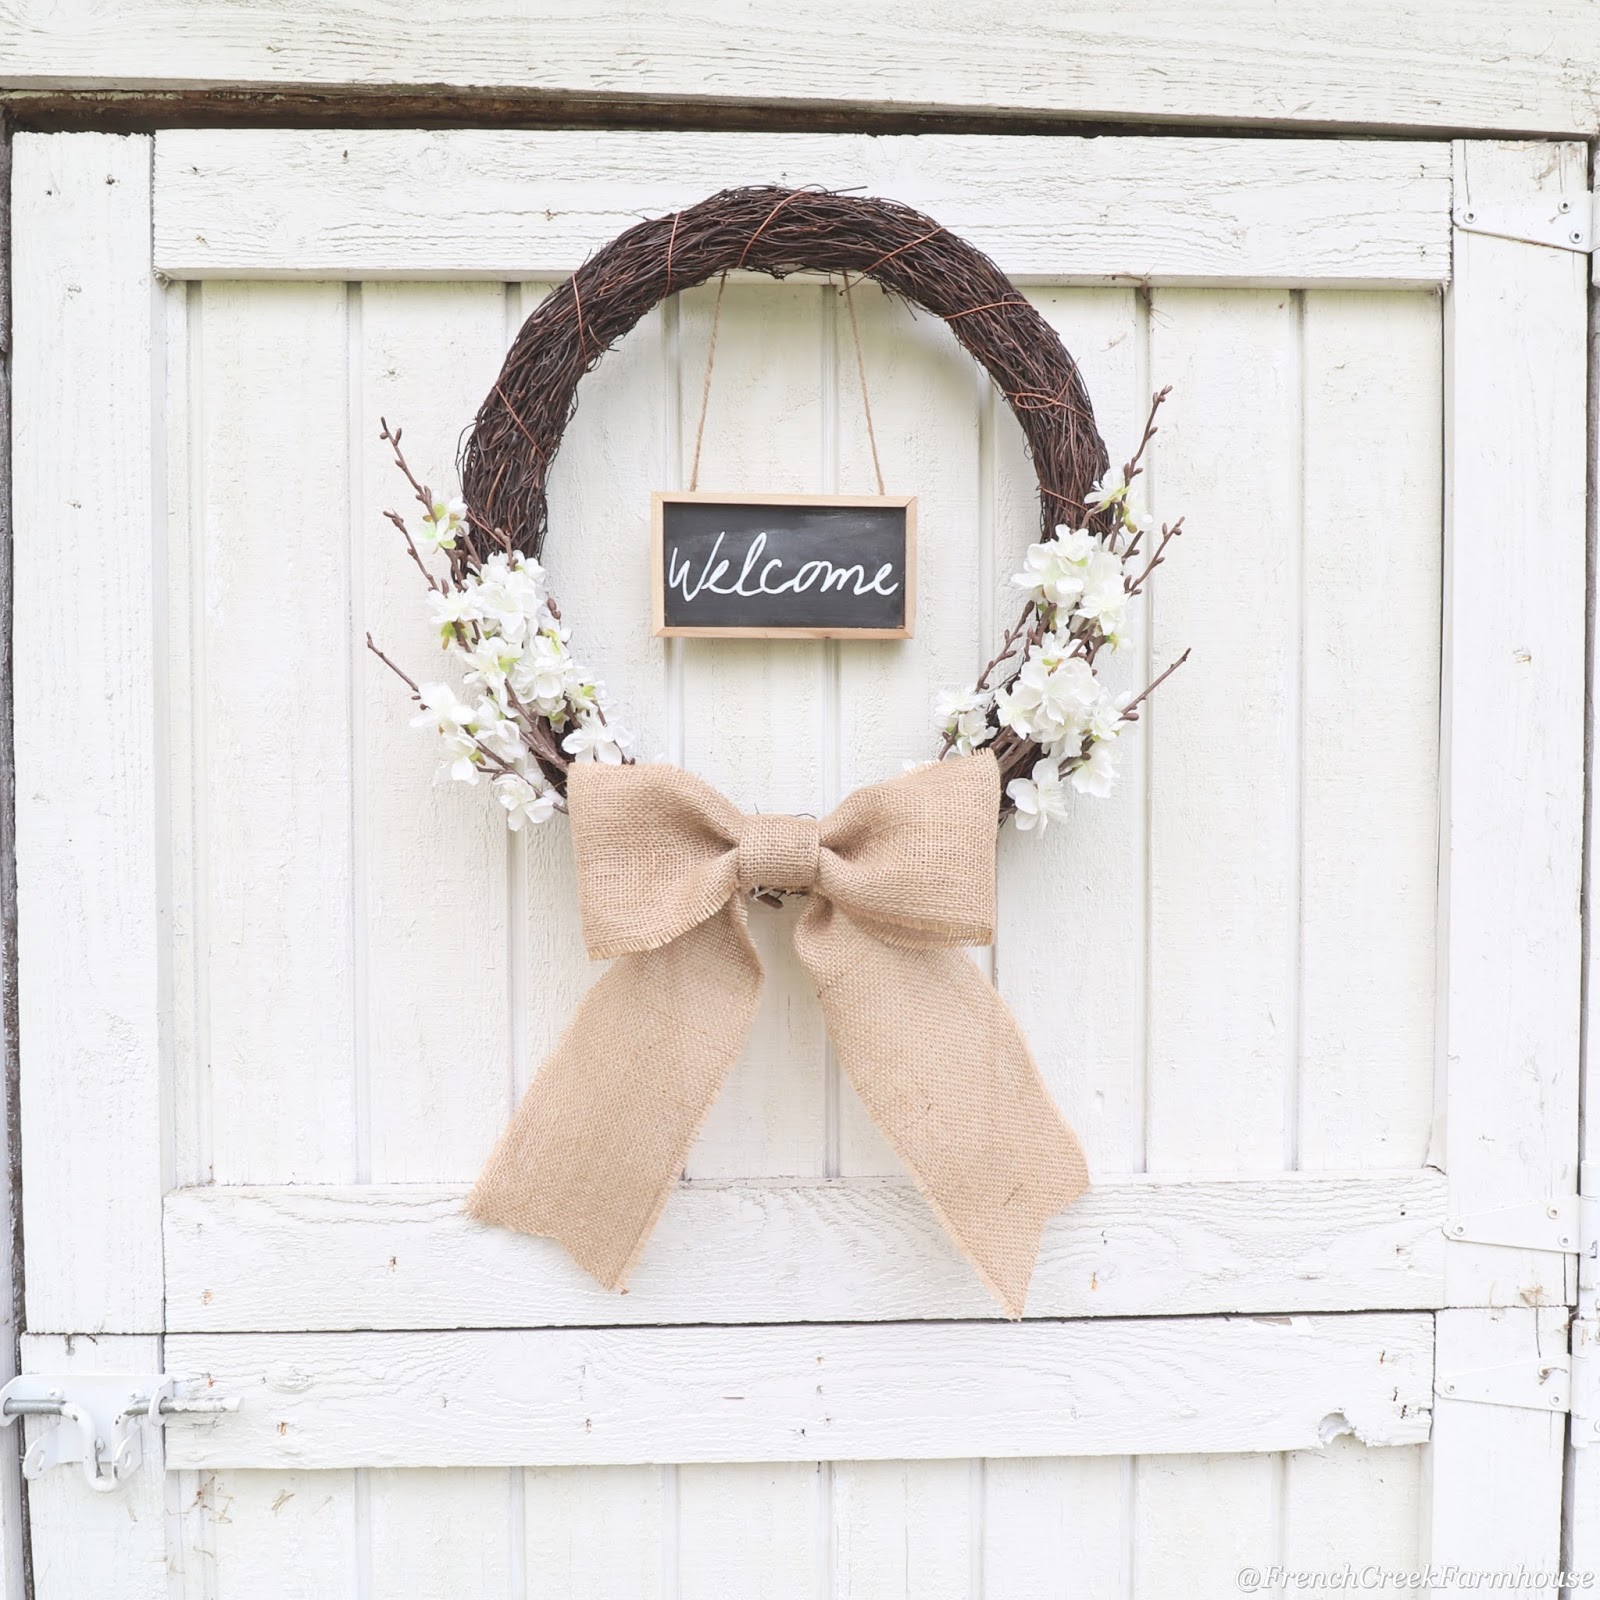
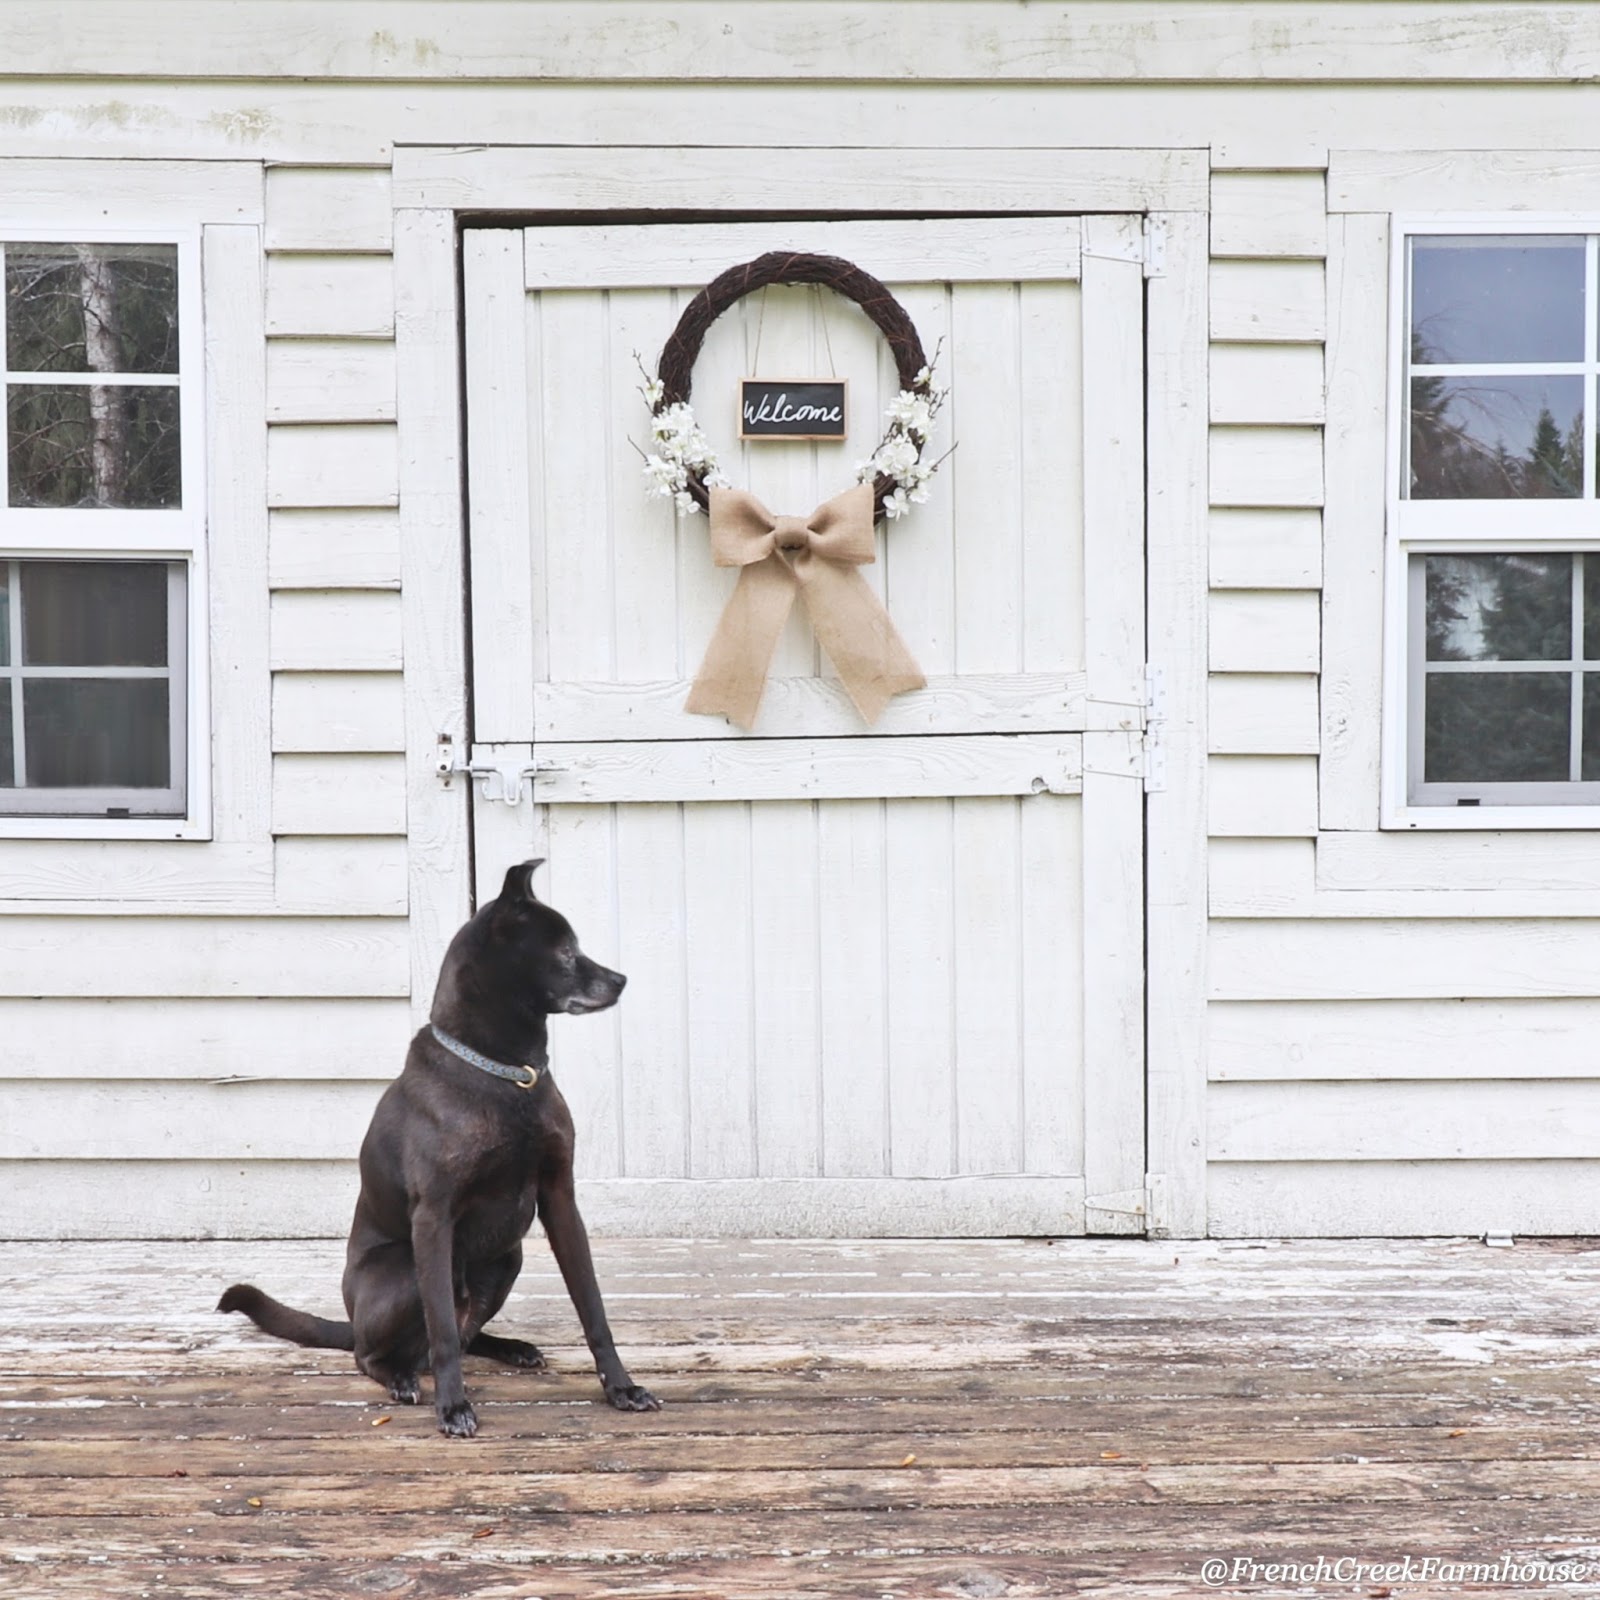
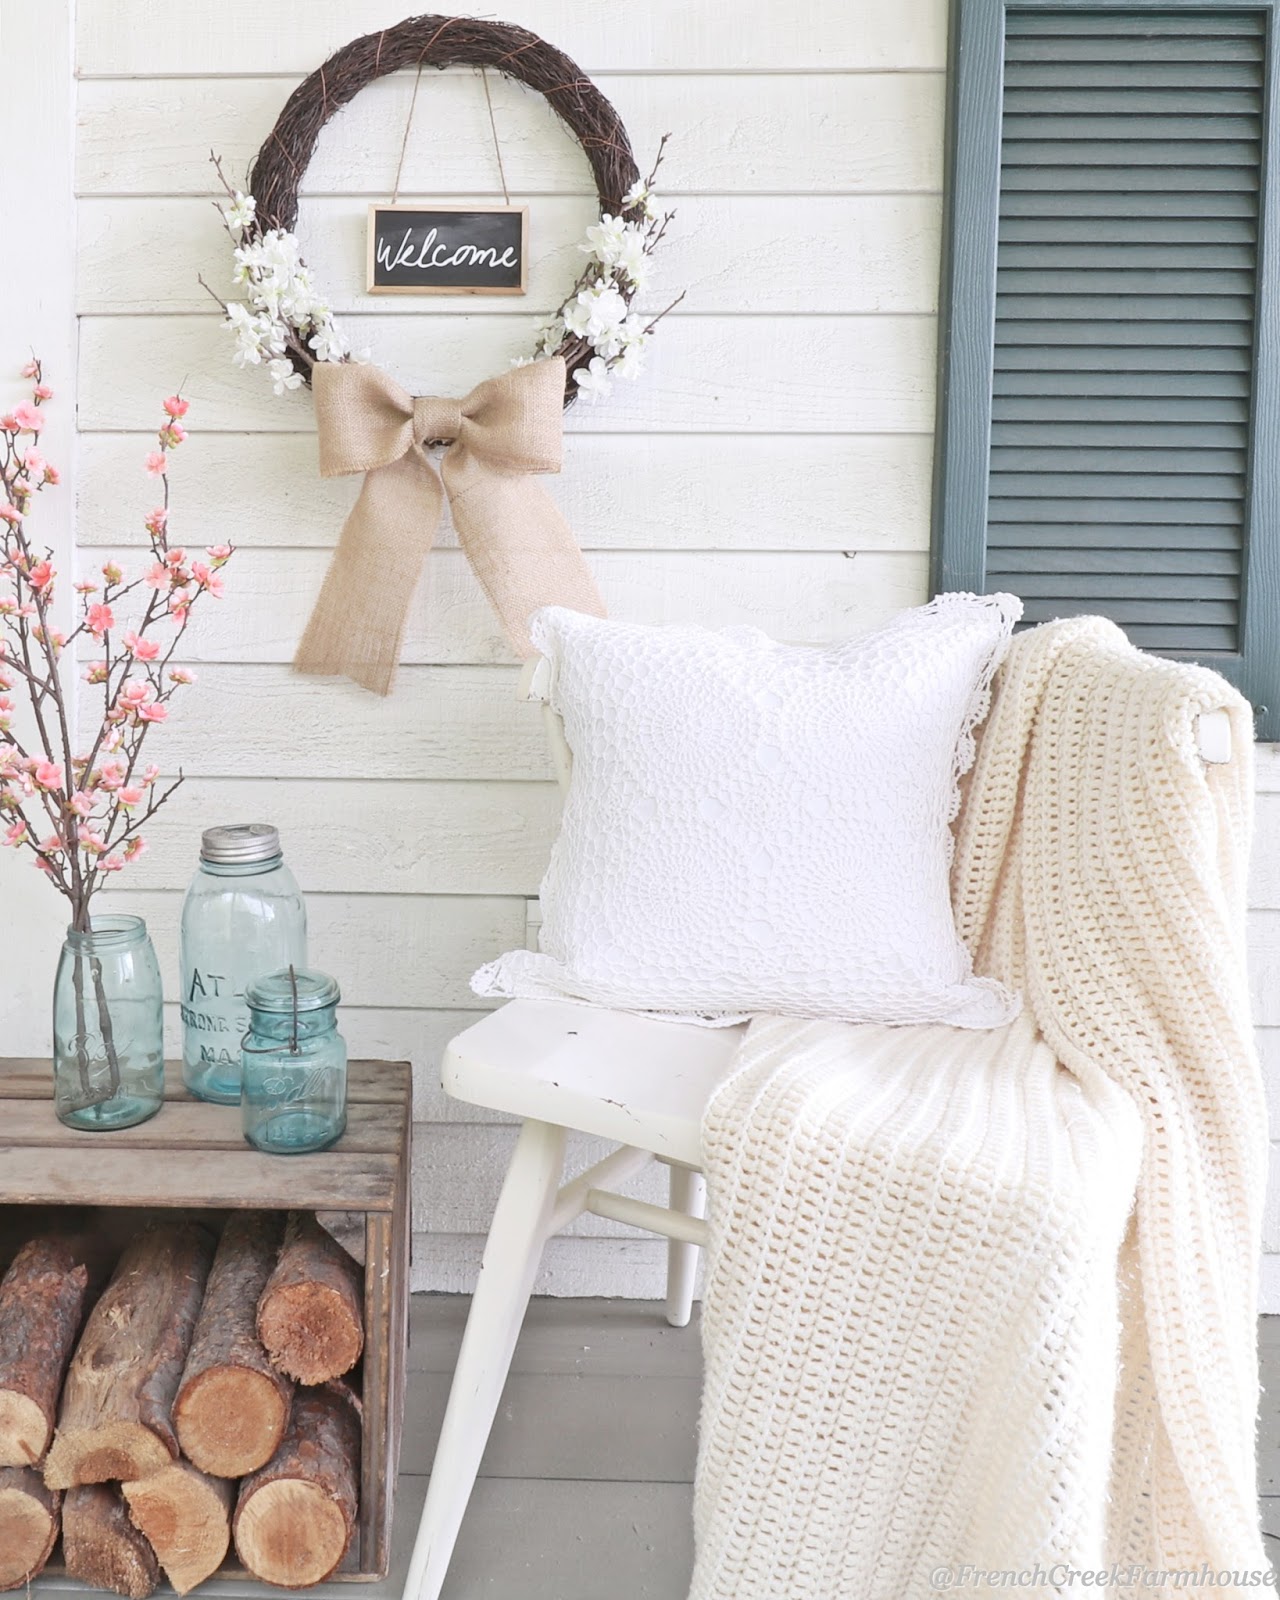
This week the flowering plum trees welcomed the first day of spring with a full bloom of flowers. Seeing all of the spring blossoms coming to life put me in the mood to create a new wreath for the front door in the spirit of the season.
I scored this fantastic twig wreath from the thrift store a while back for only $2 and stashed it away because I knew it would get used for a project someday down the line. Today was that day!
With this wreath, I really wanted to focus on a design that didn’t overwhelm the porch, but instead, celebrated the sweet simplicity of springtime. A burlap bow to finish everything off seemed like the perfect match.
The best part about this project is that it takes less than 5 minutes, and there is absolutely no sewing involved! Here’s what you’ll need…
Disclosure: This is NOT a sponsored post, and I have received NO compensation for sharing any of these supplies. Some links to products that follow may be affiliate links, and I might earn a commission if you make a purchase through that link. This usually amounts to cents, not dollars, and helps to support the projects featured on this blog. I only recommend products from companies that I have found to be trustworthy. Read my full disclosure here.
Supplies (Links to the products I used):
4″ wide burlap ribbon
Jute string
Hot glue gun
Scissors
Cutting mat (optional, but helpful)
Directions:
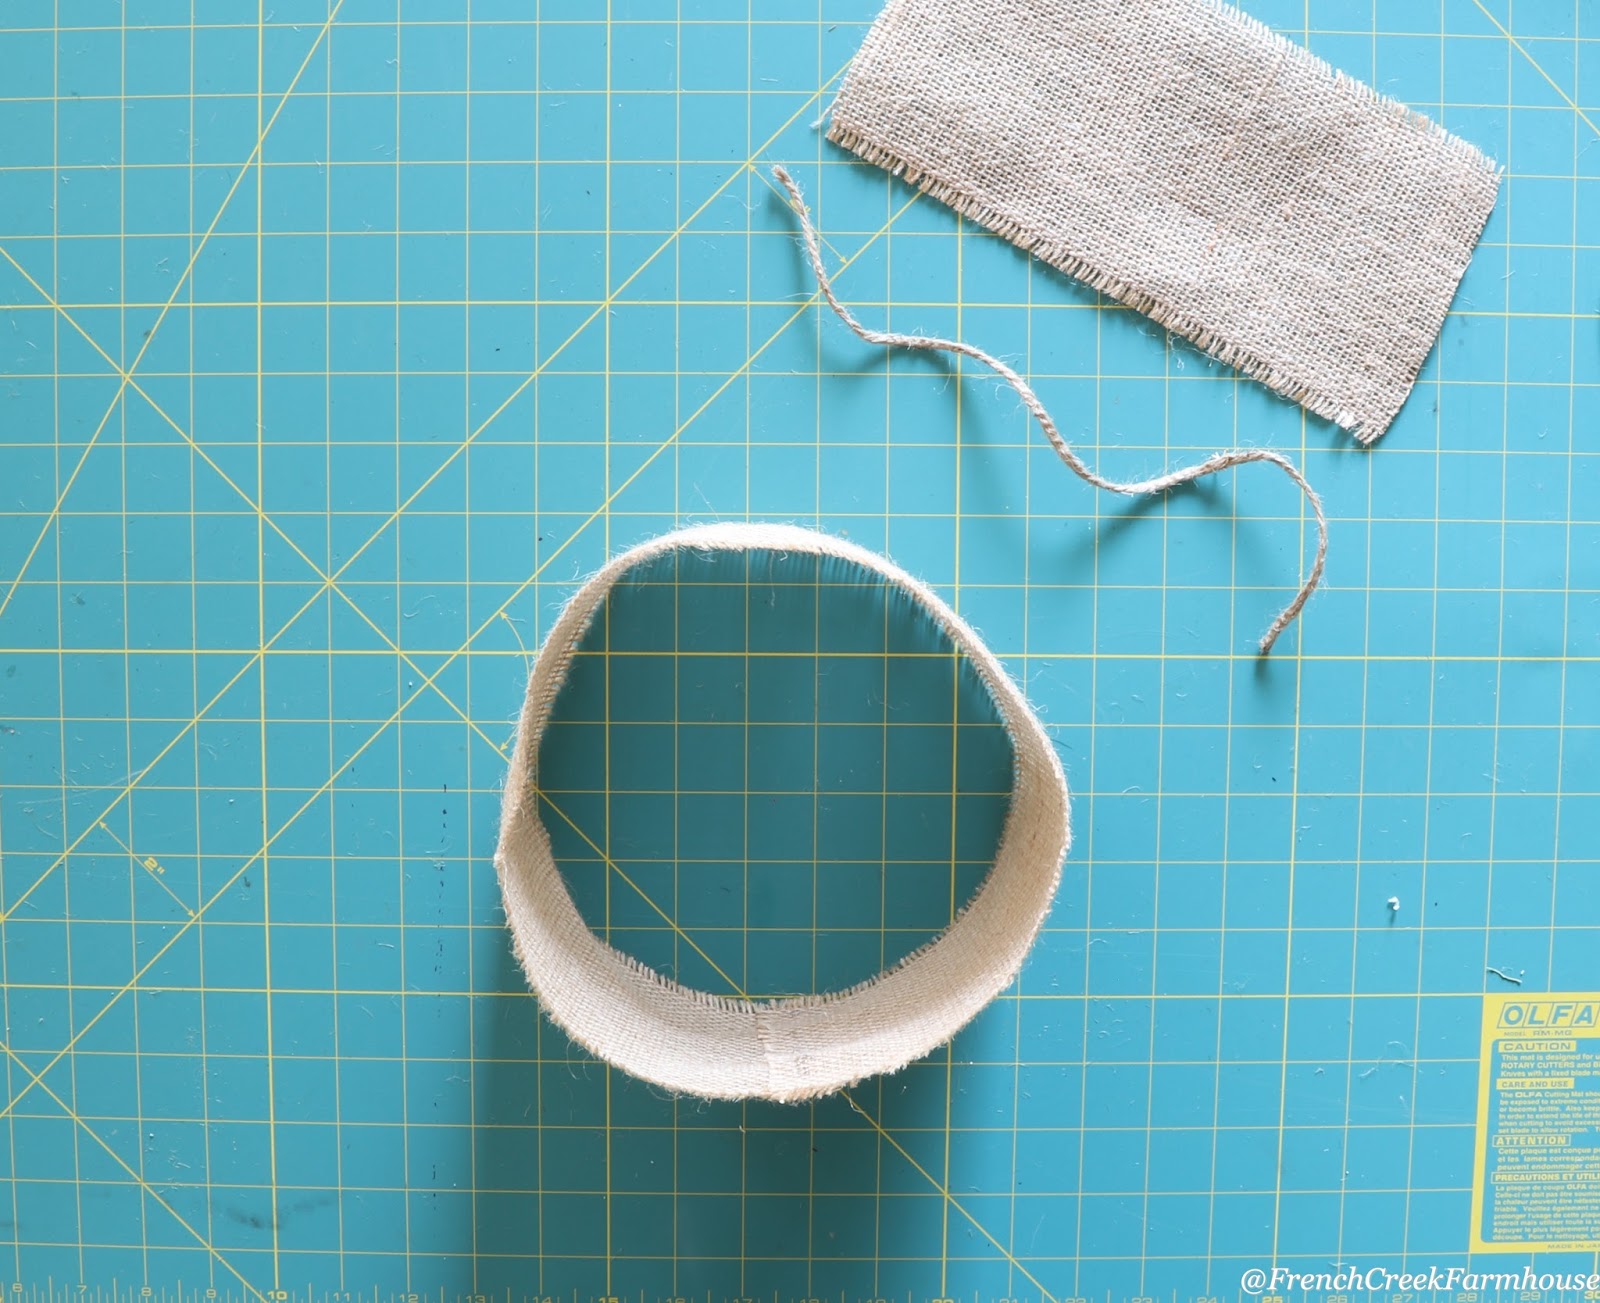
1. Begin by cutting two lengths of burlap ribbon. In my example, the lengths are 9″ and 23″. You’ll also need a short length of jute string. The ribbon I am using is not wired because burlap is a fairly stiff material. However, you could use any type of ribbon and follow these same steps.
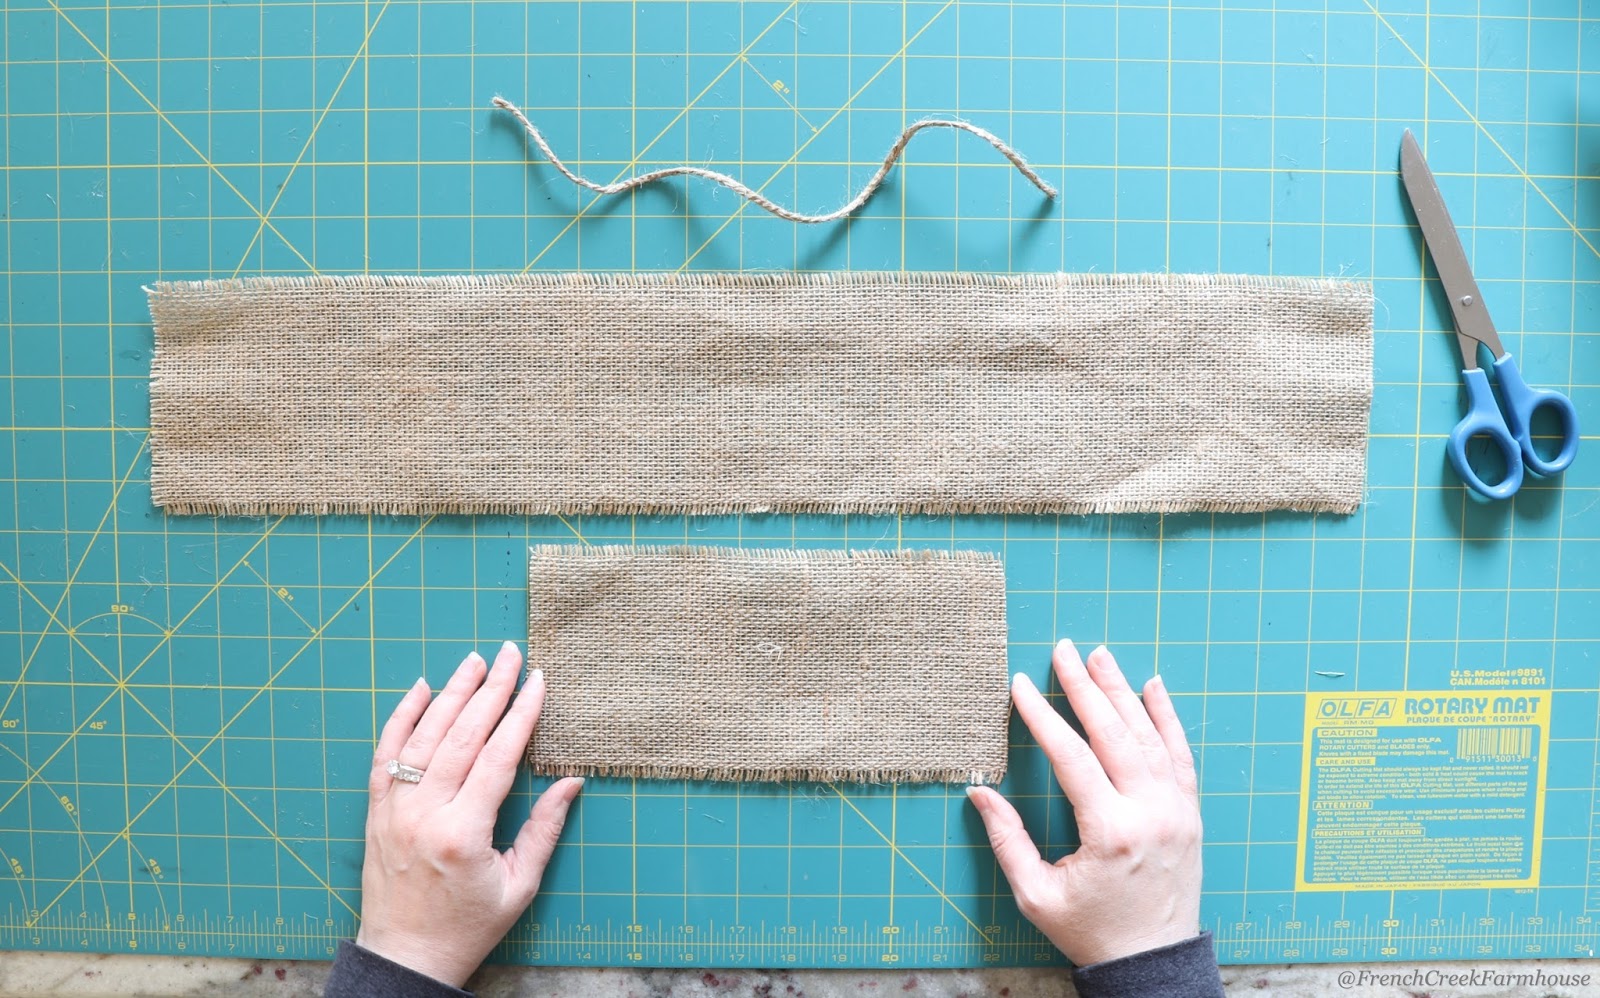
2. Set aside the string and shorter length of ribbon for a moment, and fold your longer length of ribbon so that the two ends overlap by about 1″. Using your hot glue gun, secure the ends being careful that the hot glue doesn’t seep through to the layer of ribbon below.
3. After gluing the ends together, you should end up with a circle.
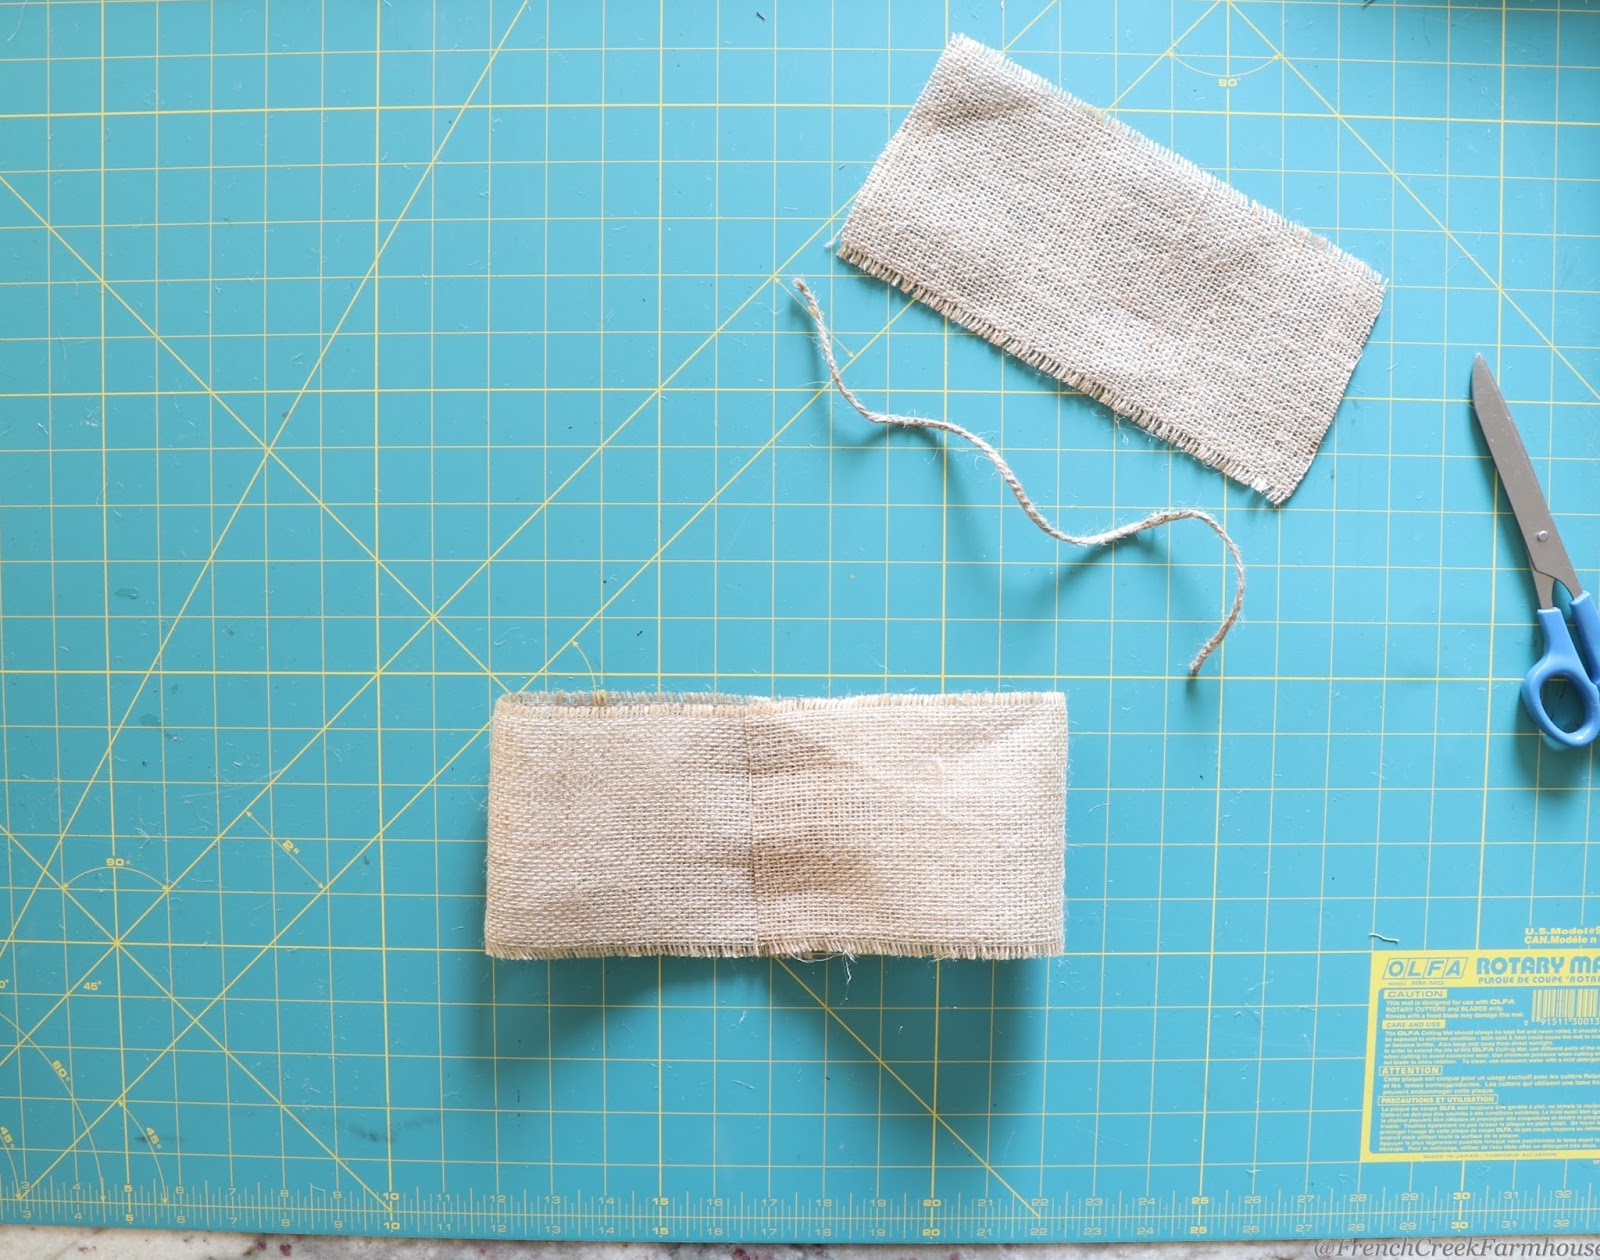
4. Place your ribbon so that the glue seam is in the center and facing up. Then, pinch at the center, effectively creating a W in the ribbon.
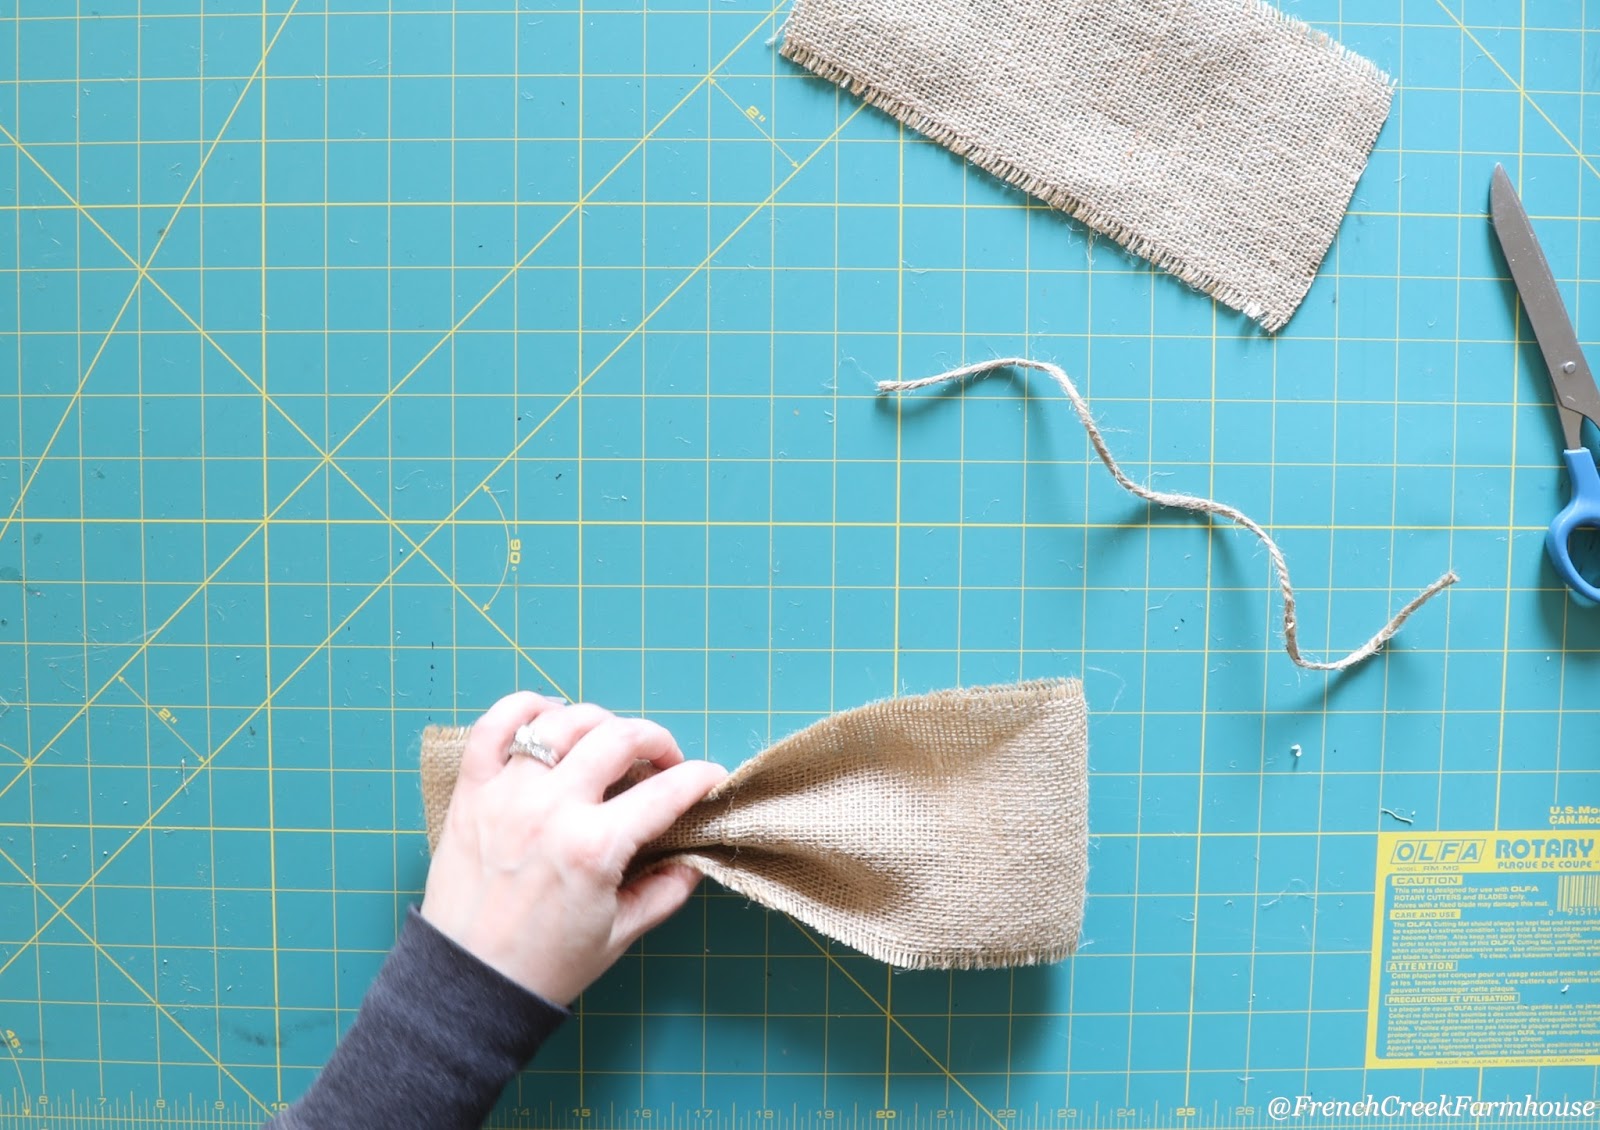
5. Using your piece of string, secure the pinched center. Don’t tie this too tight, because you want your bow to have a nice fluffy look to it. Trim the ends of your string.
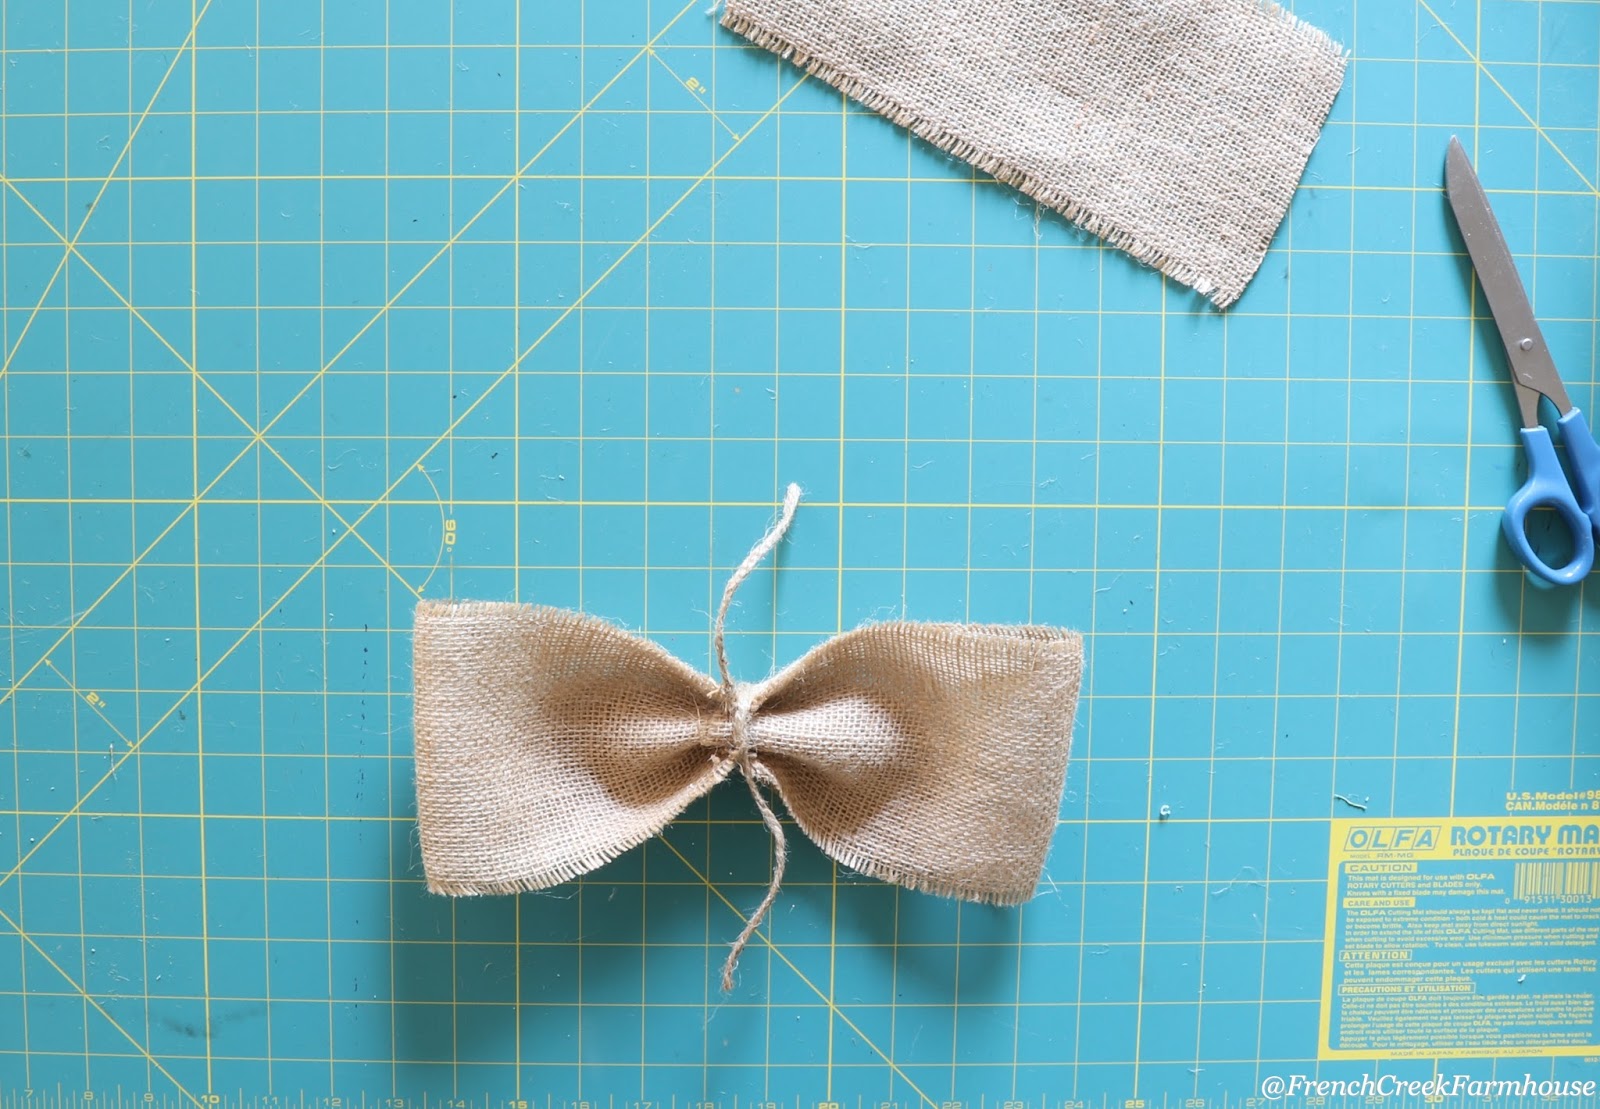
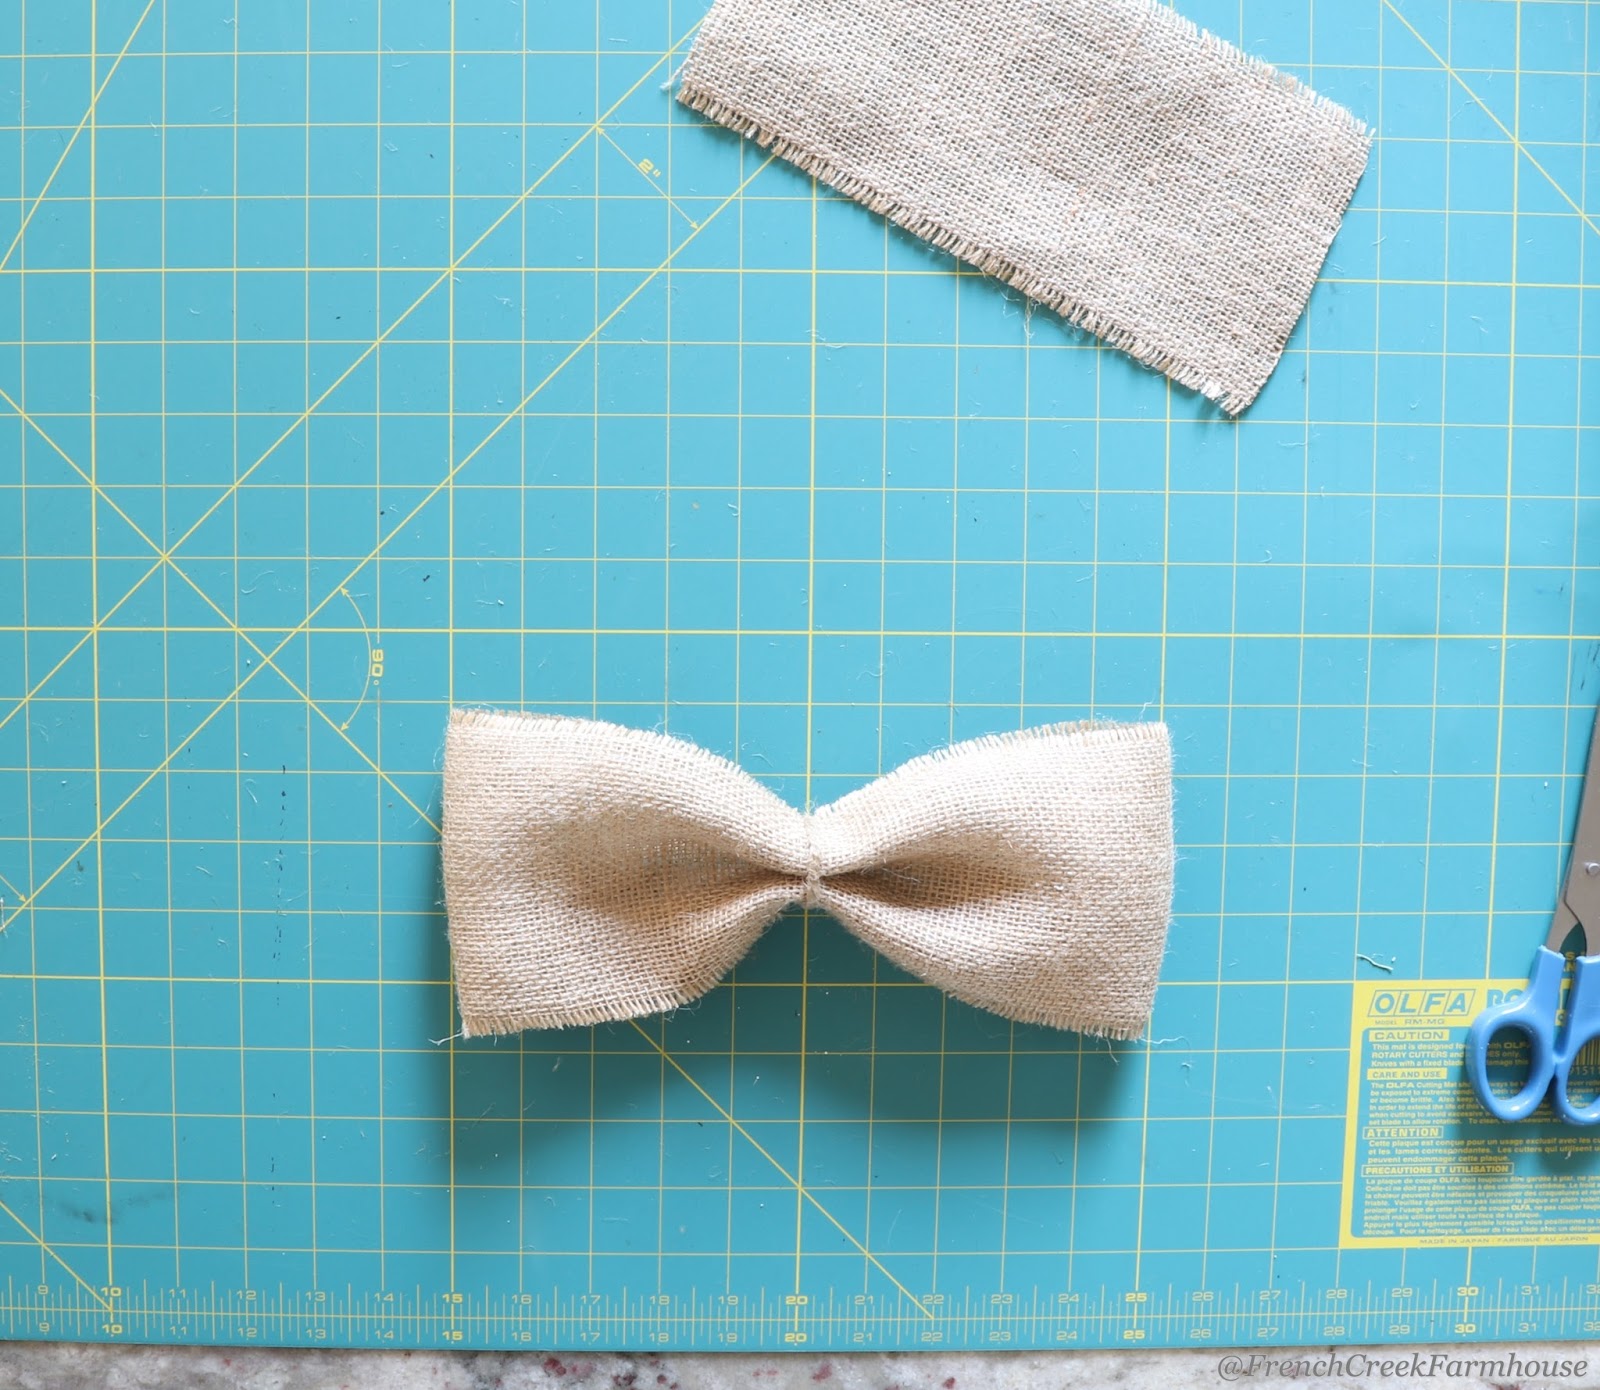
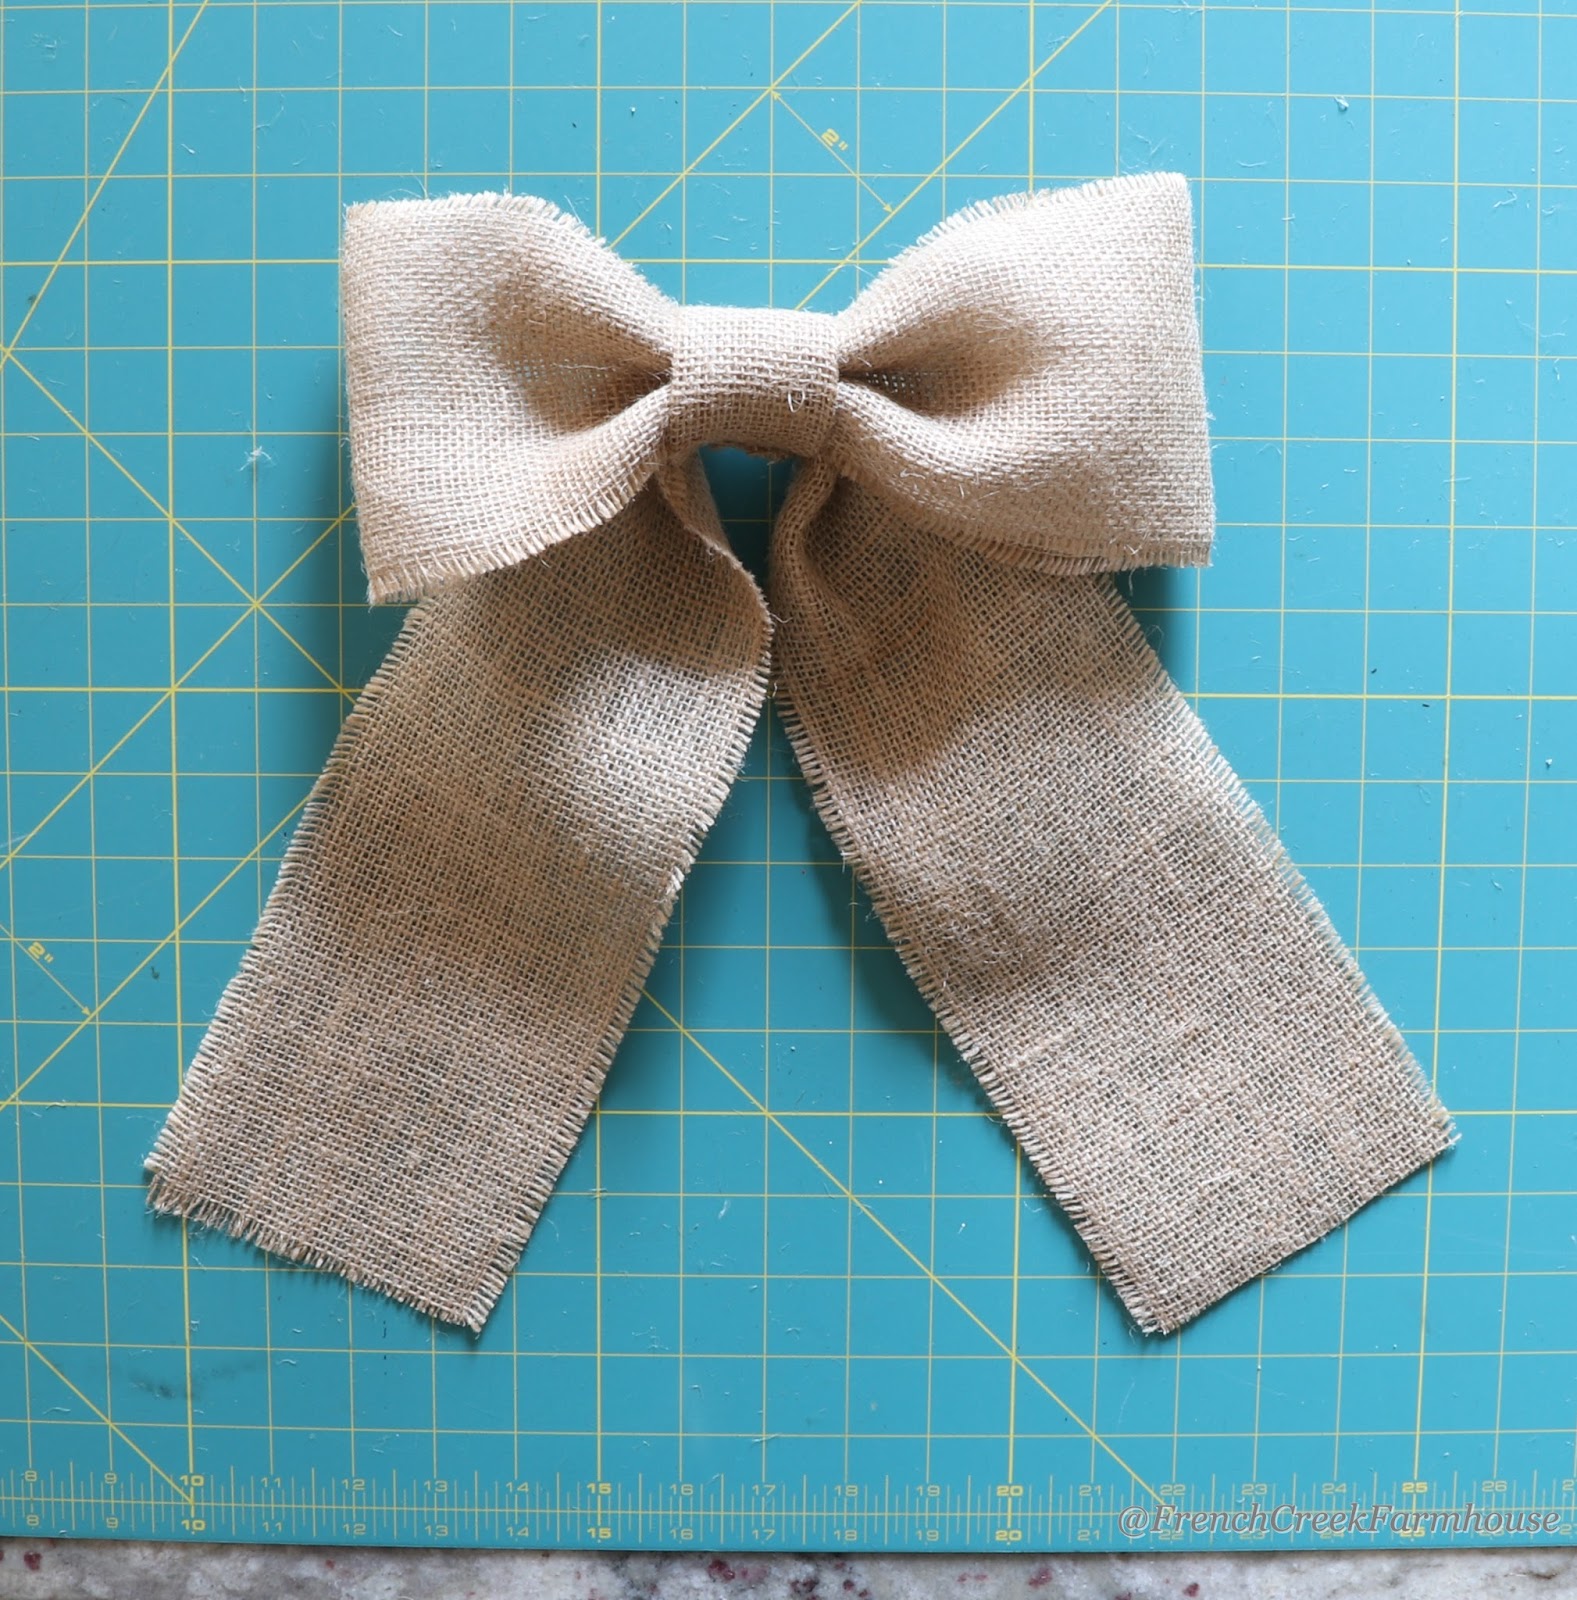
6. When you turn your bow right side up, it should look like this. Now the glued seam is in the back and mostly covered by your jute string.
7. Decide how long you’d like the tails of your bow to be. If you aren’t ready to decide yet, just cut a long length of ribbon and you can cut it to size later. In my example, the ribbon is 26″ long. Place your bow, centered, on top of the long length of ribbon. Also, tri-fold your short length of ribbon. Burlap is stiff and maintains a fold pretty easily. You shouldn’t need to glue this to get it to stay folded.
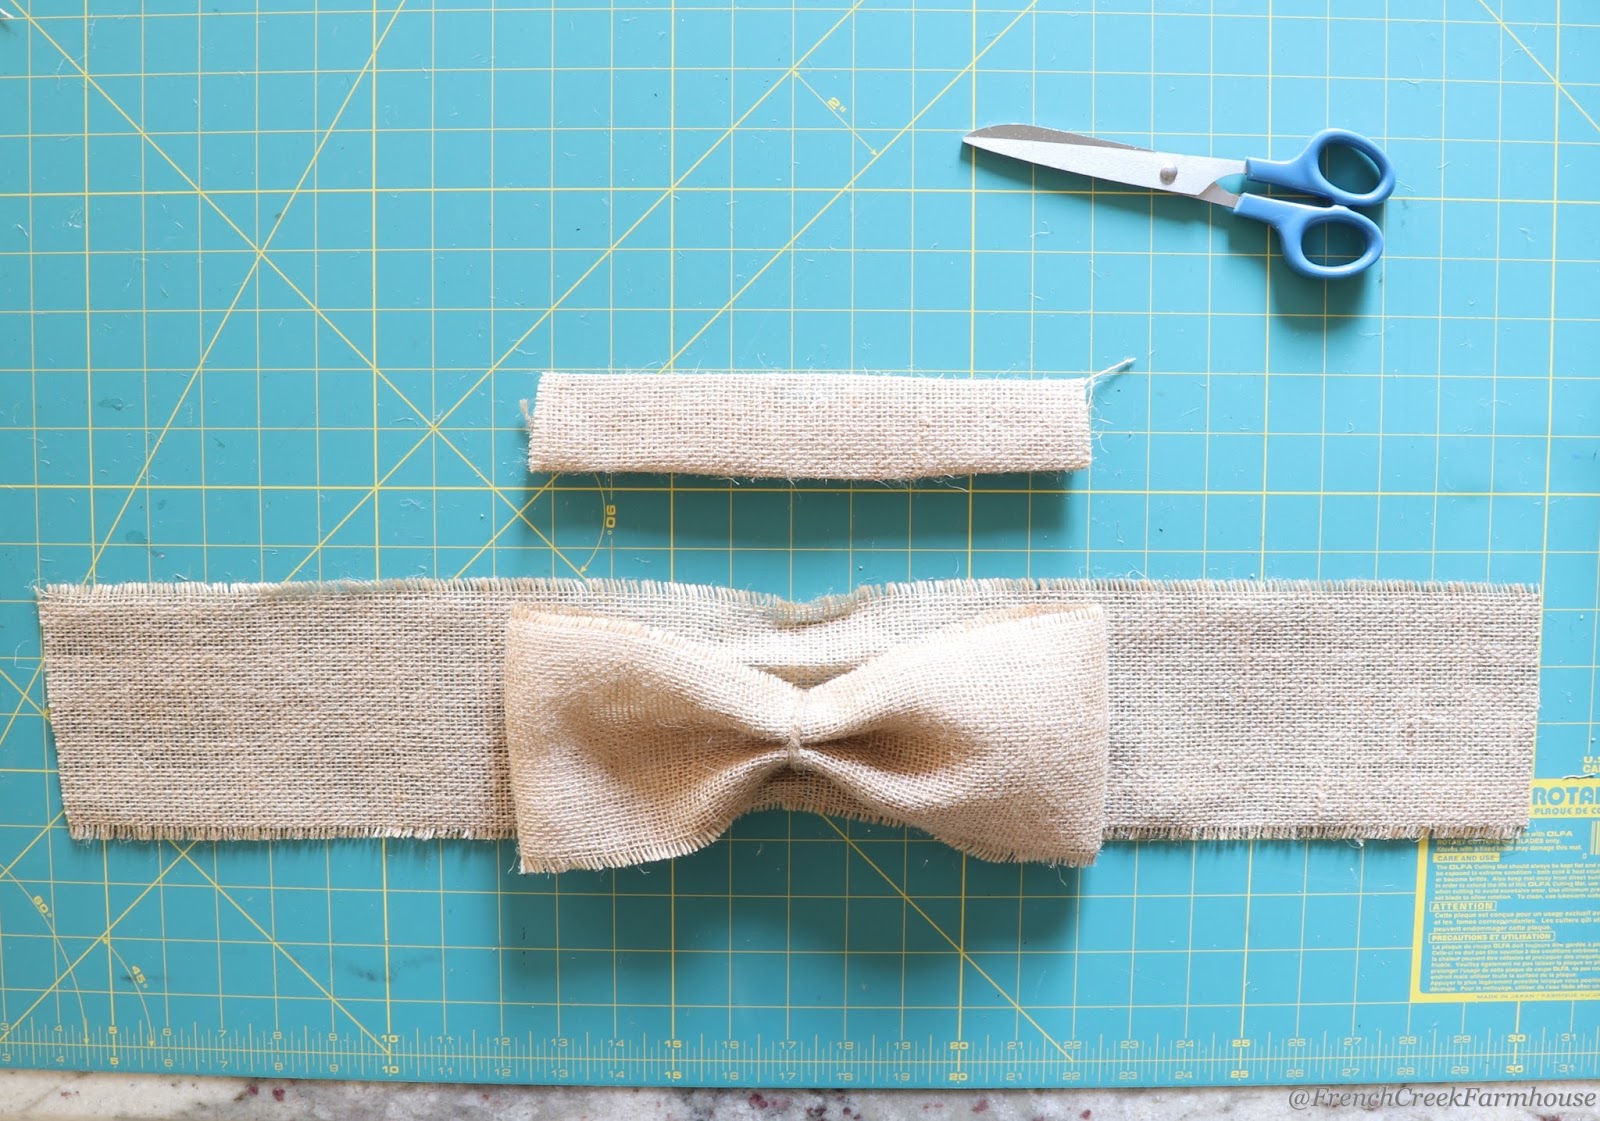
8. Once again, pinch directly at the center, this time gathering the long length of ribbon that will be the tails. Holding the bow with one hand, use your other hand to wrap the short length of ribbon around the bow. This creates the bow’s center. The seam should be at the back. Glue the bow’s center and hold the ends together until the hot glue firms up so that it doesn’t pop apart.
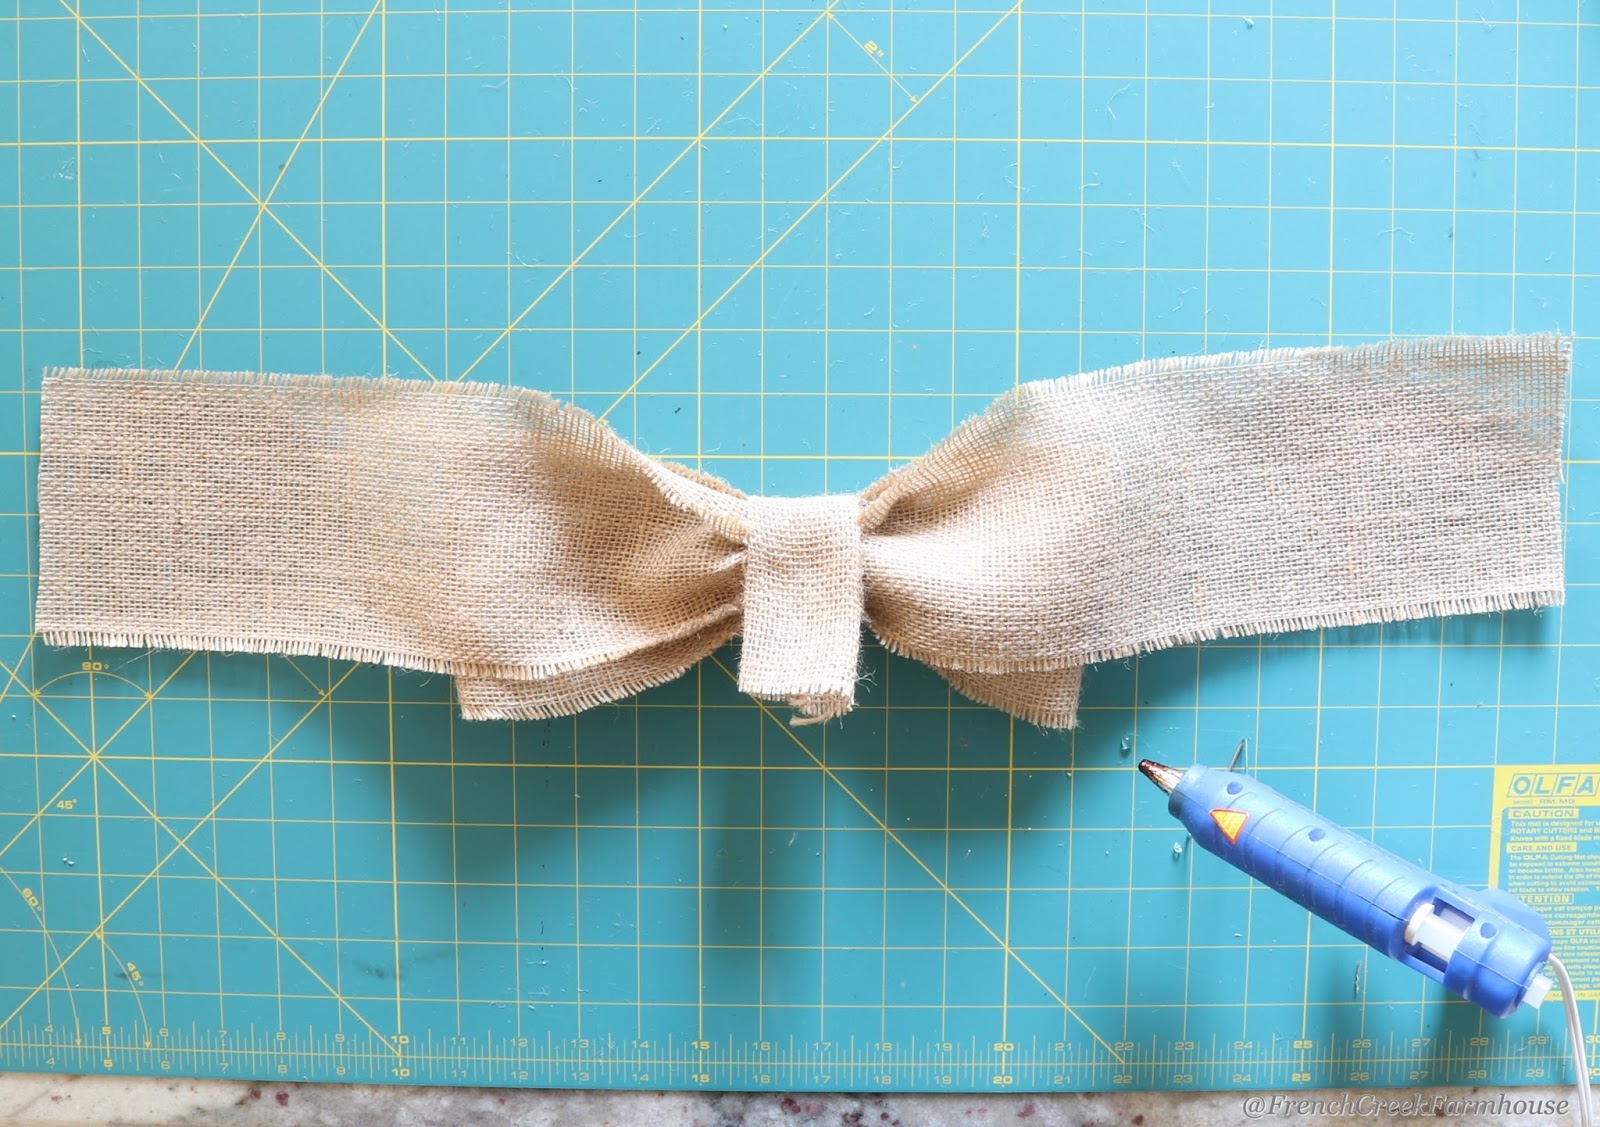
10. Trim the excess length of ribbon used to create the bow center.
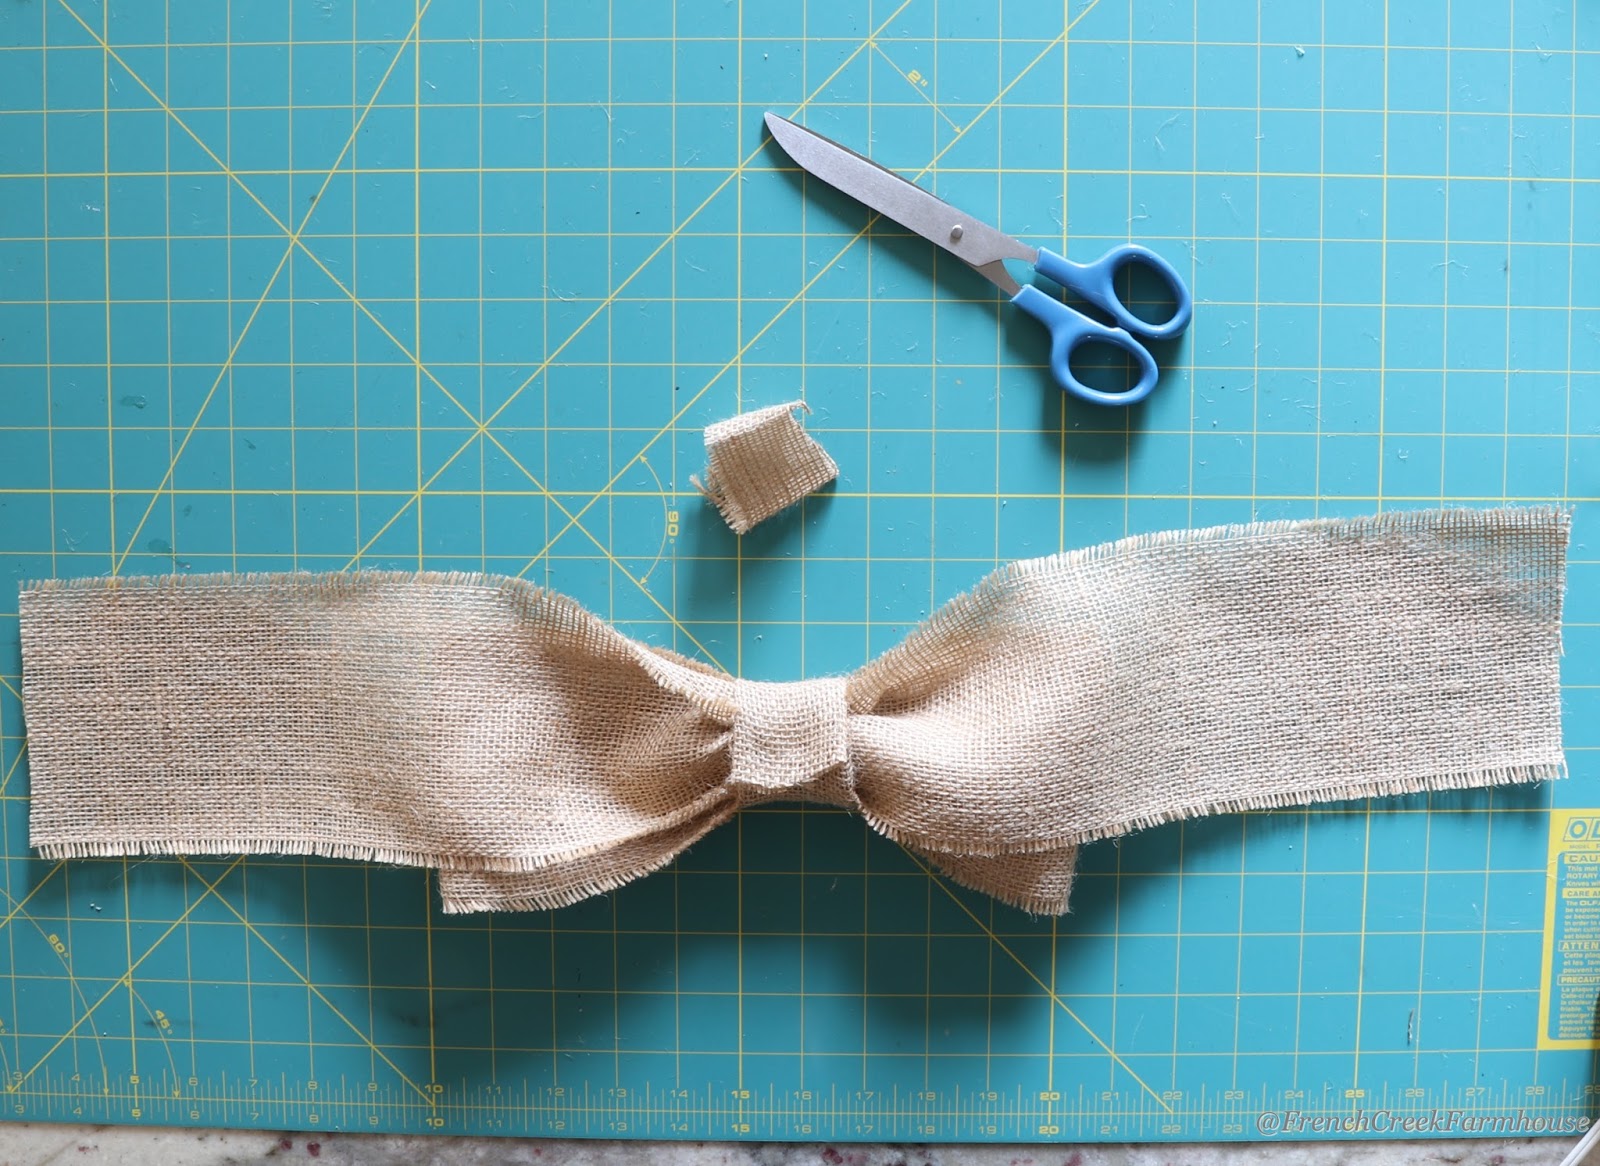
11. When you turn your bow right side up, it should look like this.
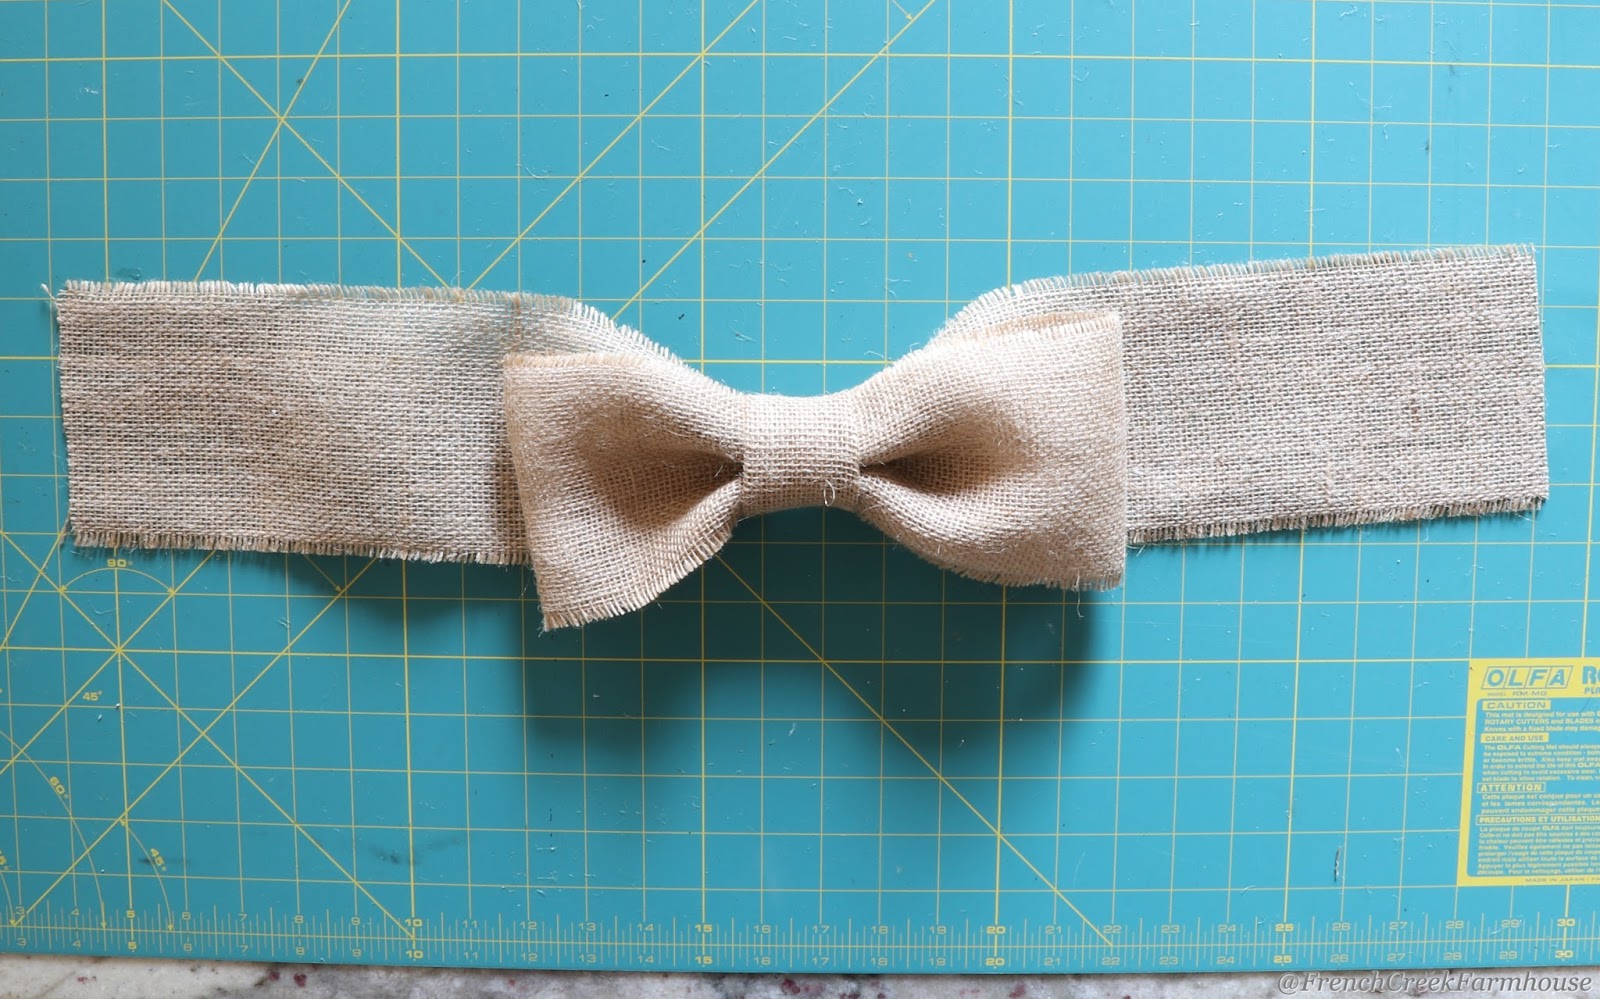
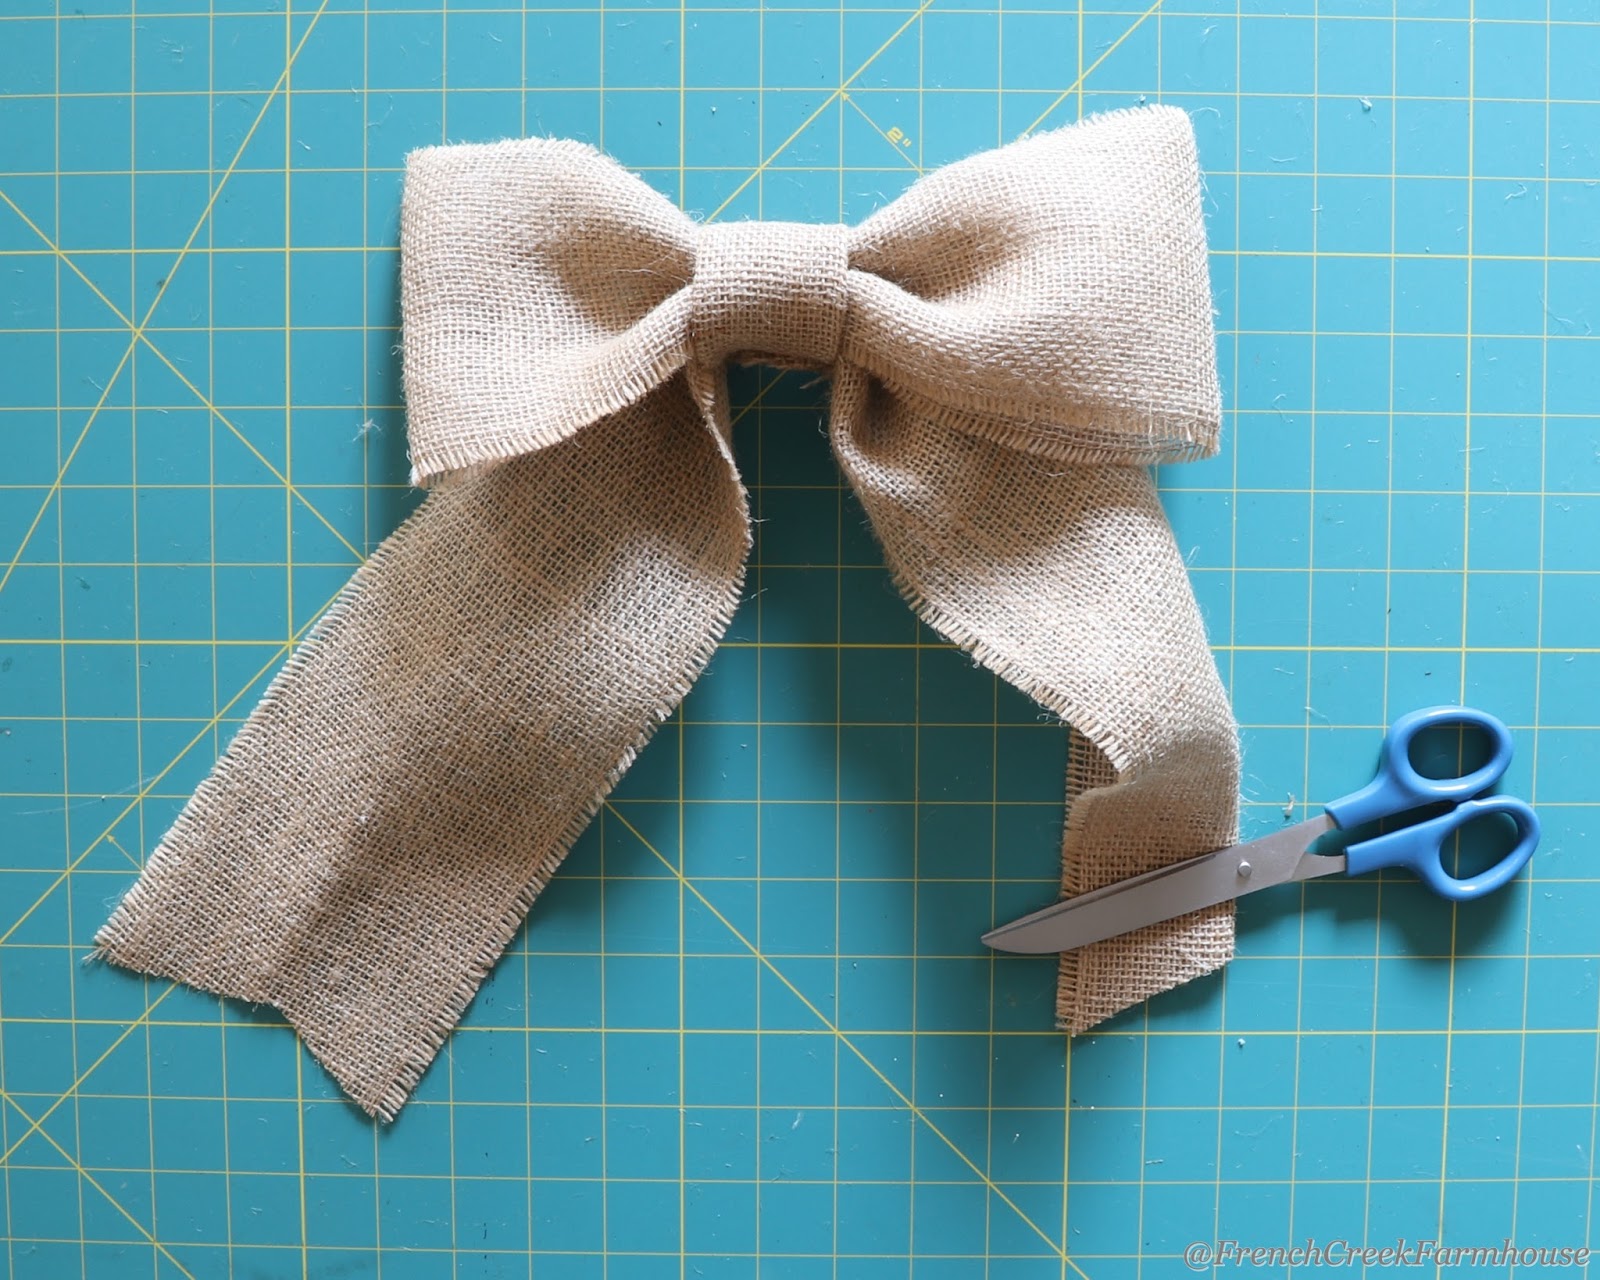
12. Pull the tails down to create a proper bow.
13. If you’d like, you can cut the tail ends for an added decorative touch. Since we’re using 4″ wide ribbon, folding in half will give you a 2″ width. I cut diagonally by a 1″ rise. The grid on your cutting mat is very helpful for this part if you want both tails to look the same.
14. Now you have a completed bow!
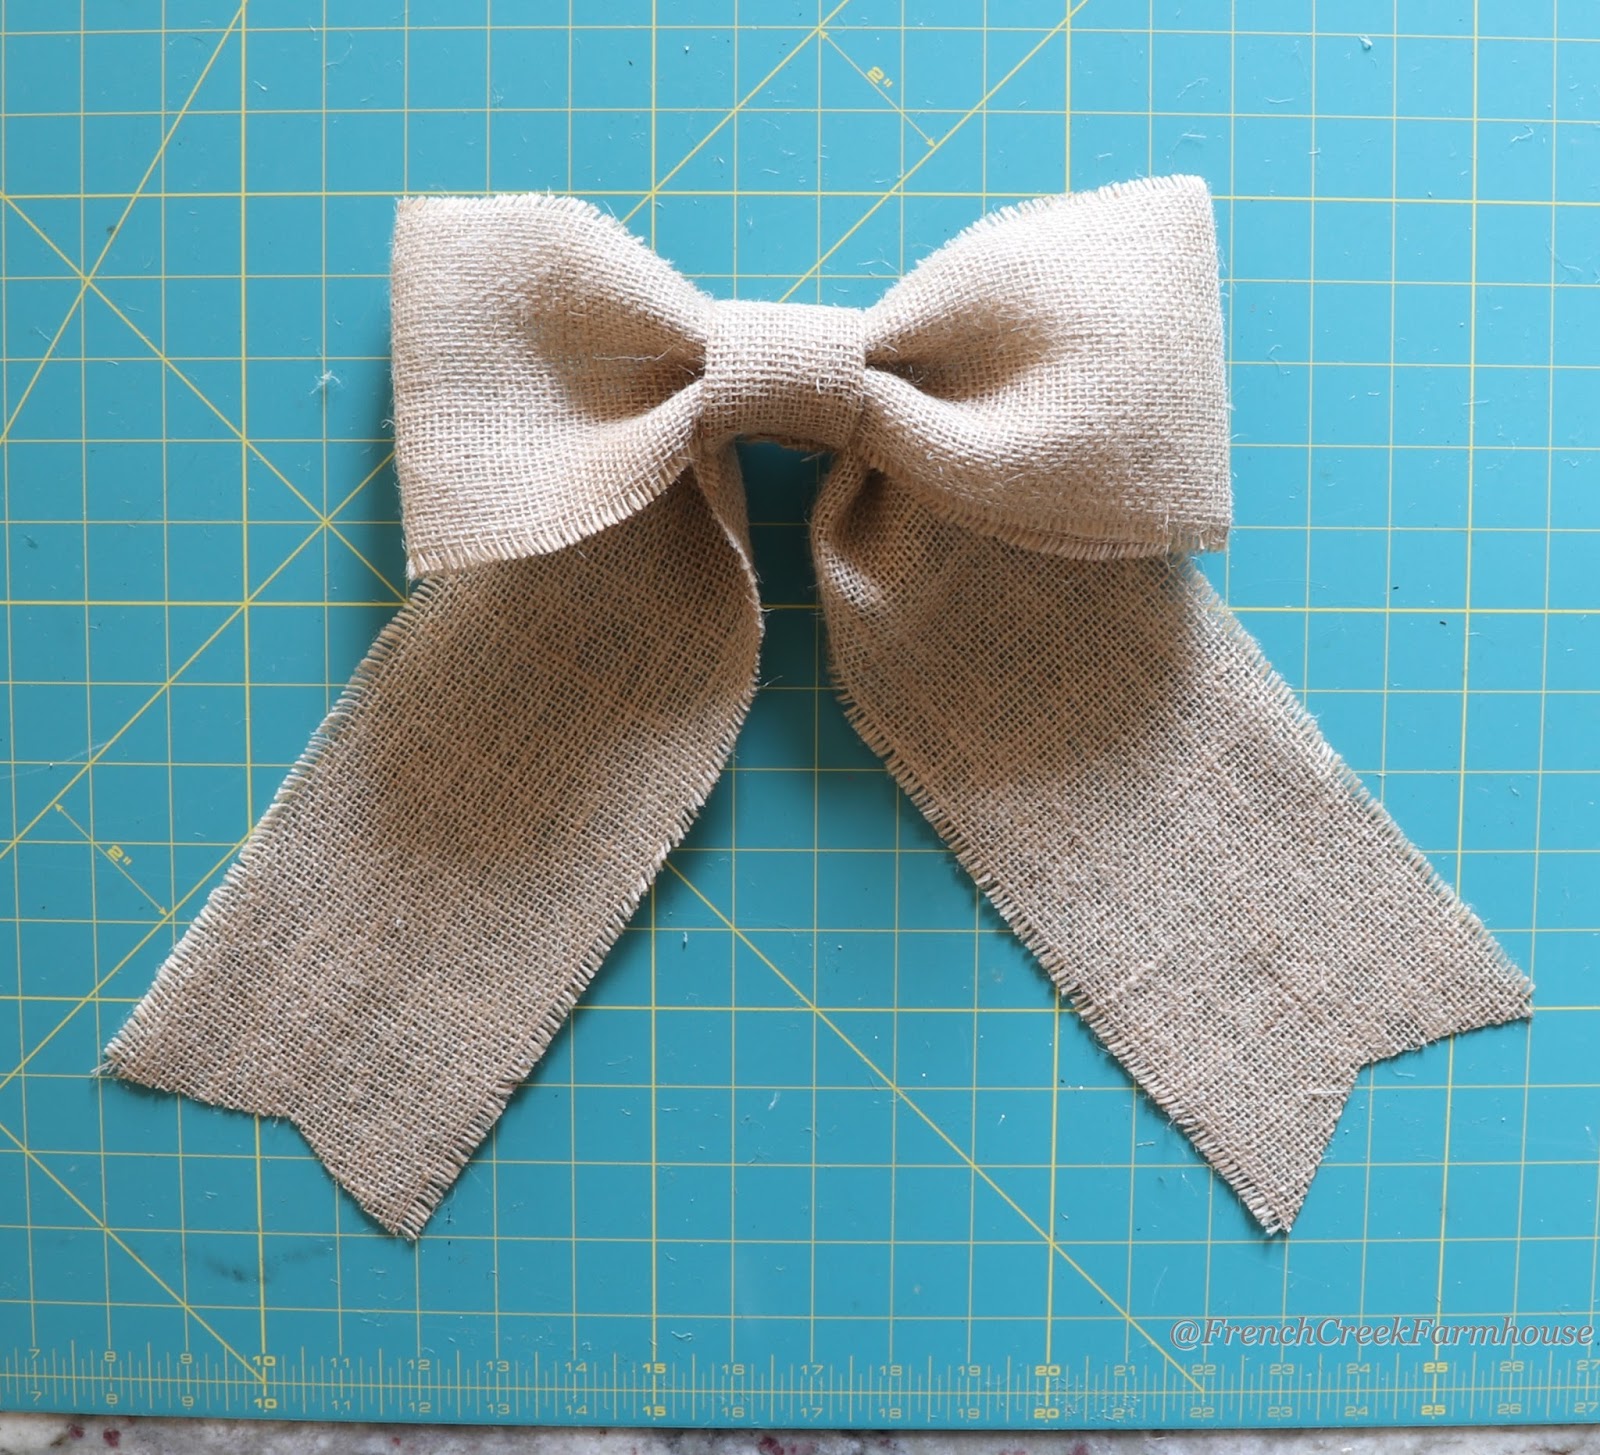
15. You can secure your bow to a wreath with a length of string or even a spare twist tie or piece of floral wire. Just loop through the backside of the bow center and attach to your project.
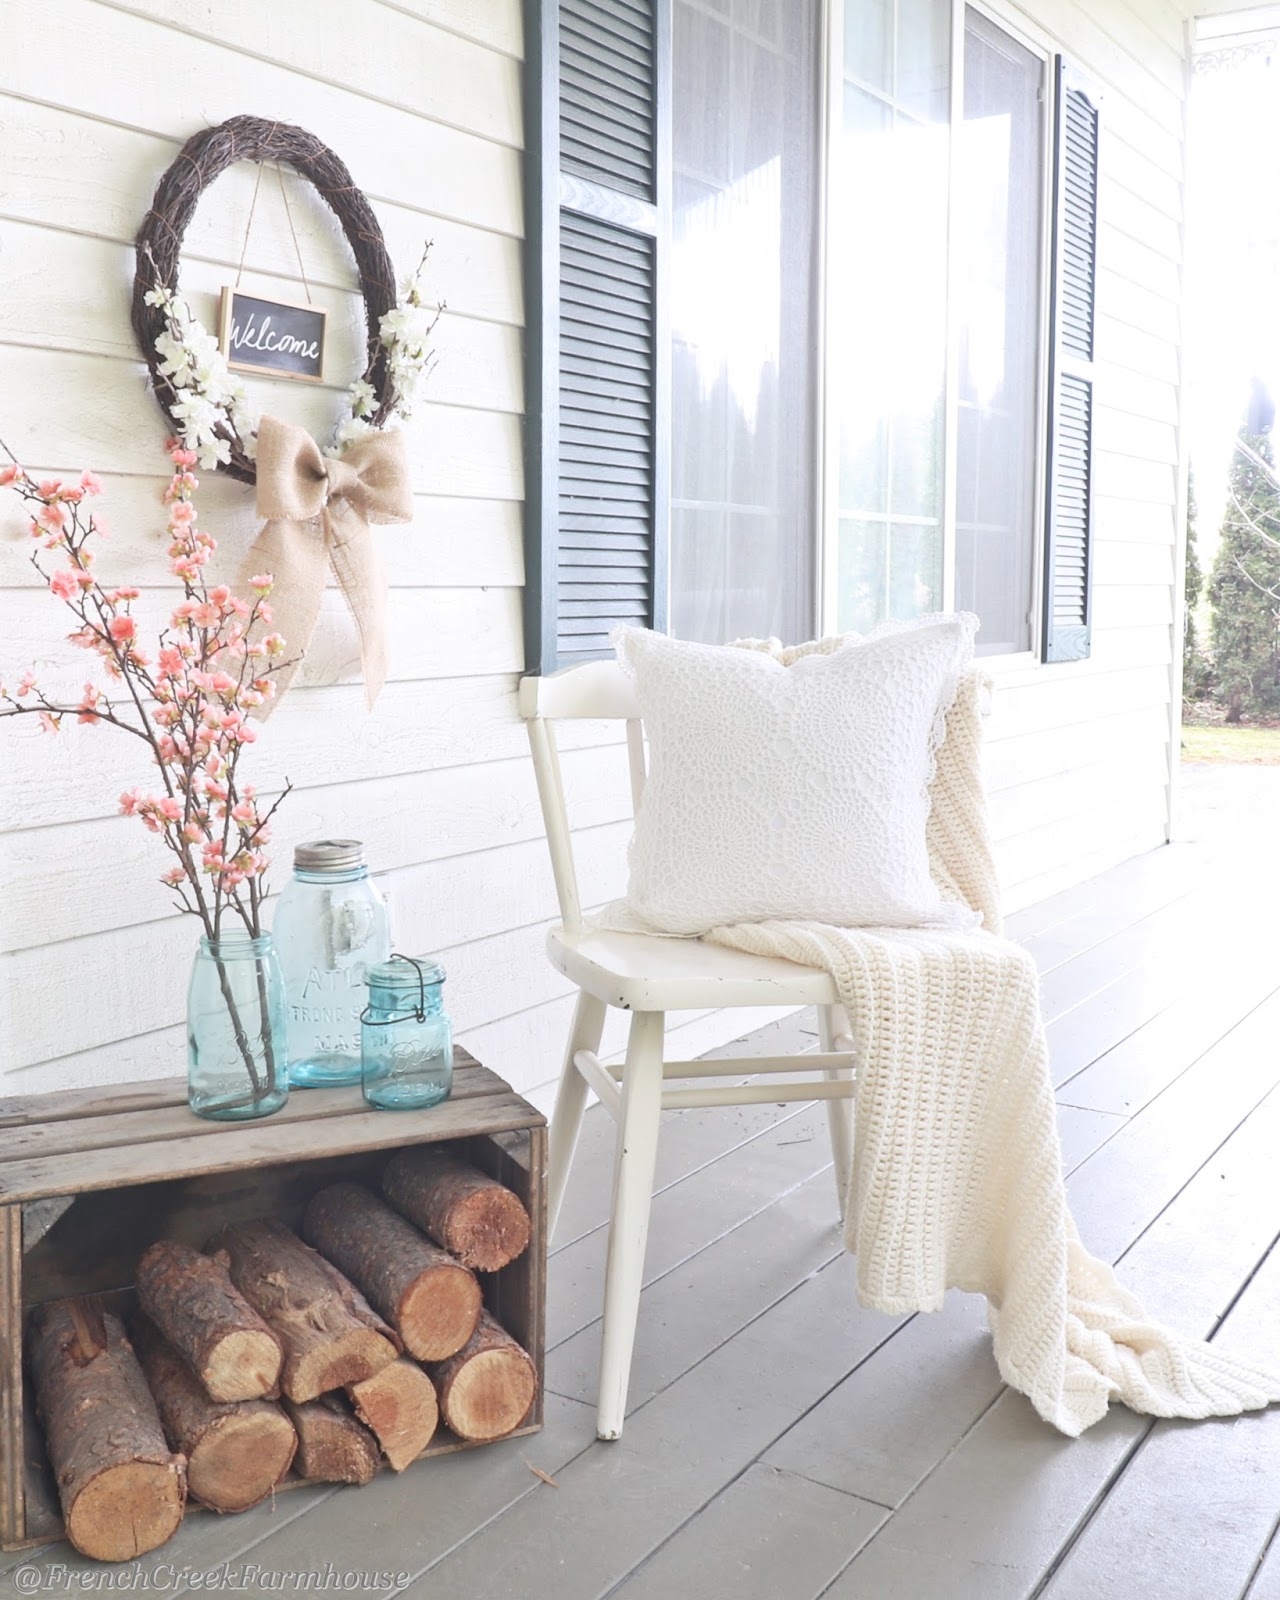
Burlap ribbons add a sweet touch of simple farmhouse style, and they can be used for endless designs in every season. What are you planning to make? Where will you put your bow?

Do you love hunting for vintage treasures as much as I do?
Get my free vintage & junk hunting journal
Let’s be email pen pals! Sign up to join our community, and get your free printable PDF Vintage Hunting Journal. This is so good!

It's the prettiest wreath, I love the simplicity and burlap is always a good idea!
I agree! It fits in with so many decor styles, and it's just so classic!
So sweet and easy! I love it!
So glad! Thank you so much for stopping by!
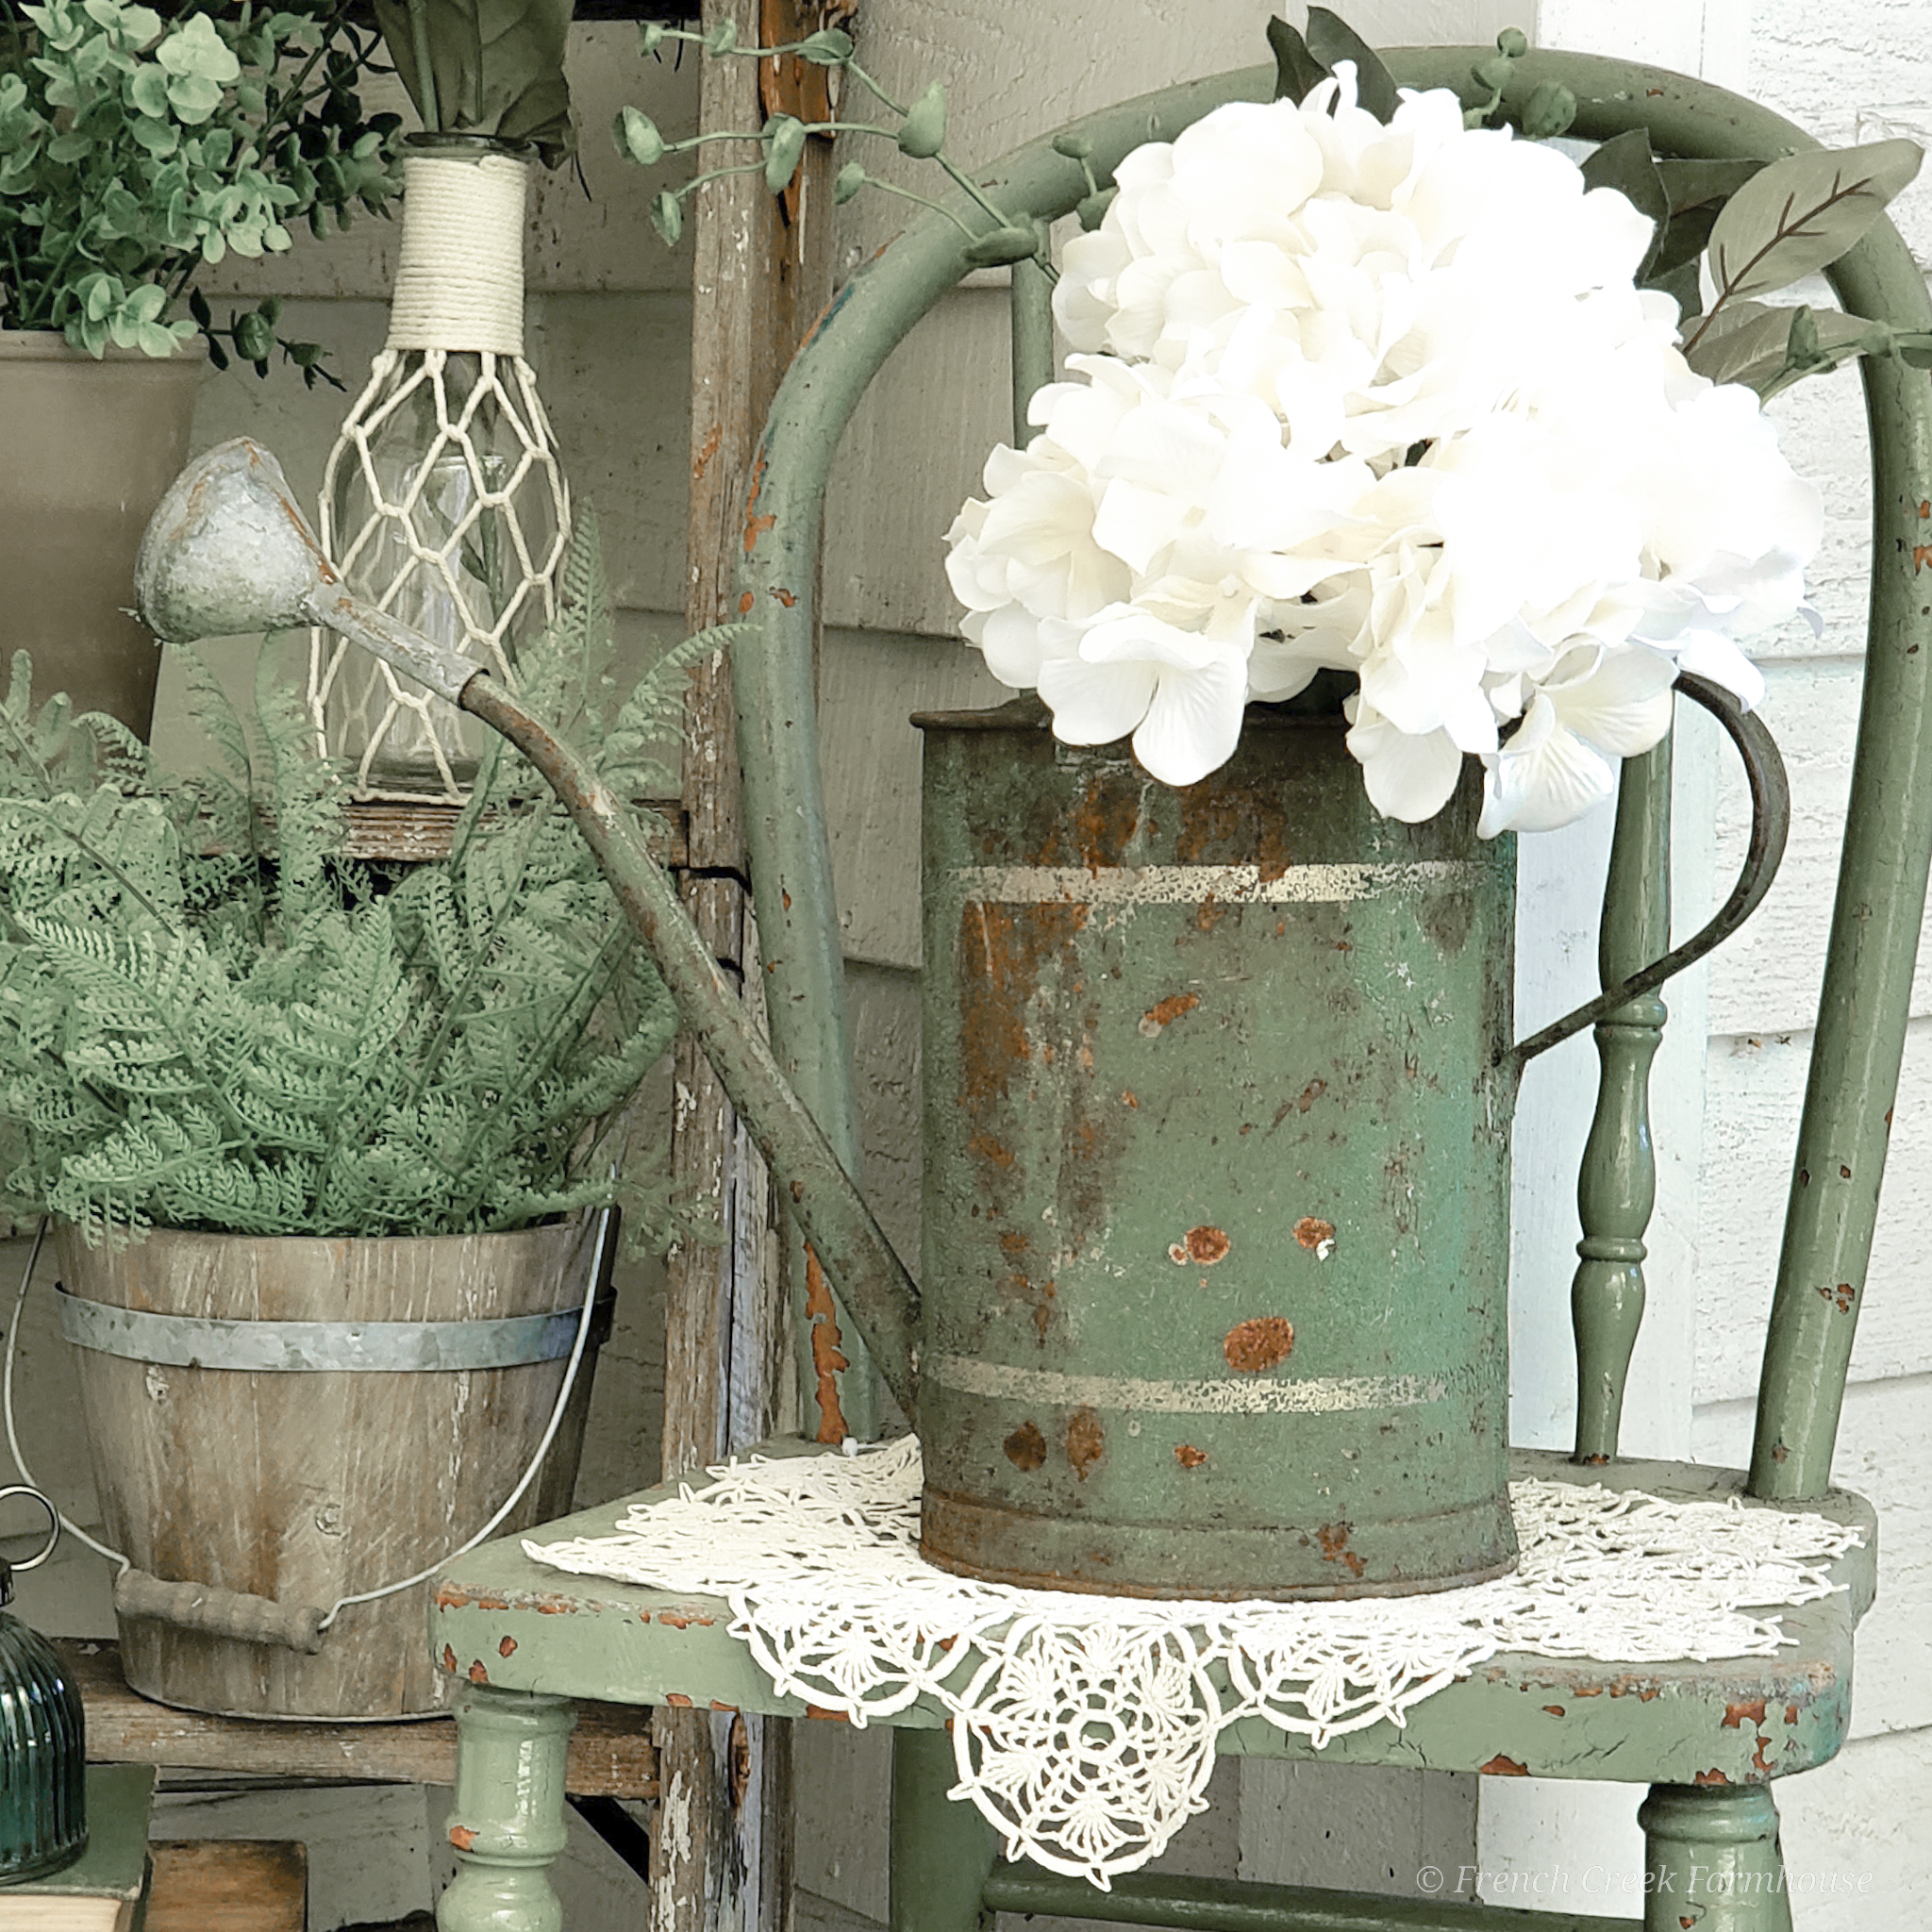
Your bow is lovely and I adore your porch! Thanks for sharing at Vintage Charm–pinned!