How to Cross-Stitch: A Heritage Craft
If you’re looking for a fun, simple, and affordable craft that you can do almost anytime or anywhere, learn how to cross-stitch! This tutorial covers everything you need to know to get started.
I have loved cross-stitching since I was just a kid. Seeing the design come together with each stitch is so satisfying. And even better, it’s one of the most affordable hobbies you can take up.
Cross-stitching is also a wonderful activity to keep your hands busy. Whether you’re going on a road trip, stuck in bed with a cold, or trying to keep from snacking while enjoying a football game on TV, cross-stitching is an excellent use of your time and energy.
Cross-stitching is also a fantastic craft to help kiddos learn the basics of hand-sewing. If they’re old enough to count, they can learn to cross-stitch!
Throughout this guide, I will teach you all of the basics you need to learn how to cross-stitch. Plus, I’ve included many photos to explain–better than words–some of the concepts and techniques you need to know. With this tutorial, you will be well on your way to becoming an expert stitcher!
Be sure to pin this tutorial so you can find it again later!

Disclosure: This is not a sponsored post, and I have received no compensation for sharing anything that follows. Some links within this blog may be affiliate links, and I might earn a commission if you make a purchase through that link. This usually amounts to cents, not dollars, and helps to support the projects featured on this blog. I only recommend products from companies that I have found to be trustworthy. Read my full disclosure here.
What is cross-stitch?
There are so many different hand-sewing techniques that you can learn, and cross-stitch is certainly one of the easiest. If you can count, you can cross-stitch!
A form of hand-sewn embroidery, cross-stitching makes a design on fabric using tiny X shapes. Hence the name cross-stitch! The stitcher follows patterns by counting the number of stitches, which makes it very easy to complete even the most intricate designs.
Stitchers often use a special type of fabric called Aida cloth to create their designs. This special cloth has a very defined grid-like weave that’s perfect for creating the cross-stitch. However, as you become more familiar with the technique, you can cross-stitch on many different types of fabric. This makes it easy to customize a variety of linens such as tablecloths, napkins, towels, and more!
How to Cross-Stitch: The Basics
The cross-stitch is very simply an X that is stitched within a square created by the woven fibers of the cloth you use as your canvas. Each completed X requires two stitches and forms one cross.
Preparing your canvas
Although Aida cloth isn’t required to cross-stitch, it is certainly the easiest material for your projects, and the best choice for beginners. The weave of the fabric makes a very obvious mesh grid that is perfect for counting your stitches. Aida cloth is available in a range of colors, so you’re sure to find the perfect one for your project.
You will hear people talk about Aida cloth by its count. For example, “14 count”. All this means is the thread count of the weave, and it refers to how many threads are woven per inch. Because the weave is the framework for the crosses you will stitch, the count of the cloth will dictate the size of the completed project. For example, 14 count cloth has 14 blocks per inch. Likewise, 16 count cloth has 16 blocks per inch, which means the weave is smaller, and your finished design would be smaller, too.
Beginners will do best using 14 count Aida cloth. You’ll also find that it’s the most popular in the majority of patterns you might come across.
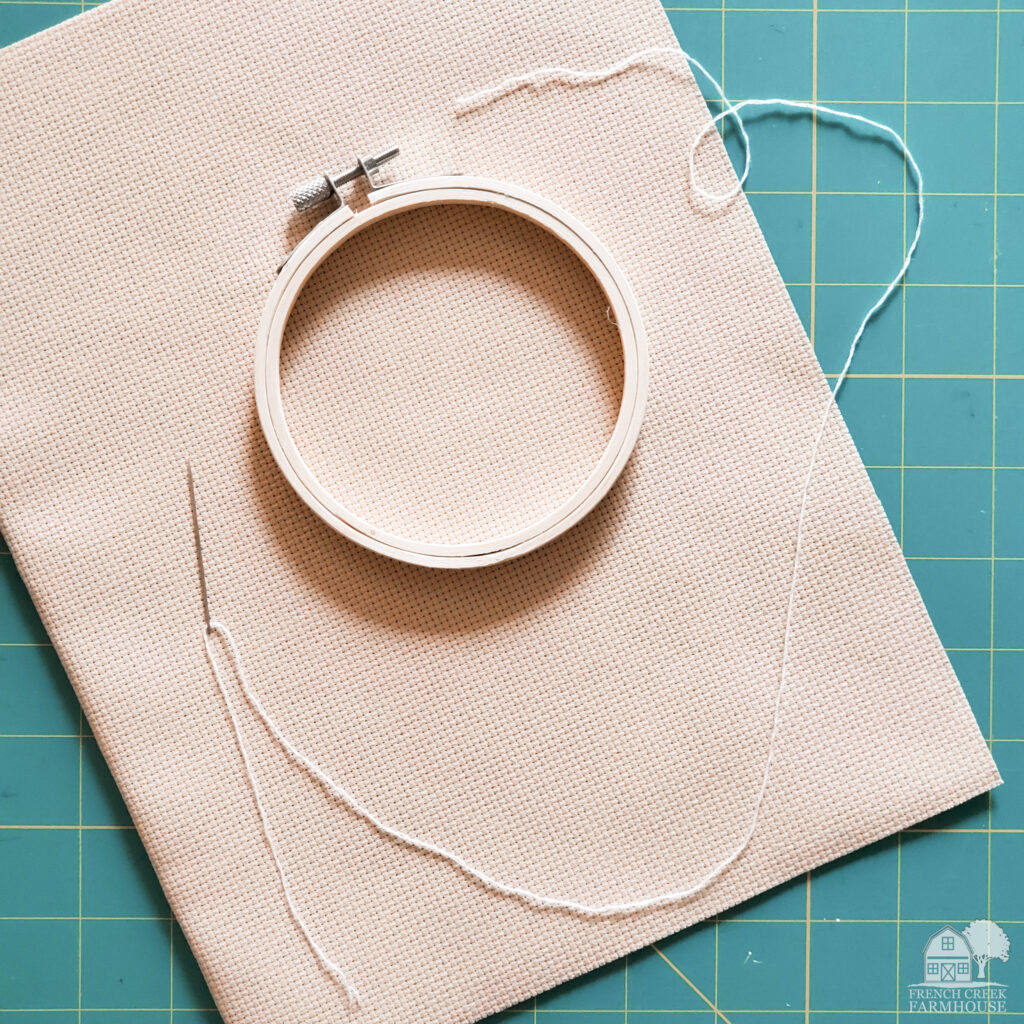
Aida cloth is also fairly stiff which means you aren’t required to use a hoop.
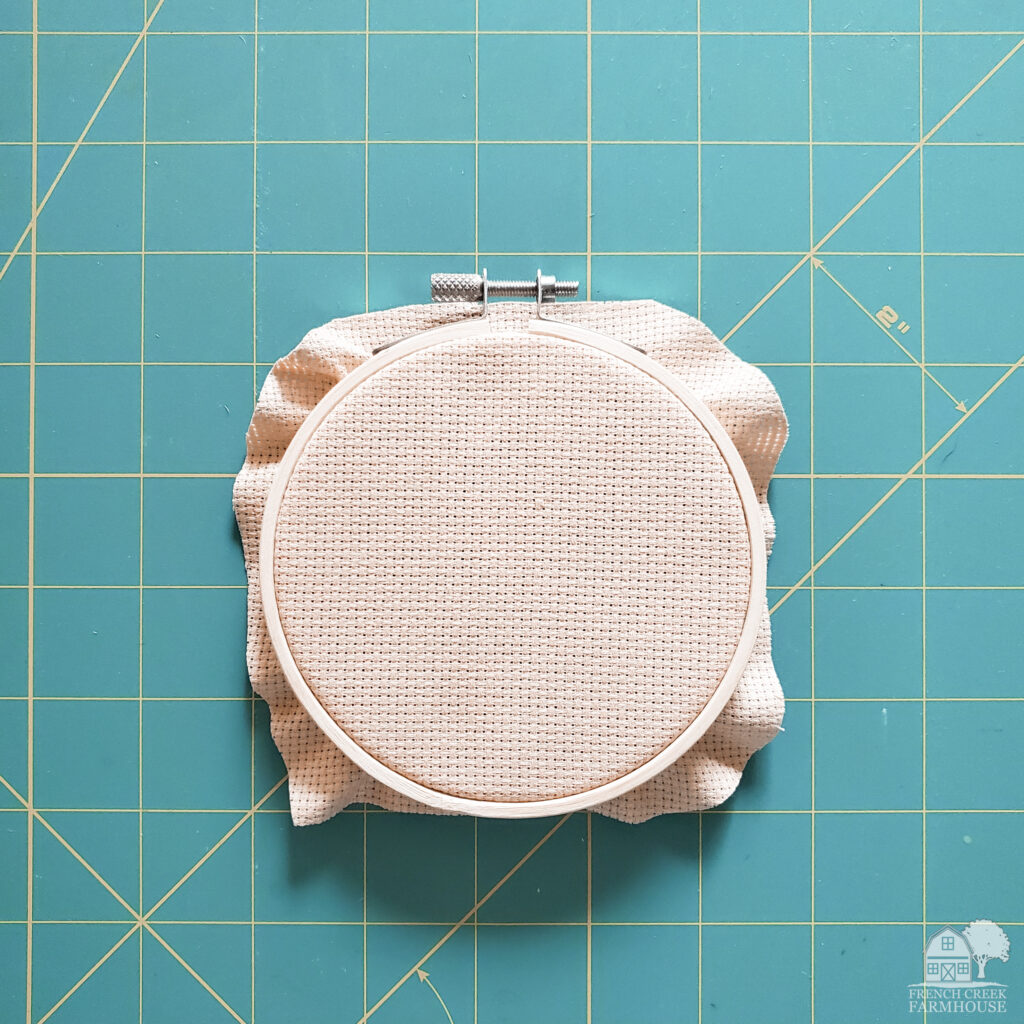
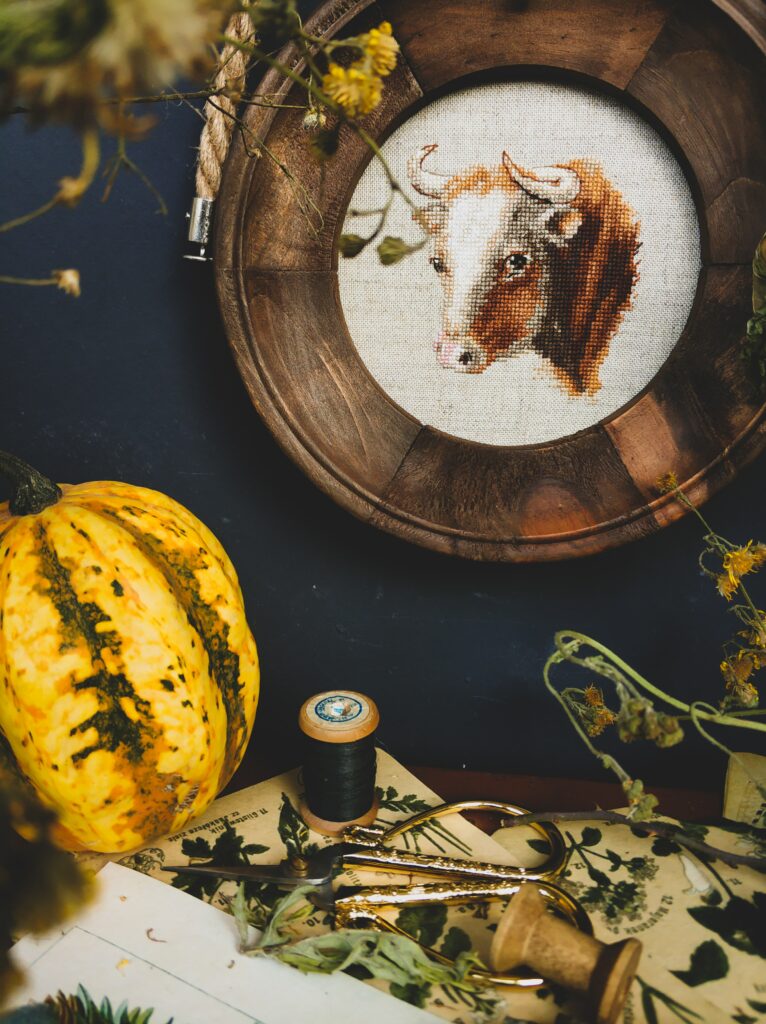
That said, I always use a hoop because it pulls the fabric taut, and makes stitching so much faster and easier. Embroidery hoops come in a plethora of sizes, styles, and finishes from simple wood rings, to beautiful and decorative styles. For a vintage or heritage aesthetic, displaying your completed embroidery pieces within hoops looks absolutely charming on the wall.
To grid or not to grid?
Optional, but very helpful, is the process of “gridding” your cloth. This is where you draw lines on the cloth every 10 rows of the weave. The grid will mirror what you see on any type of cross-stitch patterns. This makes stitching even faster because you can count visually rather than actually counting each individual stitch. For example, looking at a row of 10 squares, it’s very easy to visually see 4 of them filled with stitches. As you get deeper into creating your design, you’ll realize how much easier it is to grid your fabric upfront!
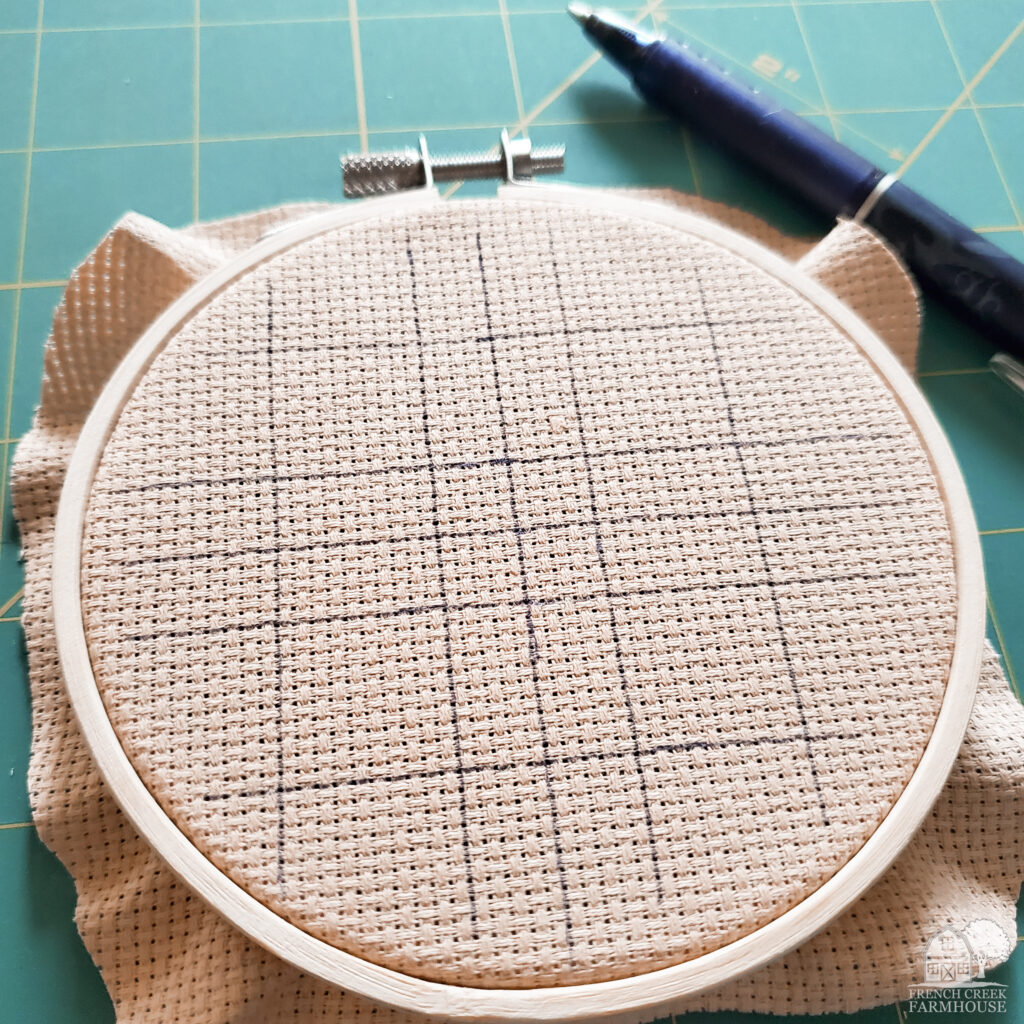
If you do choose to grid your cloth, you’ll use a special type of pen made for marking fabric. These pens have a type of ink that will disappear with either water or heat. My absolute favorite sewing pen {HERE} erases with heat. Although it isn’t marketed for sewing, it is the very best I have ever used. It never ghosts or reappears later, and it erases beautifully with a simple warm iron.
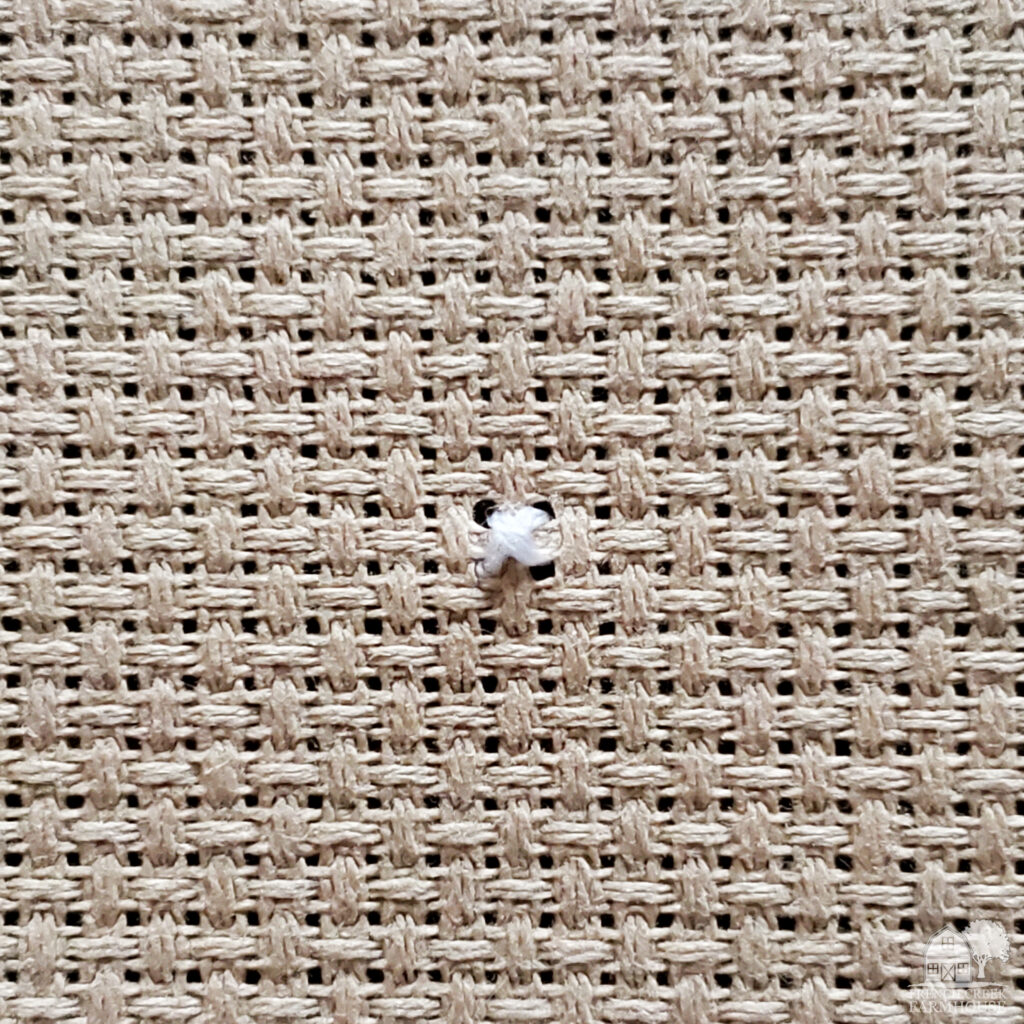
To grid your cloth, begin by marking both the horizontal and vertical center. You’ll draw along the “dots”, or the open part of the weave, as shown in the photo above. Since you’re starting by marking the center, this means that the next lines will be +/- 5 blocks away from the center lines. Then, draw both horizontal and vertical lines every 10 blocks thereafter.
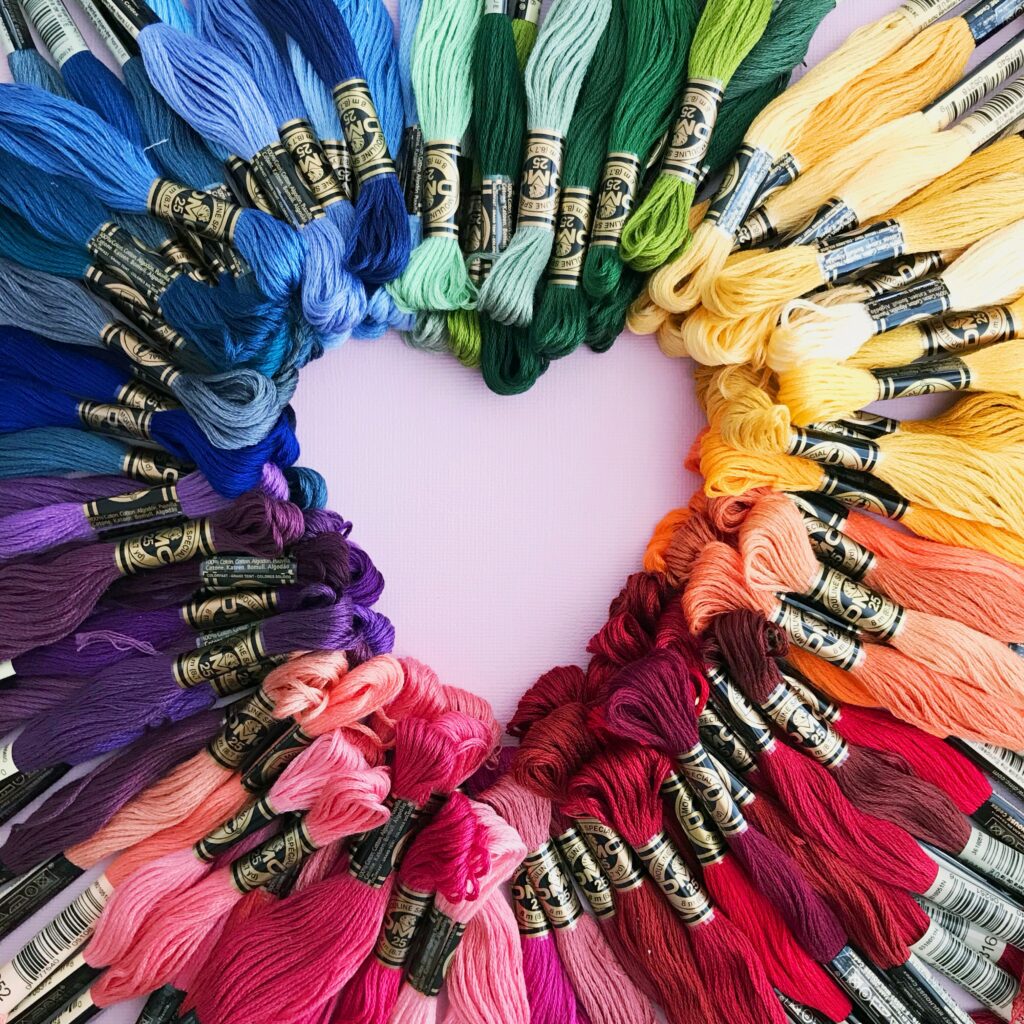
Choosing thread
Cross-stitching usually uses embroidery floss. Floss is sold by the skein, which is just a fancy word for a unit of loosely coiled yard or thread. Each skein contains a single continuous length of floss that measures 8.7 yards.
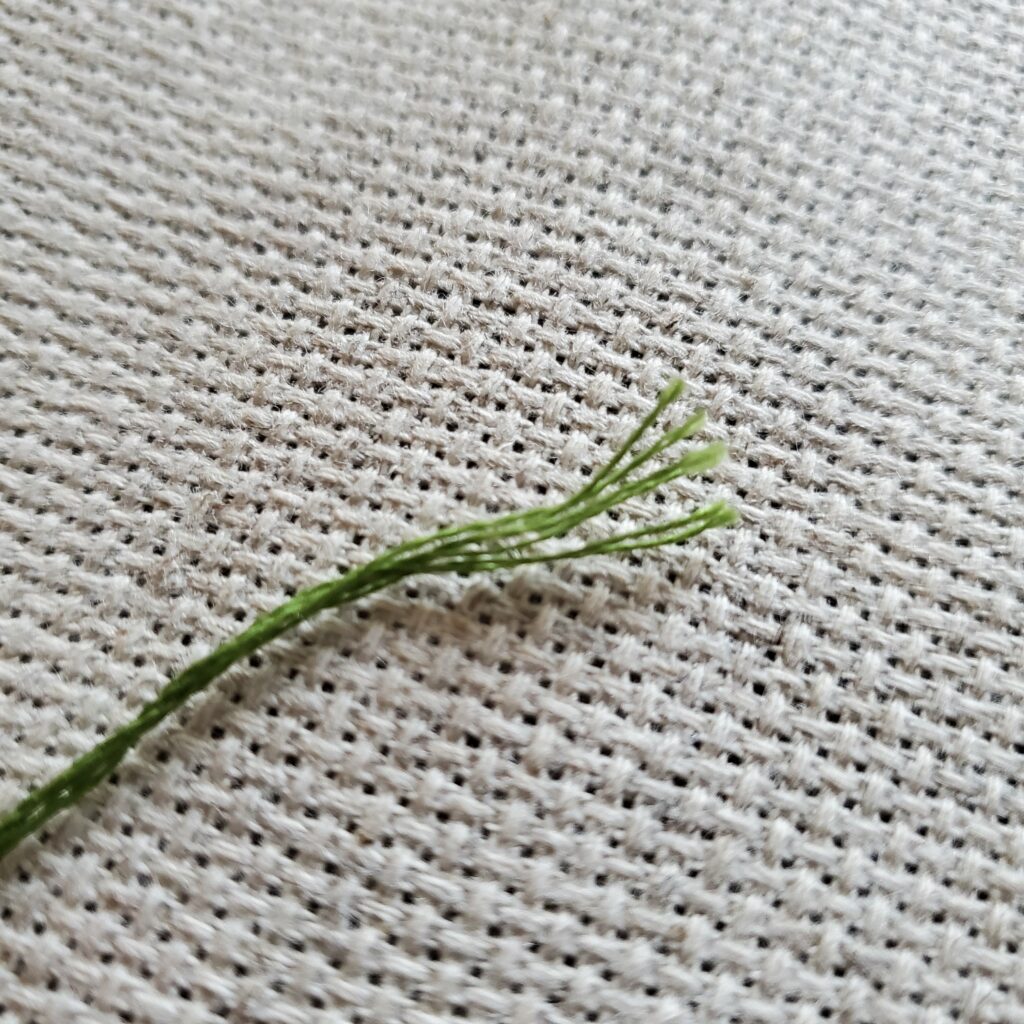
Each piece of floss is comprised of 6 threads (as shown in the photo above), and basic cross-stitching typically uses 2 threads at a time. This means that you separate out the two threads from a length of floss you cut. A good length of thread for hand-stitching is roughly the distance from your finger tips to your elbow. This length helps to keep your thread from getting tangled as you work.
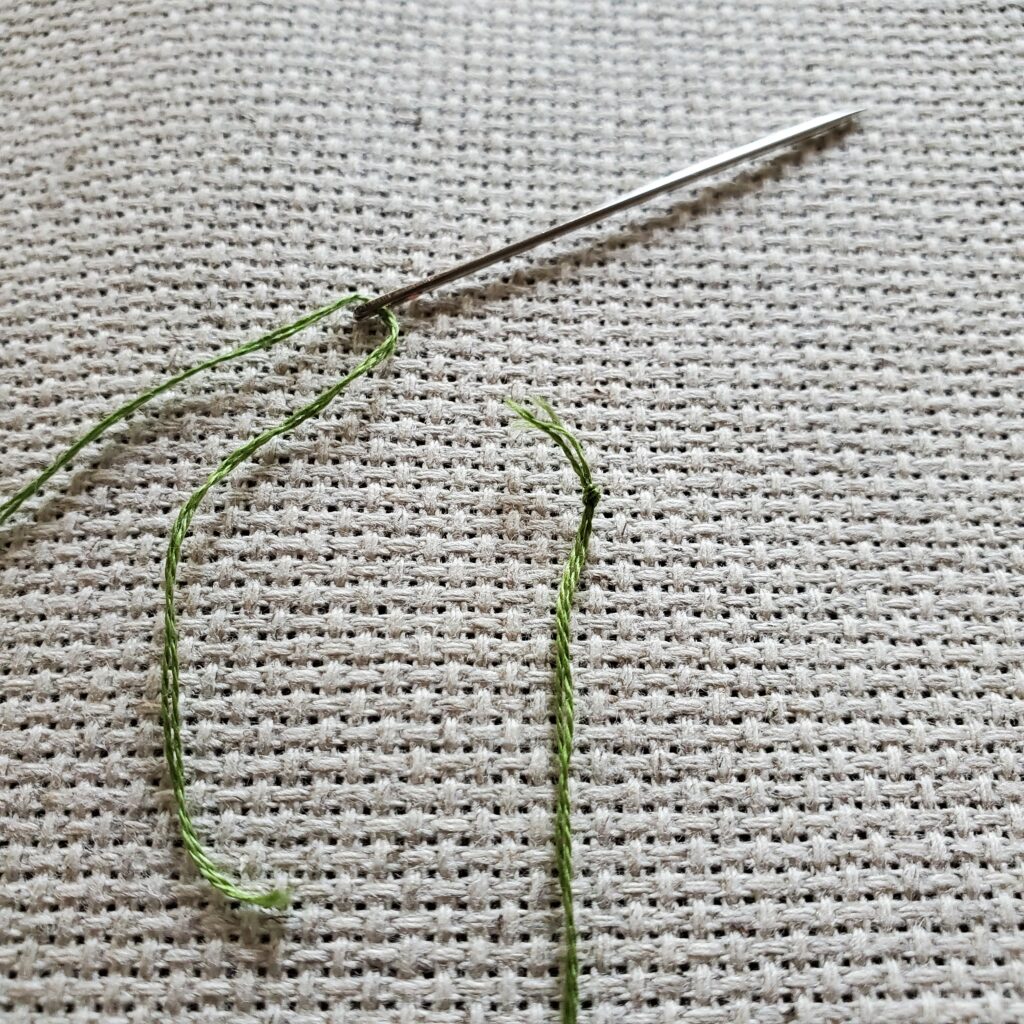
To begin, you will thread two strands of thread through an embroidery needle. Embroidery needles are different from regular sewing needles because the eye is specifically made to accommodate the larger size of the thread. You will knot one end of the thread while leaving an un-knotted tail at the needle, as shown in this photo:
When choosing thread, each stitcher will likely develop a personal preference for a particular brand over time. Personally, I have tried many, and of course, I have a favorite!
Made in France, DMC embroidery floss is certainly one of the most well-known and reputable brands on the market. As of this writing, there are 489 different color choices of DMC floss, and most other companies will provide comparison charts of their colors to DMC–again, showing that DMC is the industry leader.
But, does it really matter which brand of floss you use?
The main thing to consider is the performance and ease of use when it comes to choosing floss. DMC is made from 100% Egyptian cotton, and it is very silky smooth while maintaining its strength. This is due to the double mercerization process used by DMC, and it also means the colors have a greater luster that will make your finished art look so much better. Overall, I feel that it’s easier to work with DMC floss, and, in my experience, DMC floss tangles less.
On the flip side, you will pay a little more for DMC floss than other brands. DMC floss averages around $0.50 to $0.60 per skein in craft stores (a touch more if purchased online). Meanwhile you can find generic floss online for around $0.10 per skein. For me, it’s worth it to pay a little bit more because it makes such a difference while stitching. Also, cross-stitch is already such an affordable hobby that it takes very little investment, even with the best products. However, if cost is a concern for you, I would much rather see you have the joy of creating hand-sewn art within your budget! Work with the best materials you can find that are within your price range.
As I mentioned, every stitcher will have a different opinion on which brand is “best”. In due time, you will come to form your own opinion, too.
How to stitch: Start to finish
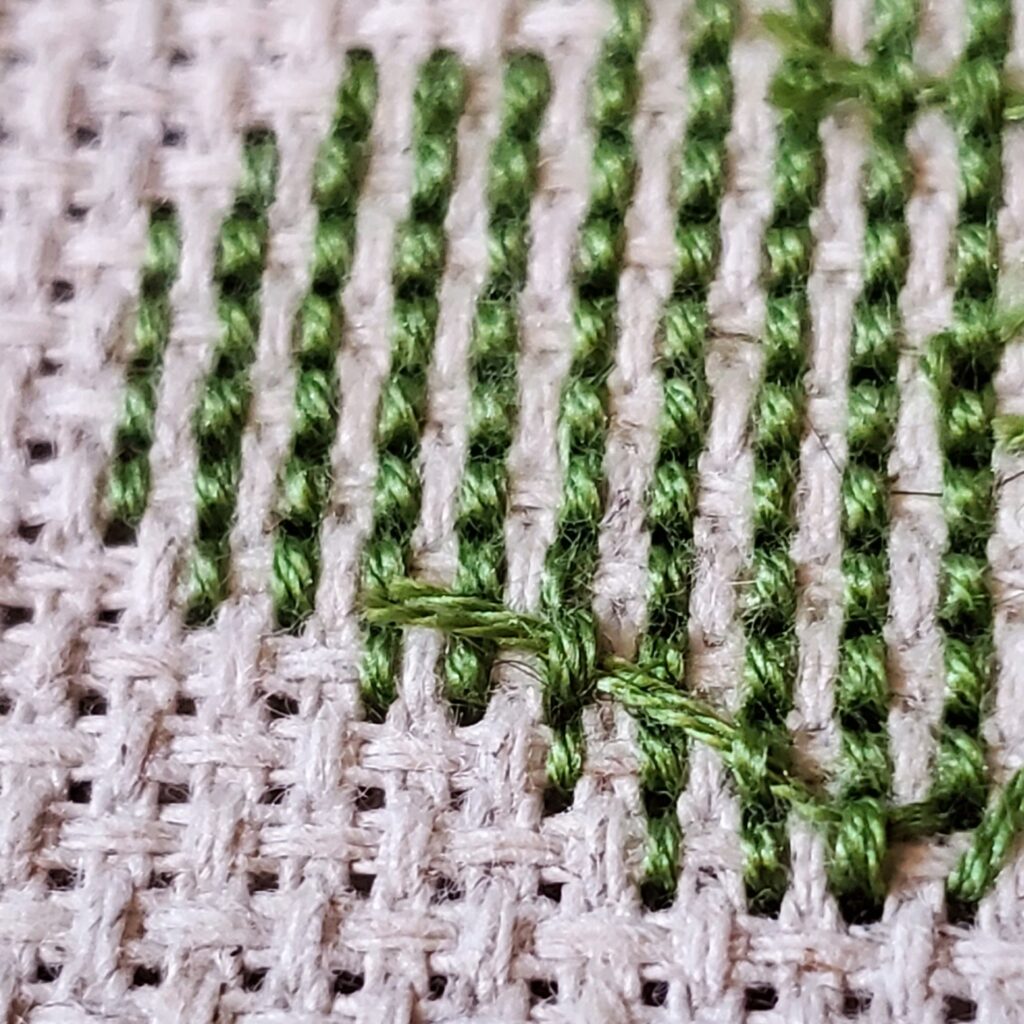
All stitches begin on the backside of the fabric, always. You will push the needle up through the fabric toward yourself to begin every stitch. Then, you push the needle down through the diagonal, up and across from where you just began.
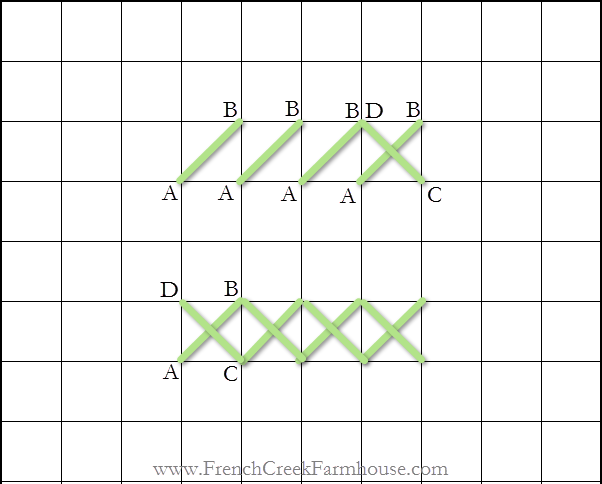
As I mentioned before, there are two stitches required for every completed cross-stitch: A-to-B, and C-to-D. However, when you are making a row of cross-stitches, you will make all of the consecutive A-to-B stitches first. When you reach the end of the row, you’ll make all of the consecutive C-to-D stitches to return to the beginning of the row.
This drawing illustrates how you would complete a row of cross-stitches:
If your design skips a block, or a few blocks, you simply move your needle over the same number of spaces to the next stitch. It always comes back to counting!
When deciding where to start working on a project, you can technically begin anywhere you like. However, I have found it is easiest to work designs from top to bottom, and left to right. That is the natural movement of the stitch and is, therefore, the most logical way to approach the pattern. That said, do what feels right for you!
Changing thread
Whether you are completing a design with many colors, or you simply run out of thread as you’re stitching, you will eventually need to change your thread. Fortunately, this is incredibly simple.
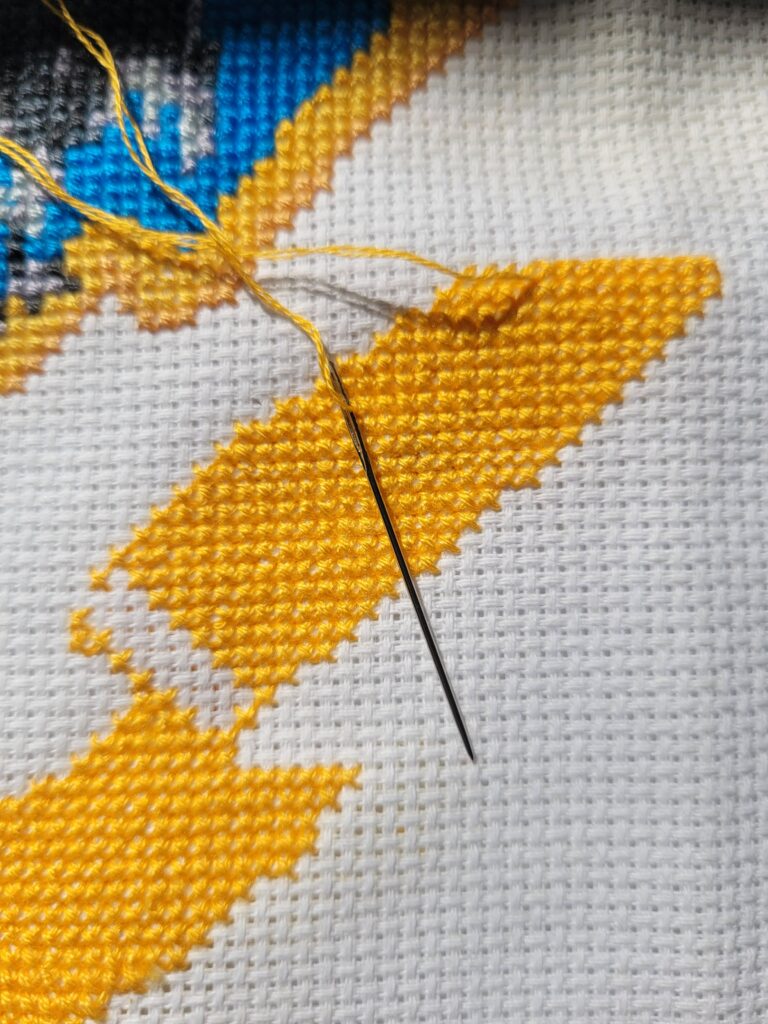
When you’re getting close to the end of your thread, simply run the needle through a couple of stitches on the back of your piece to lock the tail in place. Trim the thread with your scissors.
If I’m stitching on Aida cloth for a piece that will be displayed in a hoop, I don’t even bother to knot my thread. However, if you’re cross-stitching a towel or napkin, for example, you’ll need to add a knot to secure the thread. This will prevent your design from unraveling with use or while laundering.
You’ll then start a new length of thread just like you did when first starting your project, stitching from back to front.
Finishing and displaying the project
Just like when changing your thread, when you finish stitching, simply lock the tail of your thread and trim the excess.
You can choose to mount your project in a frame, or simply trim the excess Aida cloth from around the hoop and hang it on the wall. Wooden hoops are quite lovely just as they are, but you can also find some decorative varieties to match almost any decor style.
If you choose to leave your project in the hoop and display it where it might be back-lit (in front of a window or as a Christmas tree ornament, for example), you will want to add something to block the light from coming through your fabric. Some options include a thick piece of canvas cloth, cardboard, or heavy weight cardstock paper. Another advantage here is in covering up the unsightly backside of the project. However, if the piece will hang flat against the wall, this isn’t necessary.
Printable Cross-Stitch Patterns
Once you’ve been bitten by the cross-stitch bug, you’ll hope for any excuse to create a new project! Here are some patterns to get you started:
I hope this tutorial has helped you begin a love of cross-stitching that you’ll enjoy for many years to come! As I continue to create new cross-stitch patterns, they will be available to download and print FOR FREE to all of my virtual pen pals, so be sure to sign up to keep in touch!
Do you love hunting for vintage treasures as much as I do?
Get my free vintage & junk hunting journal
Let’s be email pen pals! Sign up to join our community, and get your free printable PDF Vintage Hunting Journal. This is so good!
Great tutorial! I have also cross stitched since I was a kid and usually have some project in the works all the time. I have never been taught about the grid option and I think it is such a great idea. I have pinned this post to review before I start my next project. So glad to see your posts linked up again. #HomeMattersParty
Hi Donna! Yes…gridding makes stitching go so much faster! It’s a great little secret! 🙂
I love to cross stitch, I used to do A LOT back in the 80’s and early 90’s, I even had a few designs in a magazine! This is such a great explanation and tutorial.
That’s amazing, Julie! I’m so glad you enjoyed the post! xo