How to Make Farmhouse Fabric Pumpkins
Late summer and early fall is such an ideal time of year. We get to enjoy the last of the long, sunny days, while also cooling off with the crisp autumn air. And, of course…it’s pumpkin season!
If you ask me (or look at the huge number of storage bins we have – haha!), you can never have too many pumpkins for decorating this time of year.
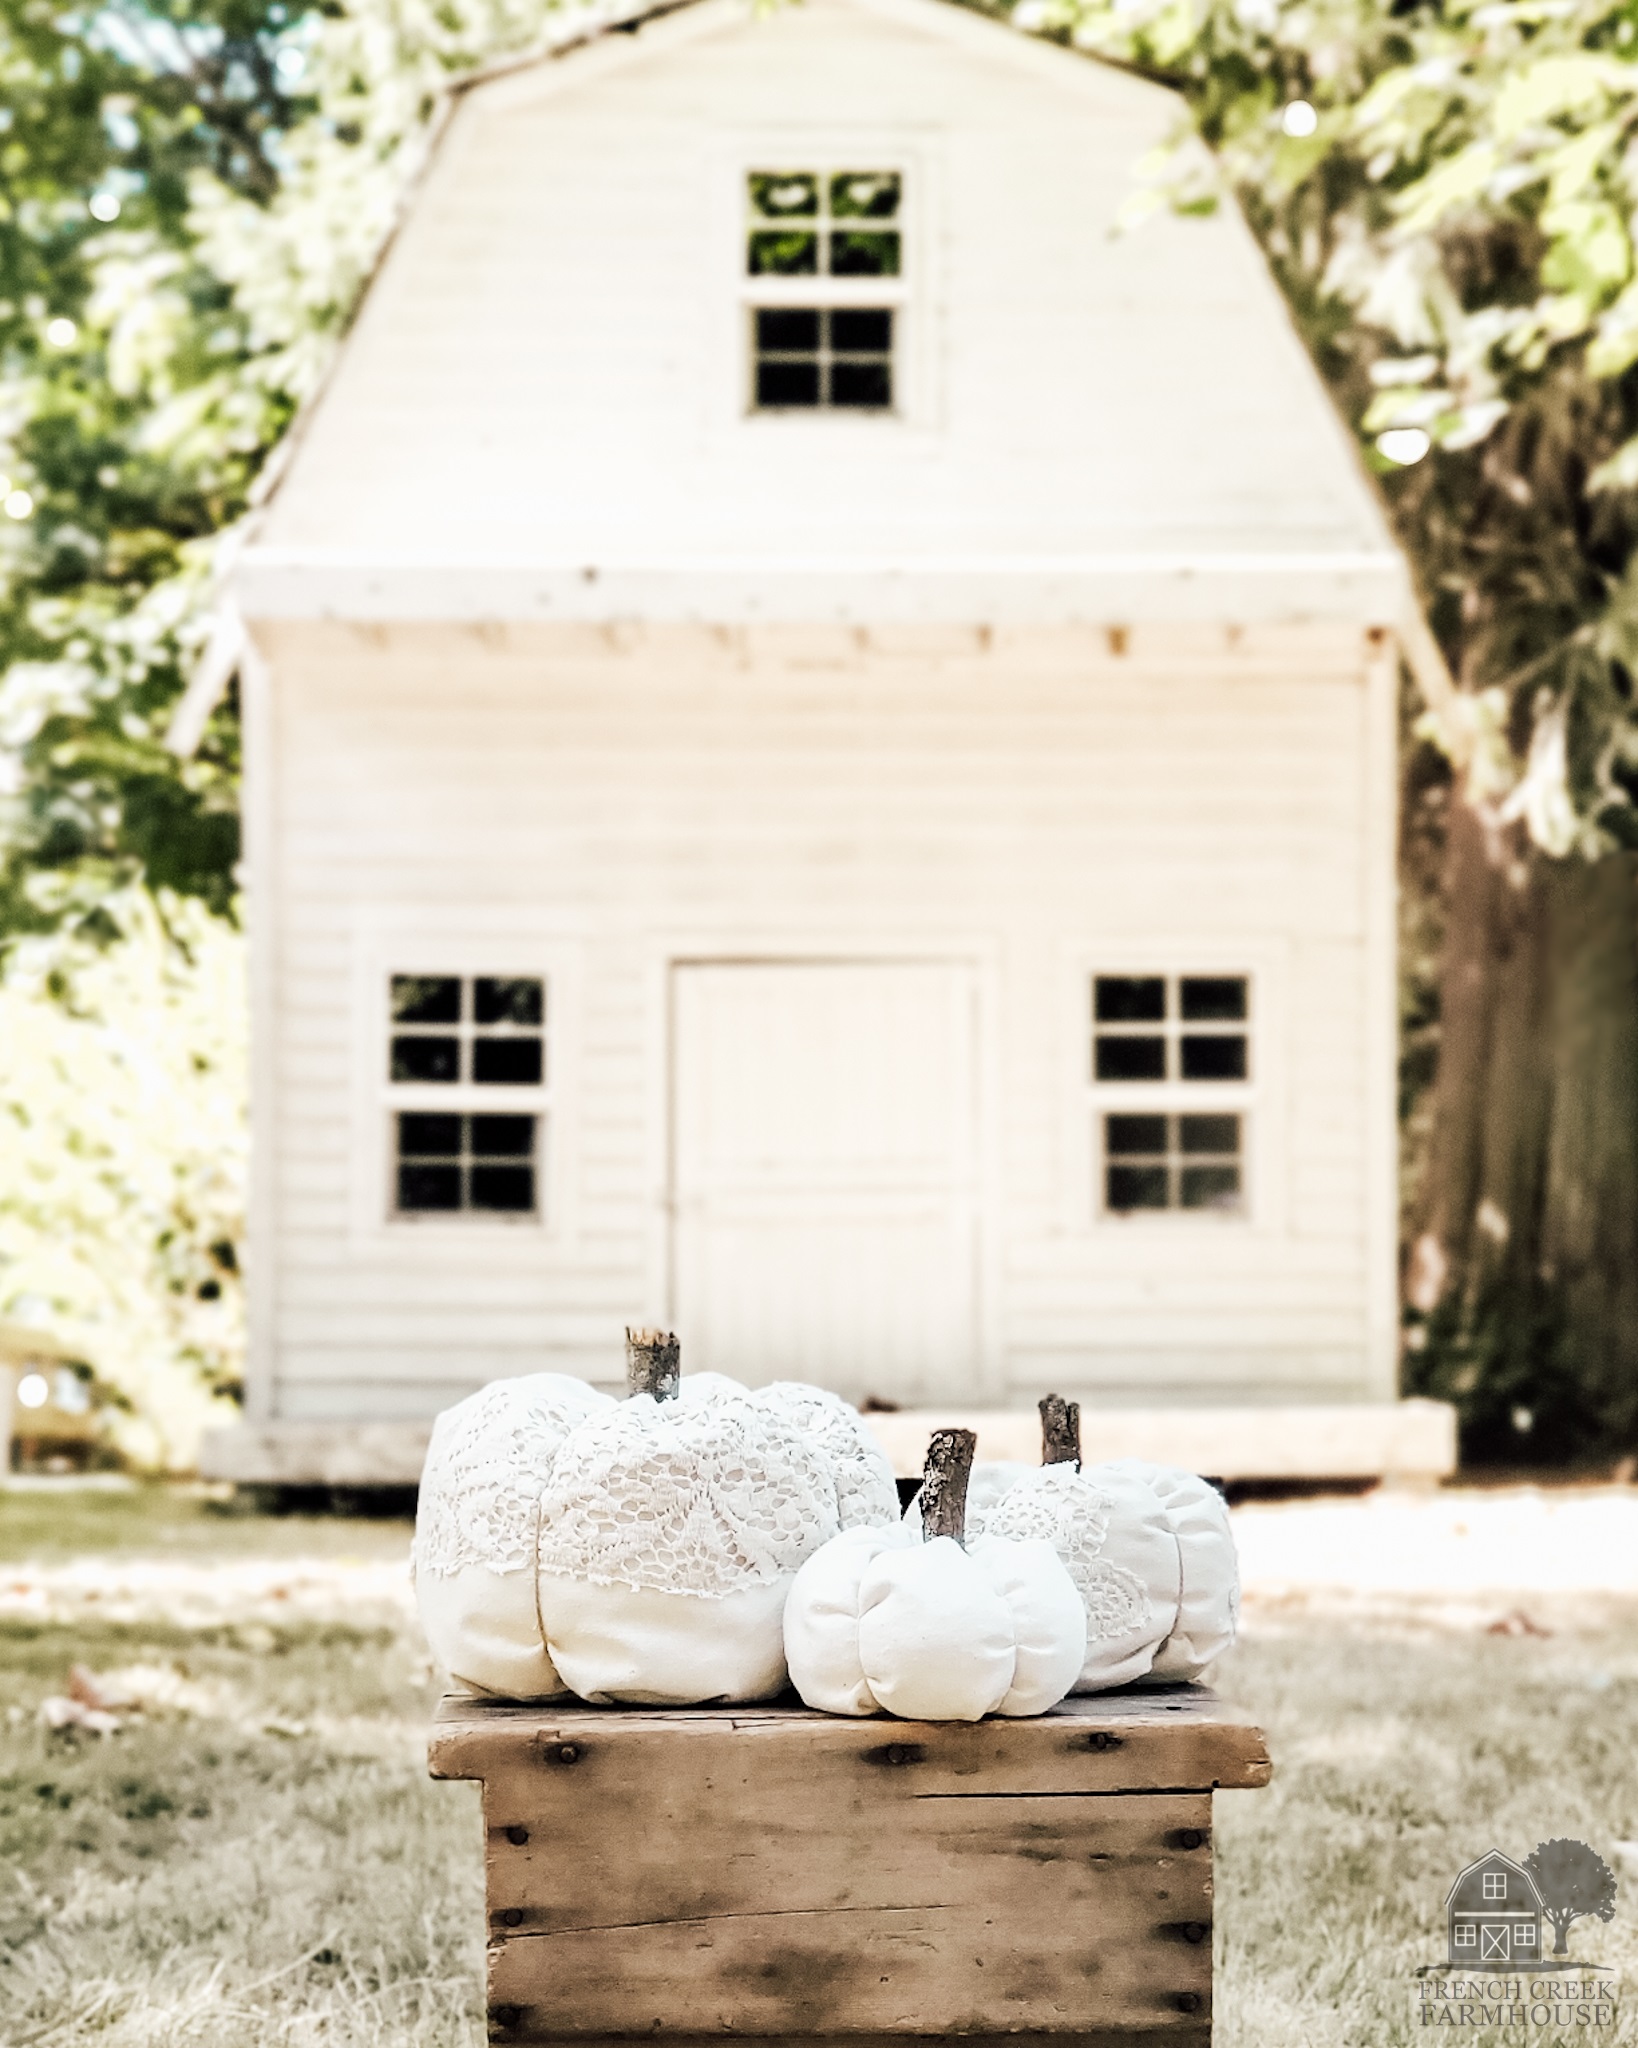
I’ve always loved stuffed fabric pumpkins, but for so long, I couldn’t figure out how to make them! A quick search of Pinterest certainly did yield hundreds of examples, but no matter how many tutorials I read, I couldn’t find one that gave thorough details, photos, and explanations of the process.
Nothing irks me more than spending my time reading a “tutorial” that doesn’t actually teach me what I need to know. So, of course you know what I did next.
I started experimenting and came up with my own pattern!

Disclosure:
This is not a sponsored post, and I have received no compensation for sharing anything that follows. Some links within this blog may be affiliate links, and I might earn a commission if you make a purchase through that link. This usually amounts to cents, not dollars, and helps to support the projects featured on this blog. I only recommend products from companies that I have found to be trustworthy. Read my full disclosure here.
If you’ve been wanting to make your own fabric pumpkins, this tutorial will give you the step-by-step directions with photos for the entire process.
I promise that you will leave knowing exactly how to make your own fabric pumpkins!
Or, if you’d rather that I just make them for you, you can also find them in our shop {HERE}.
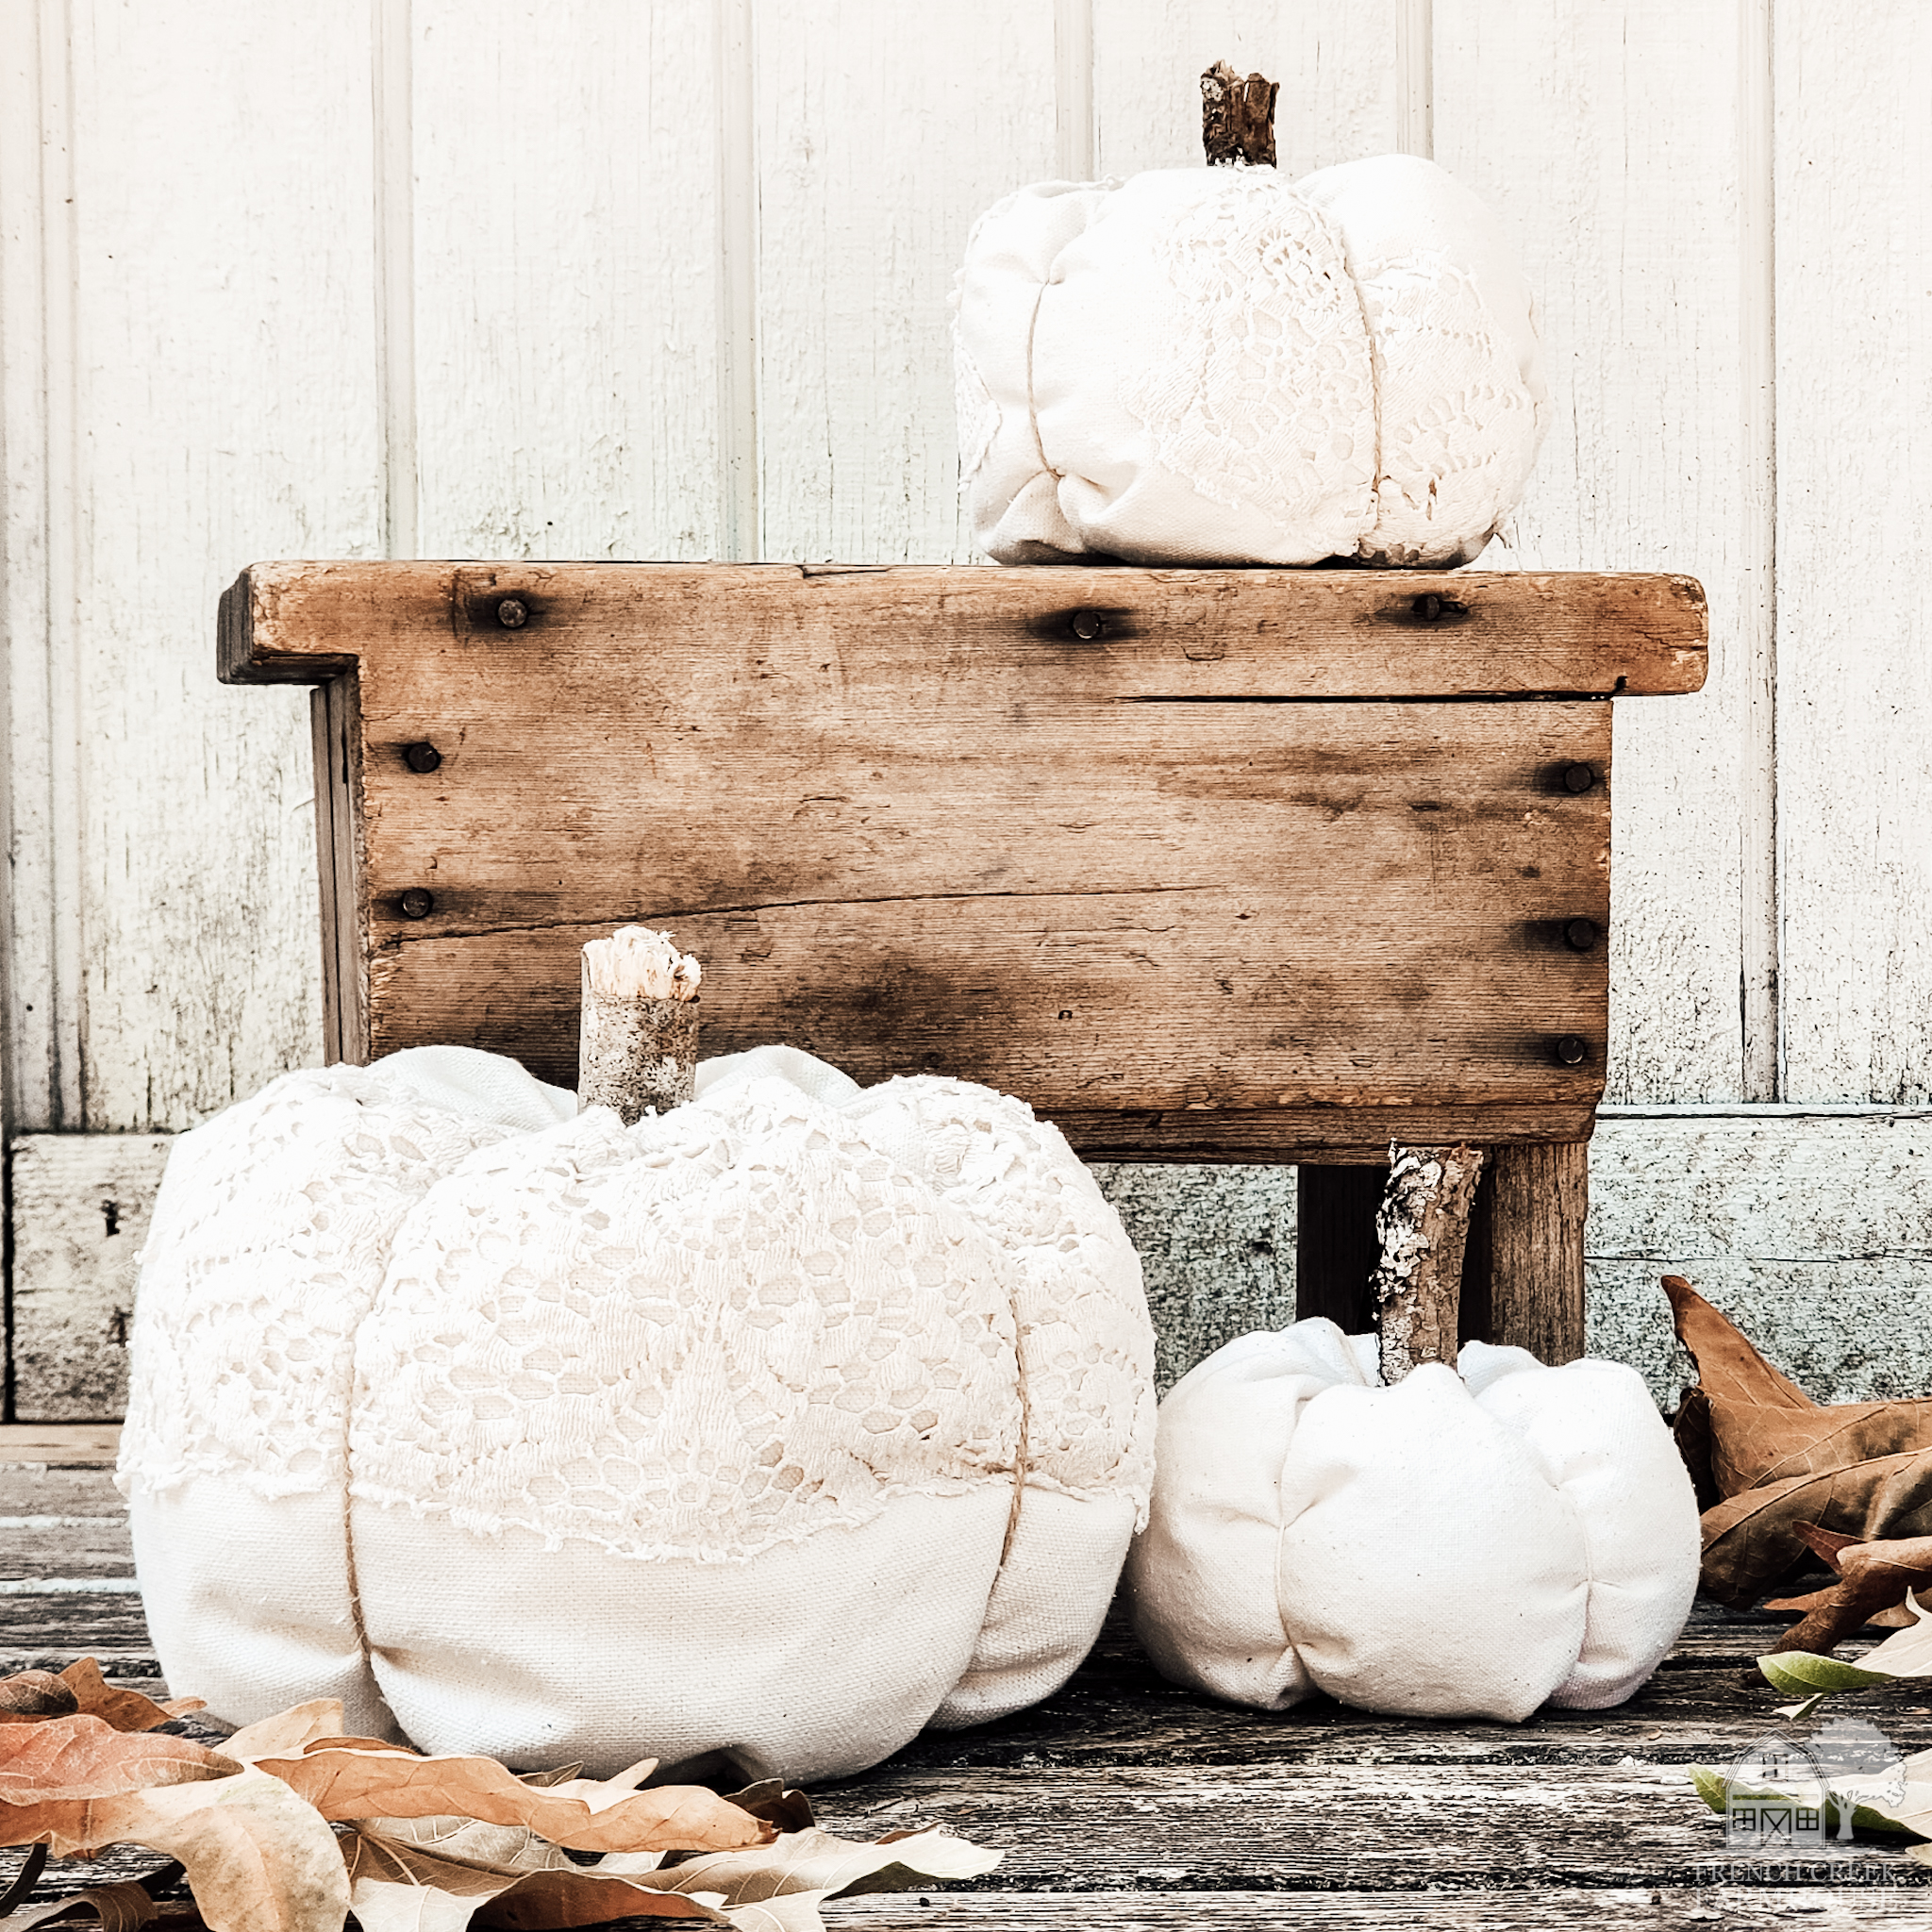
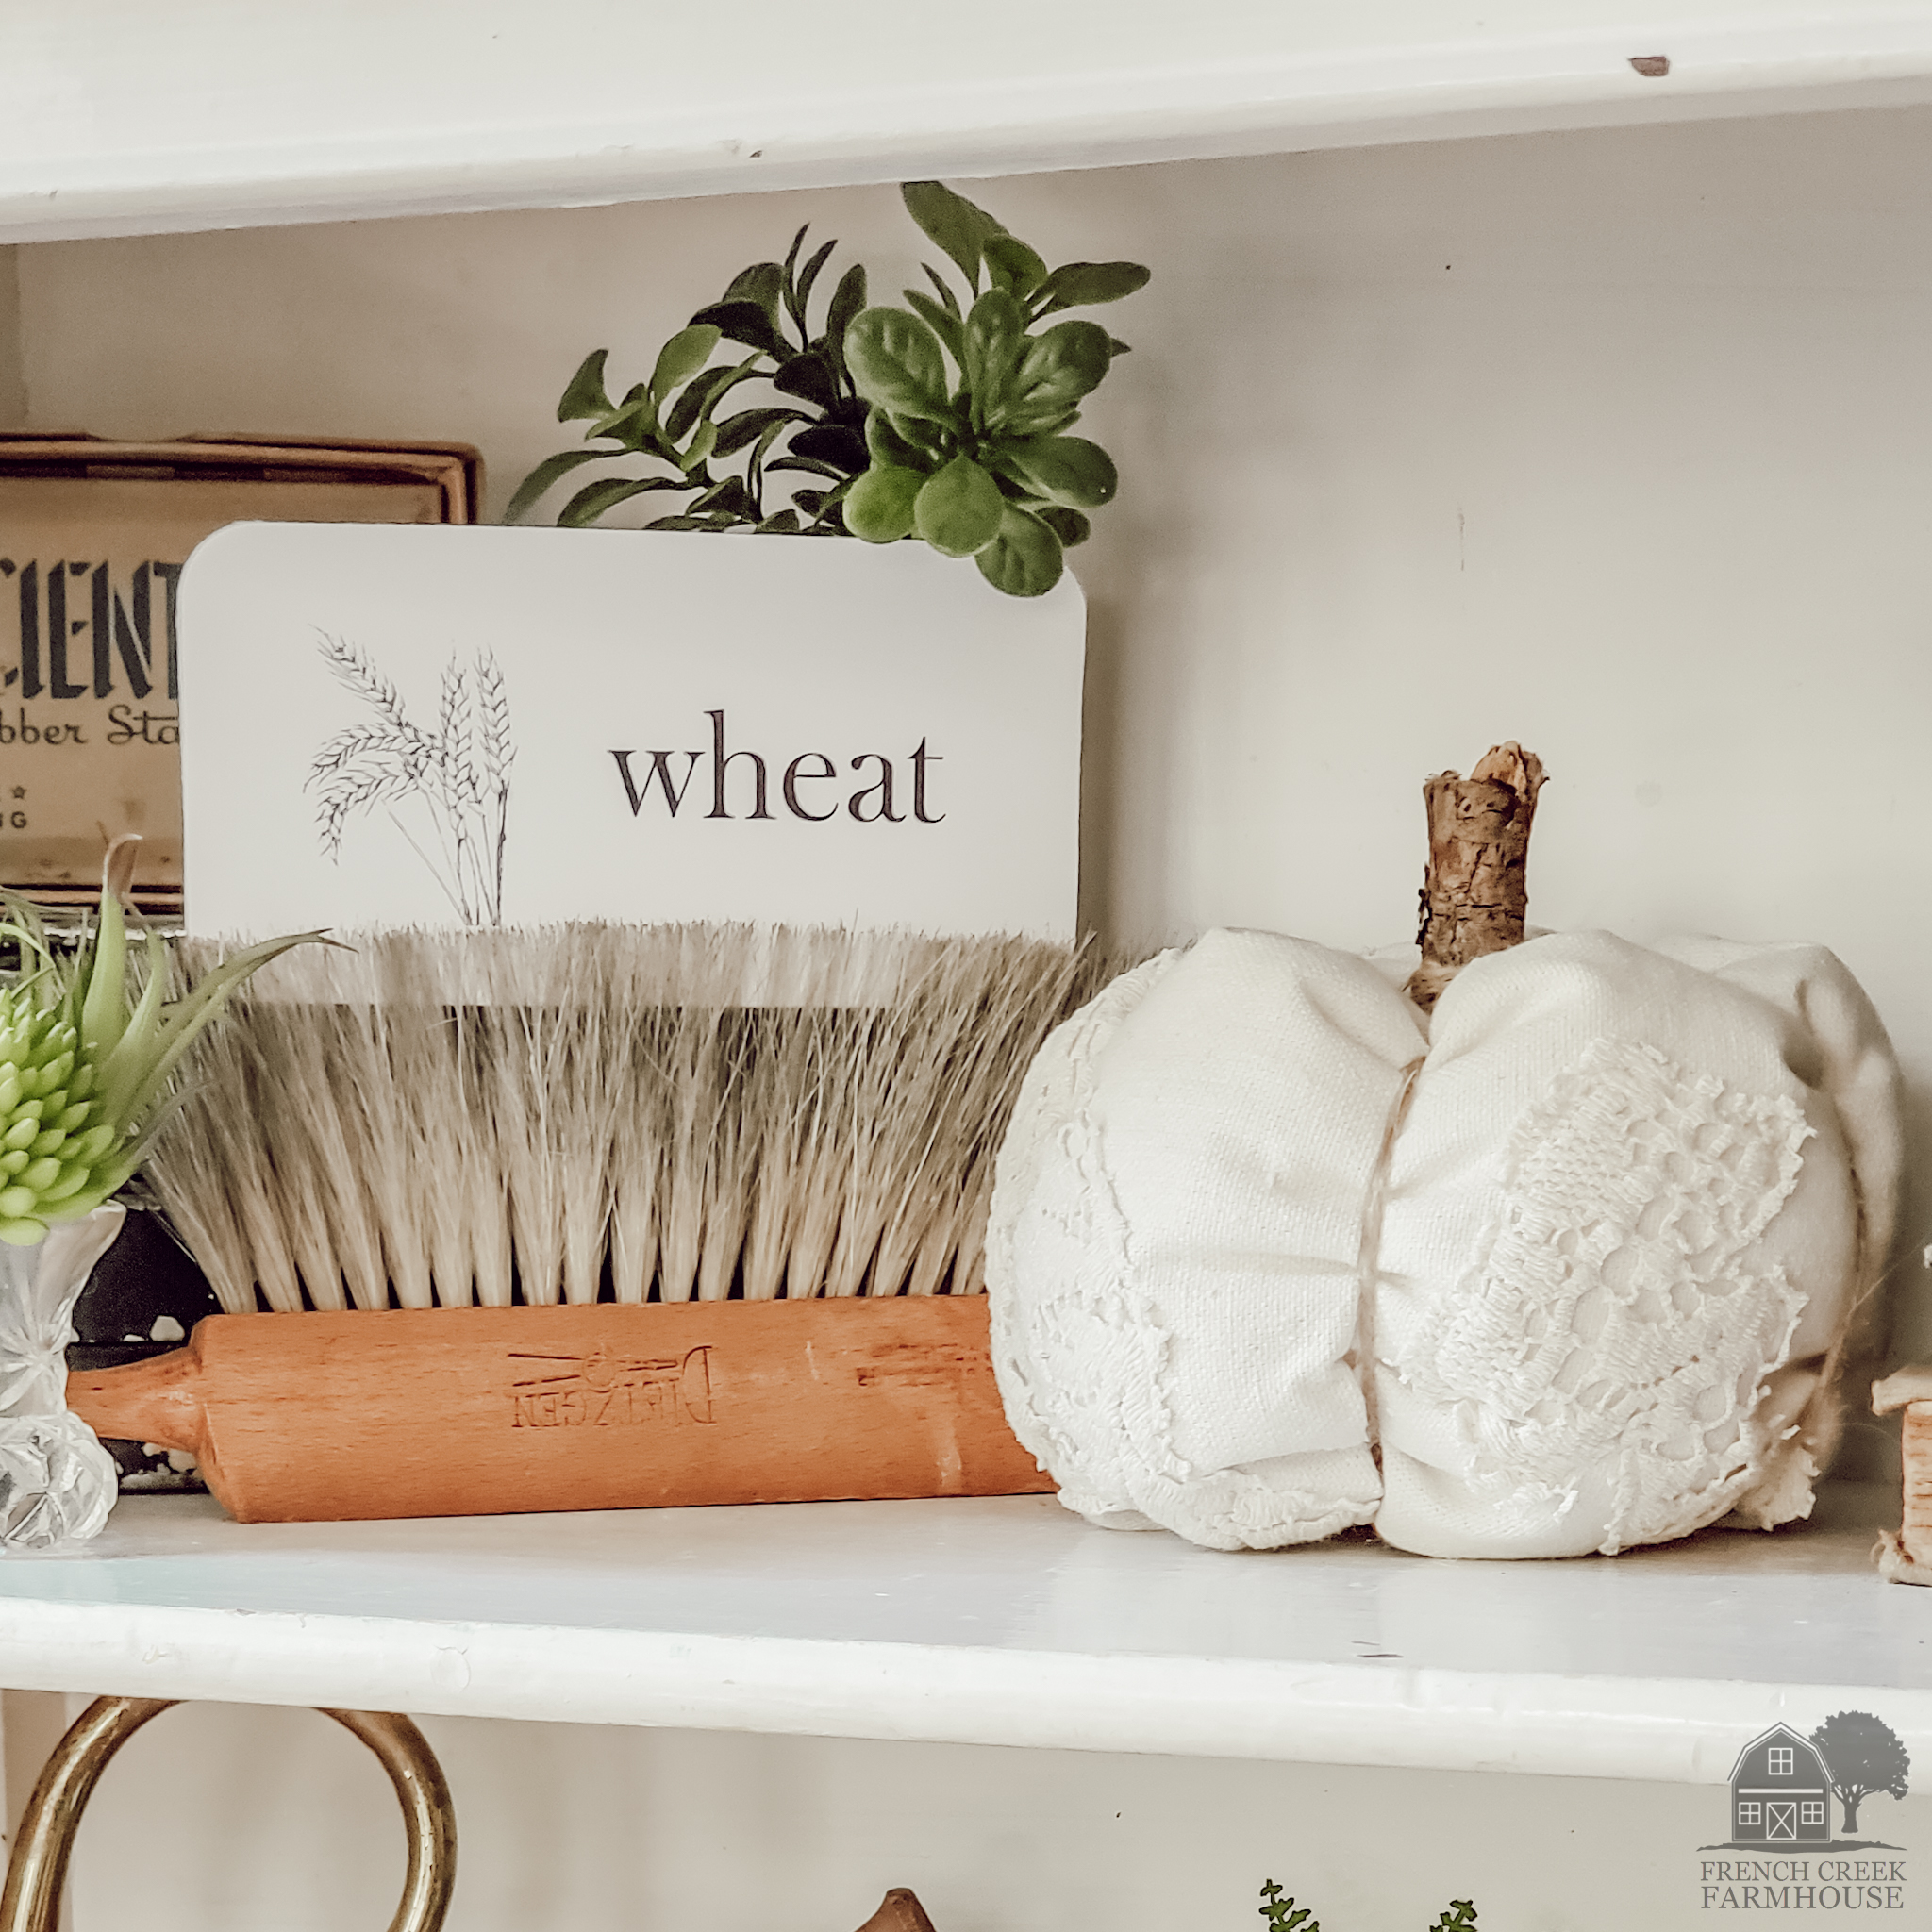
I love crafting my pumpkins from a variety of vintage and farmhouse fabrics, and in this tutorial, I will be teaching you the additional step of adding bit of antique lace to your fabric pumpkins for a truly one-of-a-kind fall craft!
Let’s get to it…
HOW TO MAKE FABRIC PUMPKINS

- Fabric of your choice (find some great ones here)
- Optional: Antique lace
- Embroidery floss
or upholstery thread (Choose a floss that’s the same color as your fabric) - Embroidery needle (This is different from a regular sewing needle because it has a longer eye for threading larger materials)
- Jute twine
- Upholstery needle (Snag this set at a great price–the same one I use!)
- Stick (for the stem)
- Hot glue gun
- Poly-fil
- Scissors
- Sewing machine
- Optional: Rotary cutter and mat

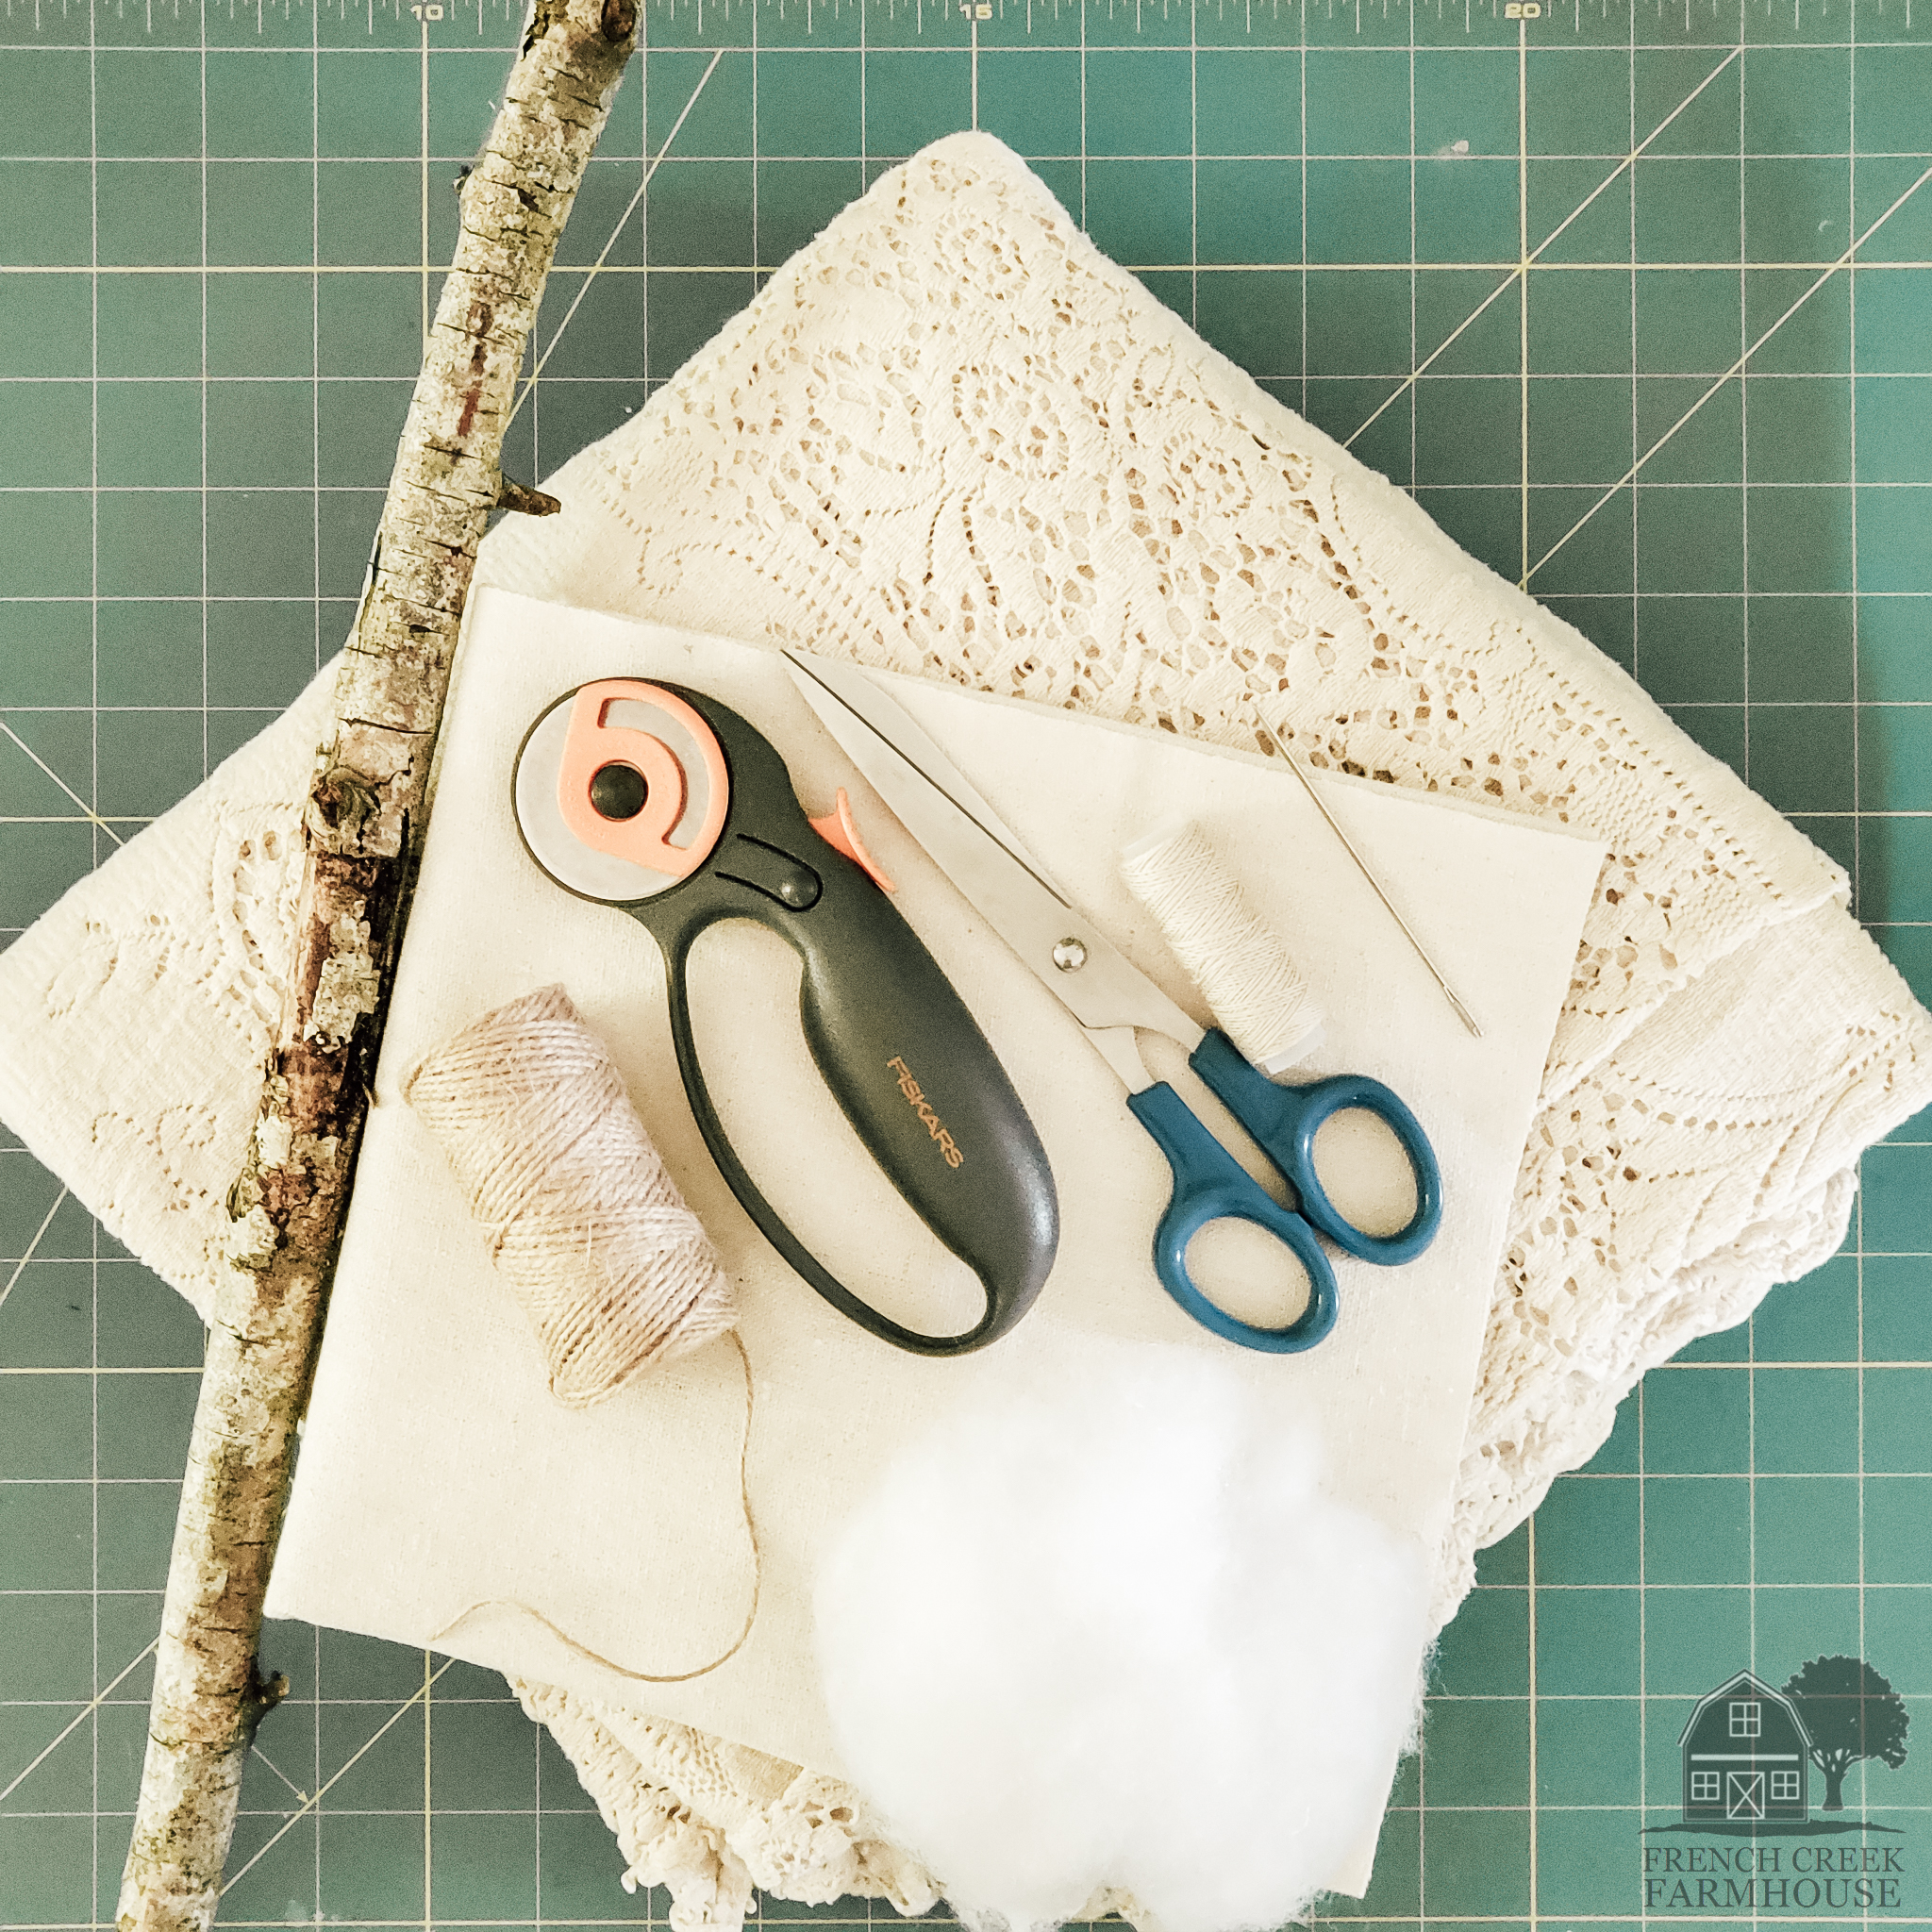
1. Gather all of your supplies. For this project, I’m teaching you the additional step of adding antique lace appliques to your fabric pumpkins. However, this is optional. I used an antique lace tablecloth that had been damaged beyond repair–this is a great way to upcycle old linens!
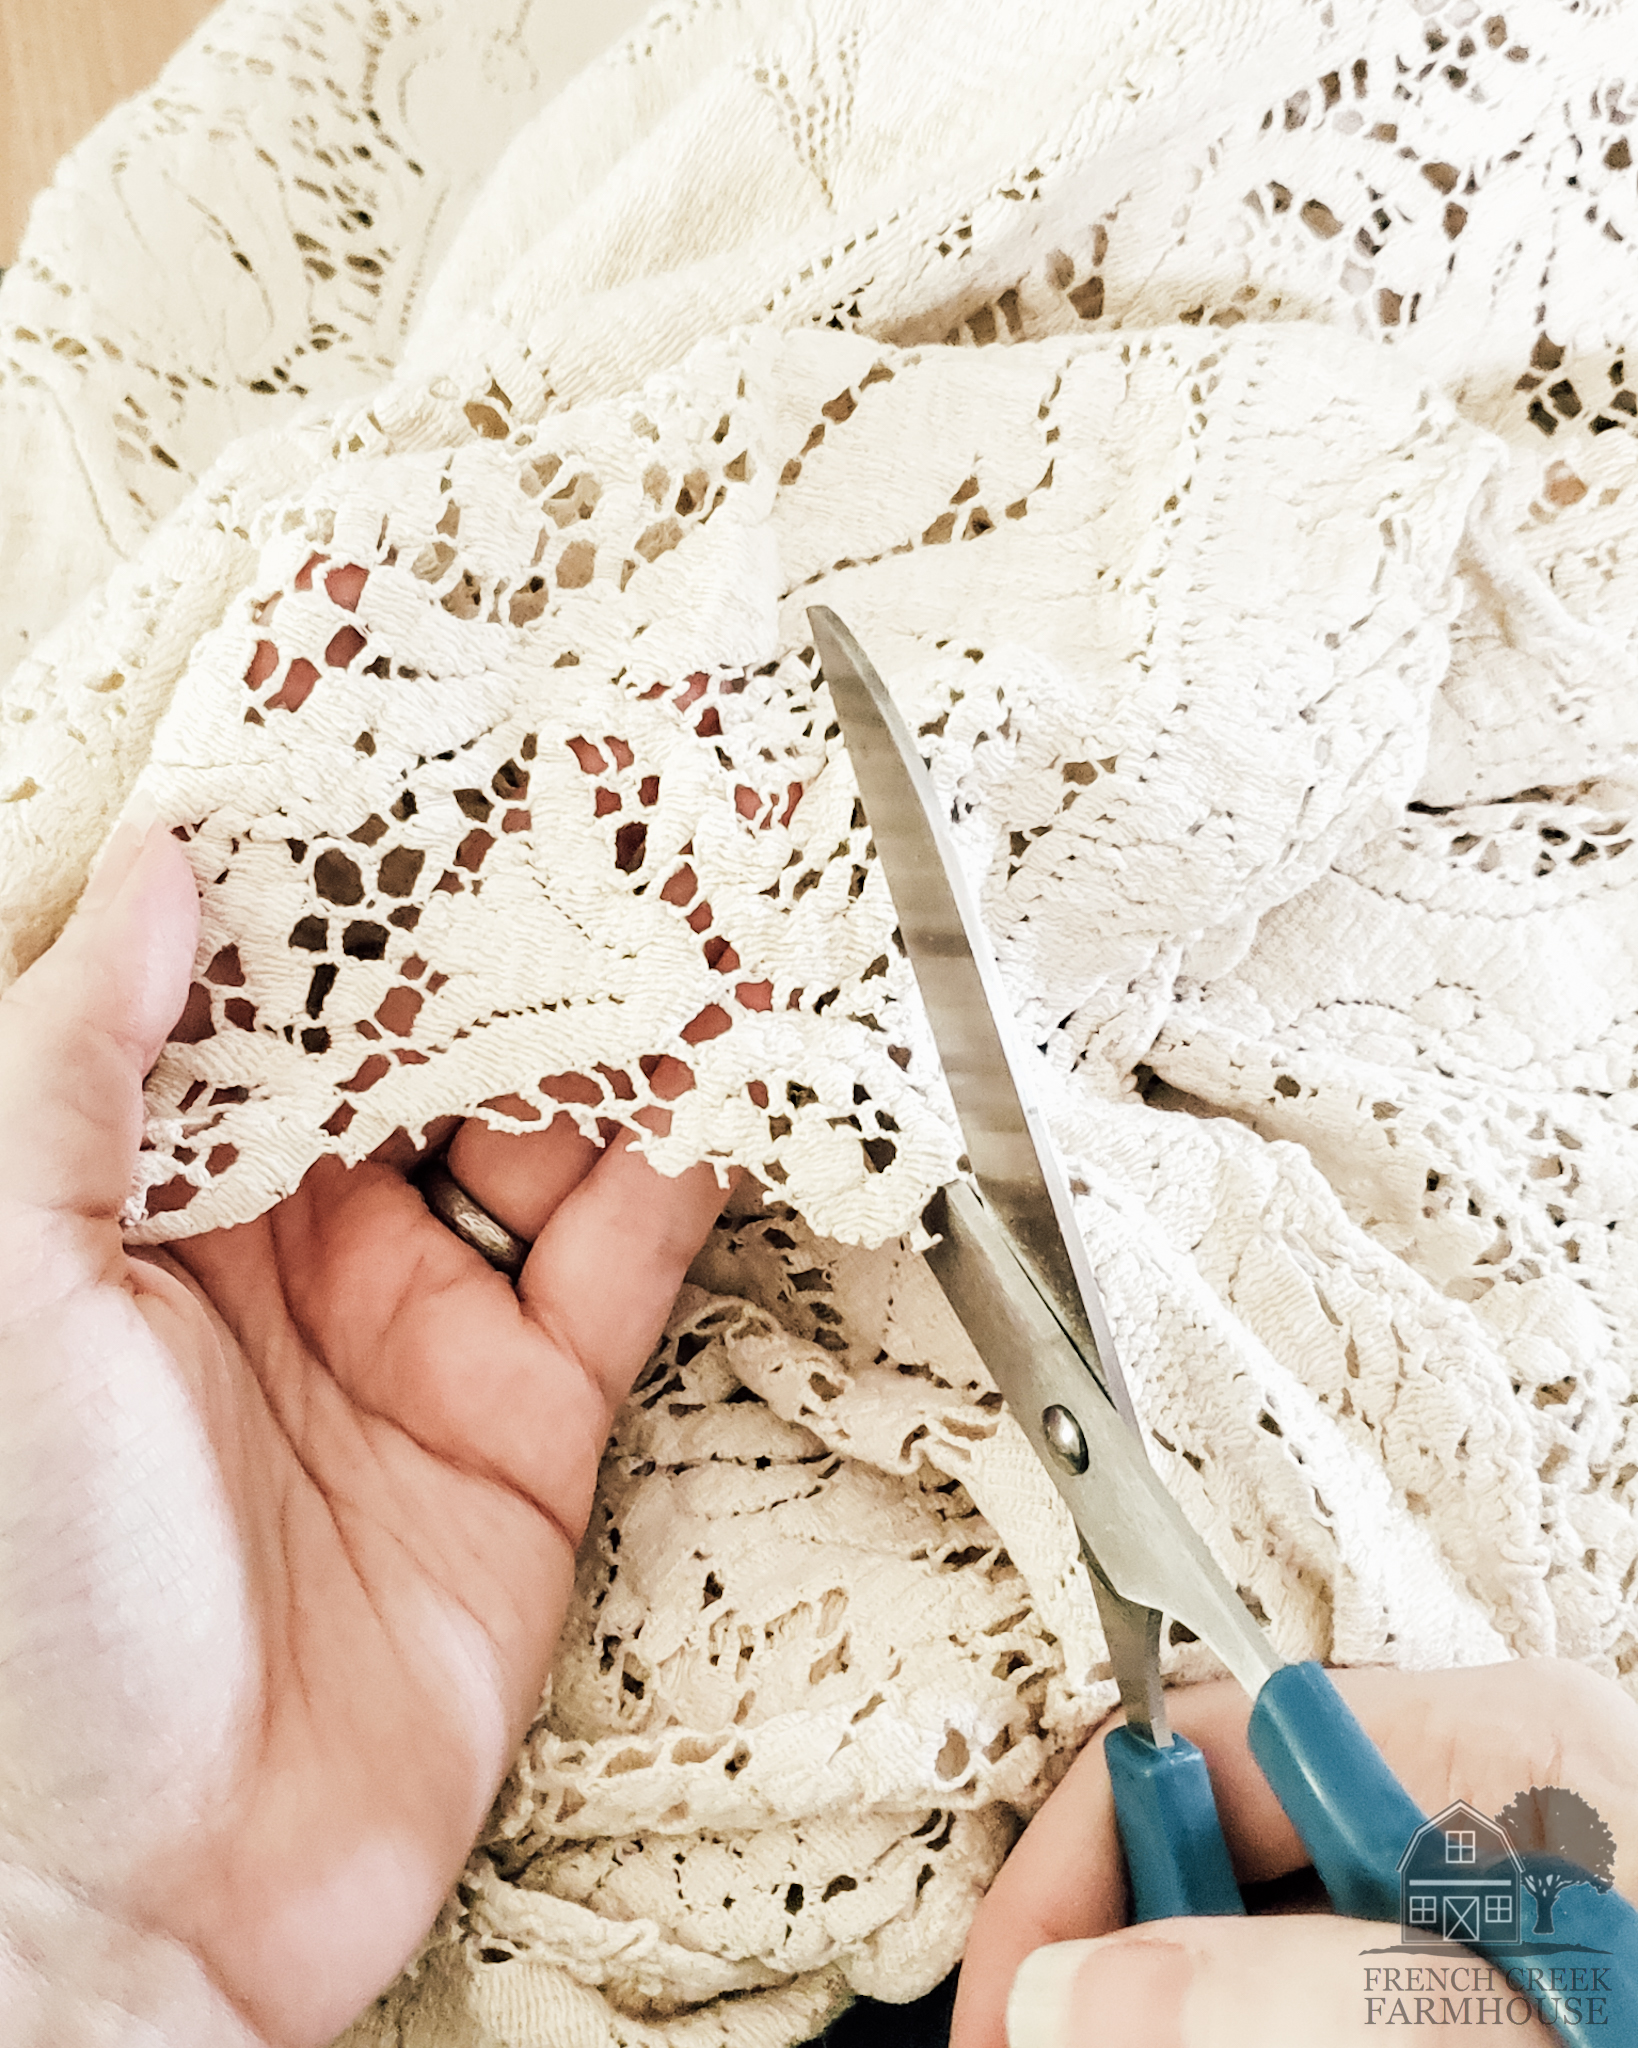
2. Cut out several bits and pieces of lace to use for your applique. The pieces need to be large enough that you can easily pin and sew them with your sewing machine (unless you plan to handstitch them in place).
After making my first pumpkin, I found that using multiple curvy shapes of lace produced the best final result as compared to large, straight-edged pieces. It simply looks more organic and interesting in the end.
For the size of pumpkin we’ll be making in this tutorial, I suggest 3-5 pieces of lace for the entire project. Of course, you can get creative and do as much as you like!
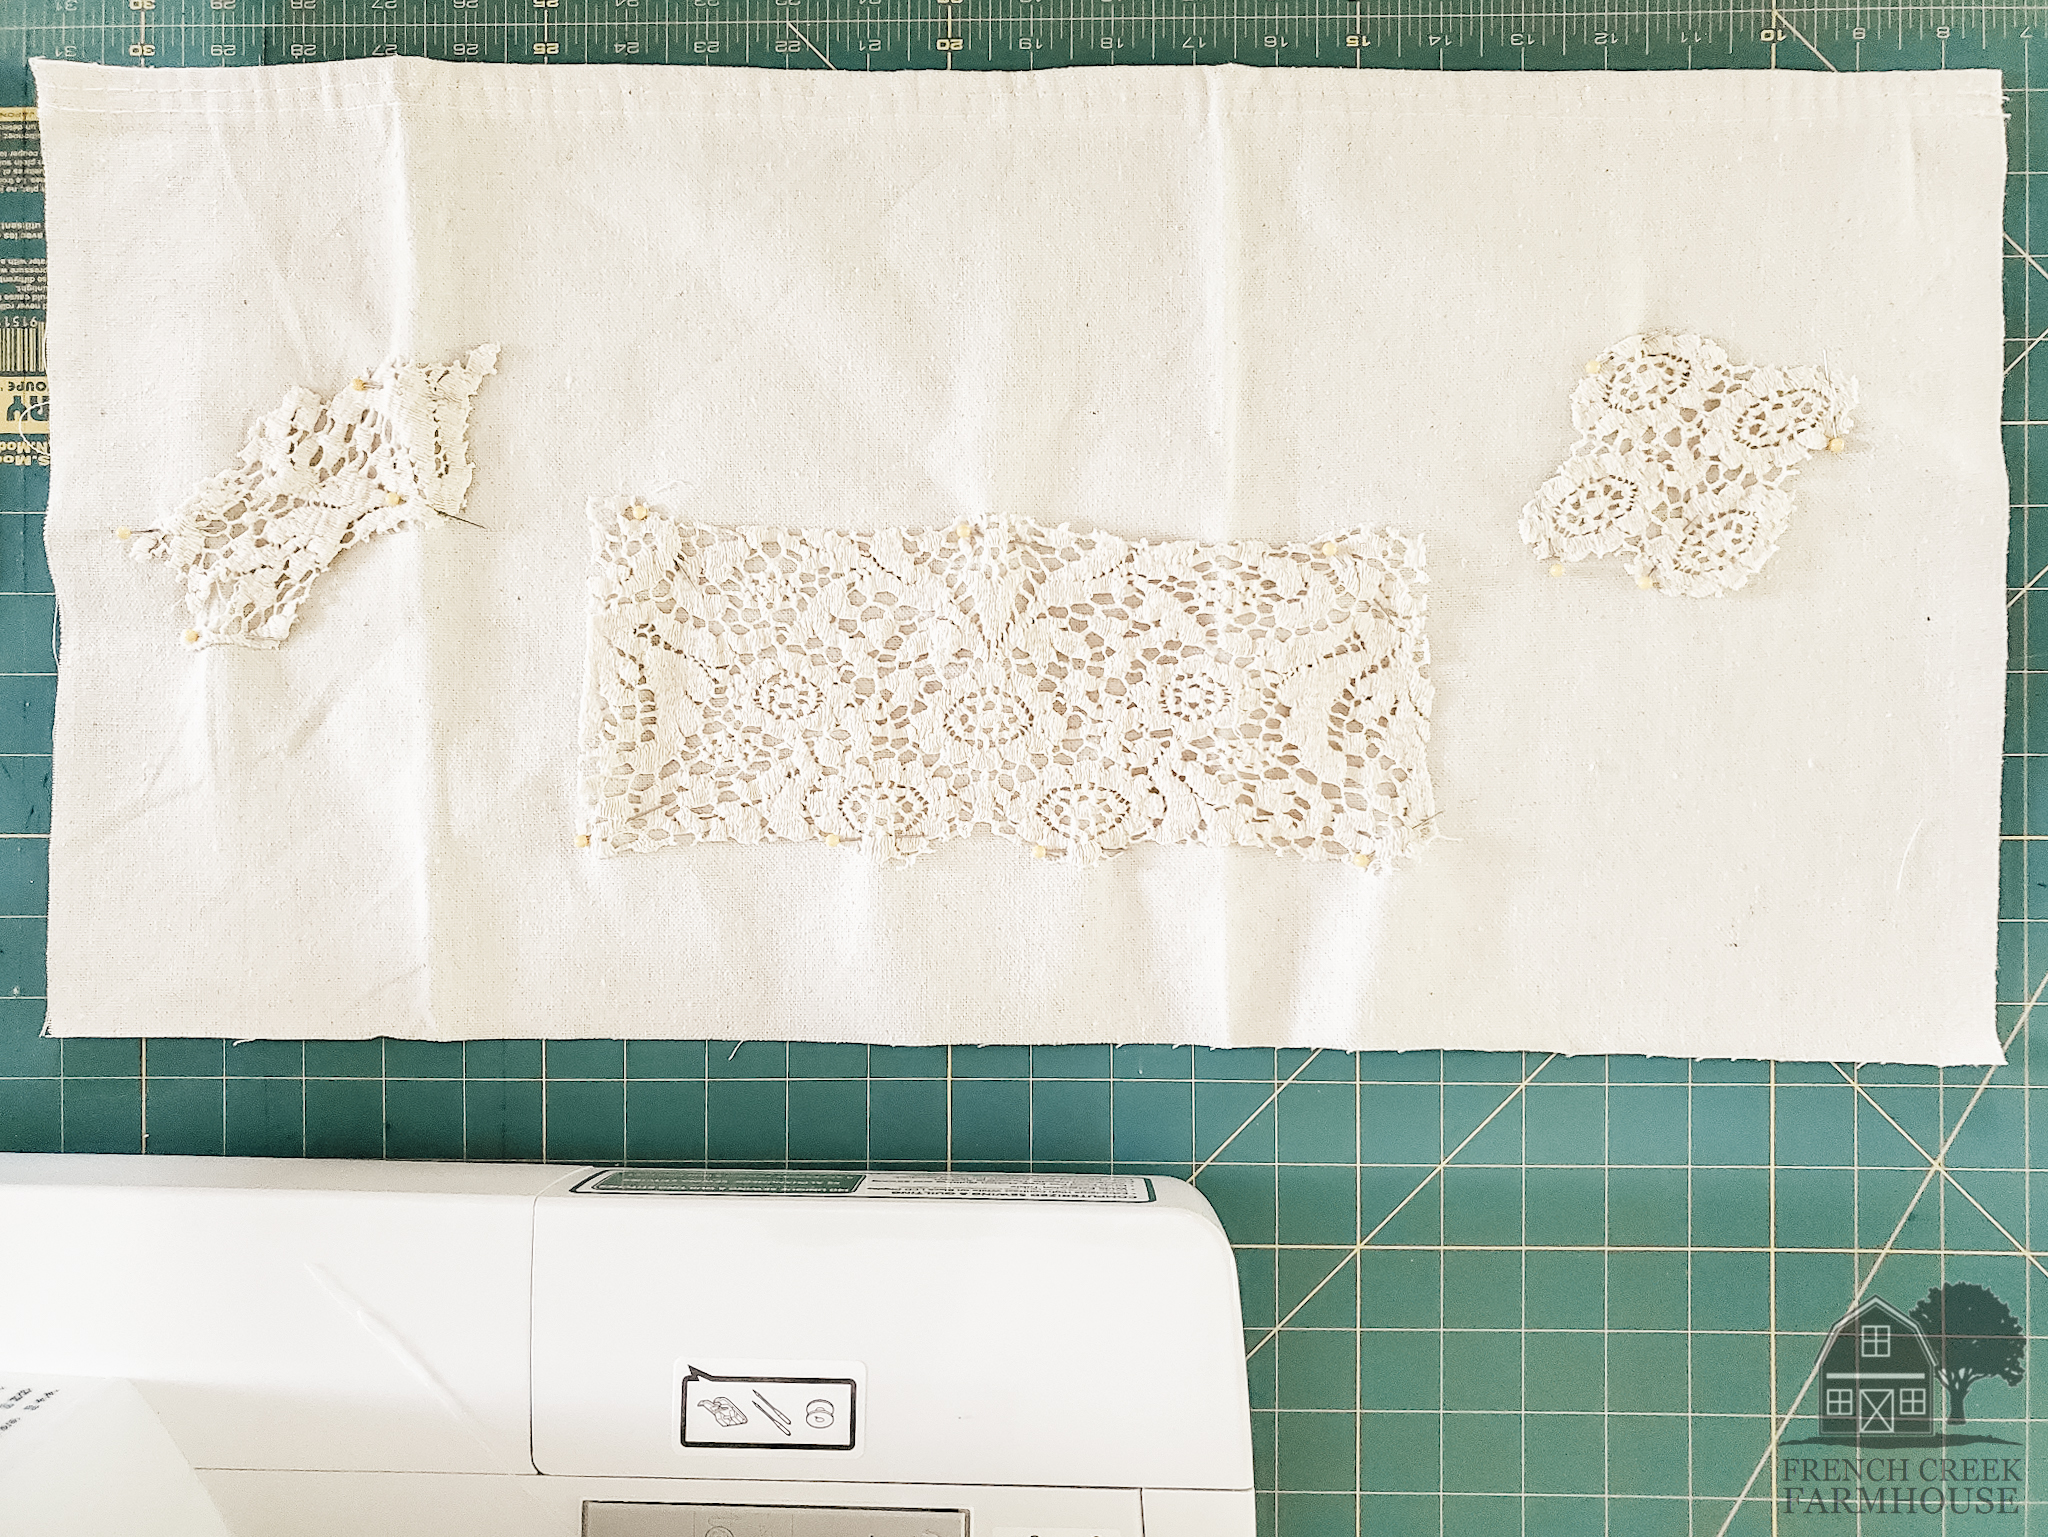
3. Cut out a piece of fabric measuring 12″ x 24″, then pin your lace pieces to it. As you can see in this example photo, this was the pumpkin where I learned not to use blocks of lace. Those two curvy shapes looked much nicer in the end–but again, get creative with it!
Another tip to mention here is that your fabric should always be in a ratio of 1:2 for a basic, round pumpkin. So, for example, our fabric is 12″ x 24″…you could also make one that’s 8″ x 16″, or 10″ x 20″.
You get the idea…the length of your fabric just needs to be two times the width.
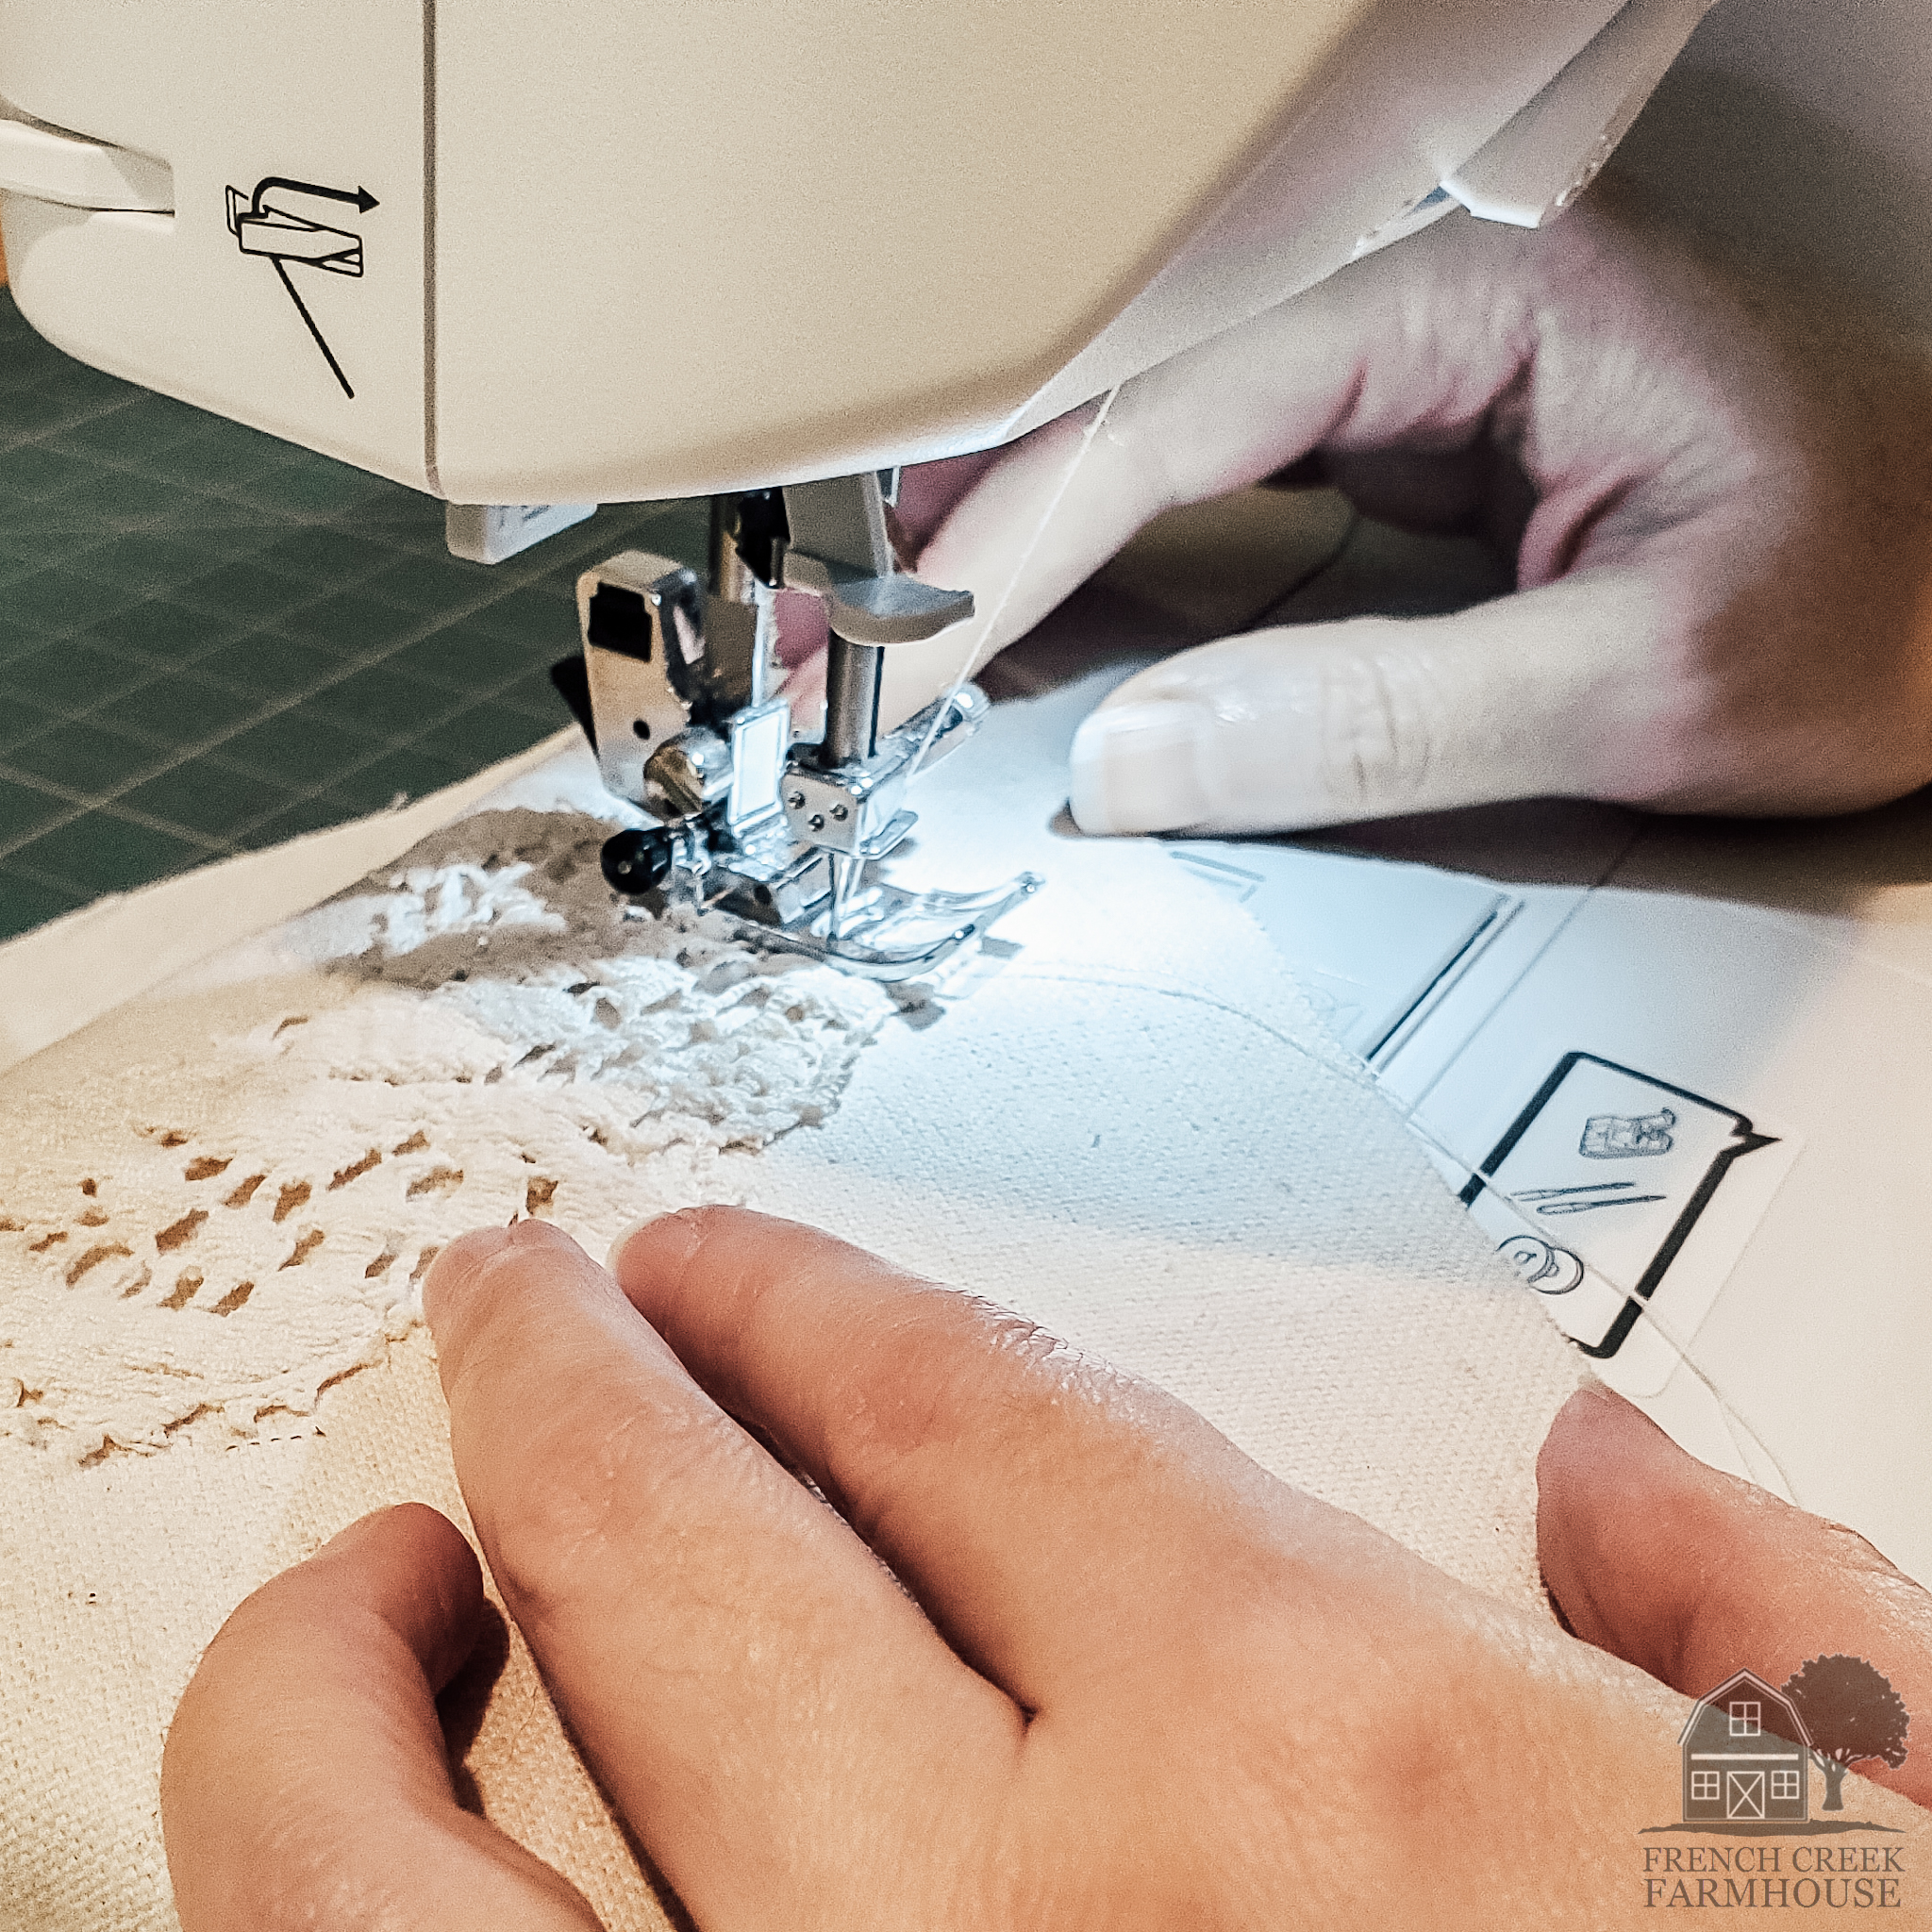
3. Stitch the lace pieces to your fabric by top-stitching with your sewing machine. Do your best to stitch parallel and fairly close to the edge of the lace so that it looks very natural.
Alternatively, you can hand-stitch these in place, and it really doesn’t take too much time with such small pieces.
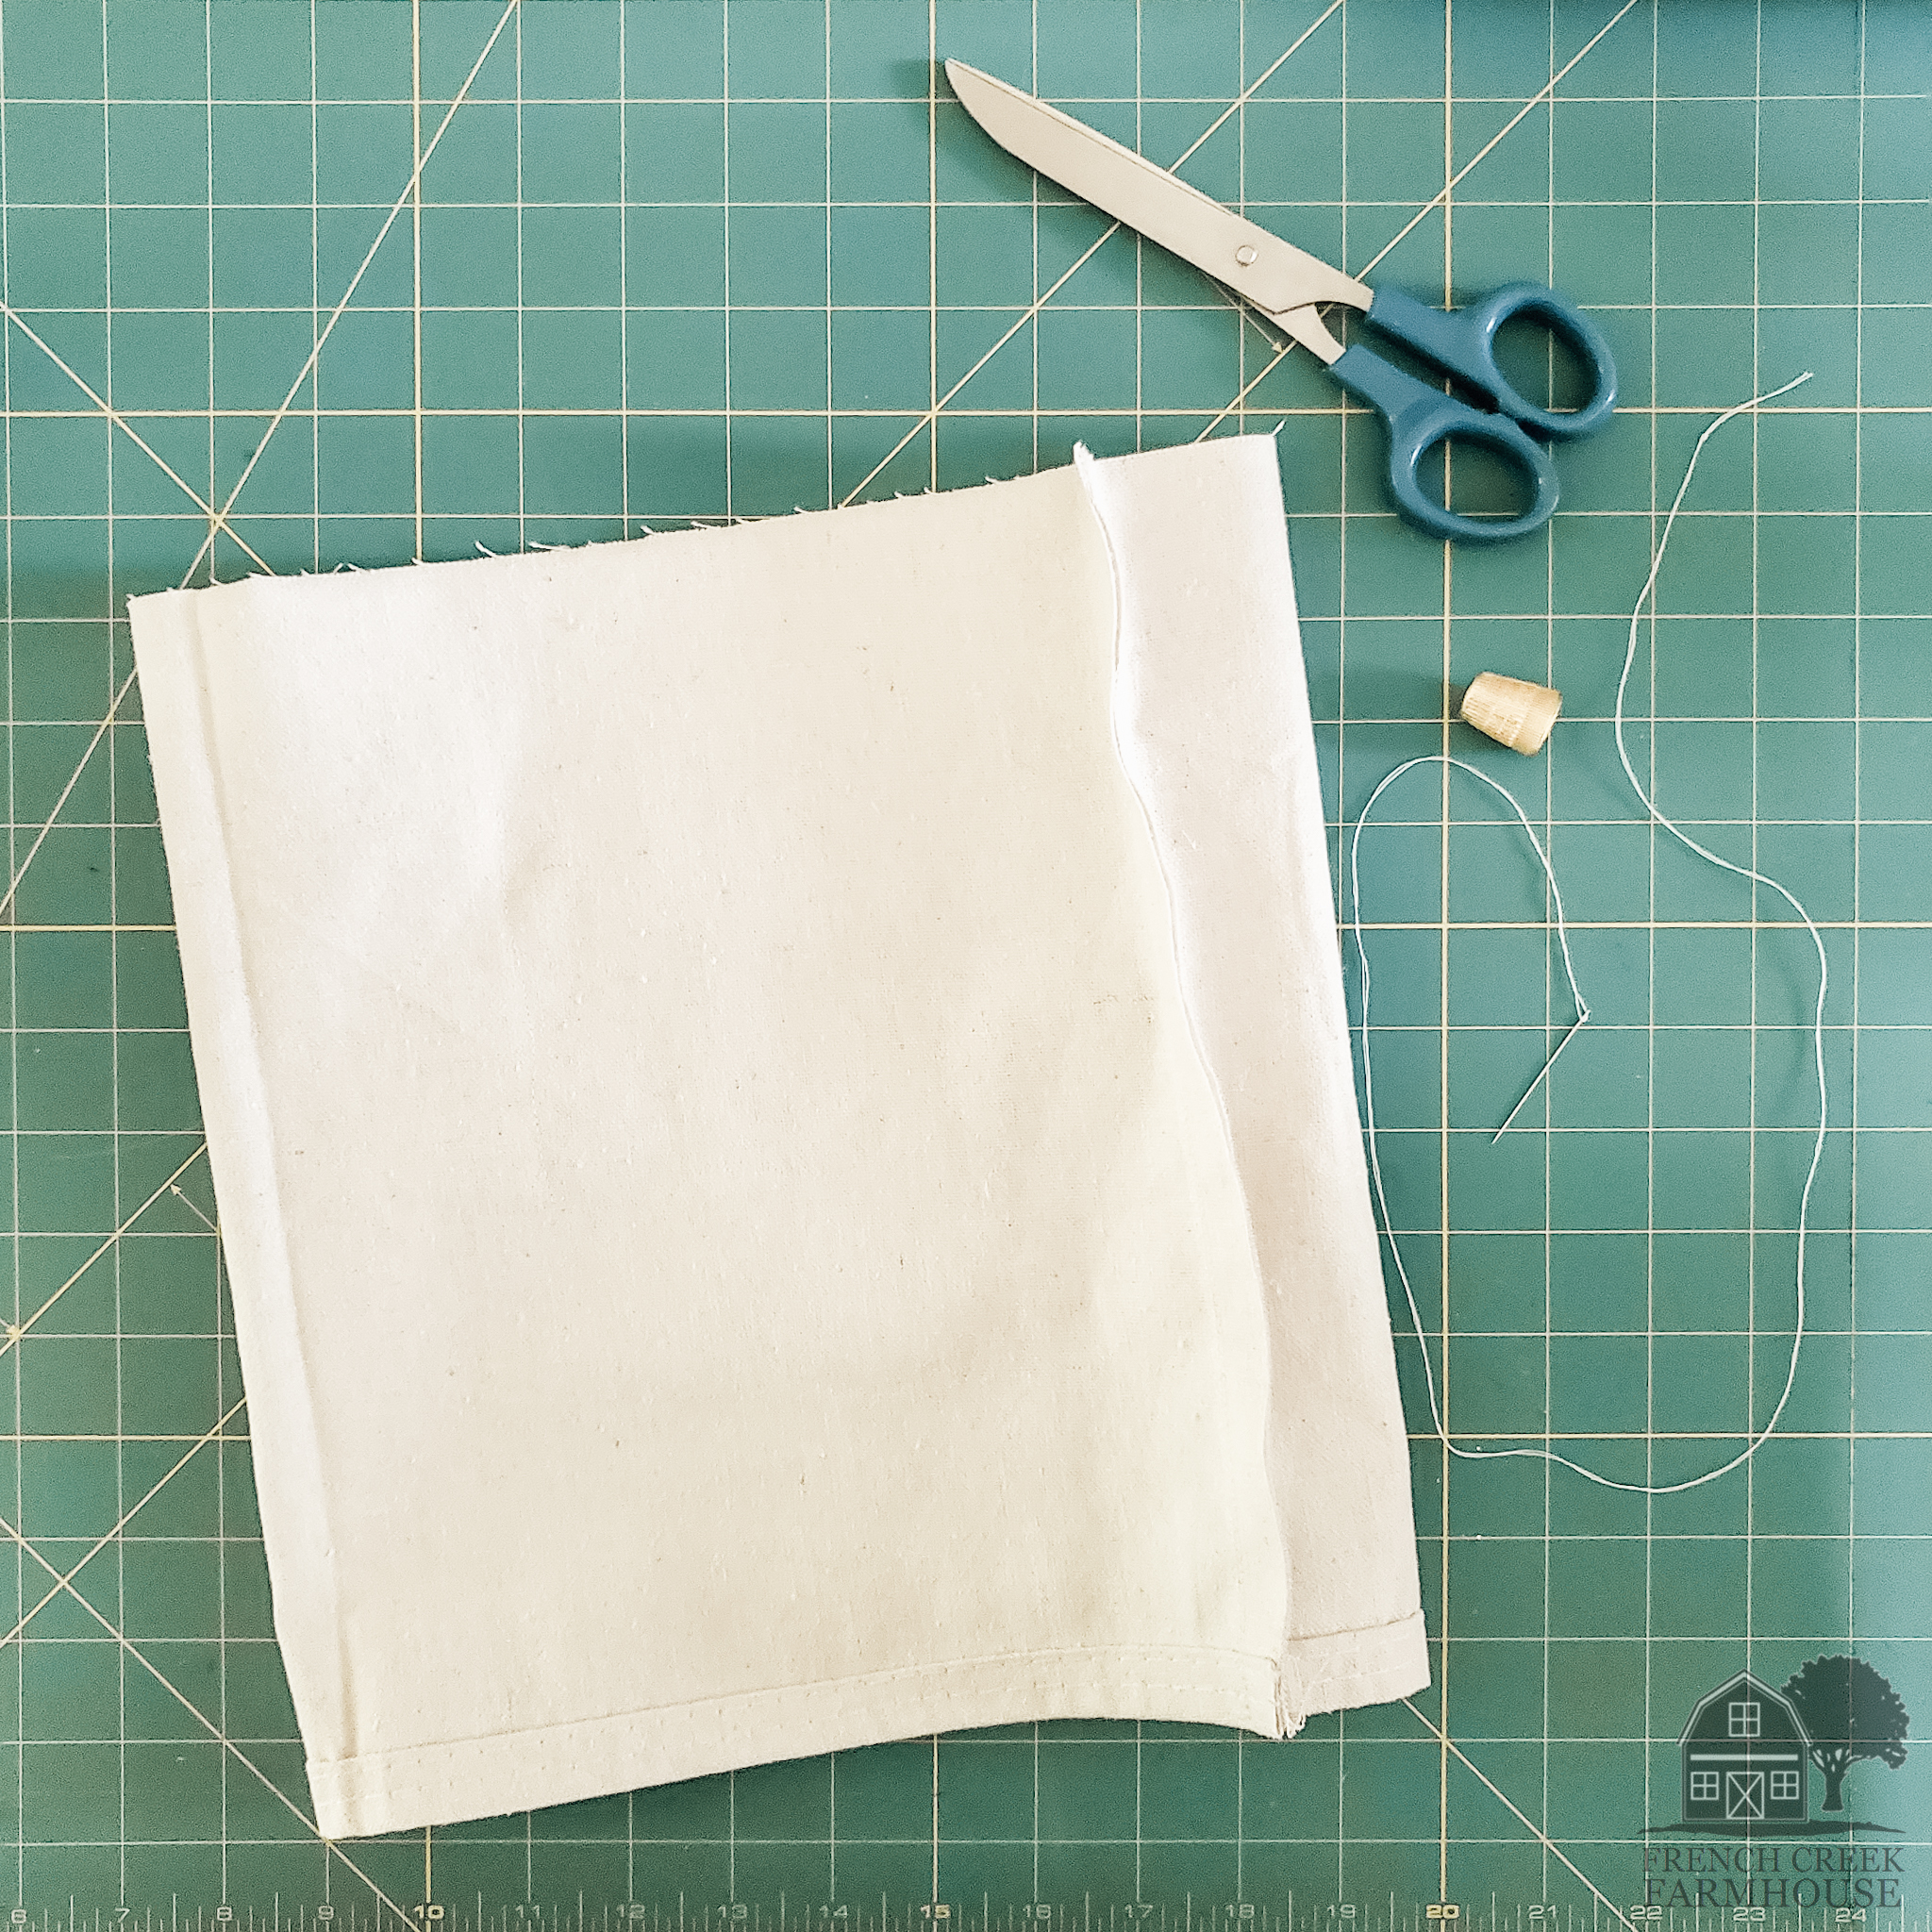
4. After all of your lace is stitched into place, fold your fabric in half so that the lace is facing inward. Then, stitch a straight 1/2″ seam along the 12″ end to effectively create a “tube”.
This is the last bit of machine stitching–everything else will be by hand.
Note that I hemmed the long of my fabric thinking that it would show. It won’t, and this is an unnecessary step. Also, it makes it MUCH more difficult to work with when hemmed–I do not recommend it, and I have never done it again.
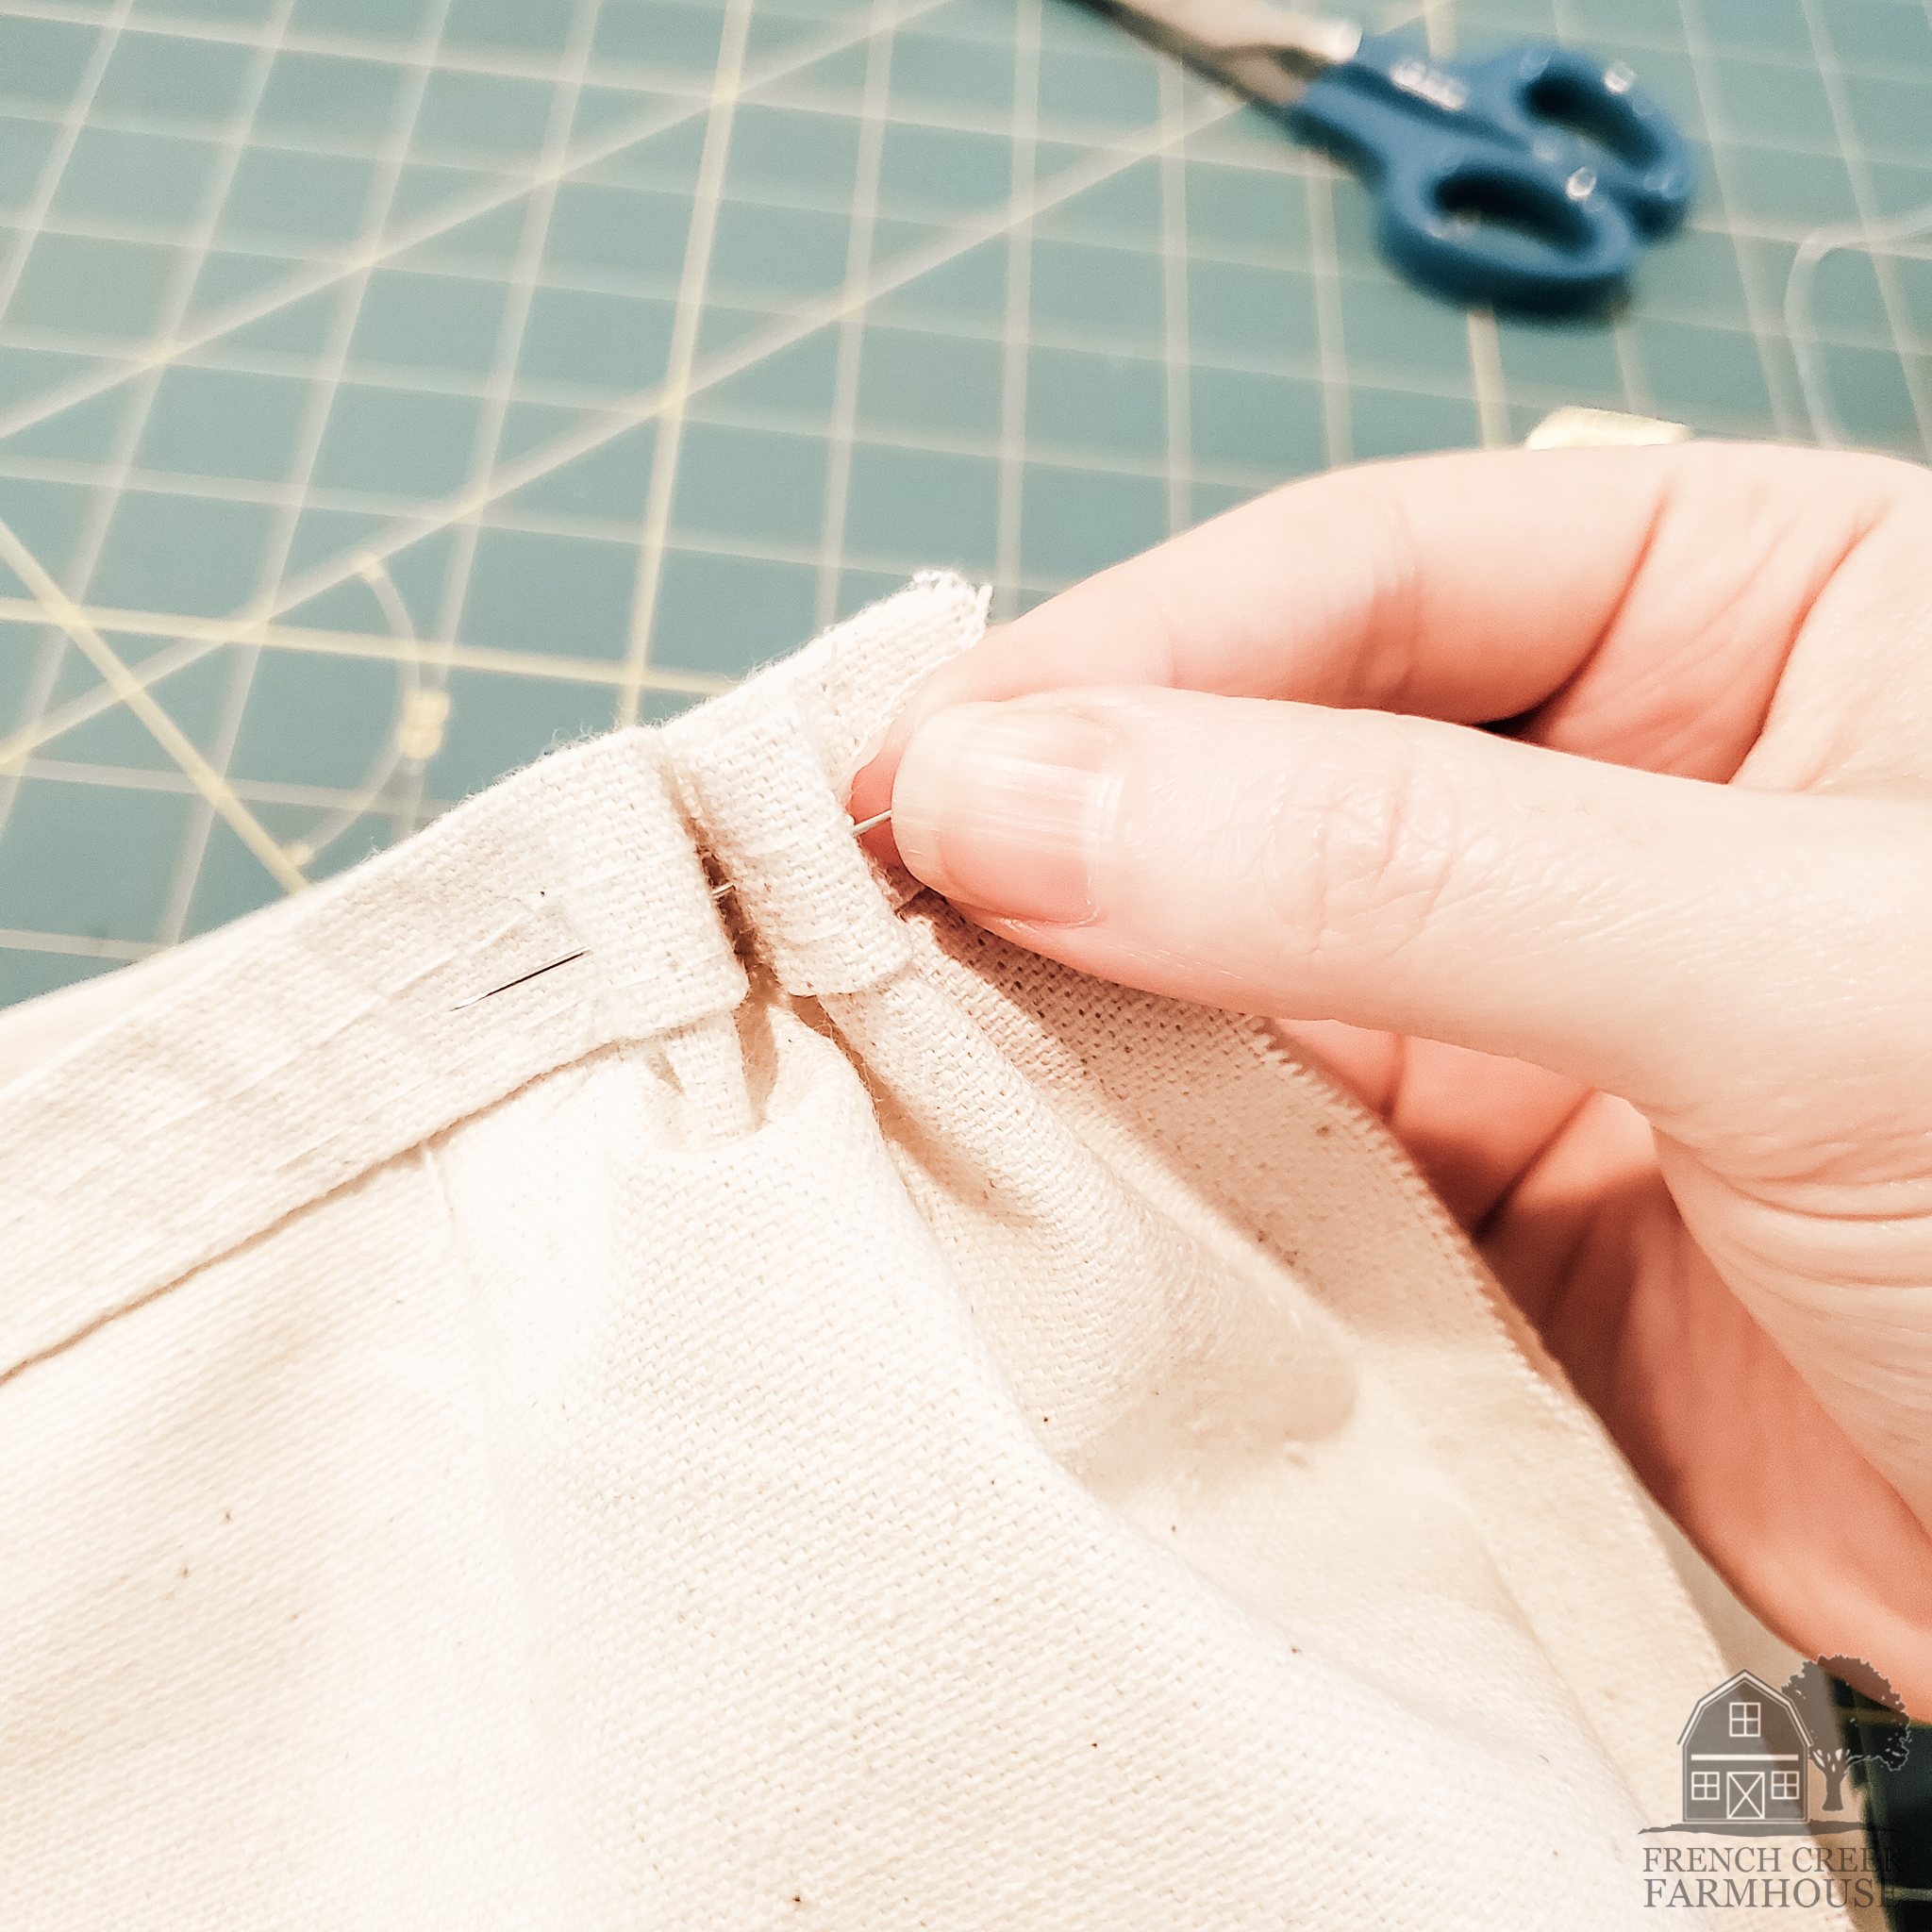
5. Using your embroidery floss or upholstery thread, sew a gathering stitch along one of the open edges. I made this stitch about 1/2″ from the edge of the fabric. This will eventually create the “bottom” of your pumpkin, so if it matters to you which end is up, take care to make the right choice here.
Also, it is very important that you’re using the thicker thread that I’ve recommended. Regular thread will not be strong enough, and will most likely break during the next step–trust me on this, I learned the hard way!
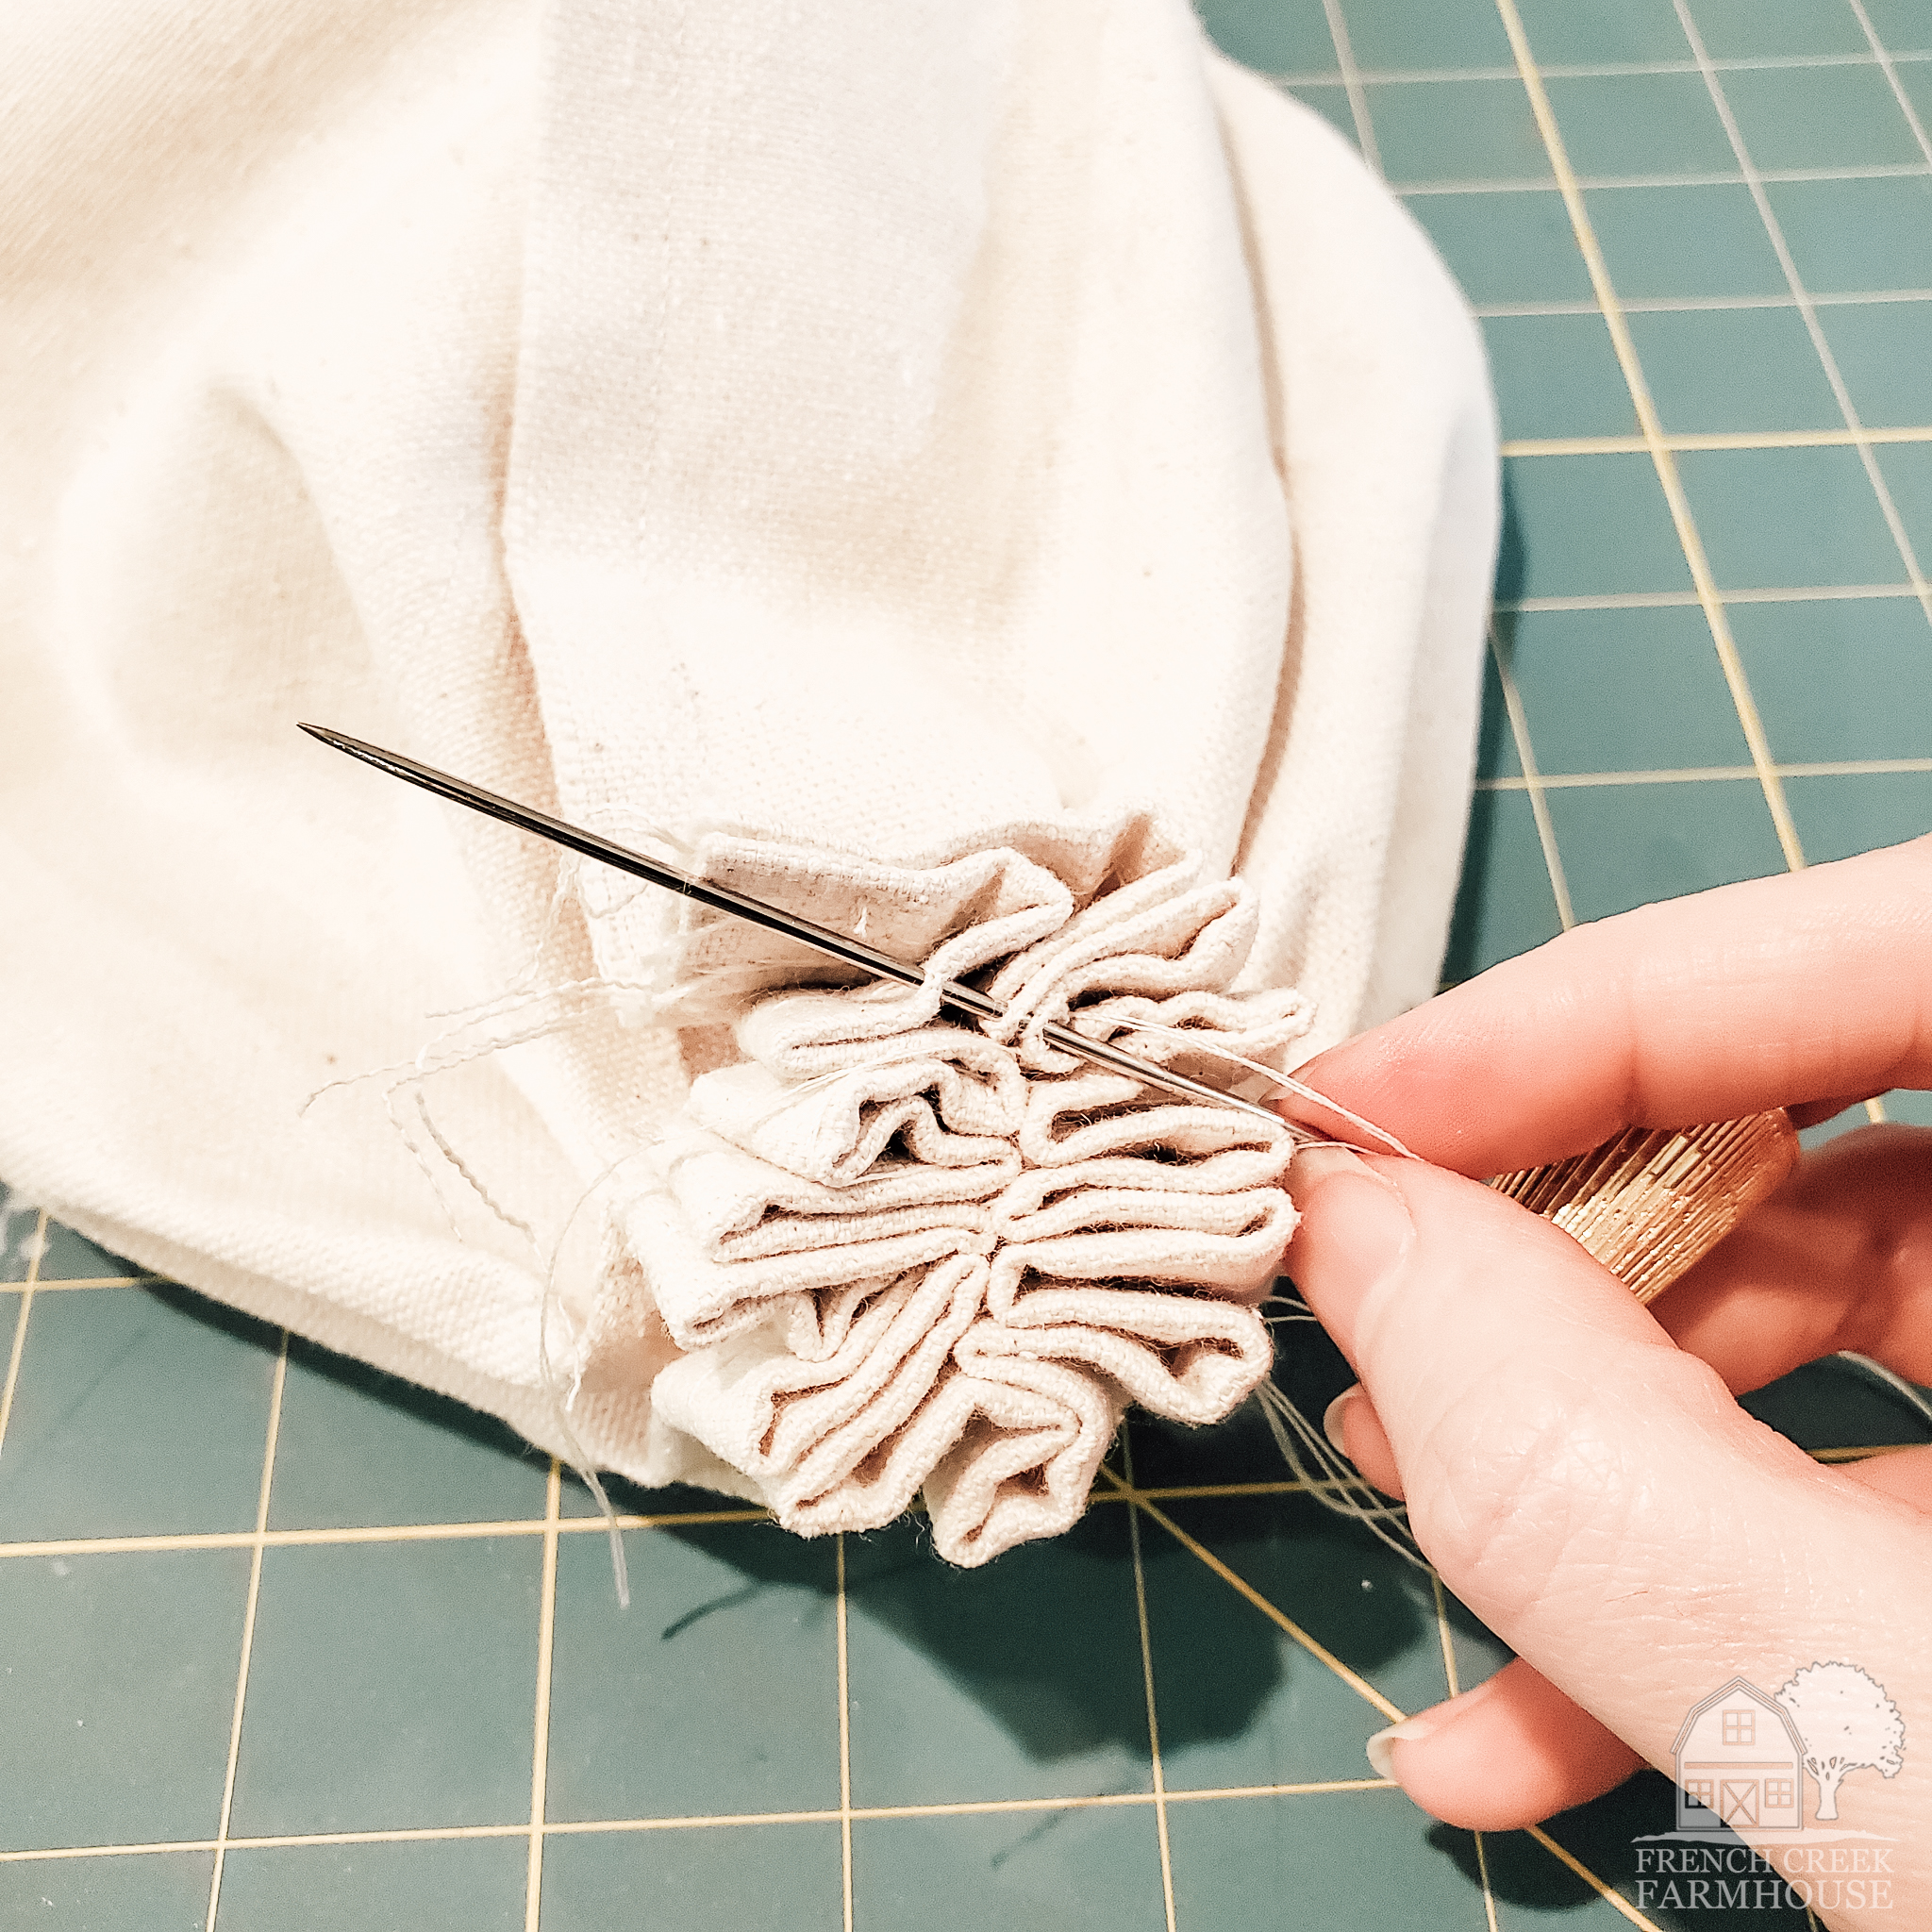
6. After you’ve sewn a gathering stitch all the way around the circle, you’ll pull the ends of your thread tightly to bring the fabric all together. Then, tie off in a double knot.
But, that knot still won’t keep the bottom of your pumpkin tightly closed, so now you’ll want to stitch through the layers, back and forth, until you feel that it’s solidly closed up. This is especially important if you plan to weight the bottom of your pumpkin with poly beads.
Sewing through so many layers is tough, so be sure to take care of your fingers with a thimble. You might even need pliers to pull your needle through.
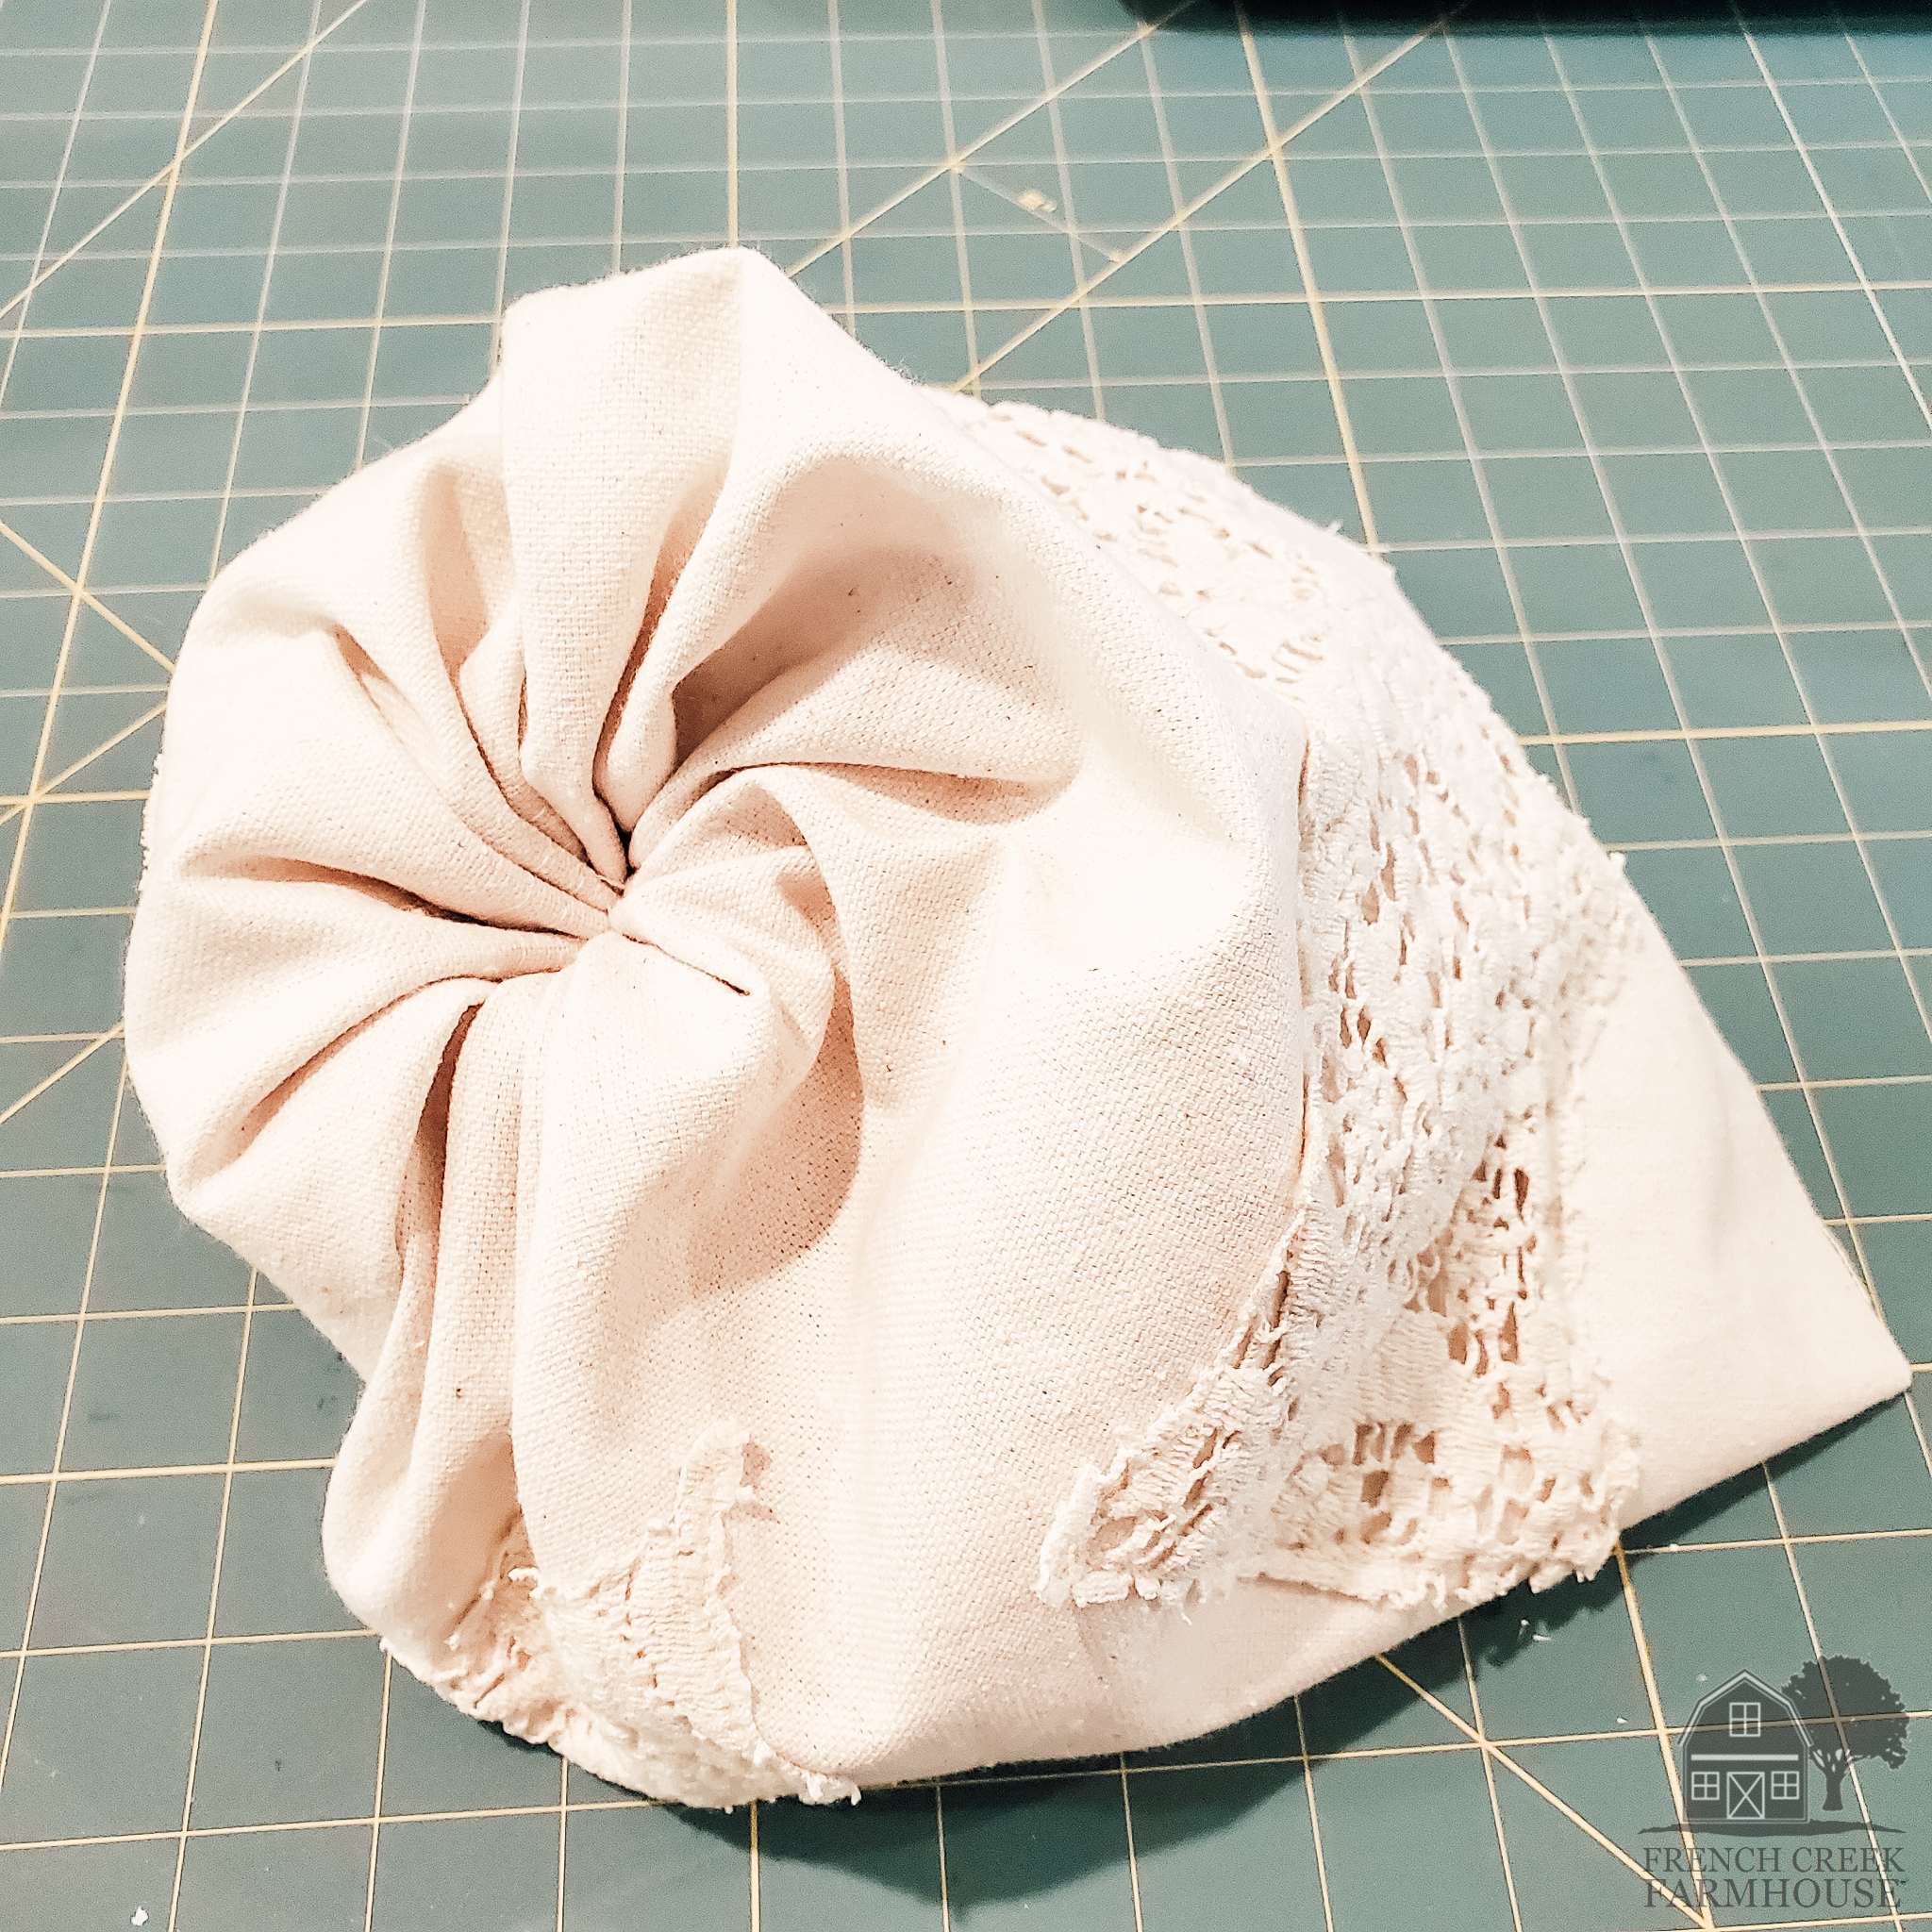
7. Turn your pumpkin right-side-out. Notice that the gathered seam and all your stitches are neatly hidden inside, and you simply see the pleated fabric bottom. Now we get to start the fun part!
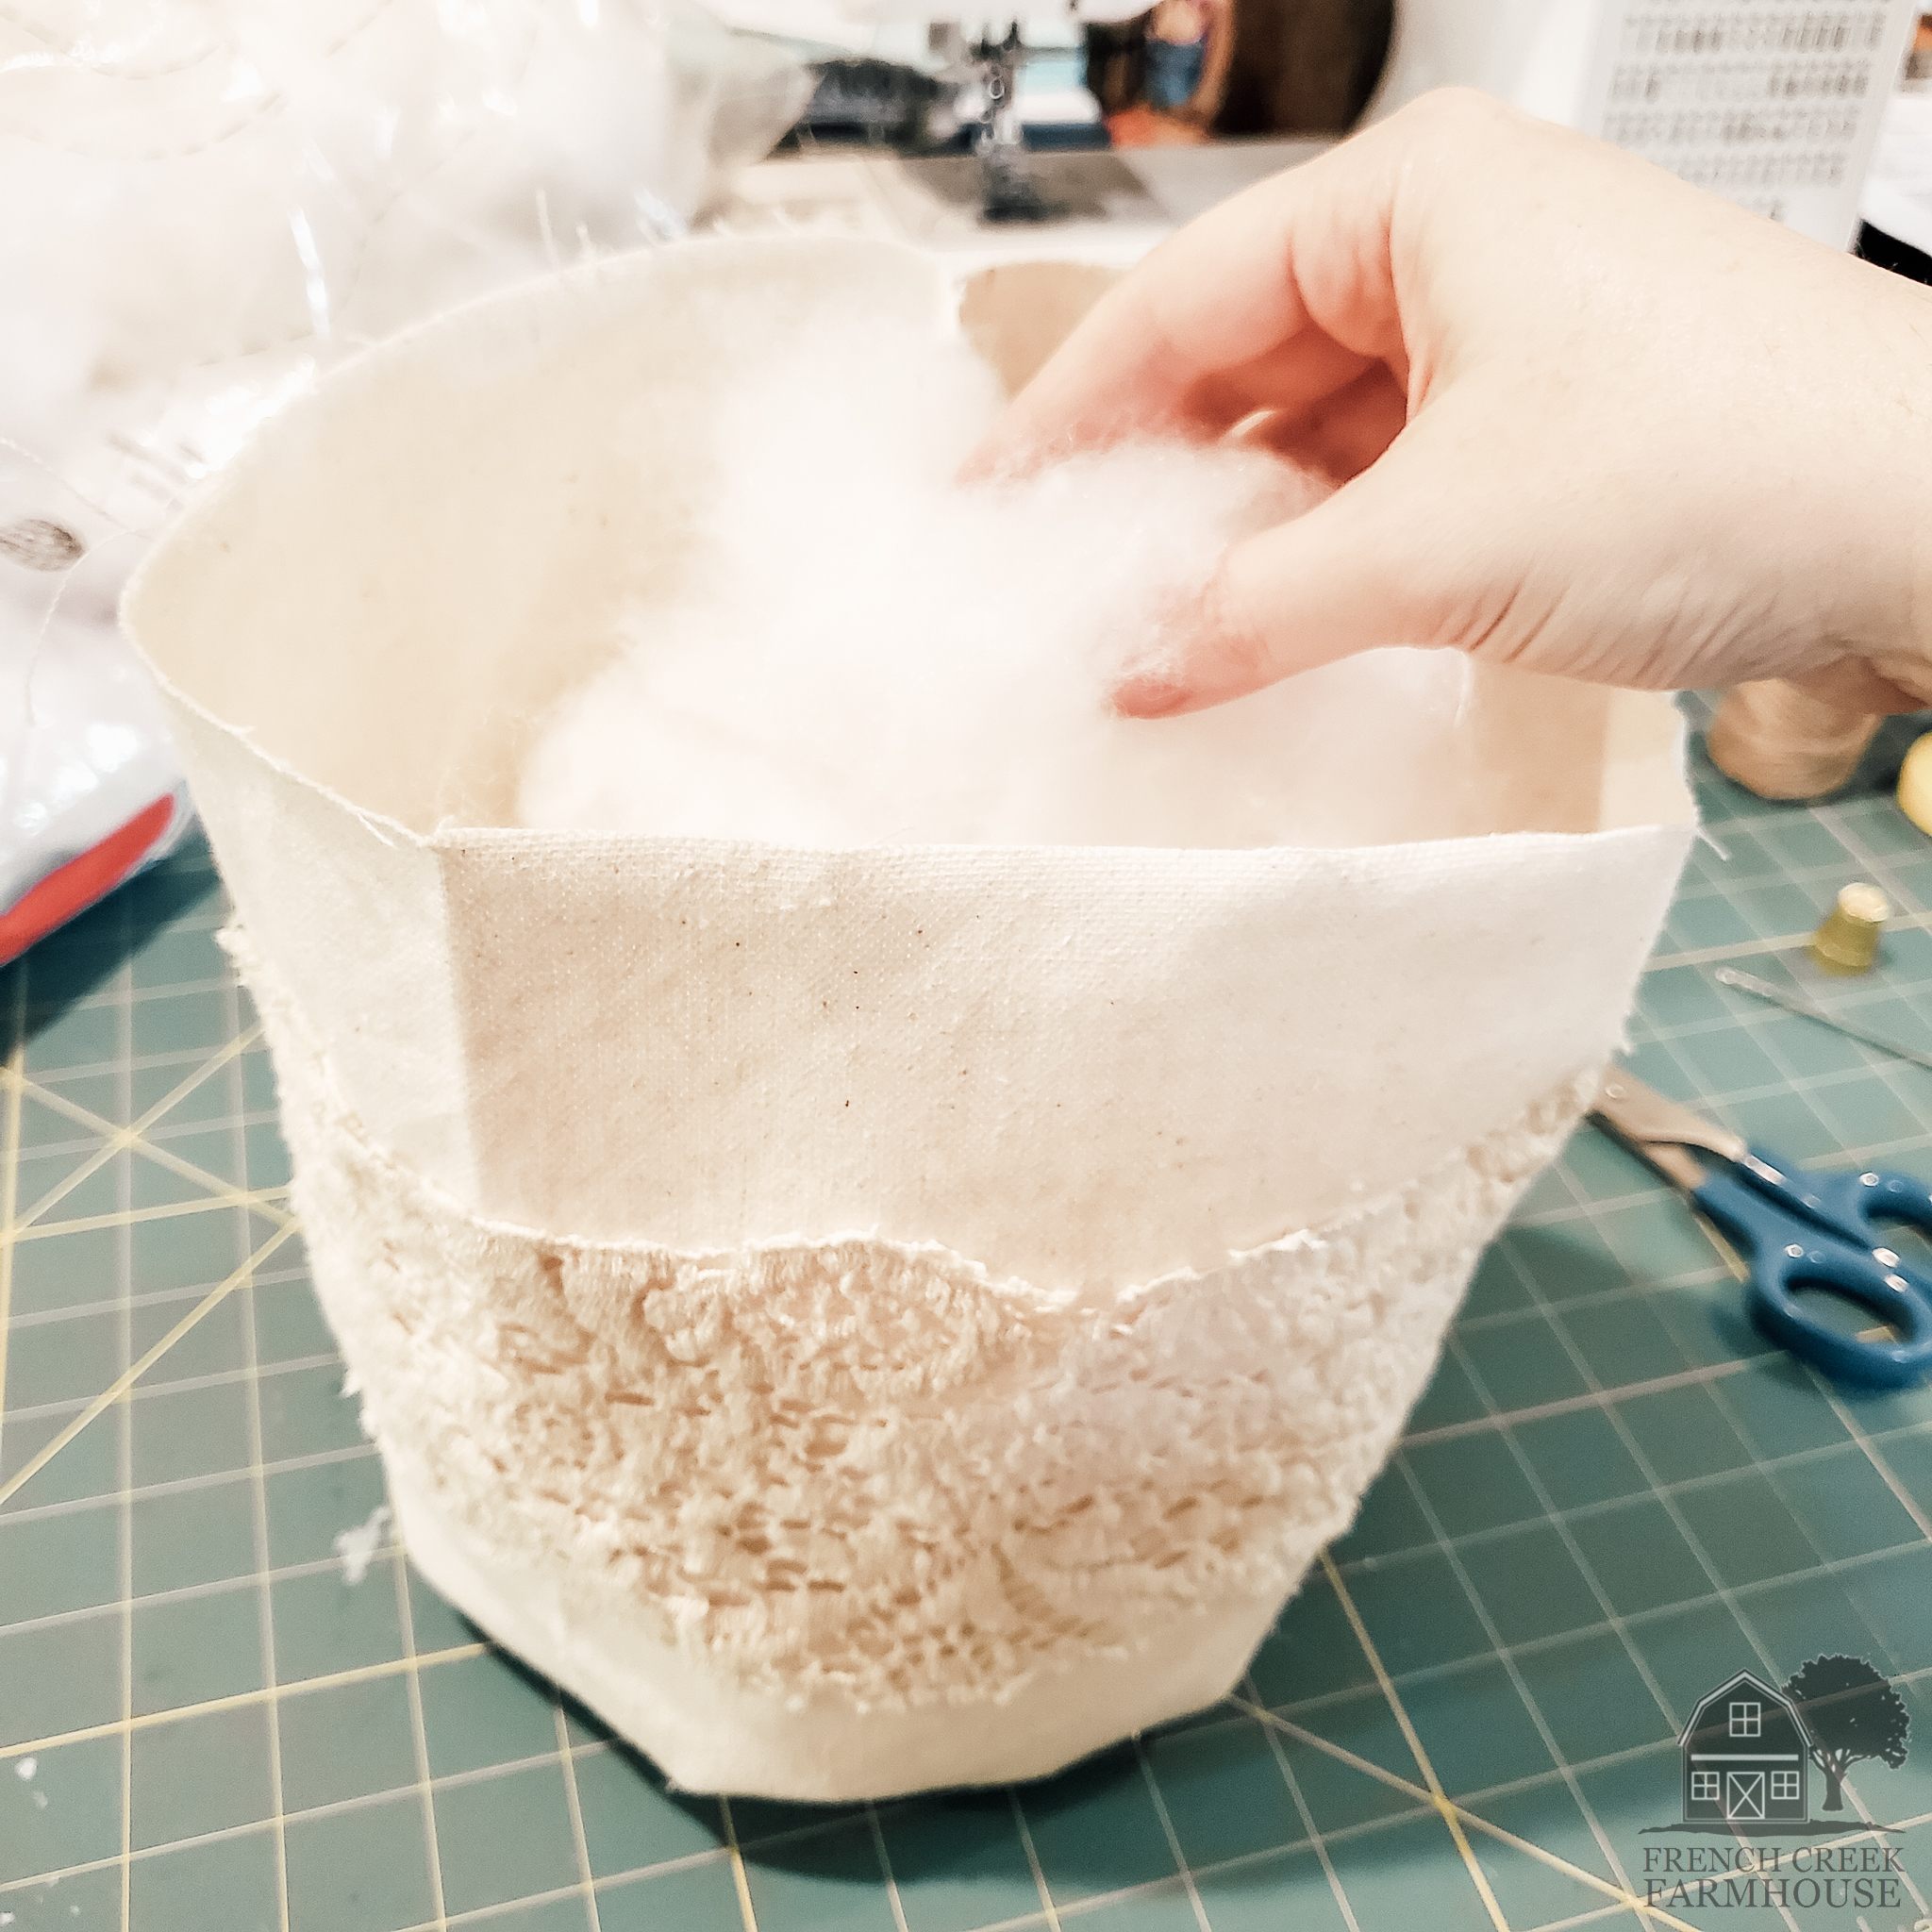
8. Begin to stuff your pumpkin with pinches of poly-fil. Make sure to really fill out the bottom.
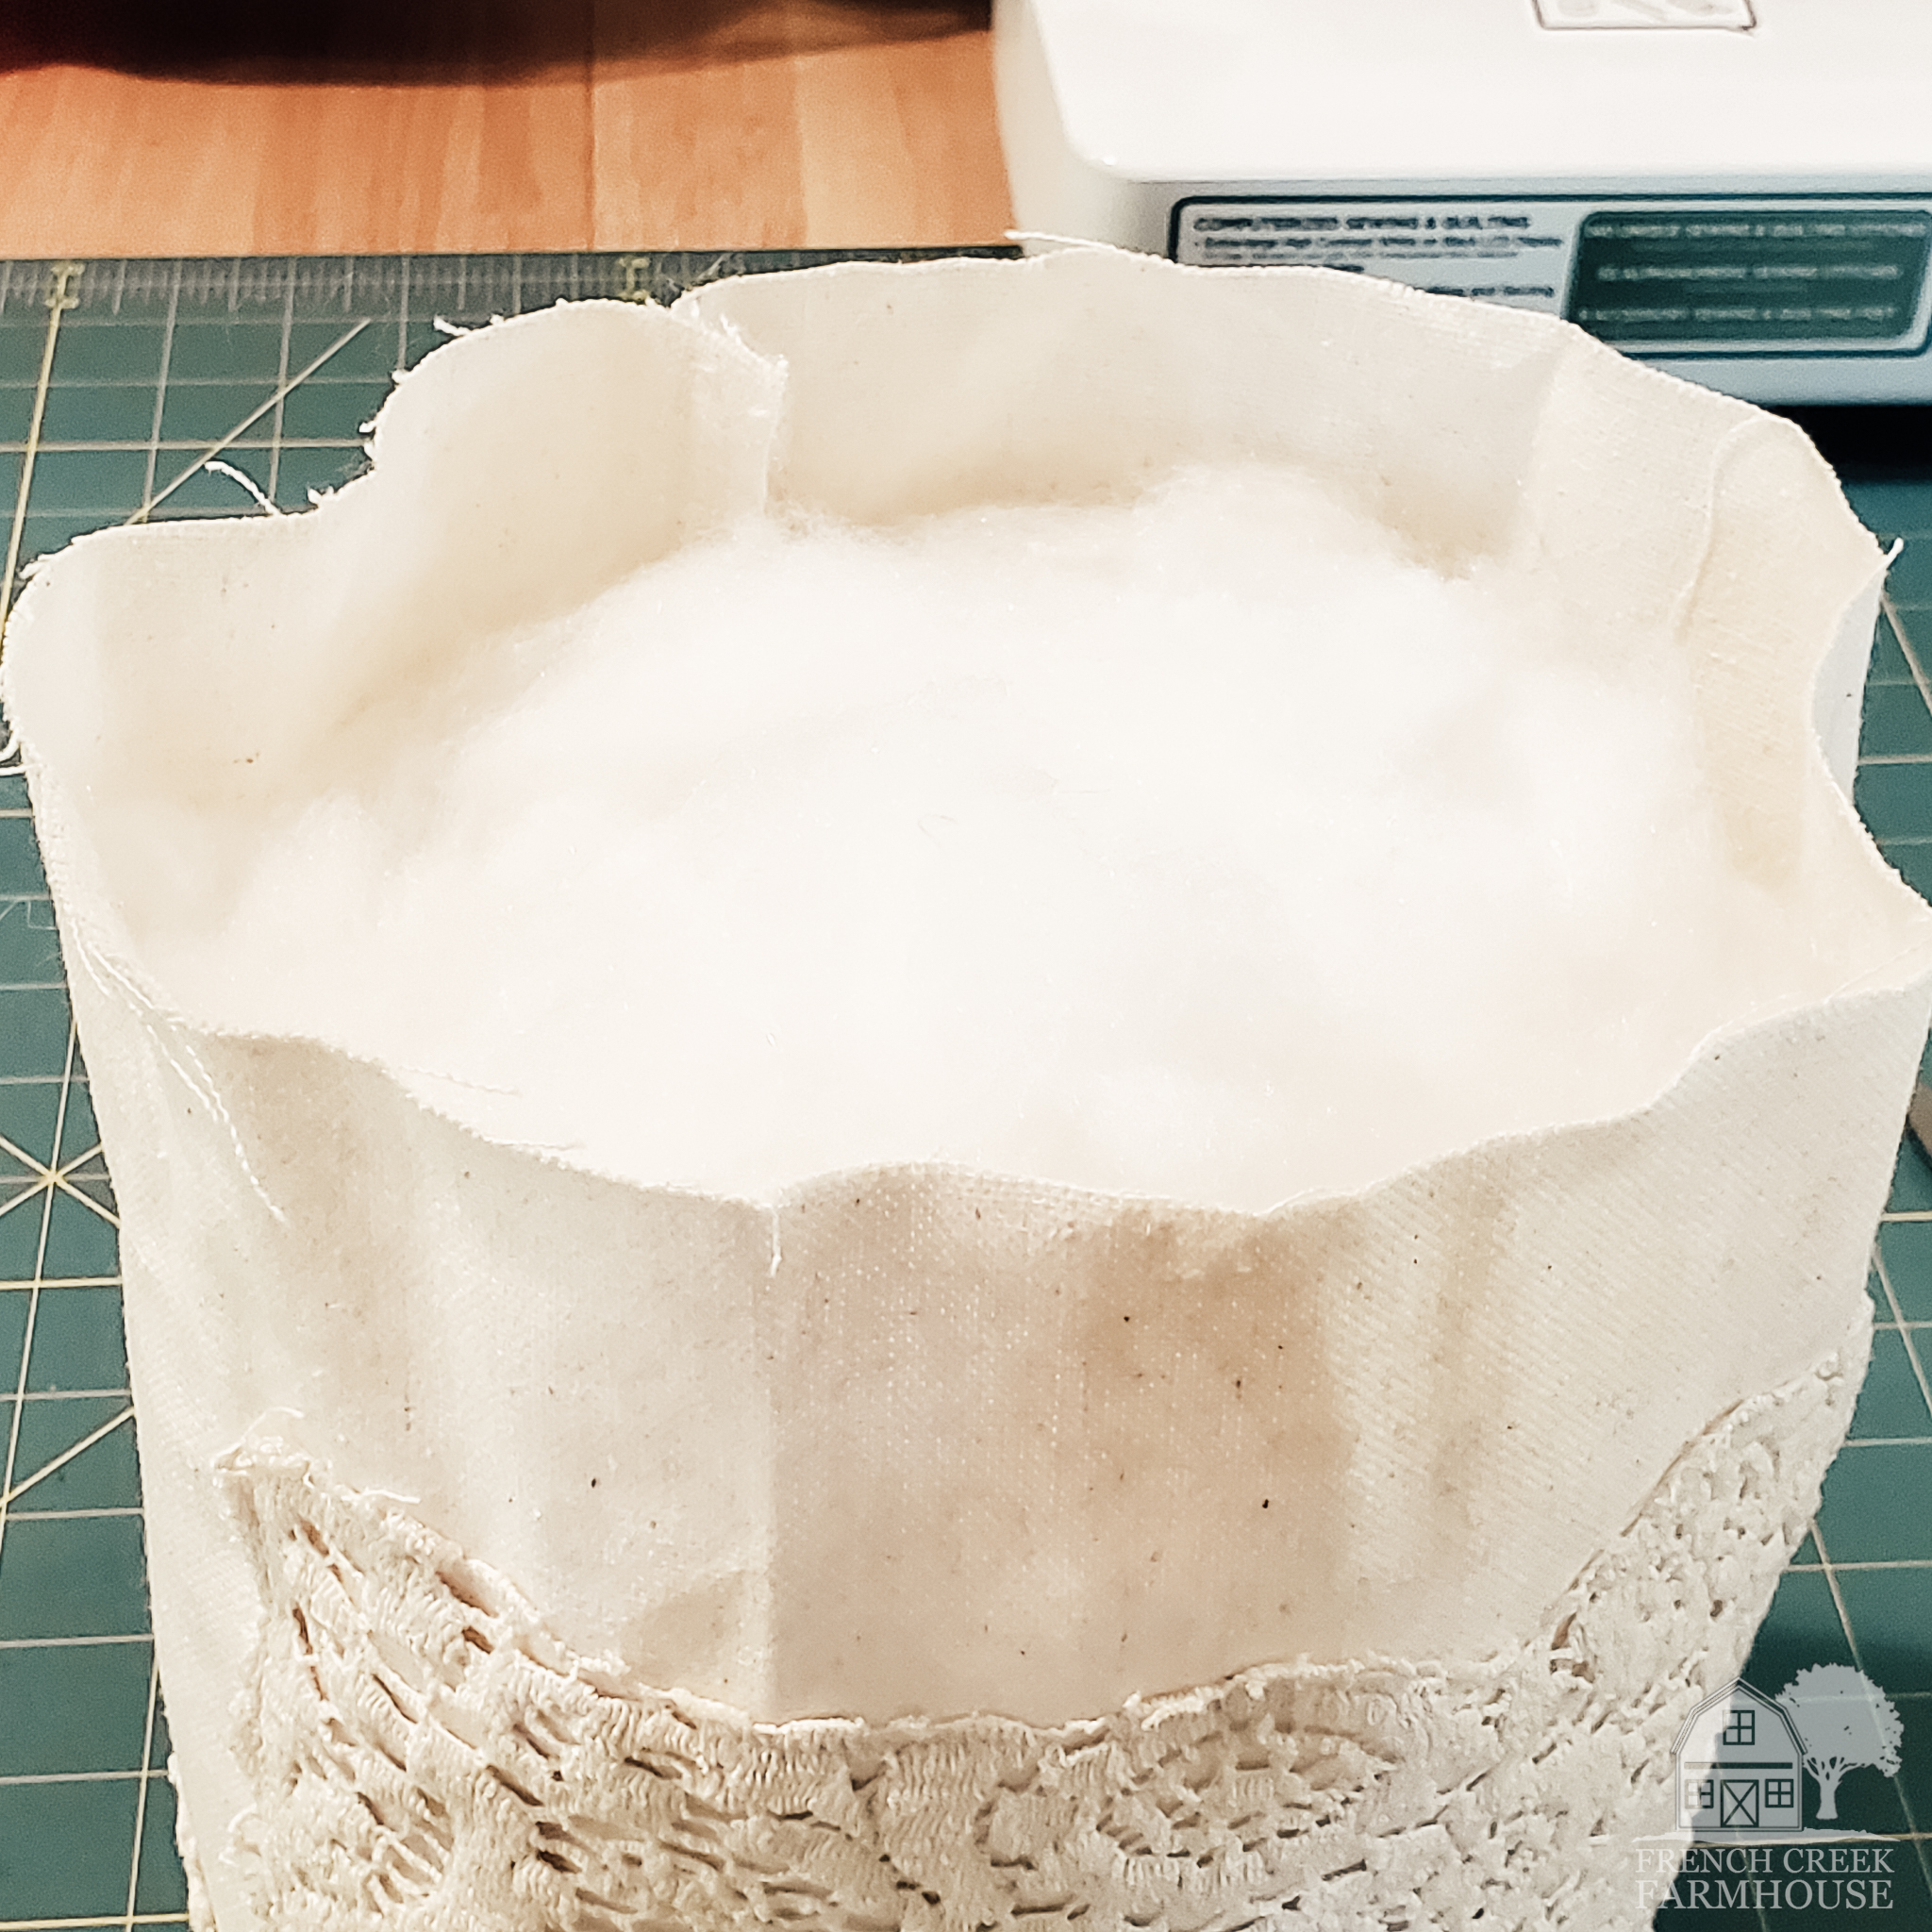
9. You’ll want to really fill up your pumpkin–to within approximately a half-inch from the top edge. Push the stuffing down a couple of times as you’re filling to make sure you have enough.
The more pumpkins you make, the more you can experiment with how much stuffing you like. Of course, the more stuffing you add, the more firm your pumpkin will be.
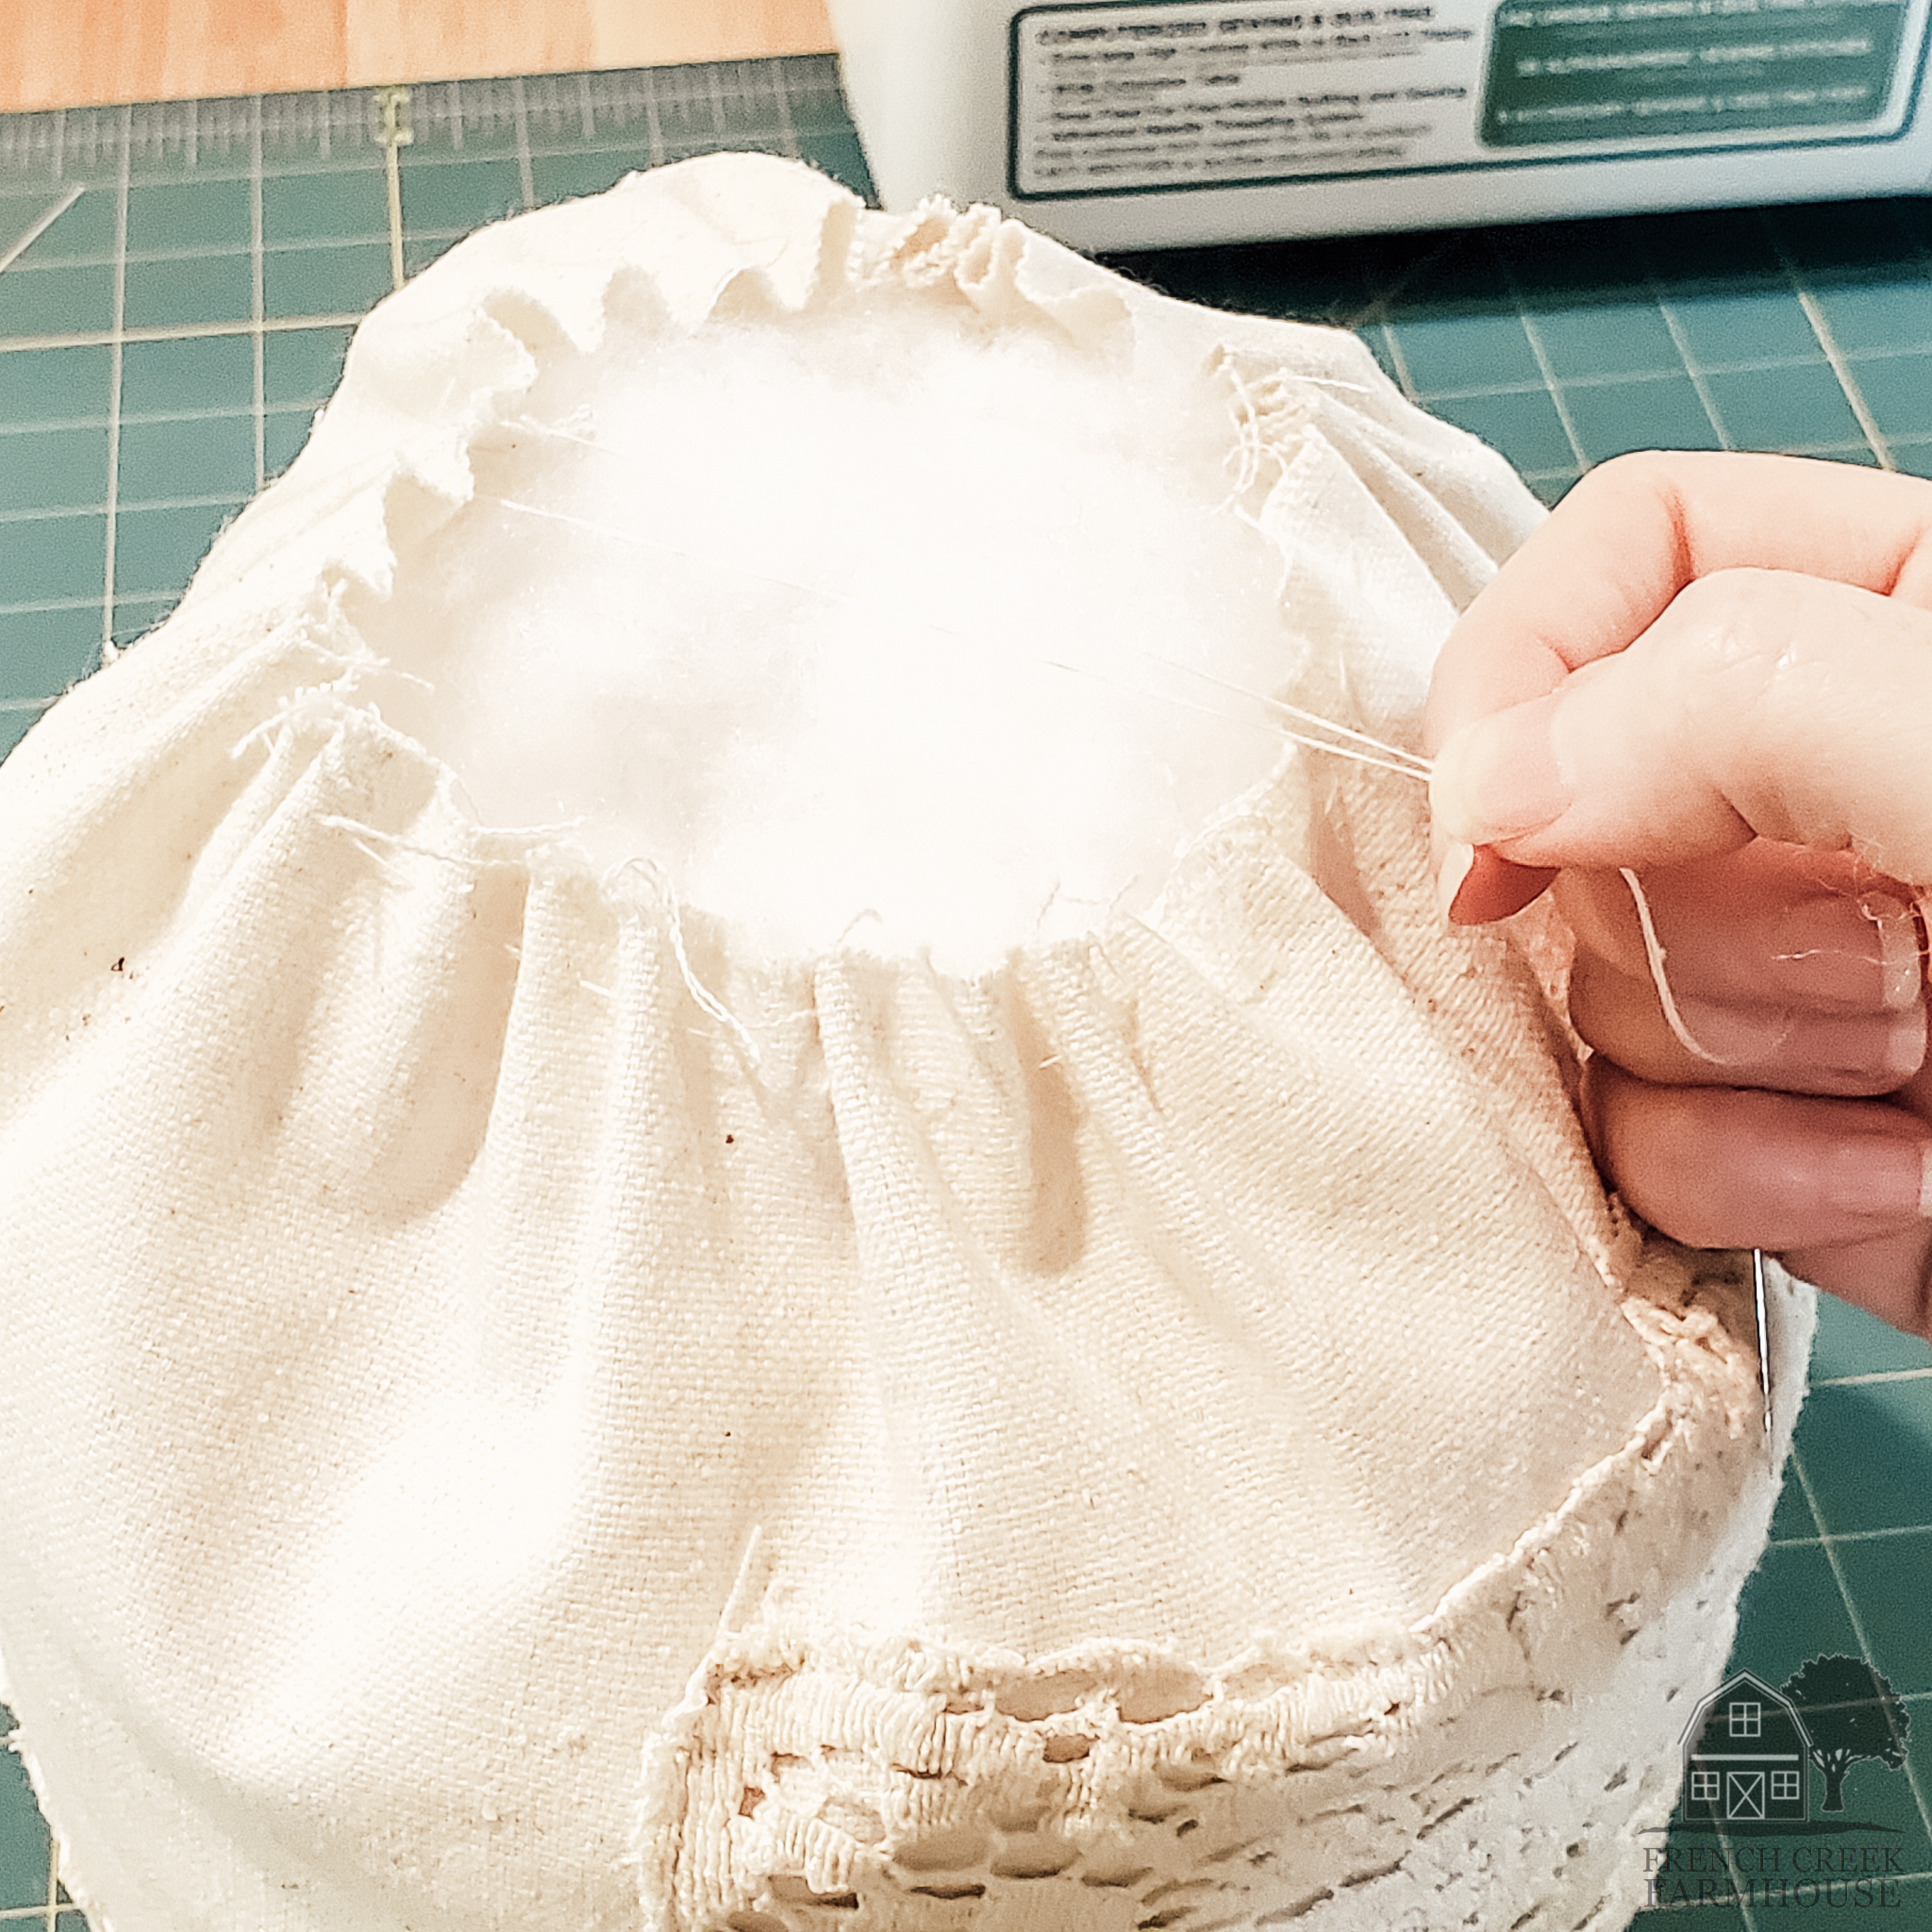
10. Now, you’ll sew another gathering stitch around the top edge–just like you did on the bottom–and pull the ends to close the pumpkin. I always leave about 1/2″ seam allowance.
Remember to use thicker thread so that it doesn’t break. This is the only thing hold your pumpkin closed, and we are about to get quite rough with it in the final steps.
If you get the upholstery kit that I’ve recommended, it includes thread that is absolutely perfect for this project!
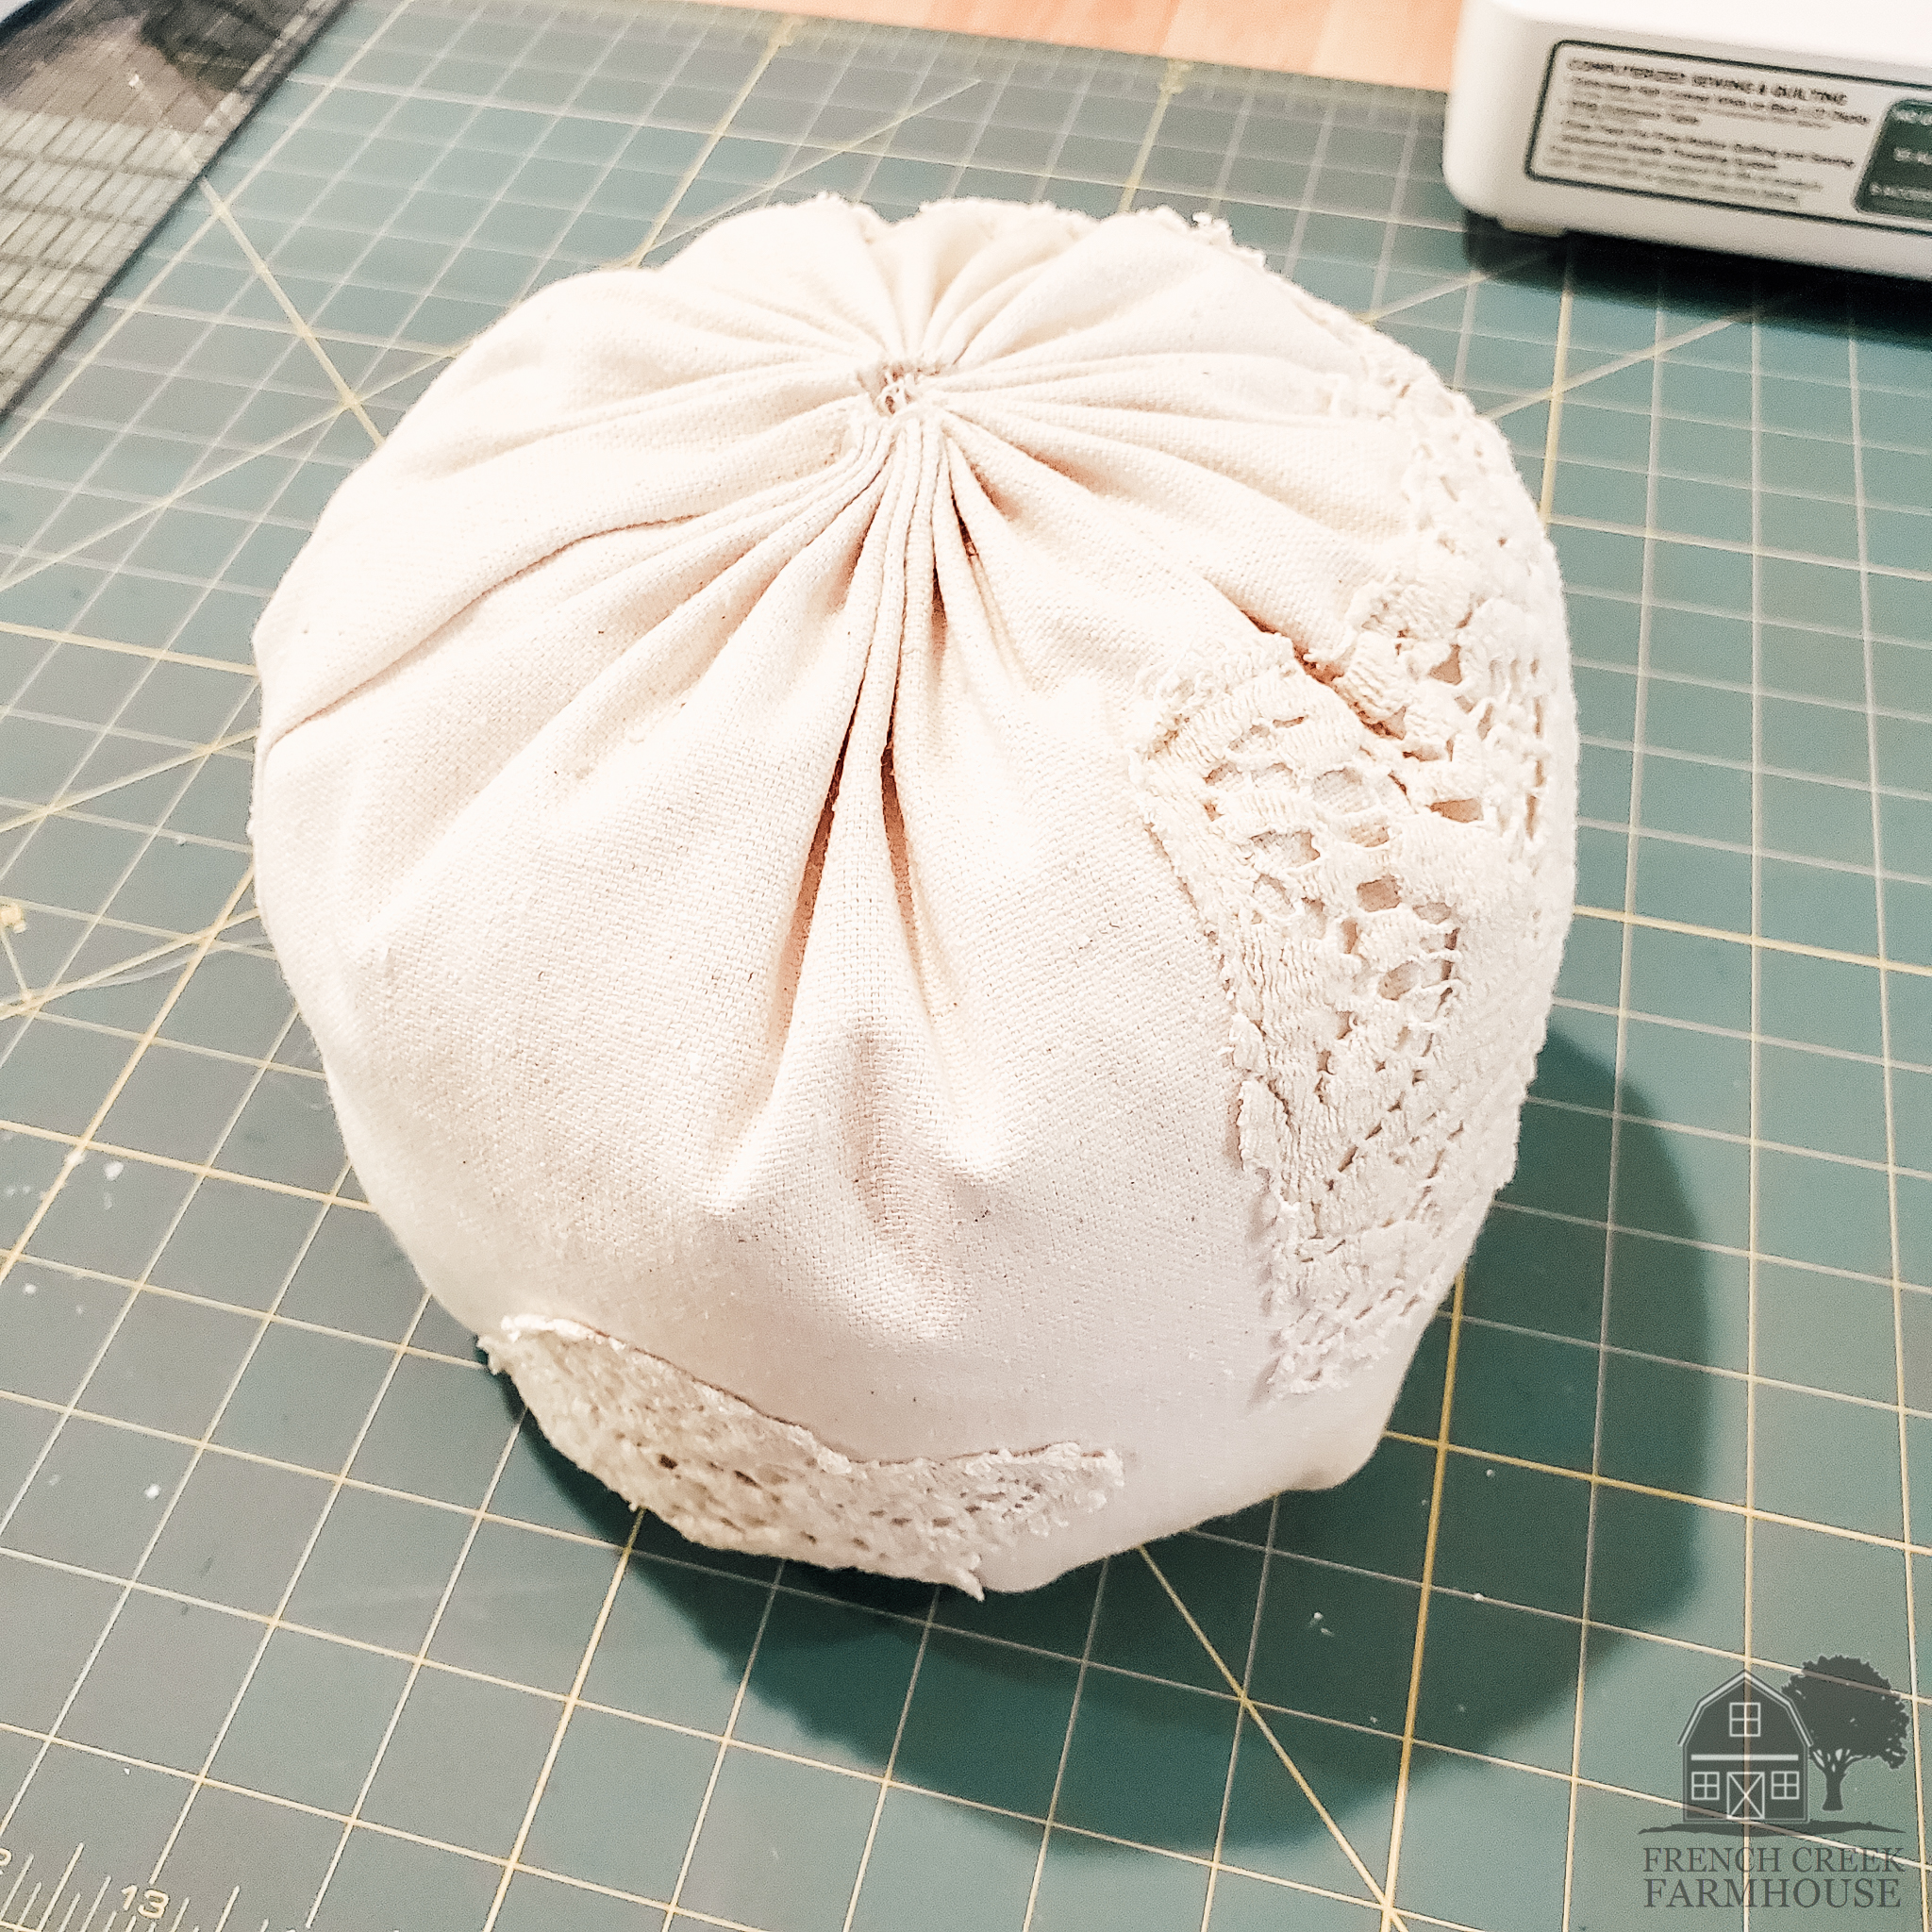
11. Once you’ve cinched up and tied off your thread, your pumpkin should look something like above. There will be a little hole at the top–but that’s okay. We’ll need that for the next step.
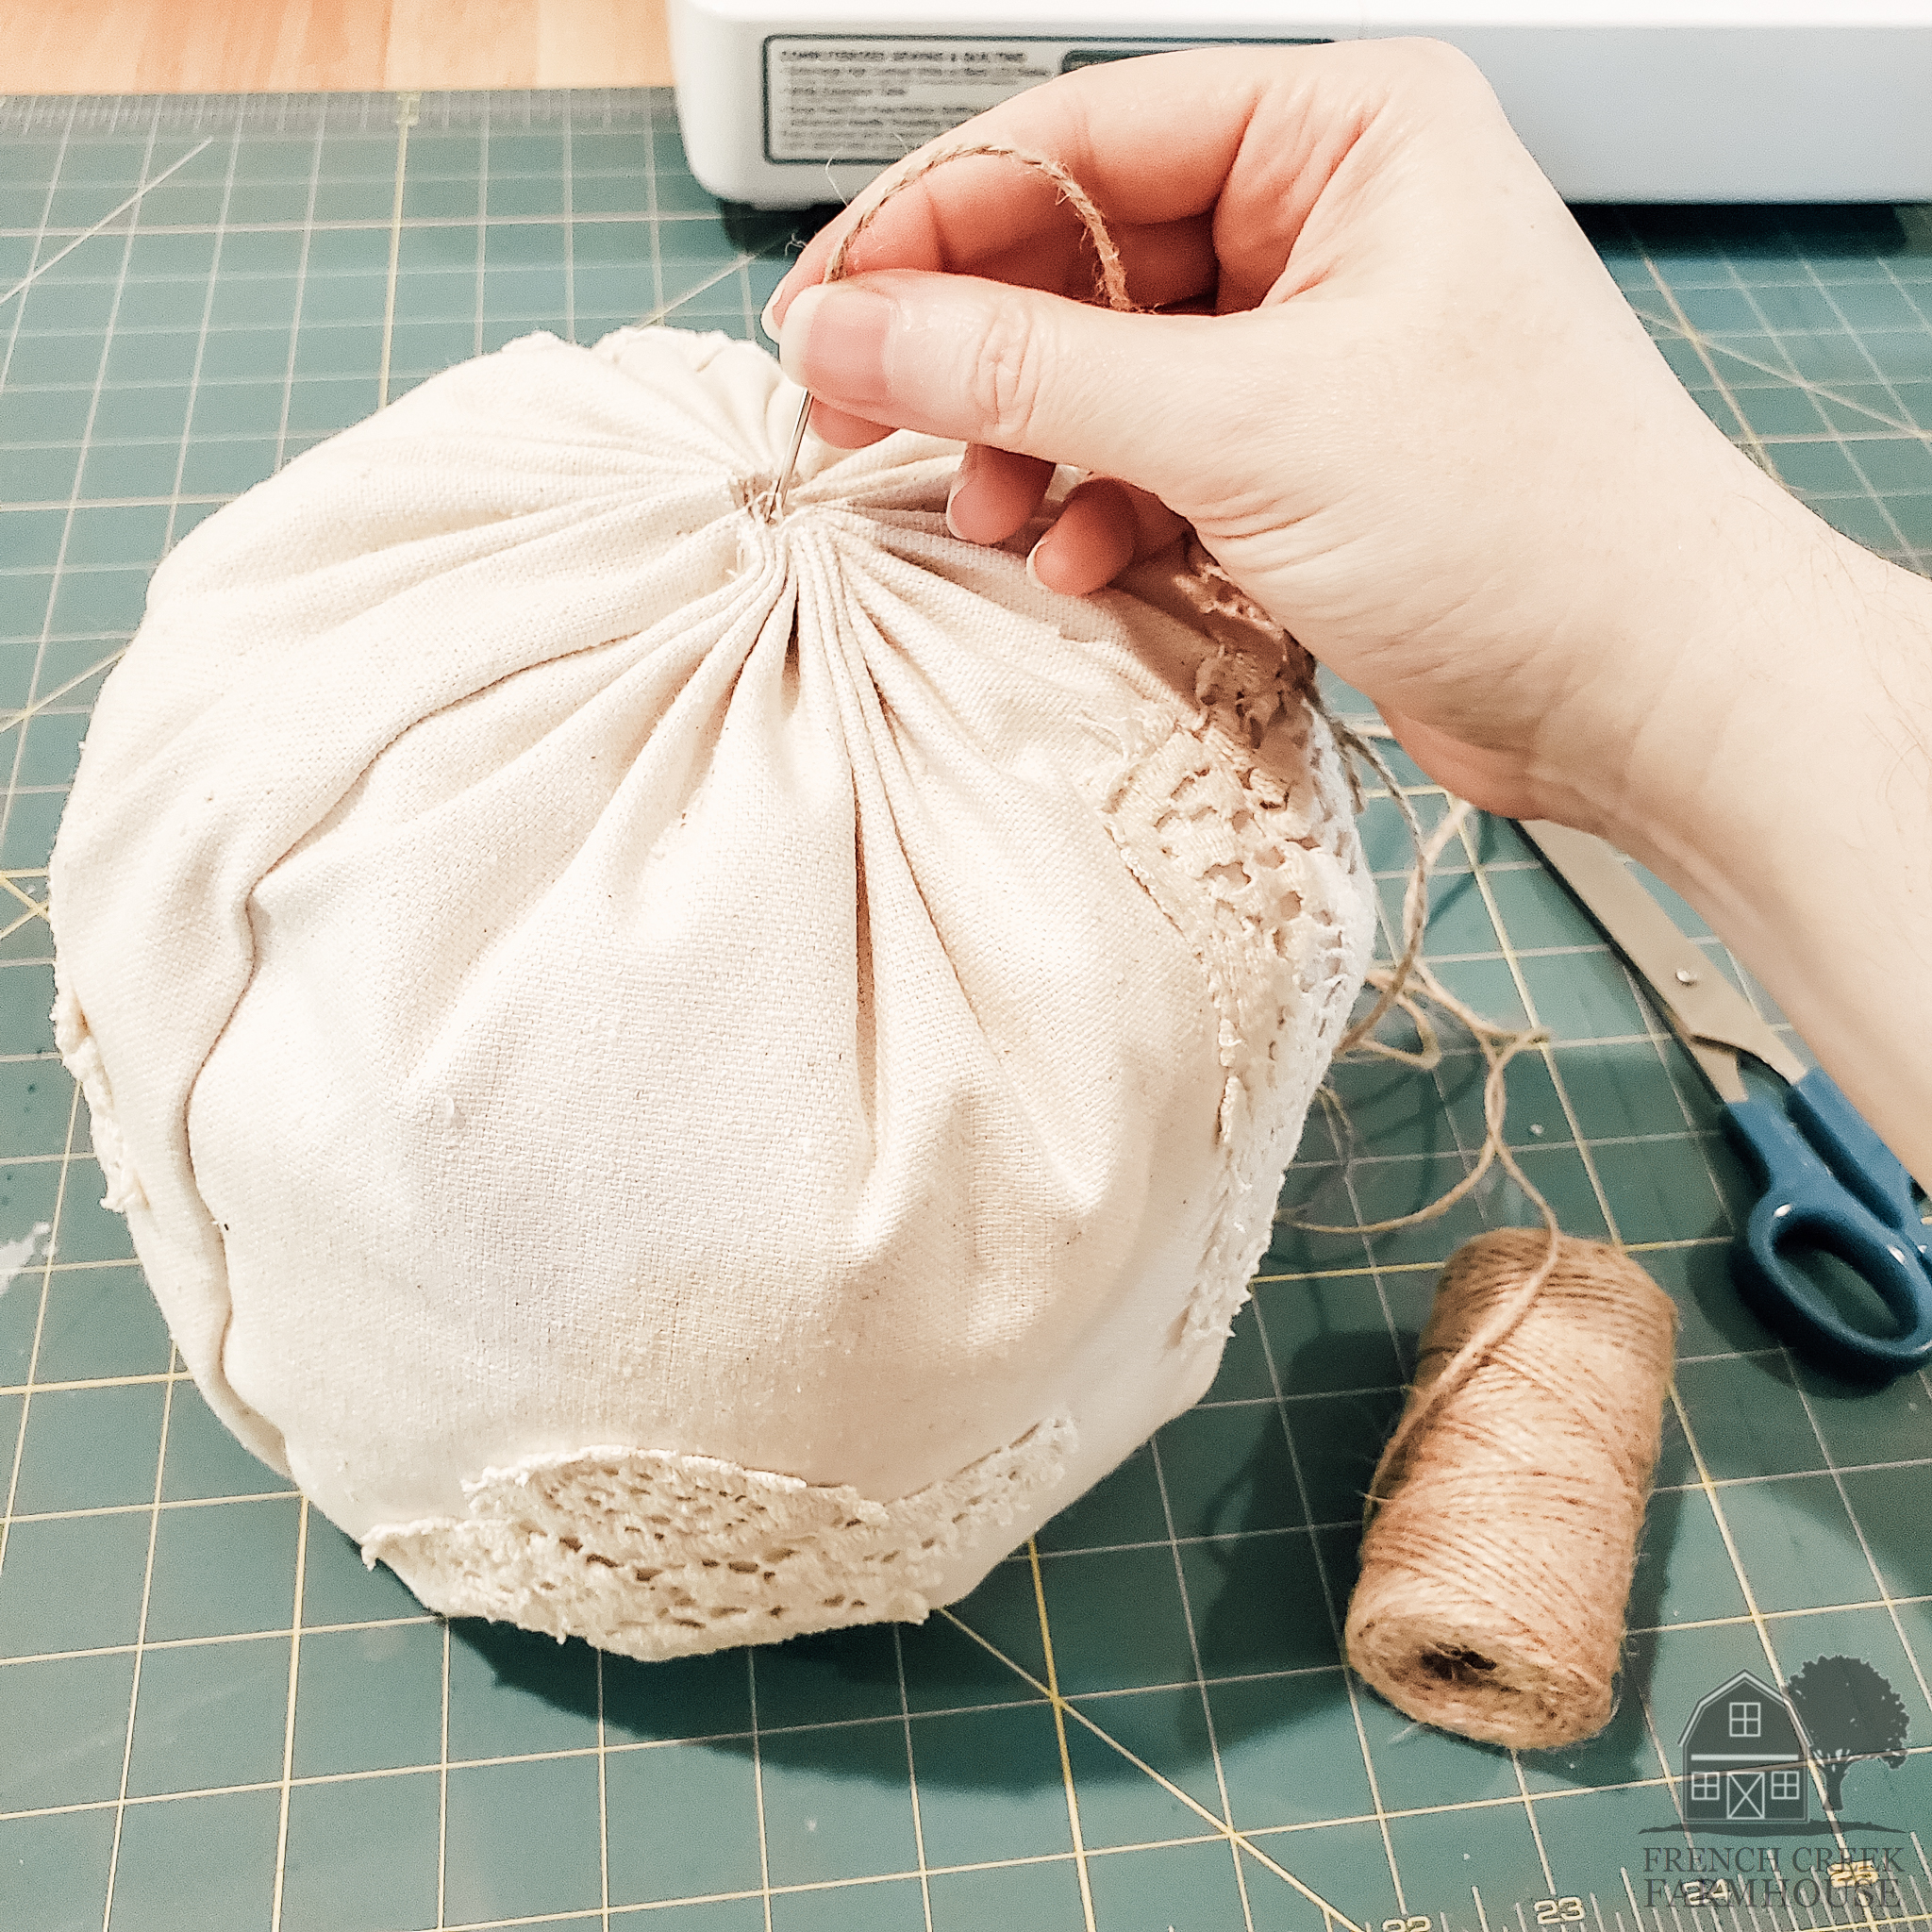
12. Now we’re going to start making this stuffed ball look like a pumpkin. Using a long upholstery needle (like the one that comes in this kit) and your jute twine, push your threaded needle down from the top where the little hole is.
This stitch might take you a few tries because you have a long way to go til the other end of the pumpkin. Ideally, you want your needle to come out right at the center of the pumpkin’s bottom (or as close to it as you can. So keep trying until you find just the right spot to push the needle through.
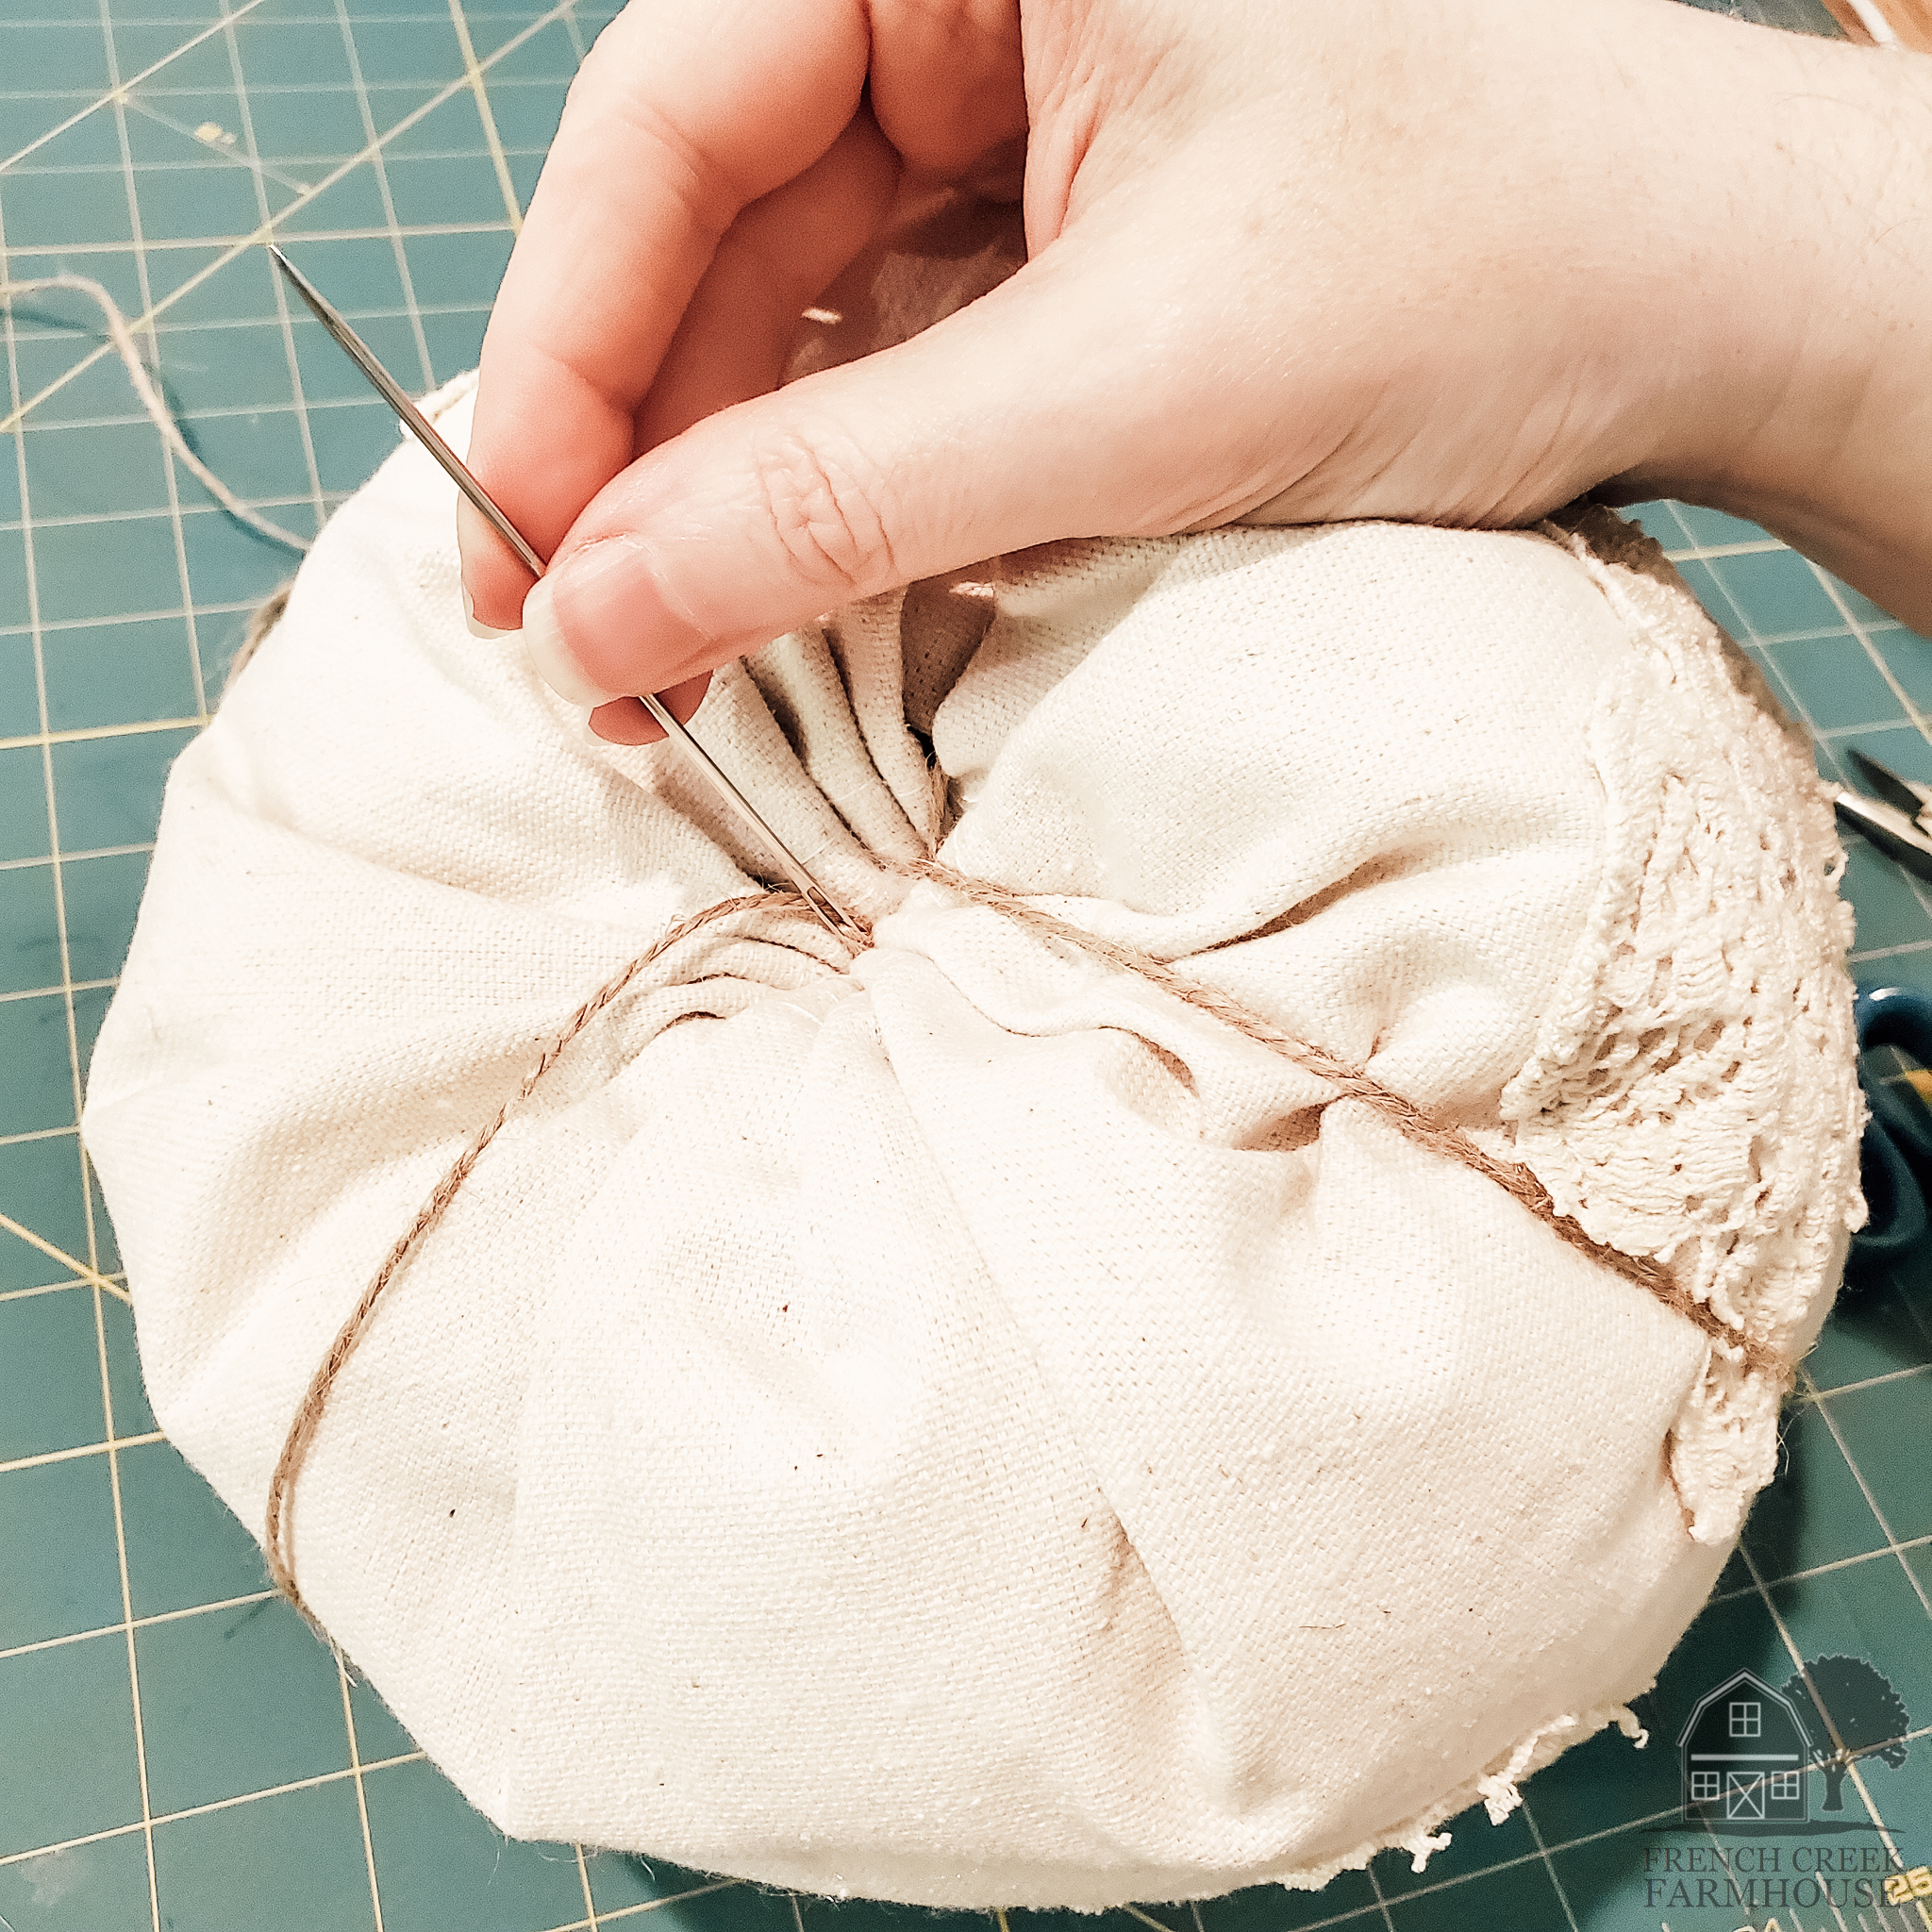
13. When you pull your needle through the first time, you’ll need to pull through quite a lot of excess twine. We are going to make this same stitch a total of 5 times (to create 5 segments around your pumpkin), so you need enough twine for all 5 loops through the pumpkin. If you want your pumpkin to have more segments, increase the length of twine and make more loops through the center.
This is the part that always confused me, and other tutorials for fabric pumpkins didn’t really address how this was done. So, here it is!
You will always push your needle down from the top, and pull it out through the bottom. Every stitch will be done exactly the same way. This is how the loop for the segment is made.
When you loop back up to make your second stitch (and each subsequent stitch as well), you’ll need to pull the twine with even pressure so that the resulting segments of your pumpkin are all about the same size. After each stitch, pause and check that things are remaining even, and make adjustments as you go. You won’t be able to easily adjust at the end after all the stitches have been made.
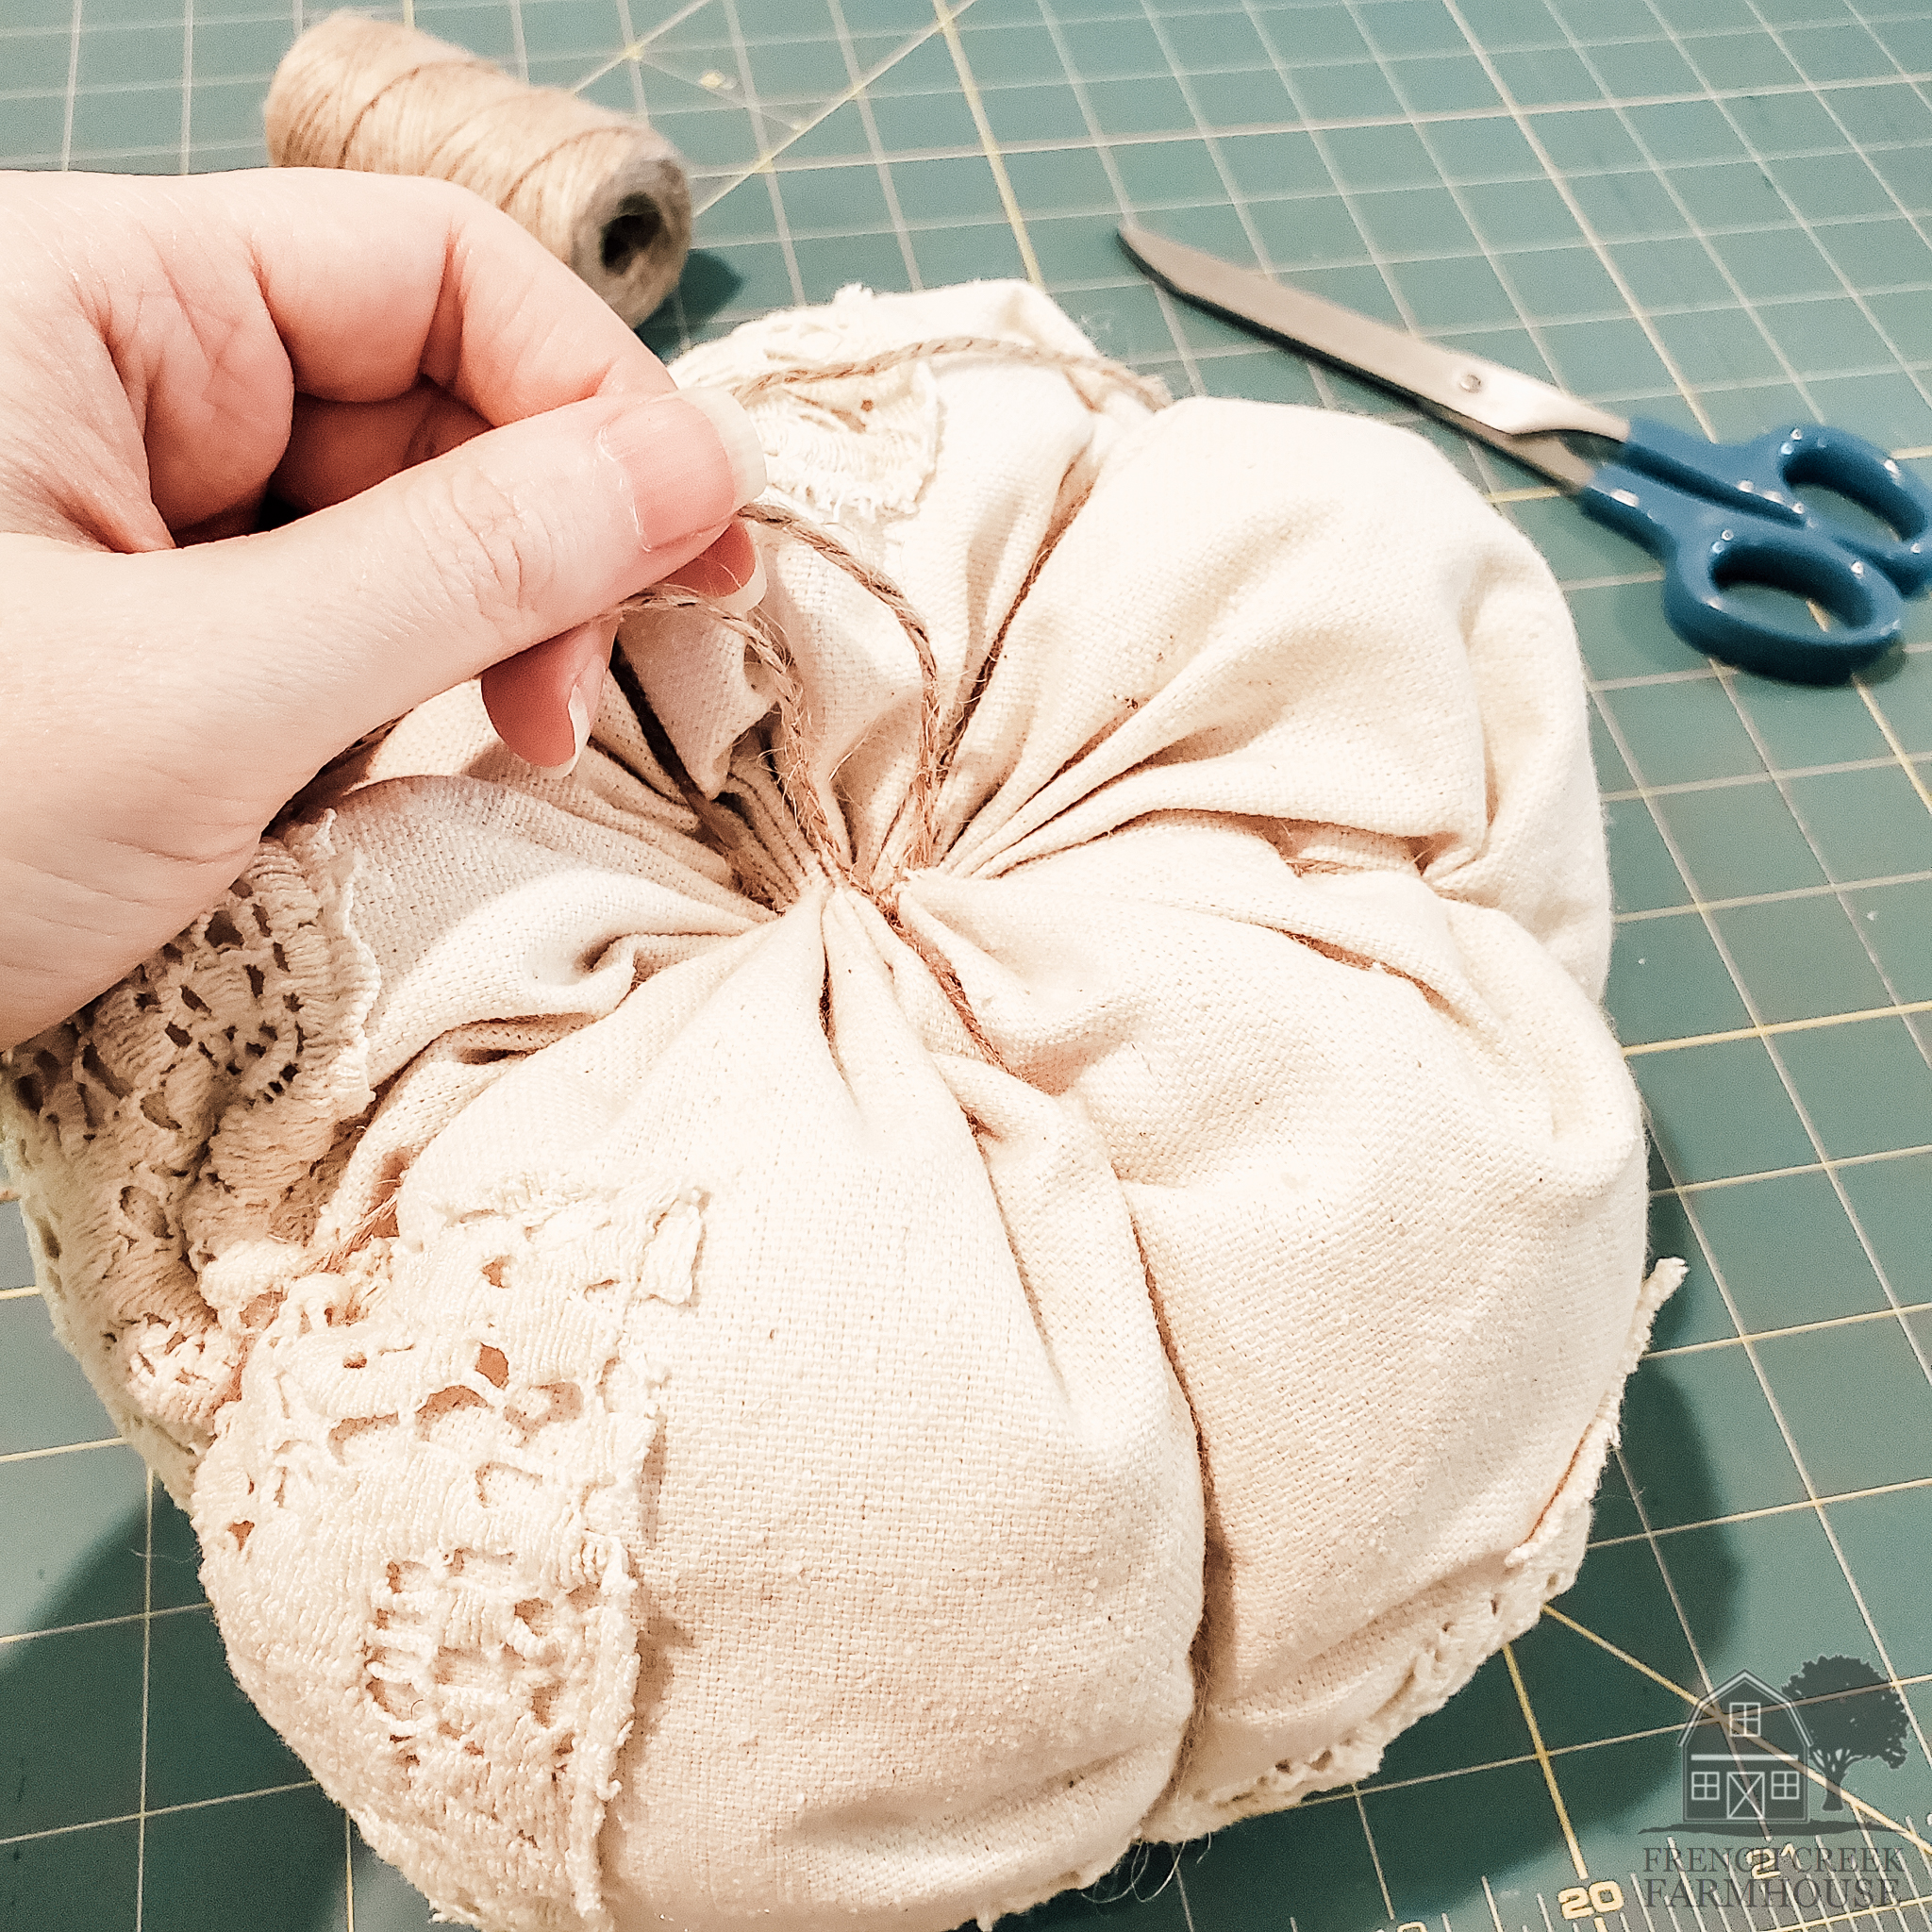
14. After the last loop, you’ll tie off this end of twine to the tail that’s still sticking out of the top. Keep this length of twine nice and long–you’ll use it for securing your stem.
Also, notice how you can no longer see the hole that was at the top with your gathering stitch? It’s now almost completely hidden by the pleats of the fabric and the jute twine stitches that went through it.
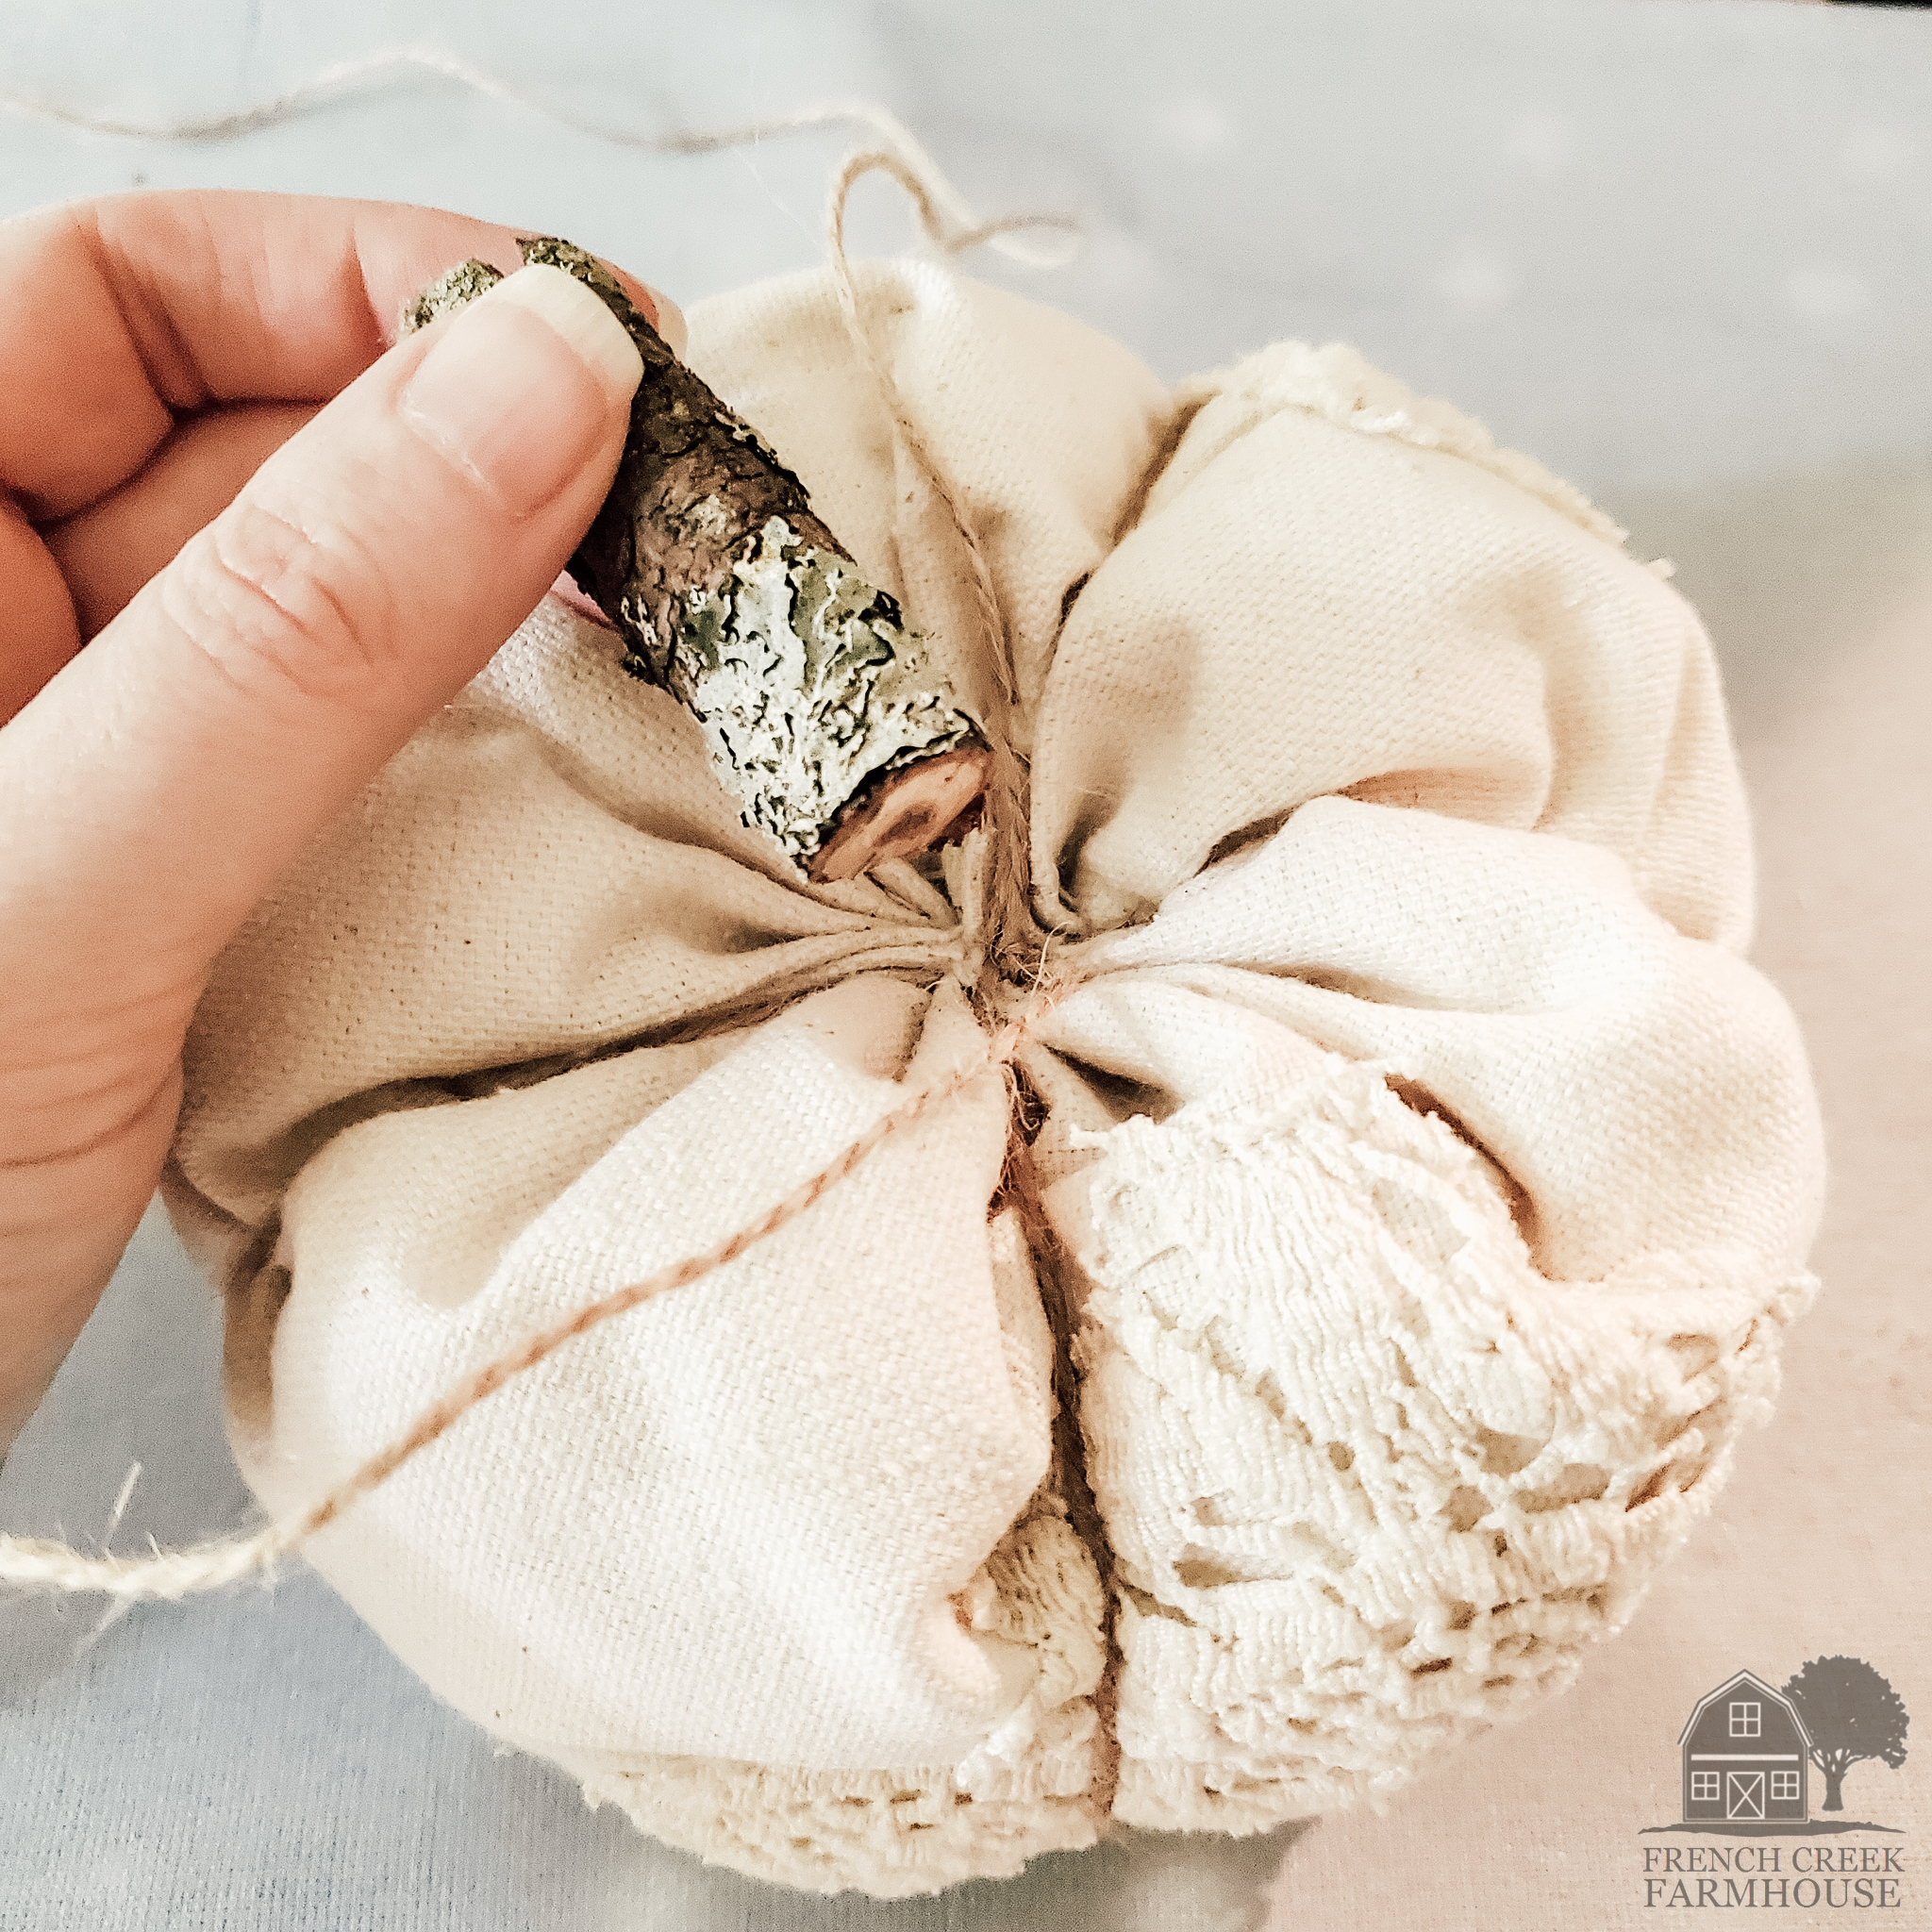
15. Cut a length of stick for your pumpkin’s stem. You can get all kinds of creative here, and you can even use dried pumpkin stems from last year’s harvest!
Hot glue your “stem” end and press it onto the top of your pumpkin. Make sure the jute twine is still left trailing out the sides as you see in the above photo.
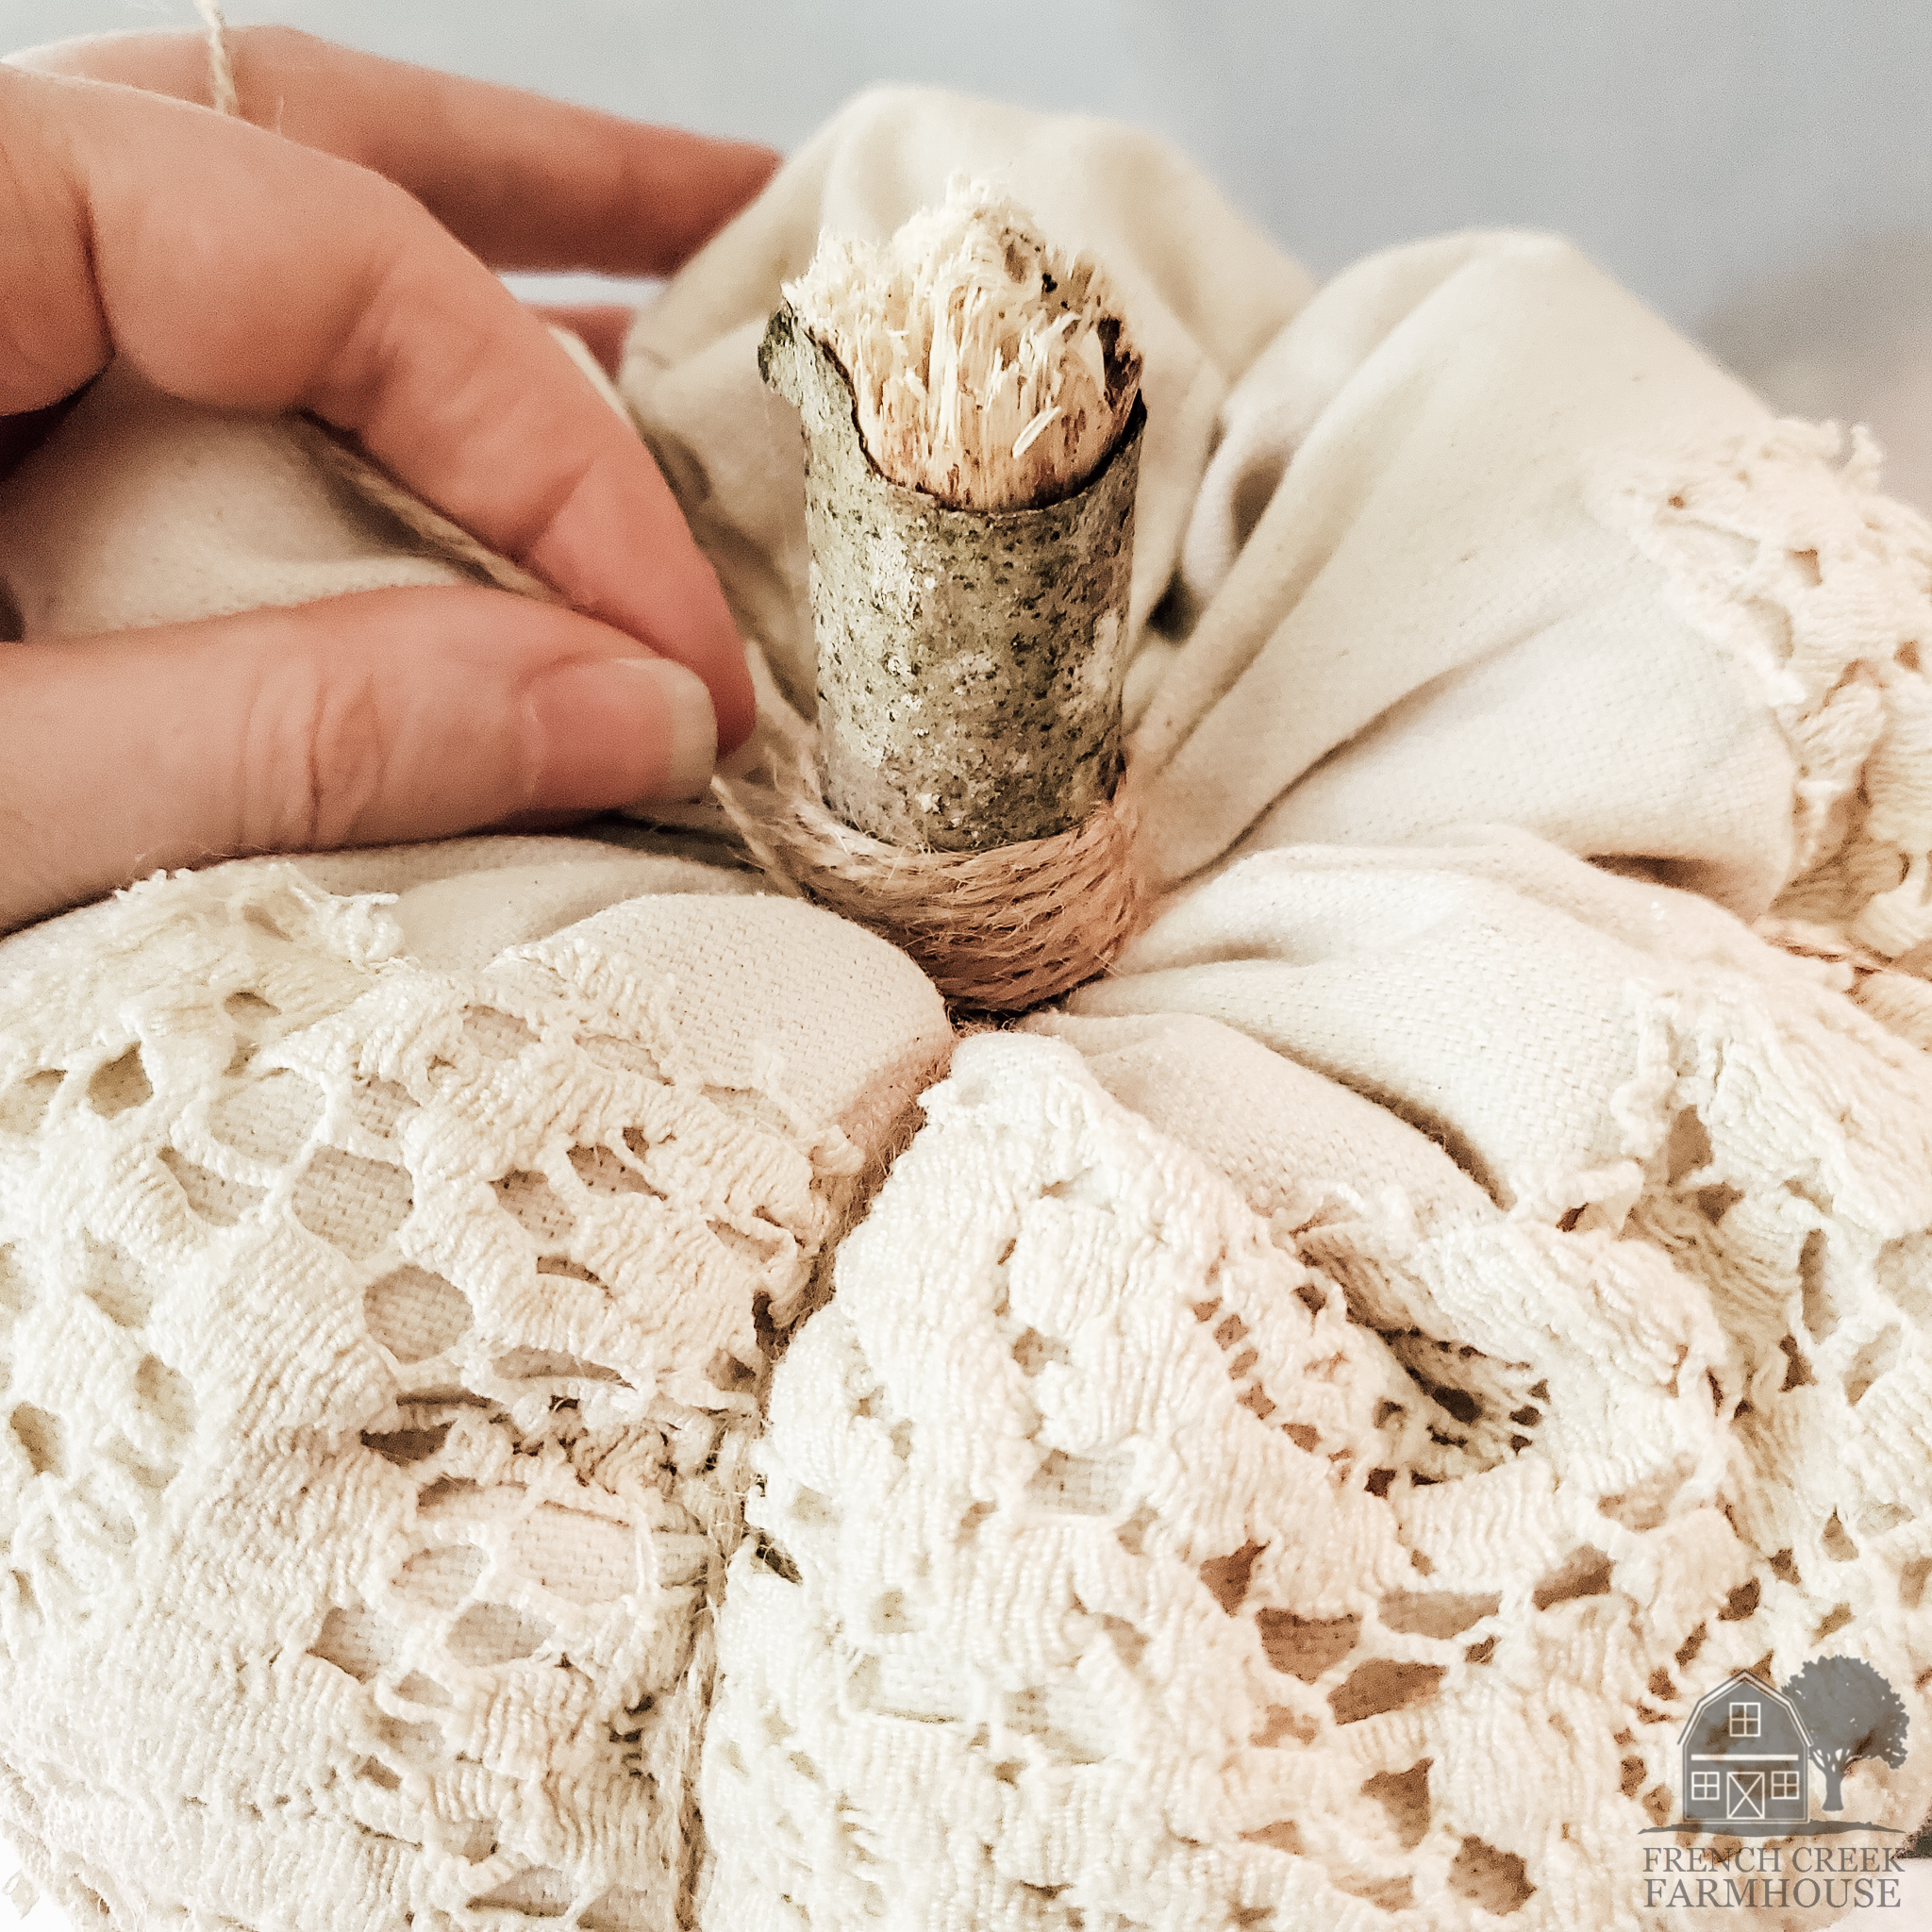
16. Use the remaining ends of twine to wrap the bottom part of your stem. Hot glue as you go to keep it secure. This will make the stem more stable, and also create a finished look to the top of the pumpkin.
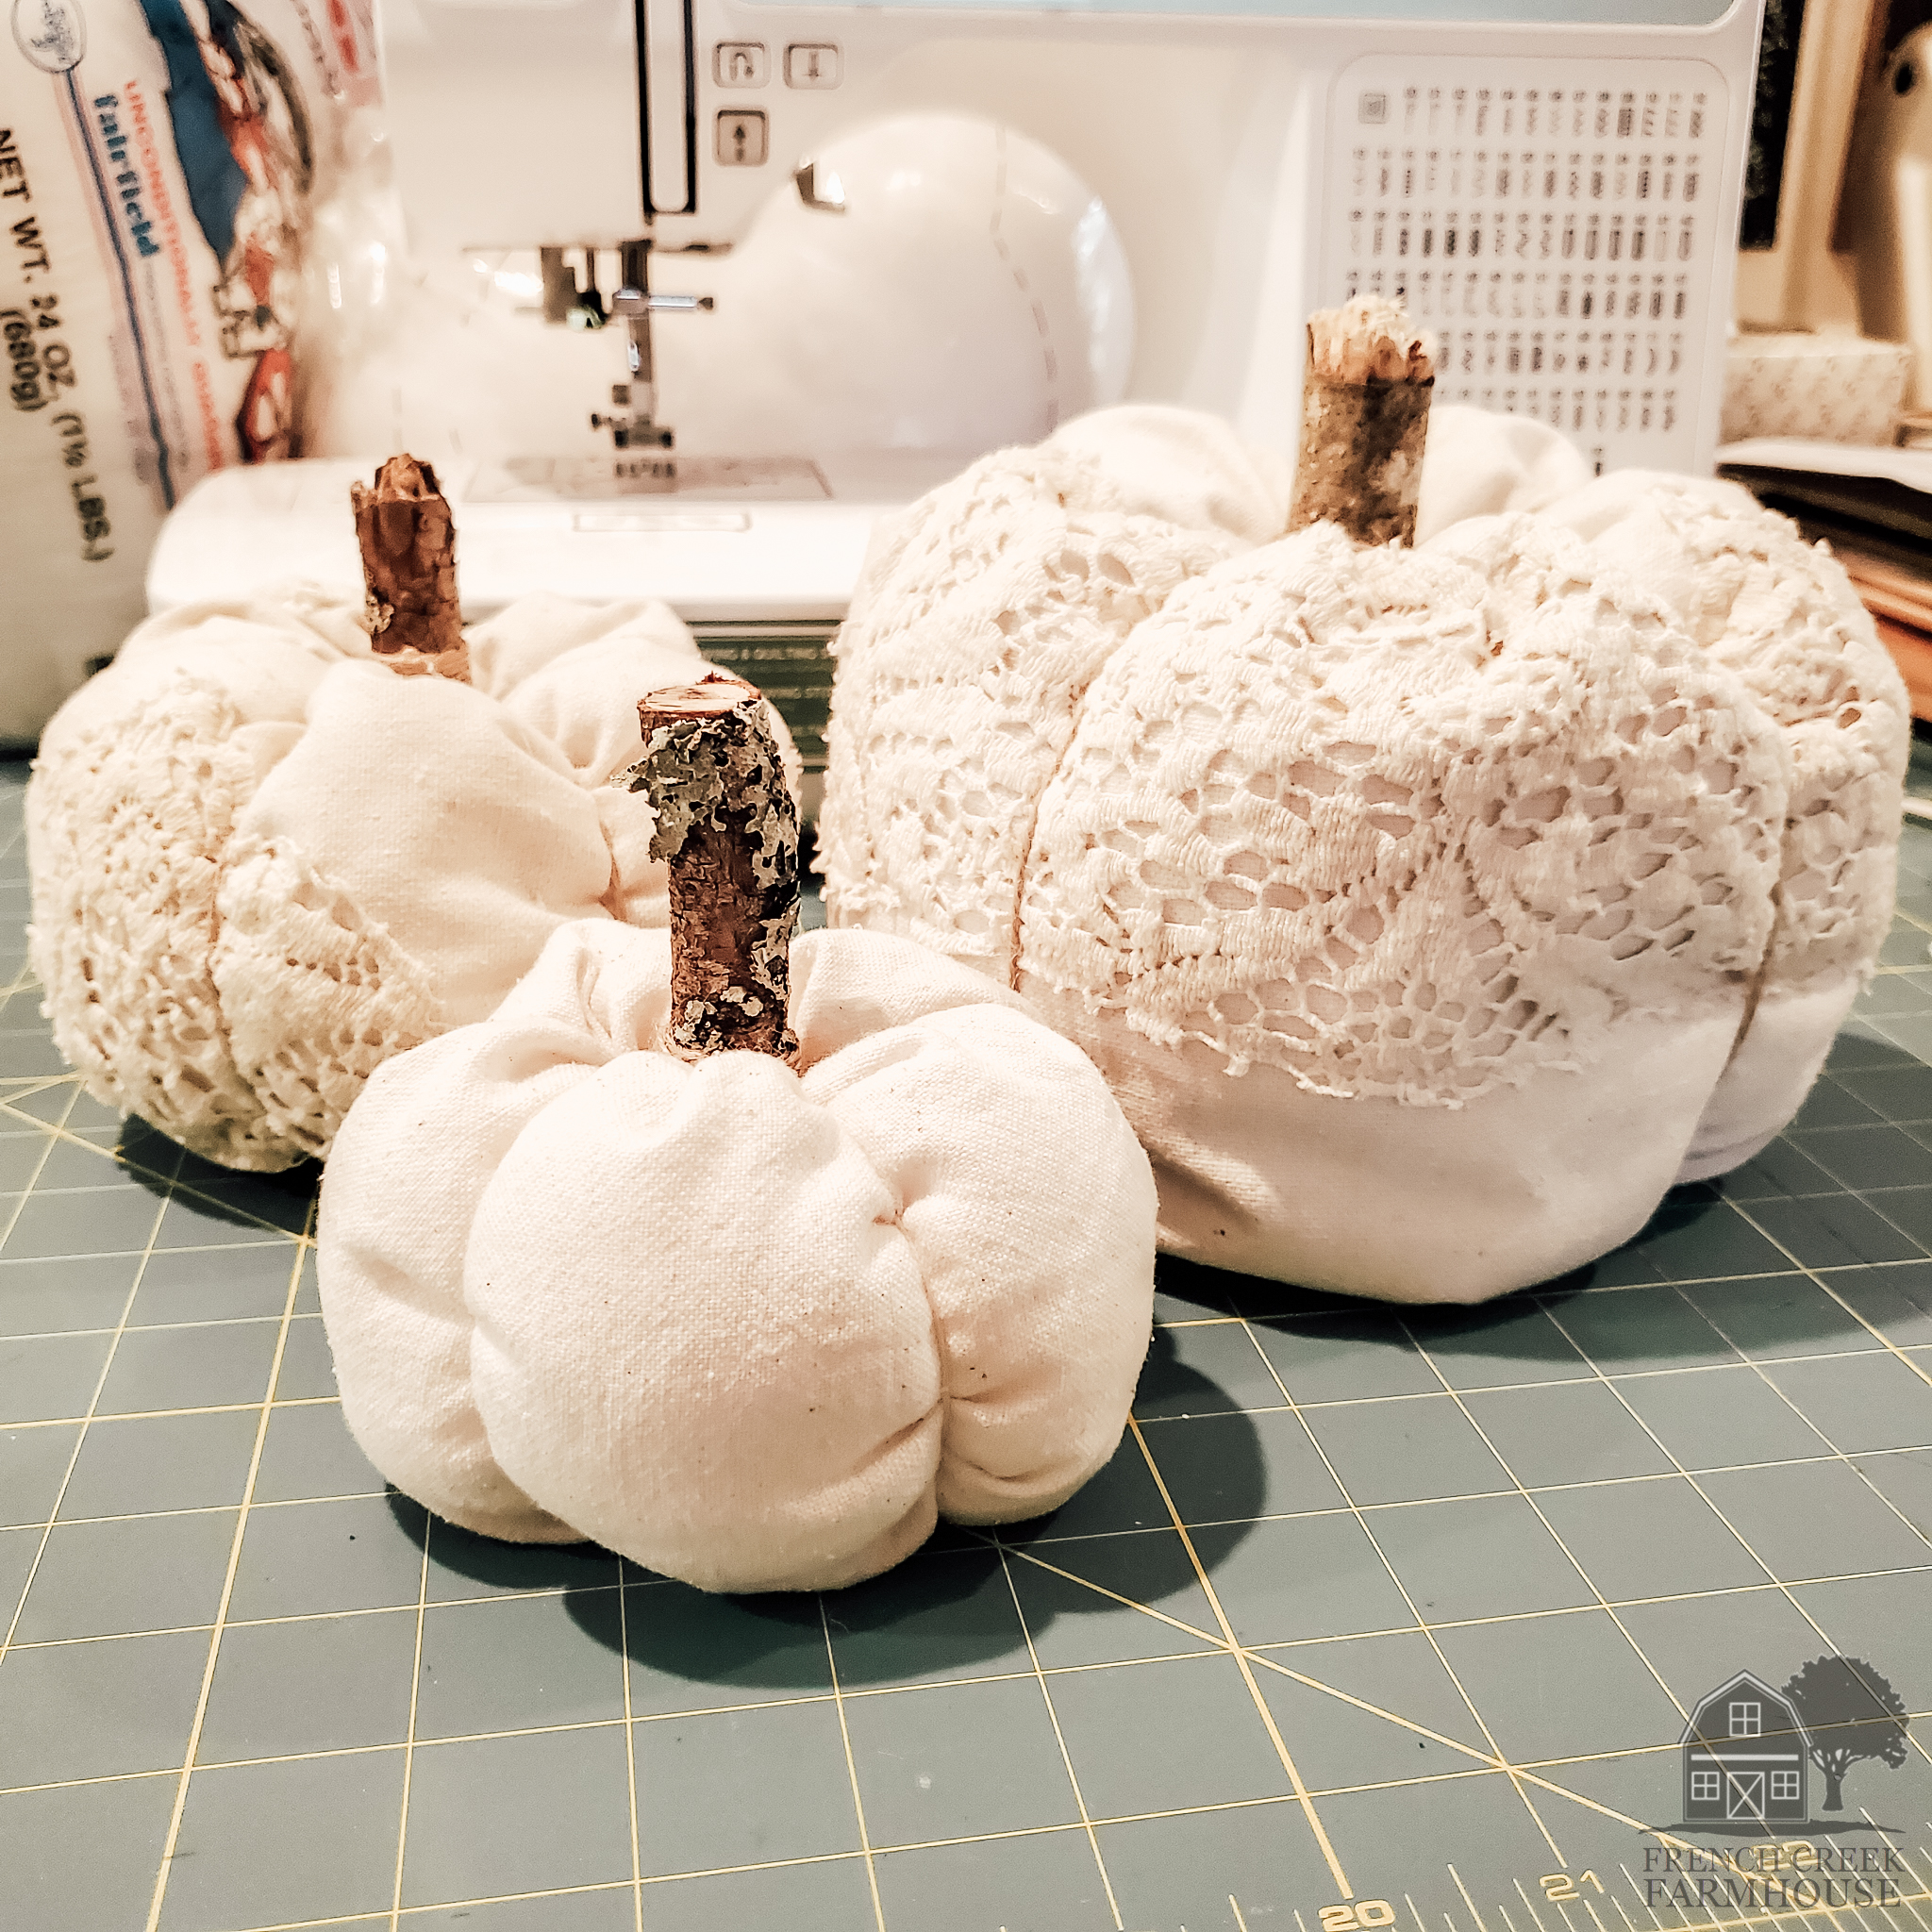
Now that you’ve finished your first fabric pumpkin, you can use these same steps to make a variety of sizes and styles!

If you enjoyed this project, be sure to sign up for my newsletter, and never miss another DIY! You’ll get access to all of my FREE printables, patterns, and lots more!
To find more of my past DIY projects, just click on any category:
Crafts | Sewing | Fixer Upper Farmhouse Renovations

