DIY Face Masks
With shortages of medical supplies becoming a serious issue amidst the coronavirus crisis, many hospitals and medical professionals have started requesting help sewing fabric face masks. This pattern for DIY face masks is very simple, even for a novice at sewing.
My own sister is a nurse at a hospital here in Washington state. Due to critical shortages of supplies, they have started using fabric face masks provided by the public. This need is what prompted me to create a tutorial in hopes that, together, we can all make a difference in fighting this illness and protecting our loved ones.
{Related: Our One-Year Covid Anniversary}
Two important things to know about this pattern:
1. Fabric face masks are not the ideal solution for preventing the spread of contagious illness. The best option will always be N95 masks, if possible. However, the shortages of supplies in some areas (like in our state) have reached a critical point, and hospitals are now using them because they don’t have other options. Before you make masks for your own local hospitals, it’s a good idea to try to confirm whether they will be able to use them.
2. I consulted with my sister, a hospital nurse, before creating this pattern to try to address some of the requirements for better masks. The best fabric masks meet three important criteria:
a) It contains THREE layers of fabric,
b) there’s an option for a wired nose piece to create a more secure fit, and,
c) it includes a pocket to accept a filter.
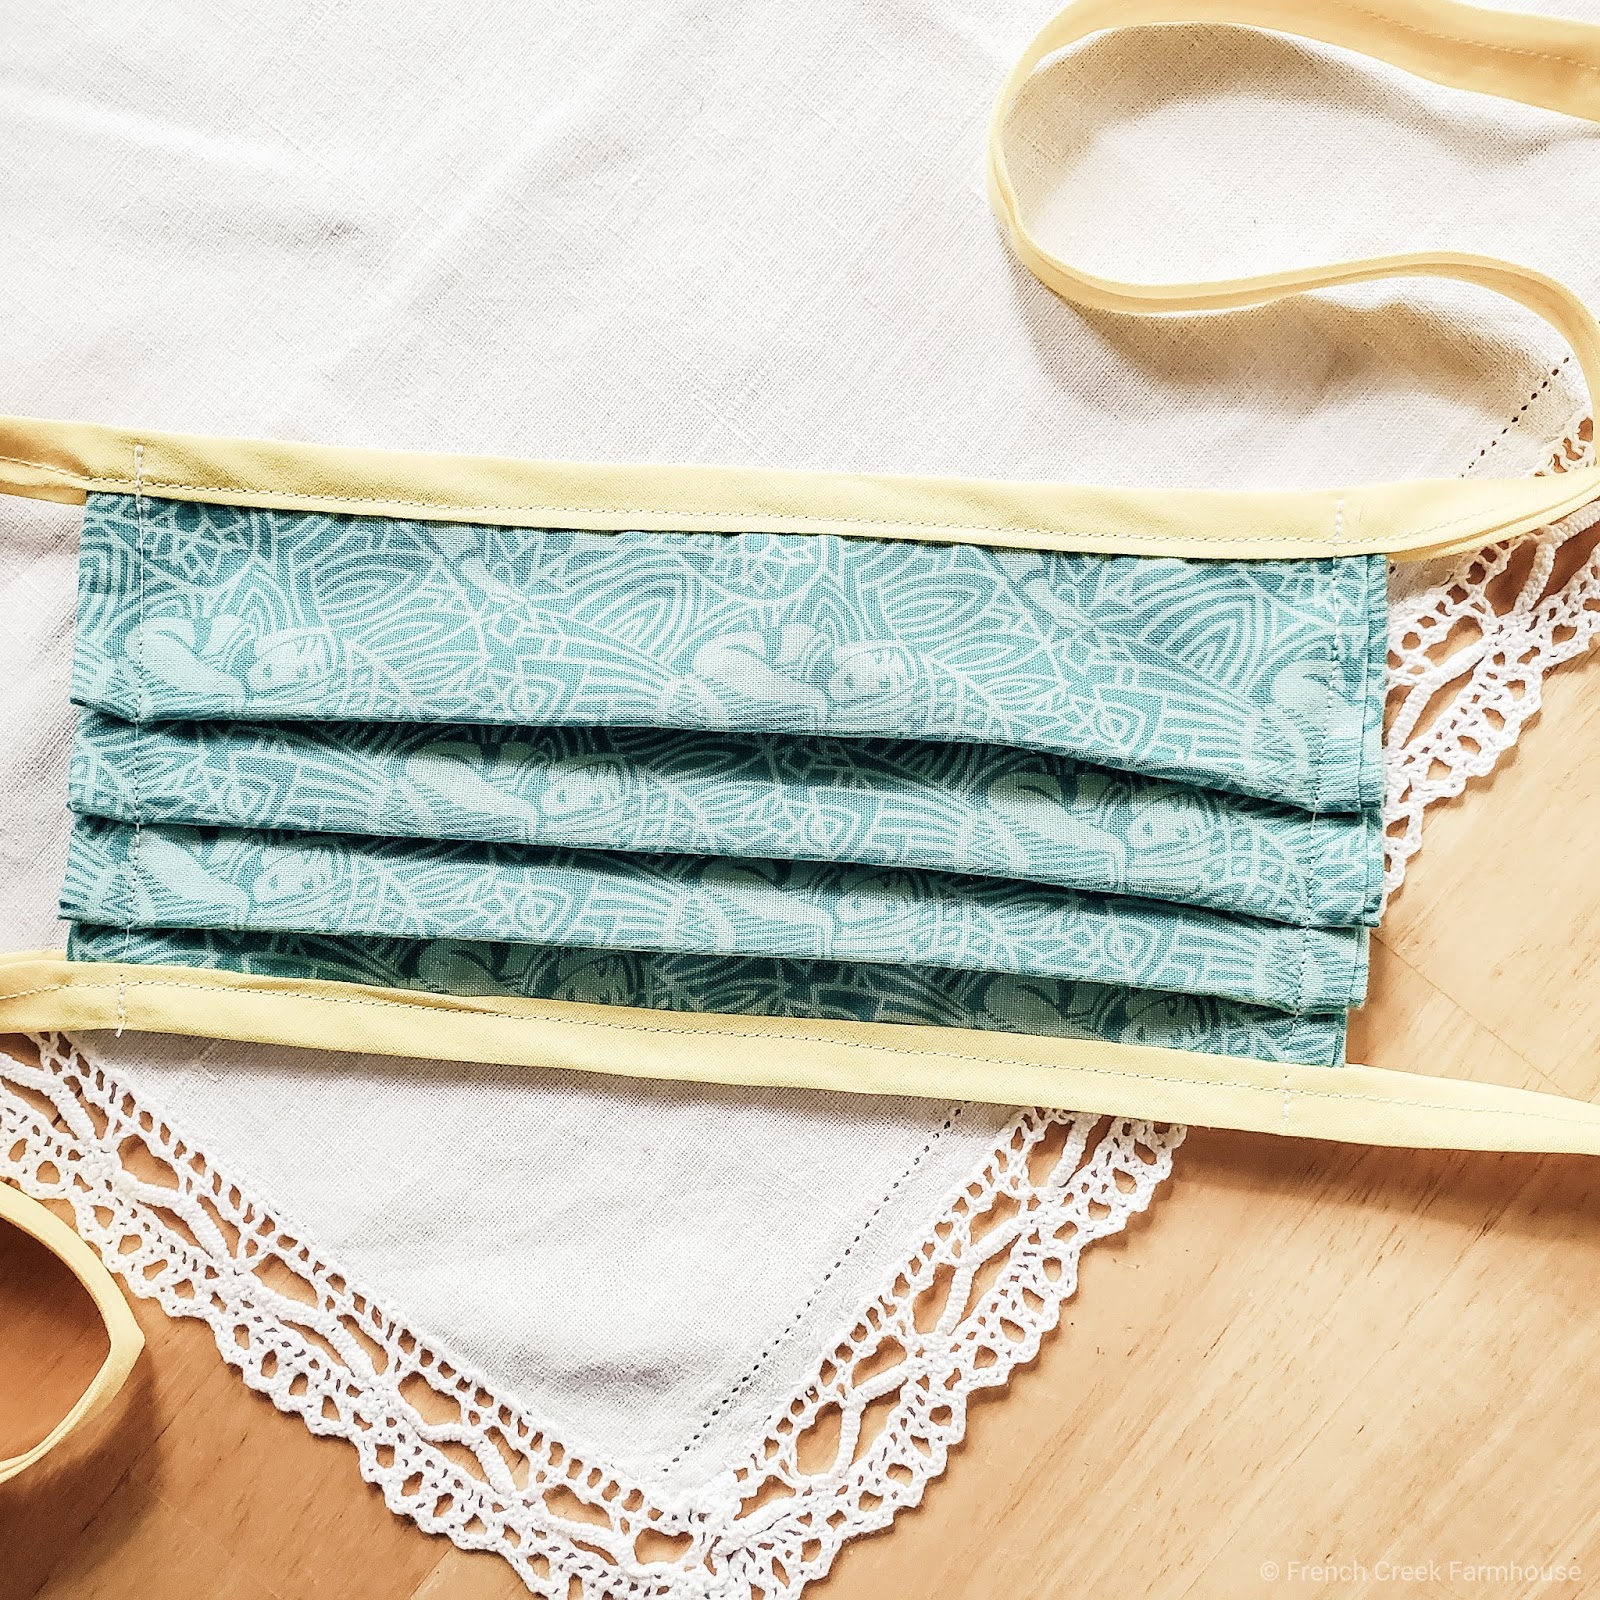
There are two additional features about this pattern that make it more useful and efficient. Because elastic is becoming difficult to find, it uses fabric ties instead. If you’re going to wear your mask for a long period of time (like medical professionals do), the elastic that goes over your ears can become pretty painful. Fabric ties help to alleviate that fatigue.
Also, this pattern is made to fit adults, however it can easily be scaled to fit children (and I’ve provided info on how to do that). It’s important that kiddos have masks to fit their smaller faces for best protection, so please make sure their mask is properly fitted.
A note regarding filters…in my sister’s hospital, they are cutting up operating room drapes to fit inside the masks to act as a filter. You could also consider cutting up HEPA filters, as well (but be sure to check the manufacturer’s warnings as some may contain tiny fibers inside the filter that should not be exposed through cutting them open). I’ve also heard of folks using coffee filters and interfacing, which are both more affordable options.
Watch the complete video tutorial, download a printable copy, or scroll below for a step-by-step tutorial with photos.

Disclosure: This is not a sponsored post, and I have received no compensation for sharing anything that follows. Some links within this blog may be affiliate links, and I might earn a commission if you make a purchase through that link. This usually amounts to cents, not dollars, and helps to support the projects featured on this blog. I only recommend products from companies that I have found to be trustworthy. Read my full disclosure here.
SUPPLIES
100% cotton fabric, pre-shrunk (quilting fabric is great because it’s tightly woven)
1/2″ bias tape, double fold
Floral wire (or jewelry wire)
Sewing machine
Thread
Mat
Rotary cutter
Ruler/cutting guide
Pins
Scissors

DIRECTIONS
(Note: Begin and end each piece of sewing by back-stitching to lock. These masks need to withstand frequent washings without fraying.)
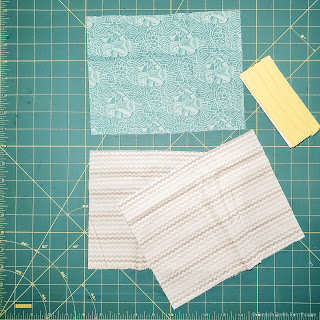
1. Cut fabric into rectangles measuring 9″ x 7″ (or 7″x5″ for children). You will need three pieces of fabric per mask.
Ideally, you should use two pieces of light/white colored fabric, and one piece of colored fabric so that practitioners can easily determine which side of the mask is the inside versus outside. This tutorial follows that direction so that you can more easily see each step in the process.
Also cut two pieces of bias tape, one 45″ long, the other 40″. If you cannot find bias tape, here is a great tutorial for making it yourself.
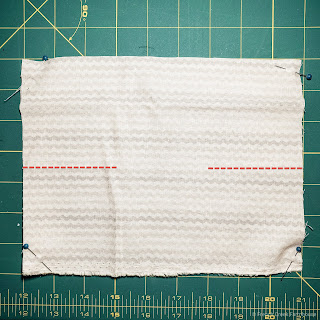
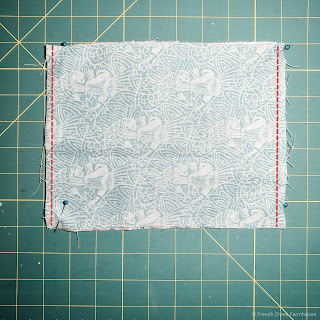
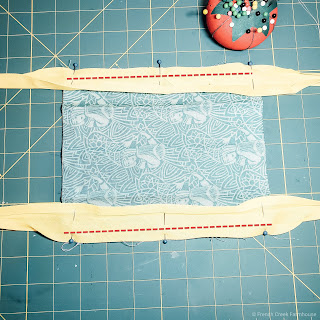
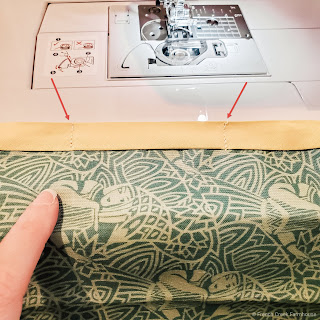
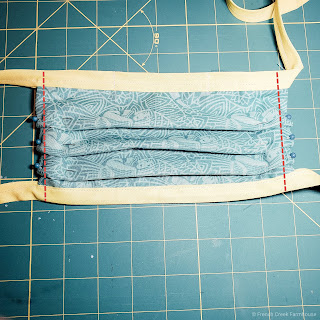
2. Pin light colored fabric, right sides facing each other. Find the center of the fabric, as shown by the dotted lines in the photo, and sew 3″ along that line from each edge, leaving the center open.
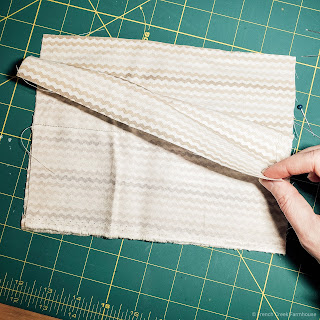
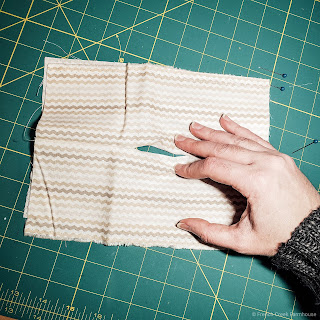
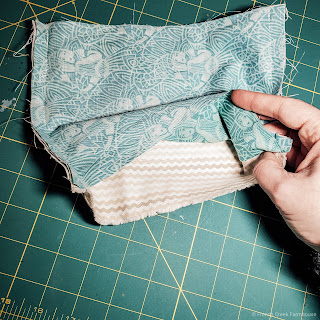
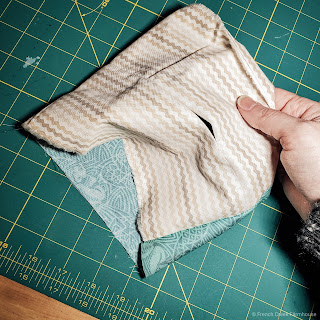
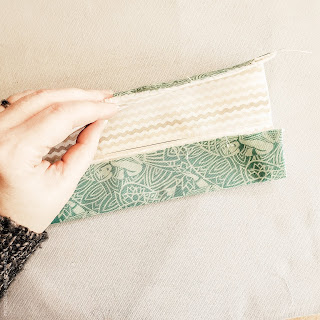
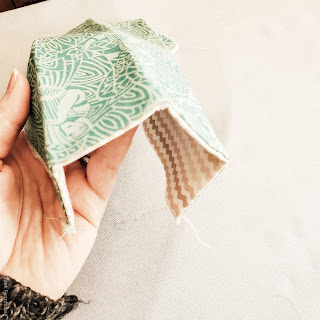
3. Fold the corners to meet the opposite side. Do this with both layers so that the result looks like the second photo below (with right sides now facing out). This is now the inside layer of the mask, and the hole in the center is where the filter can be inserted.
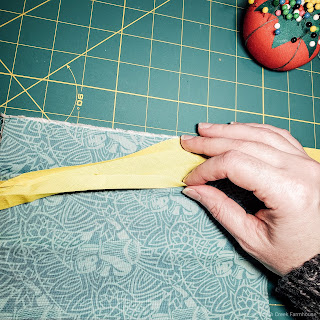
4. Pin the dark colored fabric to the piece you created in step 3, right sides together.
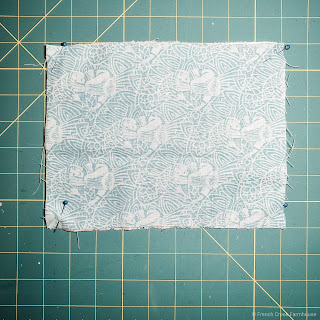
5. Sew the short sides using 1/4″ seam allowance, as shown by the dotted lines in the photo.
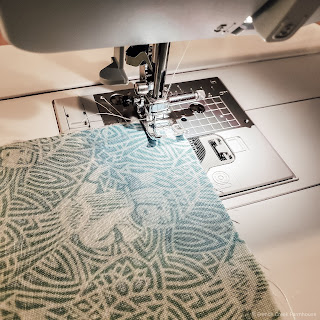
6. Turn the piece right side out, and press seams flat.

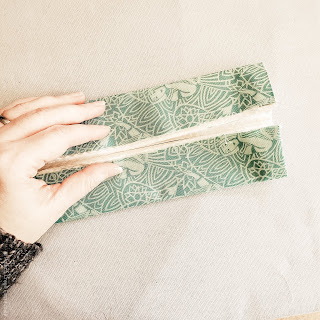
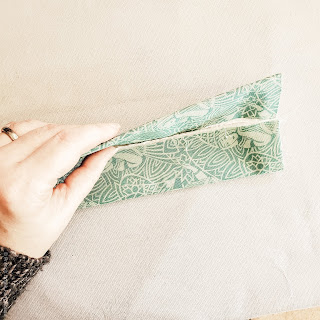
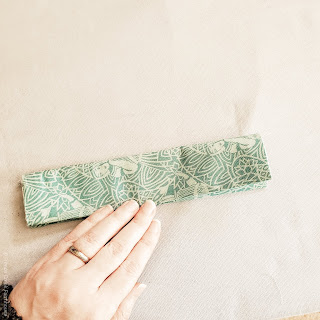
7. With the inner layer facing up, fold the mask in quarters (from the top/bottom to the center, then in half) as shown in the photos. Press with a hot iron. These lines will be used to create the pleats.
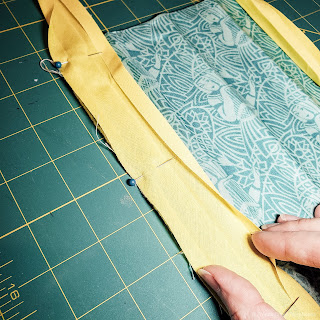
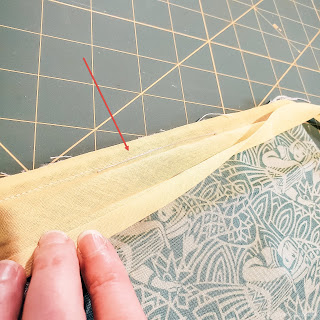
8. Open the double-fold bias tape. With the outside layer facing up, pin right sides together along the top and bottom edge of the mask. Sew in place as shown by the dotted lines in the photo below. The fold of the bias tape creates a natural line for you to follow when stitching. The longer length of bias tape will become the top edge of the mask.
9. Nose Piece (optional): A nose piece makes the mask much more useful. You can use floral wire, jewelry wire, or even cut up strips of aluminum pan liners. It should be about 5″ long. The goal is to use a metal that is easily flexible, but will hold its shape too.
If you use wire, as I did, make sure to round the ends so that it does not poke through the fabric and cause injury.
10. Place the wire inside the bias tape, on the front edge at the top of the mask (the longer piece of bias tape is the top), as shown in the photo.
11. Enclose the wire by stitching on each side so that it stays in place at the center of the mask. Be careful not to stitch over the wire. Then, stitch along the entire length of each piece of bias tape to finish the edge of the mask.
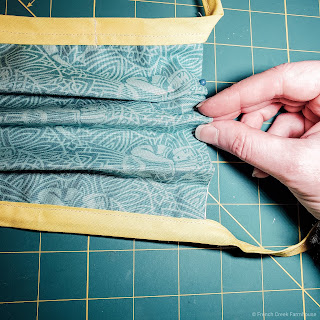
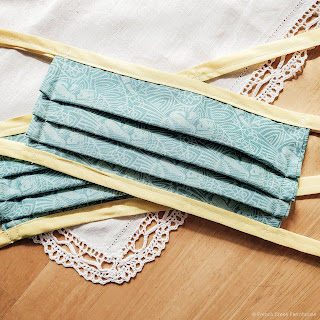
12. Next, create the pleats using the creases you previously ironed into the fabric as a guide. The pleats should all face down from the top of the mask and be 1/2″ each. Pin each pleat, and then top stitch to secure at 1/4″.
I hope this tutorial has been helpful, and I hope we can all make enough masks to fill the gap during these difficult circumstances.
I encourage you share this post and pin to Pinterest to help others find this resource! Feel free to ask any questions in the comments below, and I’ll do my best to get back with you quickly!


This made me tear up. LIterally. It's so amazing to see people using their talents in such helpful ways. Sewists, card makers, bloggers, etc. Everyone seems to be really coming together in this time of great need. Thank you for sharing.
Thank you so much for the sweet note, Dawn! These are scary times, for sure, and there's so much need right now. I only wish I could clone myself and do so much more. xo
Thank you so much for sharing this post and for your help in combating this crazy virus!
You are so very welcome! I hope it was helpful! xo
Thank you for a great tutorial and for being so willing to help out. My husband is also in the medical field and I worry every day about his lack of PPE supplies. Prayers for your sister and stay safe and healthy. #HomeMattersParty
Sending lots of good thoughts to your husband, Donna! We will keep you close to our hearts during this trying time! xo
Thanks for such a timely and helpful post Kristi.
I'm so happy that you shared how to make the face masks at Create, Bake, Grow & Gather this week. I'm delighted to be featuring them at tomorrow's party and pinning too.
Stay safe my friend,
Kerryanne
Thank you so much for featuring this pattern, Kerryanne! I hope it helps many friends during these tough times. xo
Thank you so much for these detailed instructions. I've been wondering the best way to make these from what I have on hand. Bless you for being so helpful!
Thanks so much for joining the Grace at Home party at Imparting Grace. I'm featuring you this week!
You are wonderful, Richella! Thank you so much for spreading the word and helping others stay safe! xo
I have lots of crafty friends who have been making masks like mad and sending them all over the place. This post is perfect and very helpful to others who may want to contribute. Thanks for sharing and linking up.
Shelbee
http://www.shelbeeontheedge.com
It's amazing what the crafting community can do working together! So inspiring! xo
What a timely project. Your masks are beautiful and are inspiring me to dust of my own machine!
I'm featuring your project in this week's DIY Salvaged Junk Projects 521. Thanks for linking up!
Thank you so, so much for helping get the word out about this pattern! I hope it's helpful to many others looking for an easy pattern right now! xo
Thank you for the mask tutorial. I have been sharing it everywhere. I was trying to find a HEPA filter that can be cut up and so far the ones I found say not to cut because they contain glass particles. I did come across a tutorial using a Hoover HEPA vacuum bag. Is that what could be use in the mask? Thank again. I love all your projects and tutorials.
Hi Kat,
Thank you so much for helping to get the word out! You have such a wonderful heart!
My sister's hospital is cutting up operating room drapes to fit inside and act as a filter. I'm definitely not an expert about filtration, so it's tough to give any advice, per se, but I do know that's been their strategy. We buy cut-to-size HEPA filters for our Honeywell air purifier here at home, so that might be an option?? I haven't used them for a mask, so I'm not sure if that's a possibility, but I do know that there are HEPA filters that can be cut. I'd recommend always checking in with the manufacturer to see if their product is safe before buying/using anything!
Totally used your pattern, Kristi, and featured you on a DIY Face Mask collection today on my blog. (do-follow, non-pinnable, one image). Let me know if that's a problem and I can take it down. Thank you!
Oh… from myweeabode.com 😉