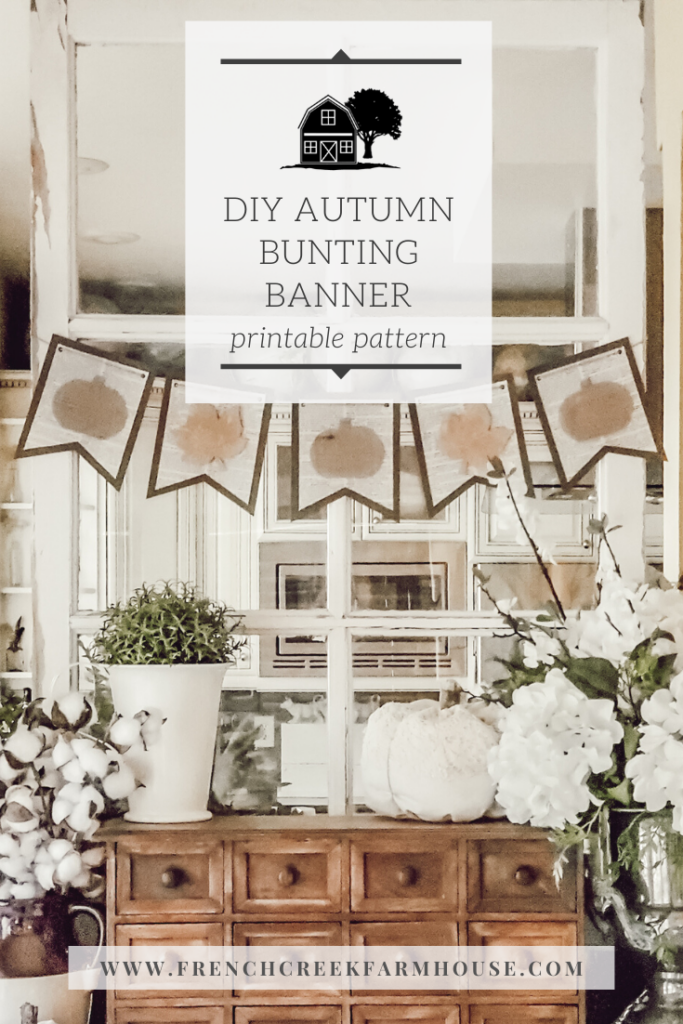
Autumn Bunting Banner

Celebrating life’s moments is such an important part of cultivating gratitude, and that includes the changes of the seasons. No celebration is complete without joyful decor, and this autumn bunting banner is perfect for fall!
Decorating for the seasons has always been important to me. Even as a child, my sister and I would spend hours at the kitchen table with a stack of construction paper, scissors, glue, and our imaginations to come up with new ideas for decorating the front windows of our home.
I’m not sure if there was ever even a time when those windows were free of our creations taped up for the world to see. From paper chains to pumpkins, snowflakes to fluttering hearts, and everything in between–we were always finding ways to express our joy and creativity.
I guess that just stuck inside me because I still do the same thing as an adult. Although the mediums might be more advanced, I still love to use my creativity and imagination to get in touch with the feelings and joys of life’s celebrations.
It’s been a while since I had done any paper crafting, but I wanted to make a fall bunting, and I knew I wanted to use the aesthetic of old books to do it. I love books, and there’s rarely an area of our home that’s decorated without them, in some form or another.
{ Related: Decorating With Old Books }
This autumn bunting banner is an easy craft that you can do with basic supplies, and the possibilities are truly endless with the printable pattern I’ve created for you!
Be sure to pin this post so you can find the pattern again later, too!


Disclosure: This is not a sponsored post, and I have received no compensation for sharing anything that follows. Some links within this blog may be affiliate links, and I might earn a commission if you make a purchase through that link. This usually amounts to cents, not dollars, and helps to support the projects featured on this blog. I only recommend products from companies that I have found to be trustworthy. Read my full disclosure here.
What is a bunting banner?
Bunting is a type of decoration that was historically used on British naval ships. You would see the colorful flags strung up and used as signals, and the officer in charge of hanging them was (and still is) known as the bunts (the ship’s communication officer).
As for the origin of the word, it’s uncertain. However, the German word bunt means colorful, so that might be a clue!
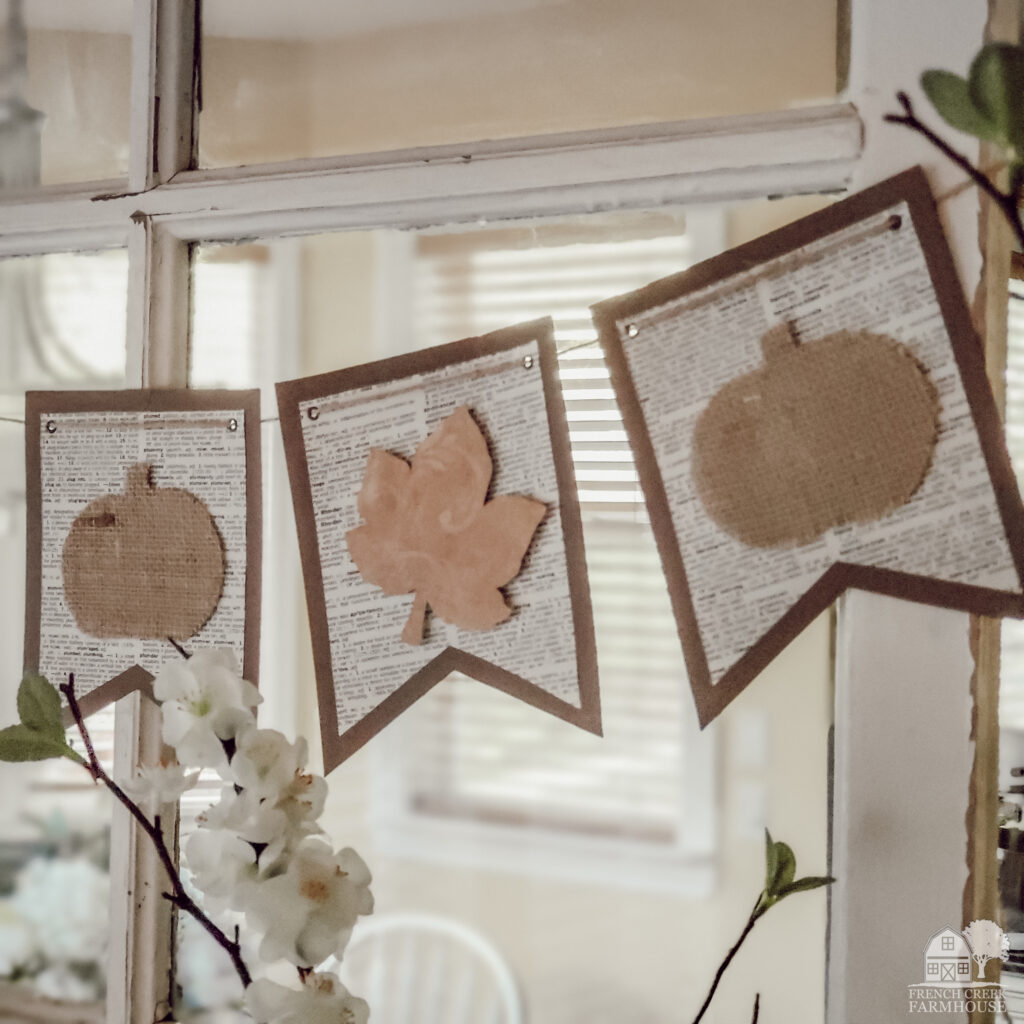
Typically, bunting banners look like a string of flags. The pennants can be square, triangular, tapering, or swallow-tail, like the one I created for you in today’s printable pattern.
Before the 11th century, pennants were primarily square. The forked, or swallow-tail, pennant came into popularity during the reign of Henry III, in the 1200s, and it’s still my favorite of all the shapes.
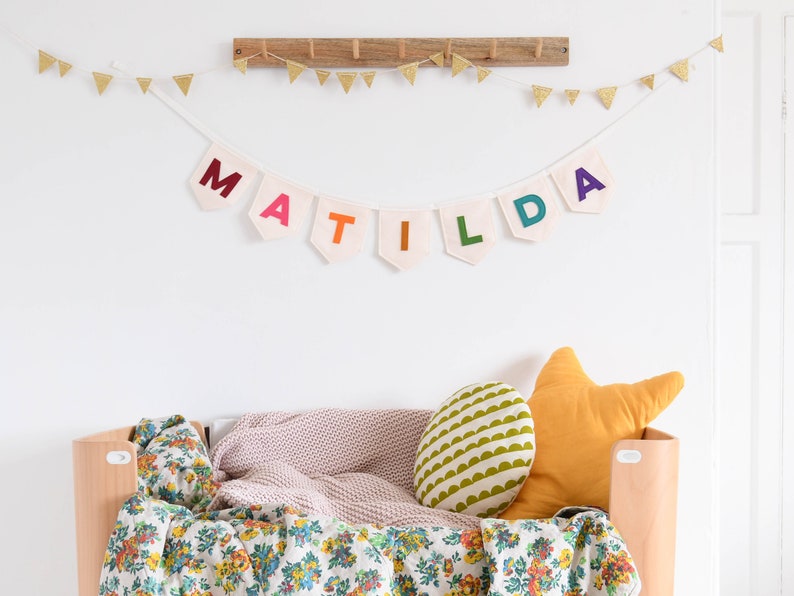
Using Bunting Banners as Decor
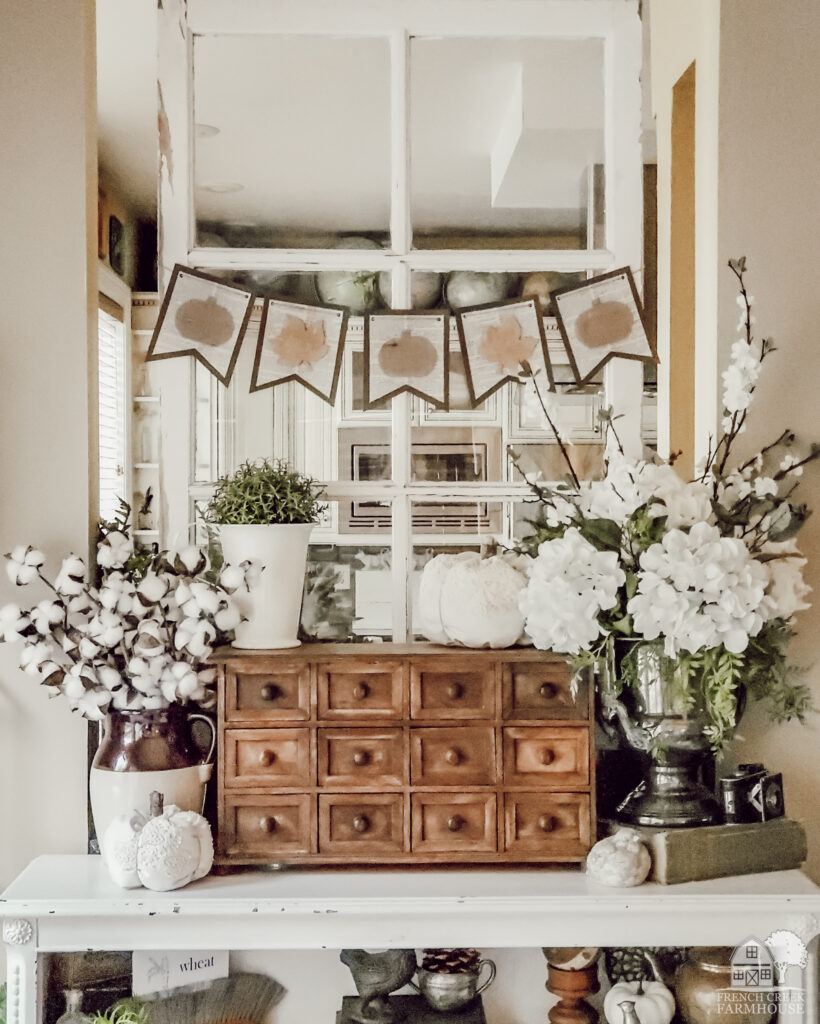
There are so many cute ways to use bunting banners in your decor. I love to string them across windows or shelves, and of course, they look great across a fireplace mantel.
It’s also a sweet wall decoration in a nursery or kids’ playroom, like the one above from House of Hooray.
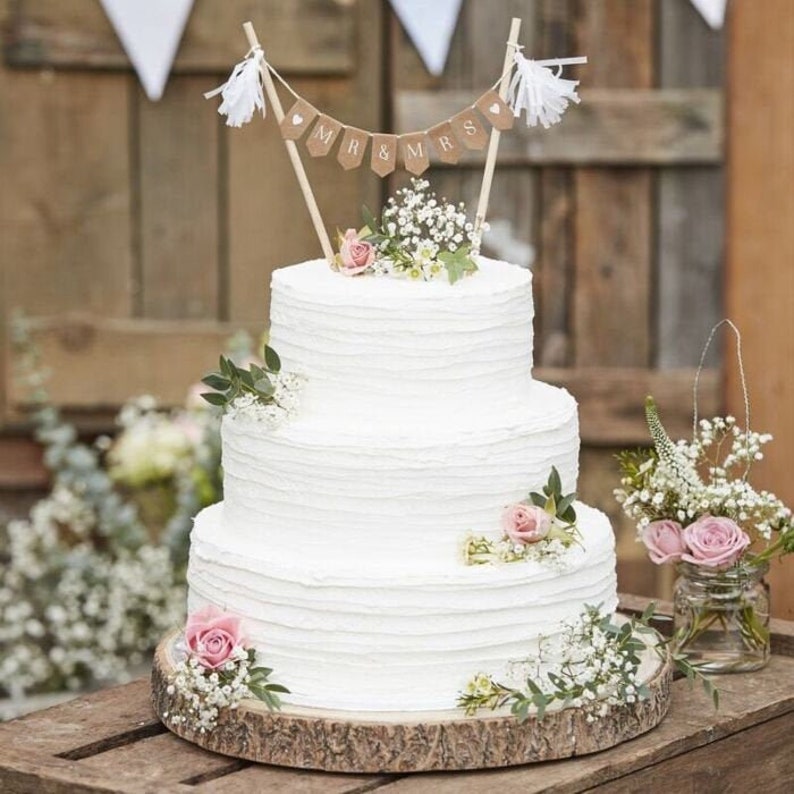
You can even use a mini-bunting as a cake topper, like this one from Hooray Days!
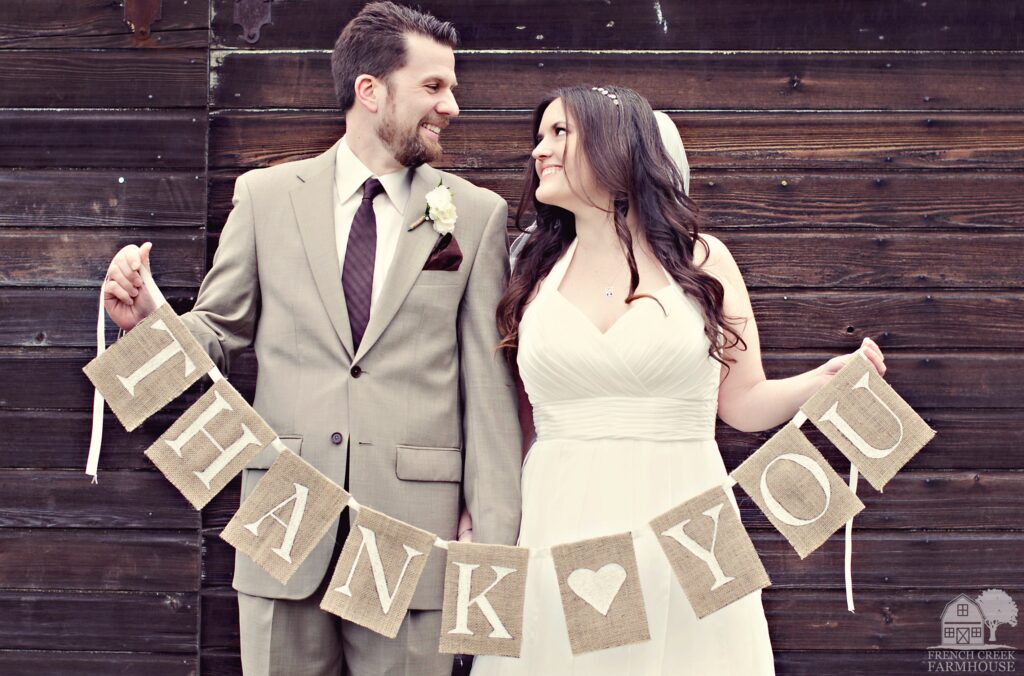
When we got married, I crafted this bunting banner from burlap, and we had our photographer capture this photo of us. We used it to create photo cards that we sent out as custom thank you notes!
No matter how you use your bunting banner, it’s going to be perfect because it will be personally made by you to reflect your unique style!
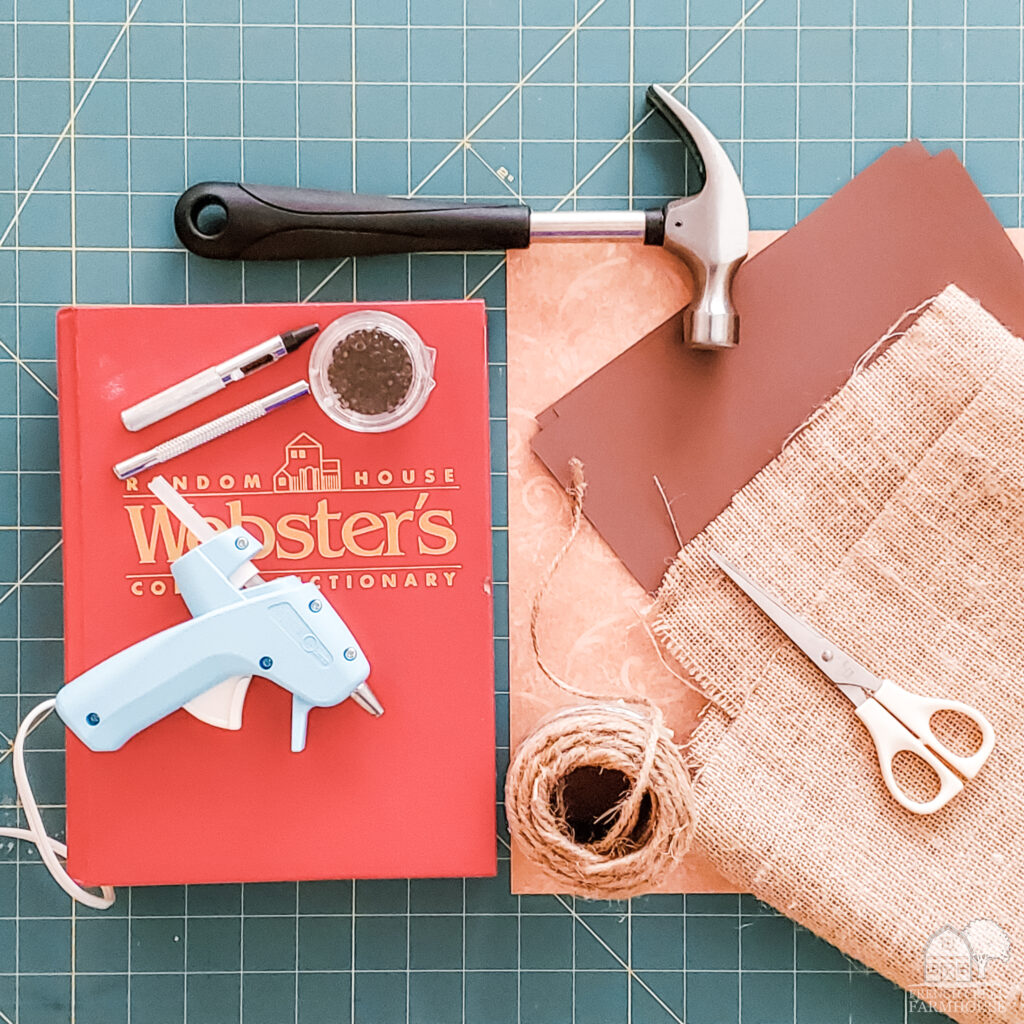
How to Create an Autumn Bunting Banner

- Stiff cardstock paper
- An old book
- Burlap
- Scrapbook paper
- Eyelets
- Eyelet punch and setter
- Hammer
- Craft mat
- Foam mounting tape
- Hot glue gun
- Glue stick, or craft glue
- Jute string
- Pencil or pen
- Scissors
- Autumn Bunting Banner Template (a free printable available HERE to my newsletter subscribers)
- Optional: Lamintor
Give me all the cozy autumn feels!
free Autumn bunting banner pattern
Craft your own fall and harvest decor with my easy-to-use printable pattern, and start celebrating the season today!
1. Begin by gathering your materials and supplies, including the printable Autumn Bunting Banner pattern.
I always strongly recommend laminating your patterns before cutting them out because it not only makes them stiffer, but you can reuse your patterns again and again. I file mine by season/theme so I can easily find them later.
This is the exact lamintor we own, and it gets a ton of use in our house. We’ve never had a single issue with it in over seven years, and it’s so affordable that you’ll find a billion ways to use it!
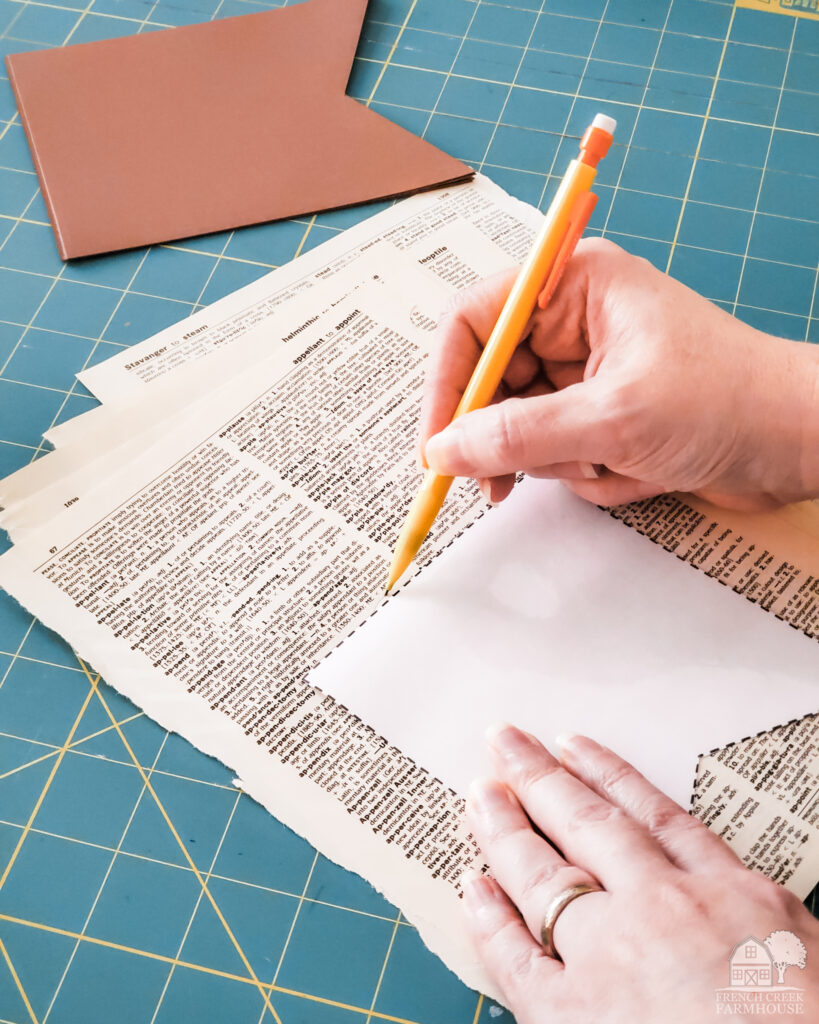
2. After you’ve cut out the pattern shapes, start by tracing the pennant pieces.
To make your banner exactly like mine, you’ll need five total pennants. I layered each of the pennants in my bunting to give them more depth and character. So, for each of the five pennants, you’ll need a large piece made of stiff cardstock (cut on the solid line of the pattern) and a small piece made of a book page (cut on the dotted line of the pattern).
The pattern is sized so that you’ll have a nice even edge when you layer the two pieces.
For the smaller/inner piece, I used an old dictionary that I picked up at the thrift store for about a dollar. I like the type face of old dictionaries, and the pages are nicely yellowed so they give that vintage look that I enjoy. I’ve been using this same dictionary for all of my book-page-theme crafts for years, so it’s certainly an affordable option when it comes to craft paper! You could use any old book, a newspaper, or scrapbook paper–get creative!
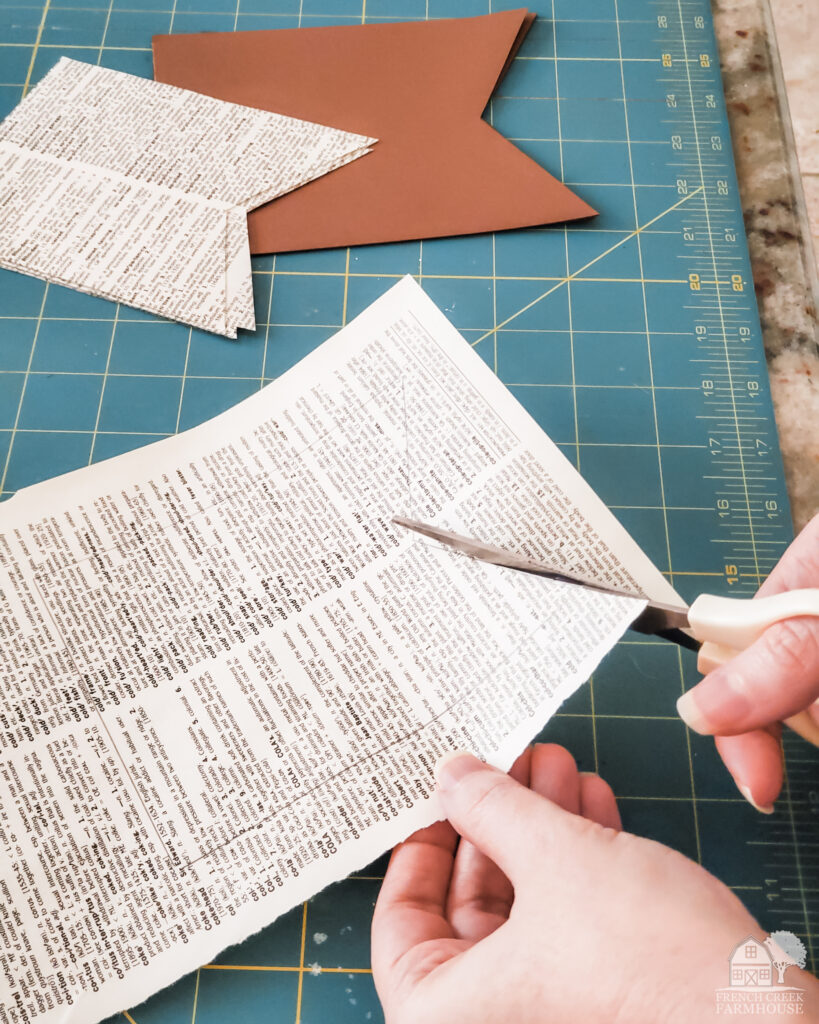
3. After you’ve traced all of the pennant shapes, cut them out.
You might be tempted to stack the pages together and cut multiple sheets at the same time, but I don’t recommend it. Inevitably, the papers will shift a little and the lines you cut will be uneven. Then, when you layer the two pieces, the edges will look wonky.
But–maybe you’re going for a more “imperfect” look, and in that case, you do you!
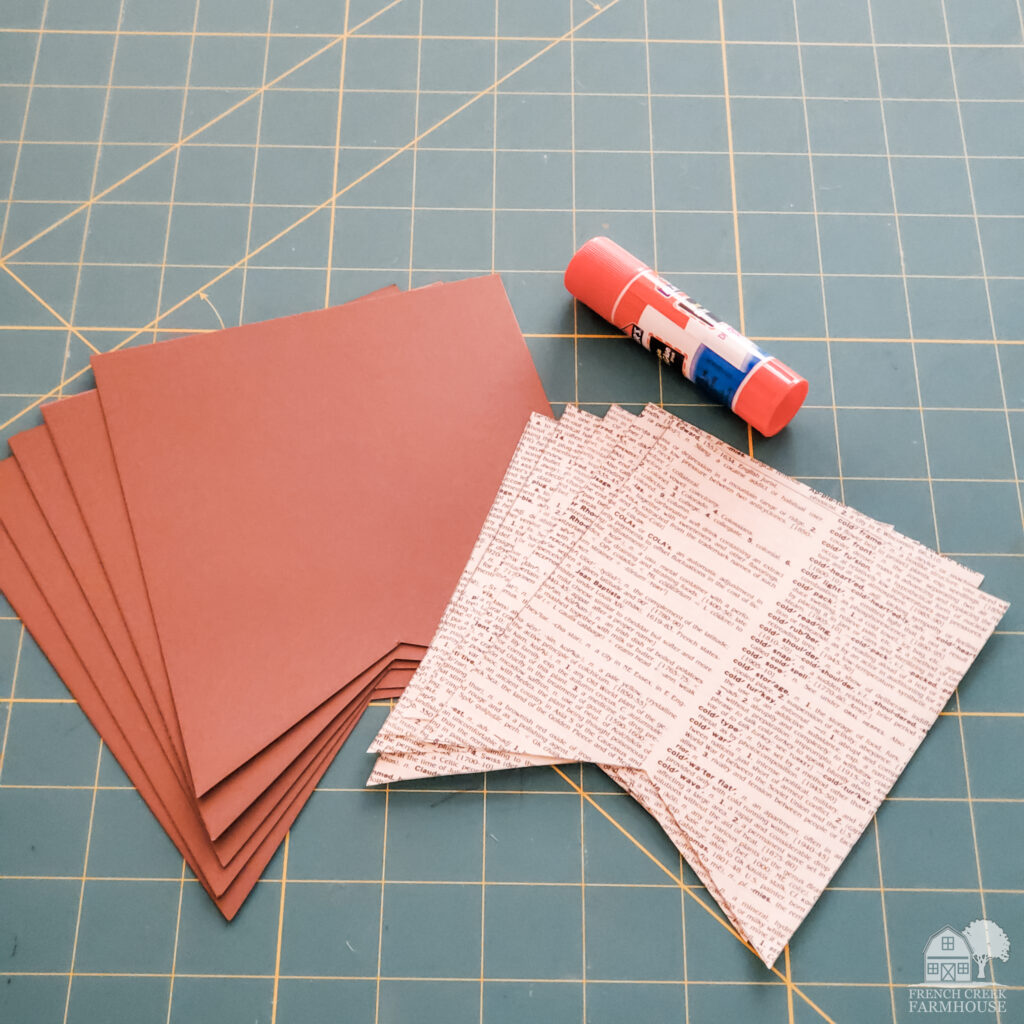
4. Now it’s time to glue the pennant pieces together.
For this, I used a basic glue stick, but you could use any type of craft glue. I will note, however, that the paper of dictionary pages is very thin. So, if you use a thicker glue, the paper might warp a little. Using a glue stick will help to prevent that.
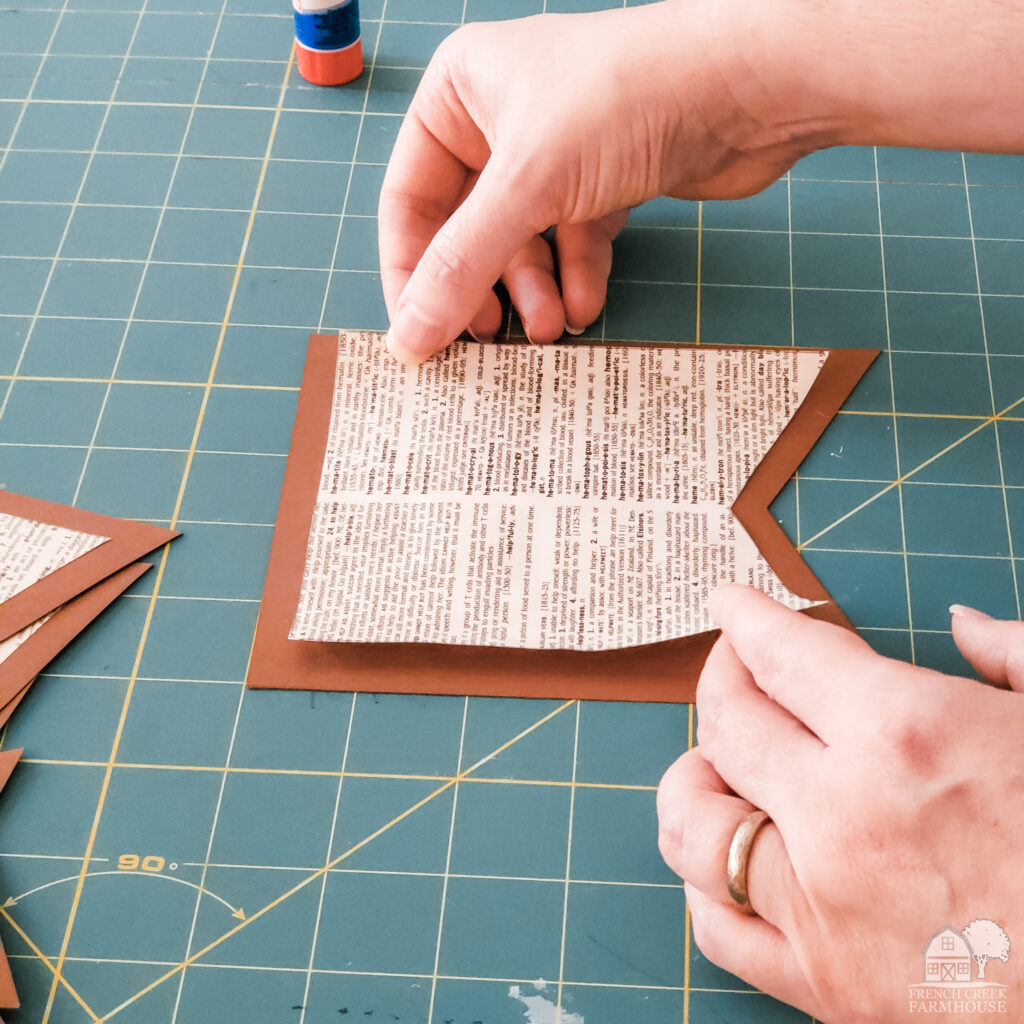
To glue the pieces together, I just eyeball where they should go. Make sure to line up the pieces so that the edges look fairly similar all the way around.
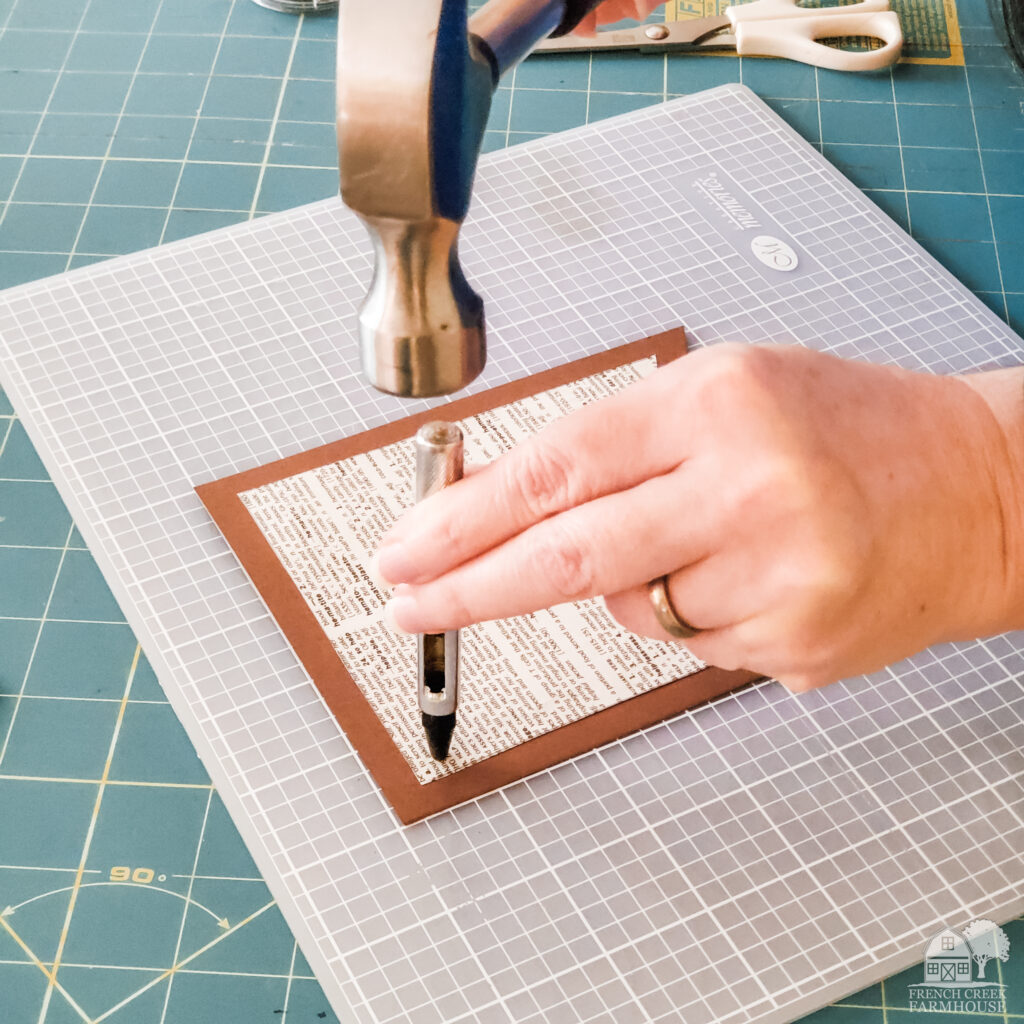
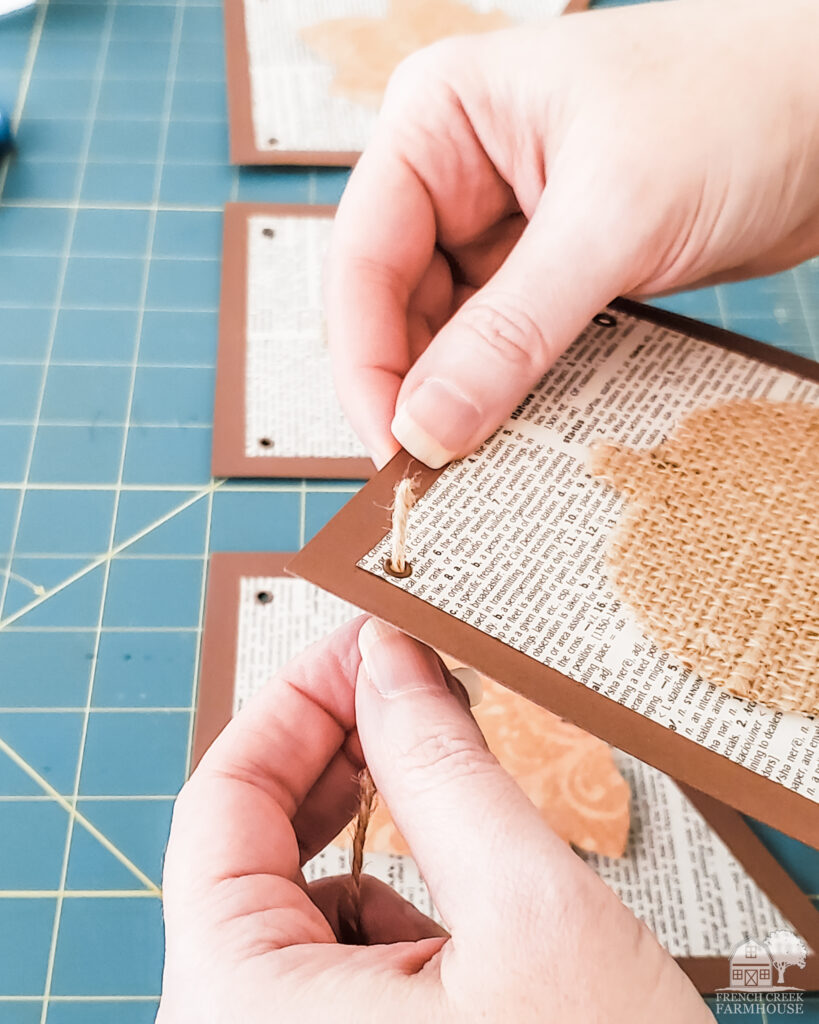
5. Next, apply the eyelets.
Each pennant will ultimately be threaded onto the jute string. To make the holes look pretty, I use eyelets. You could just use a hole punch, but the eyelets really give a finished look.
Some people call these grommets, but that’s incorrect. For starters, eyelets are used on lighter materials, and grommets are much more heavy duty. To accommodate their heavy duty usage, grommets also have two pieces–a front and back–whereas eyelets are only one piece.
If you’ve never used an eyelet punch and setter, it’s very easy.
To begin, align your punch where you’ll want the eyelet to go. Make sure to leave some room around the edges because the eyelet needs something to hold onto once it’s through the material.
Smack the punch with a hammer. You don’t have to hit too hard…it’s only a piece of paper you’re punching through. Also, make sure that you’re using a craft mat, or a piece of scrap wood, or something to protect the surfaces below!
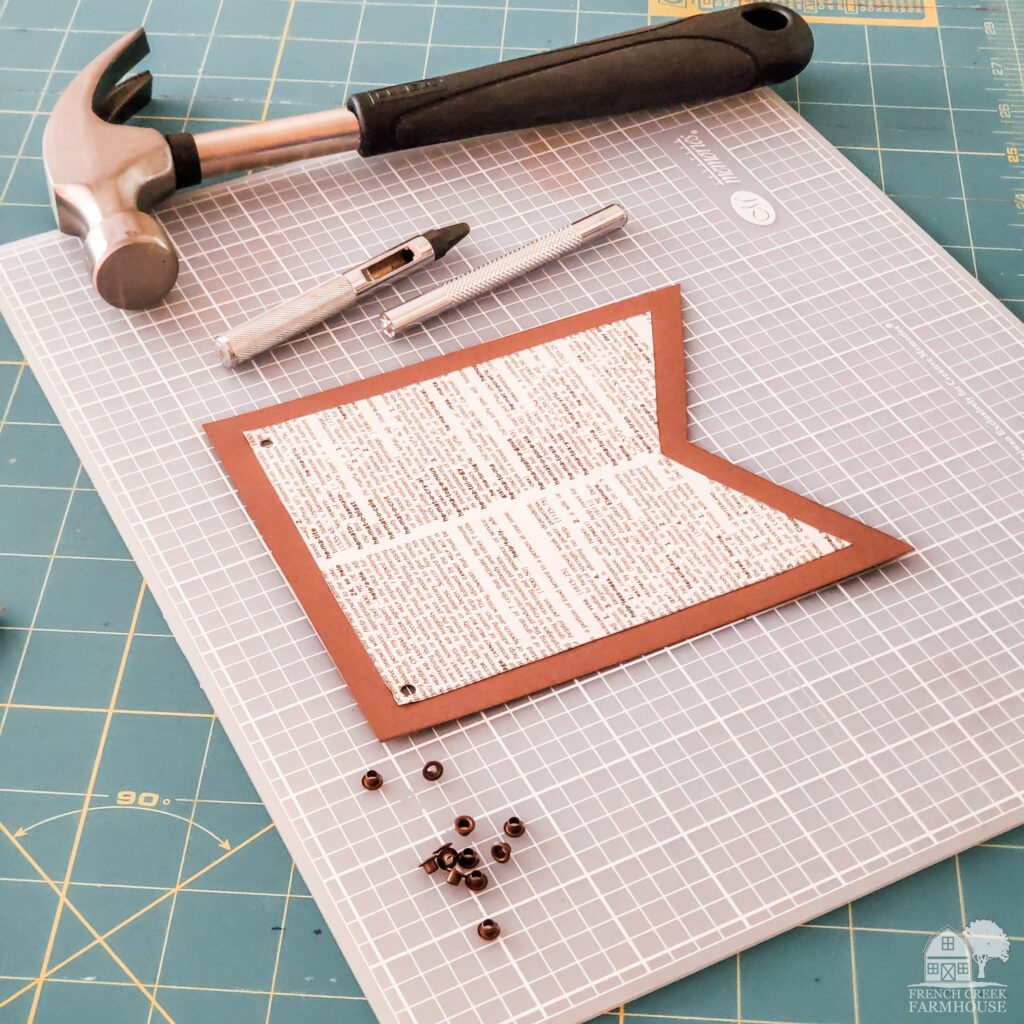
Once you have the holes punched, push the eyelet through the front. The finished edge will be on the face side. Then, flip the pennant over (holding the eyelet in place so it doesn’t fall out).
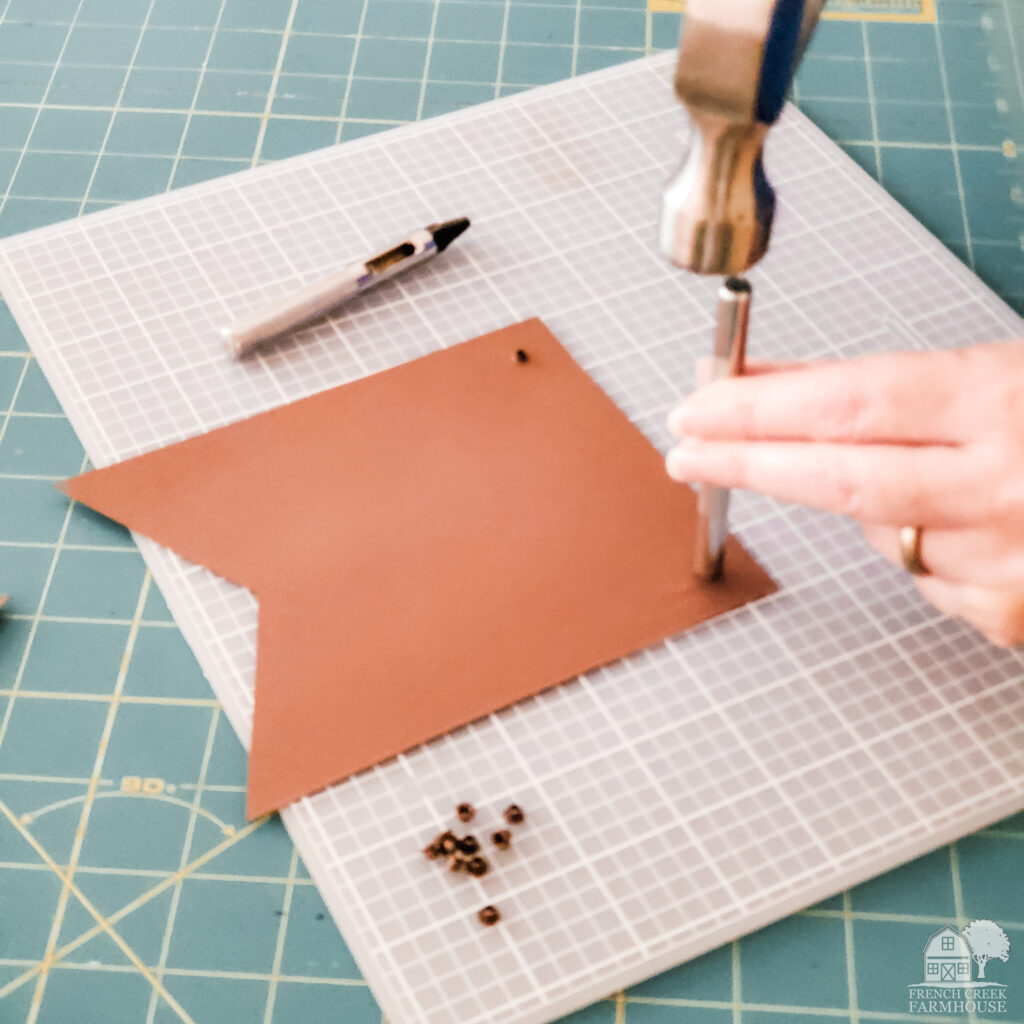
Now, use the setter tool to secure it in place. Again, a gentle whack with the hammer is enough. You’ll see the eyelet spread open like flower petals to grip the back of the pennant.
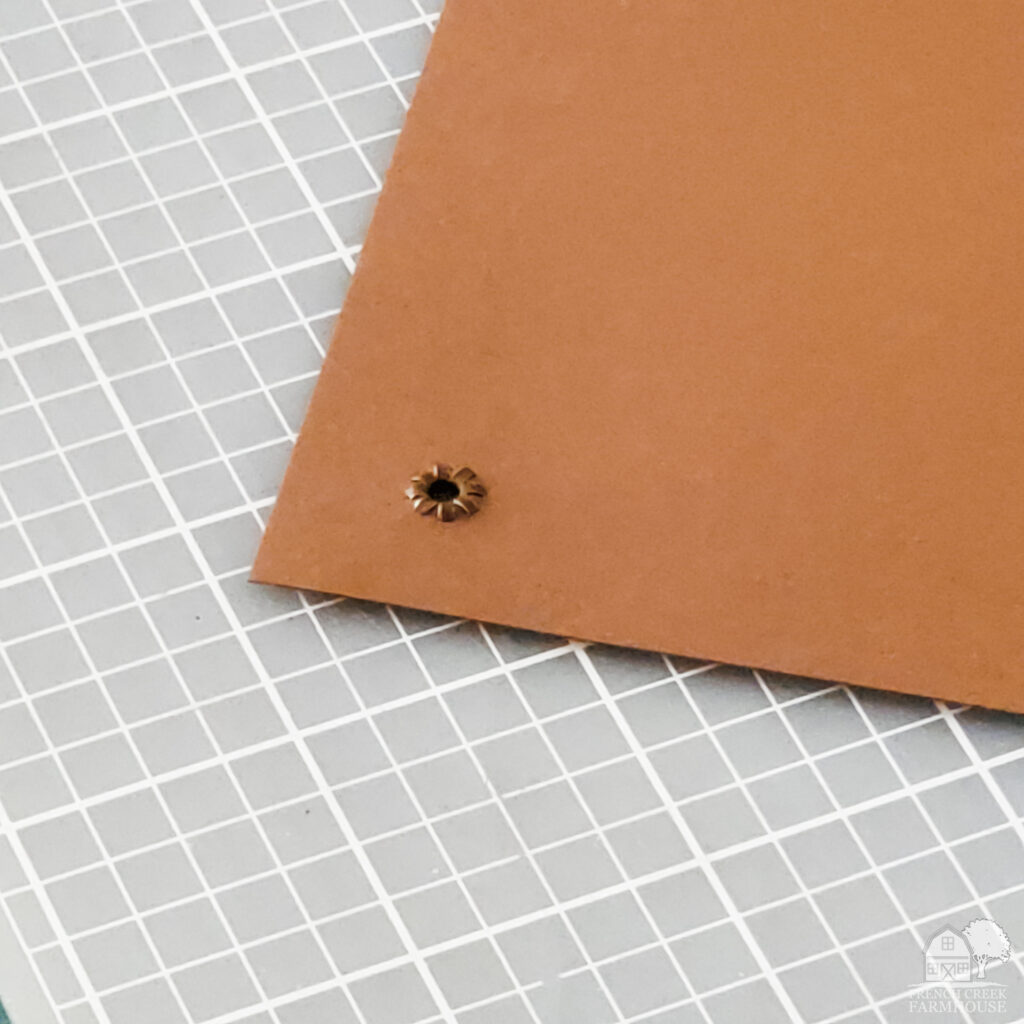
You’ll need two eyelets on each pennant (a total of 10 for the project); one in each of the top corners.
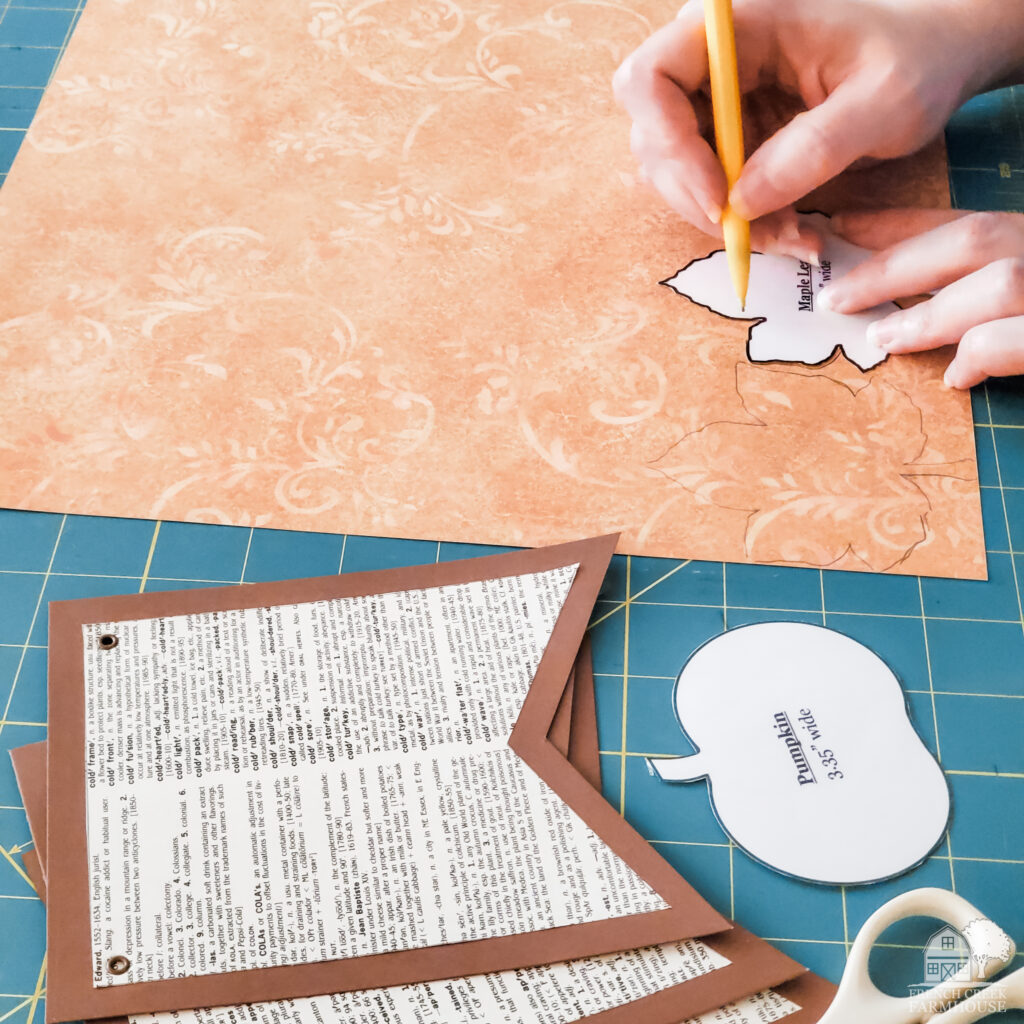
6. Create your autumn shapes using the printable pattern.
Each pennant has an autumn shape to celebrate the season. For my bunting banner, I used two leaves and three pumpkins. I also wanted to mix it up and use both fabric (burlap) and paper. You can get very creative here, but if you want yours to look just like mine, here’s how I created my shapes…
Autumn Leaves
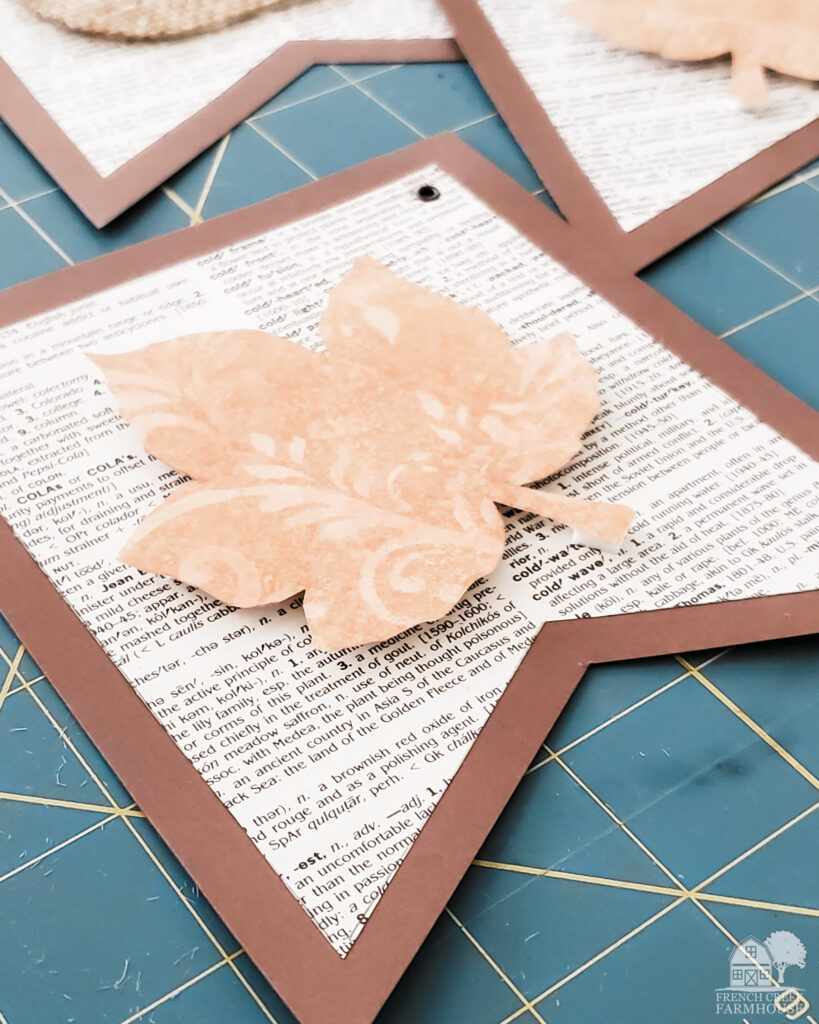
For the leaves, I found a fall-patterned piece of scrapbook paper, and traced two leaves onto it from the printable pattern.
I could have just glued those leaves to the pennant, but I wanted them to have more depth. So, instead, I used foam mounting tape. This raises the leaves off the page and adds a bit of shadow to give them greater dimension.
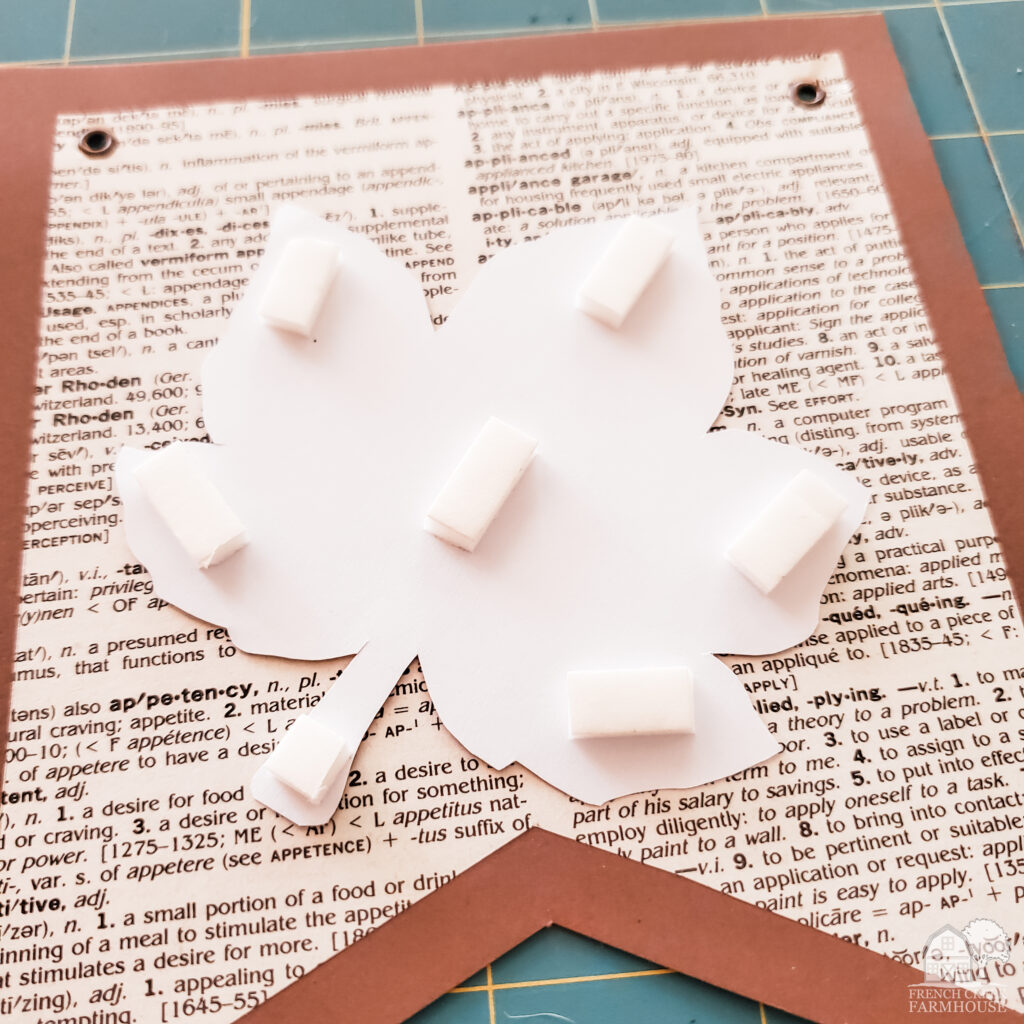
Foam mounting tape is such a versatile craft supply, and I love to use it to add dimensionality to projects. It basically works like two-sided tape, but there’s a later of foam in between for additional height.
See the difference once the leaves are mounted?
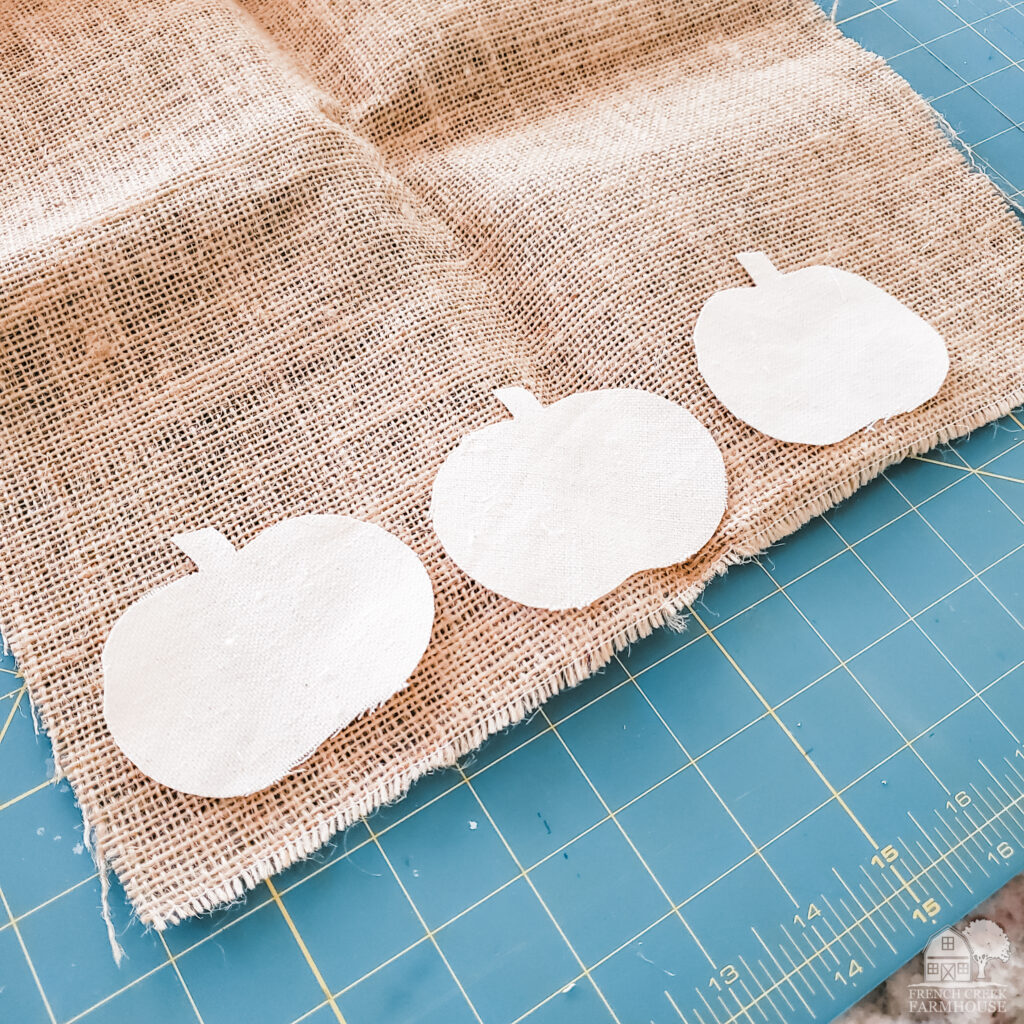
Burlap Pumpkins
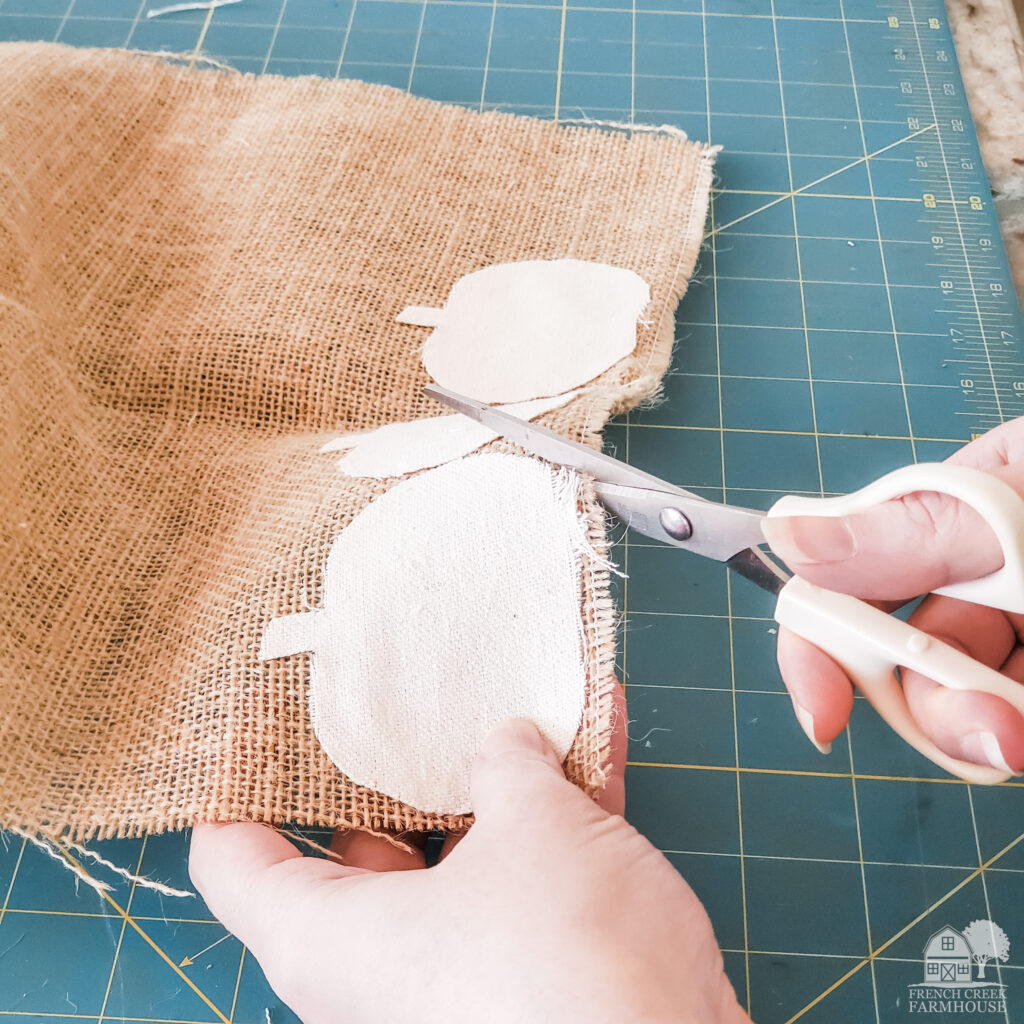
Then, for the pumpkins, I used burlap. However…burlap is a squirrely fabric to use in crafts. So, first, I traced the pumpkin shapes from the pattern onto some canvas grain sack material. Then, I hot glued those canvas pumpkins to the burlap and cut them out.
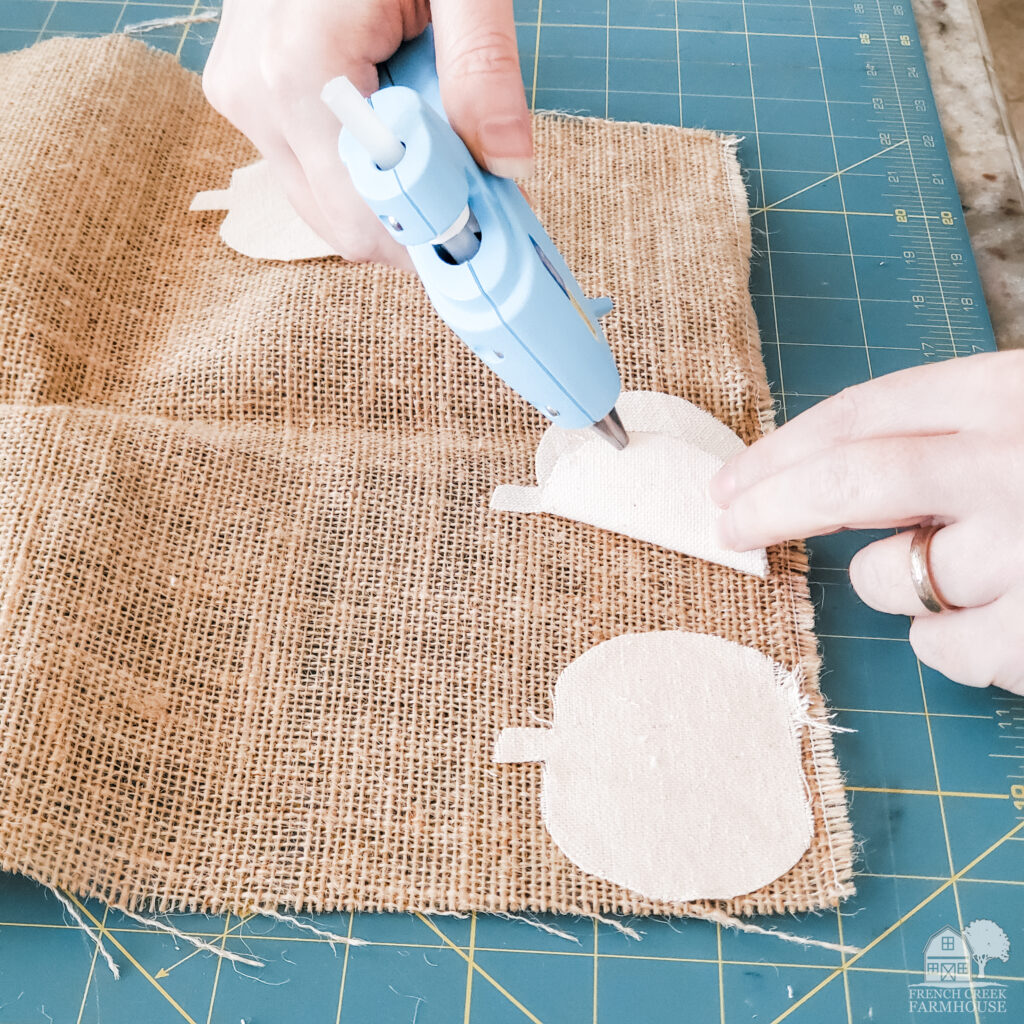
Hot gluing the canvas to the burlap accomplishes three things.
- Burlap is a bit see-through, so the canvas provides a background that helps the rustic weave stand out better. You could also use felt like I did when I made my burlap leaves garland.
- Burlap likes to fray…horribly. And, it makes quite a mess in the process! When you glue the canvas pumpkins to the burlap, then cut them out after they’re glued, the edges are essentially sealed and won’t unravel later.
- Because I wanted this autumn bunting banner to have a lot of depth and dimension, the extra layer of canvas between the burlap and the pennant also helps to lift them off the paper.
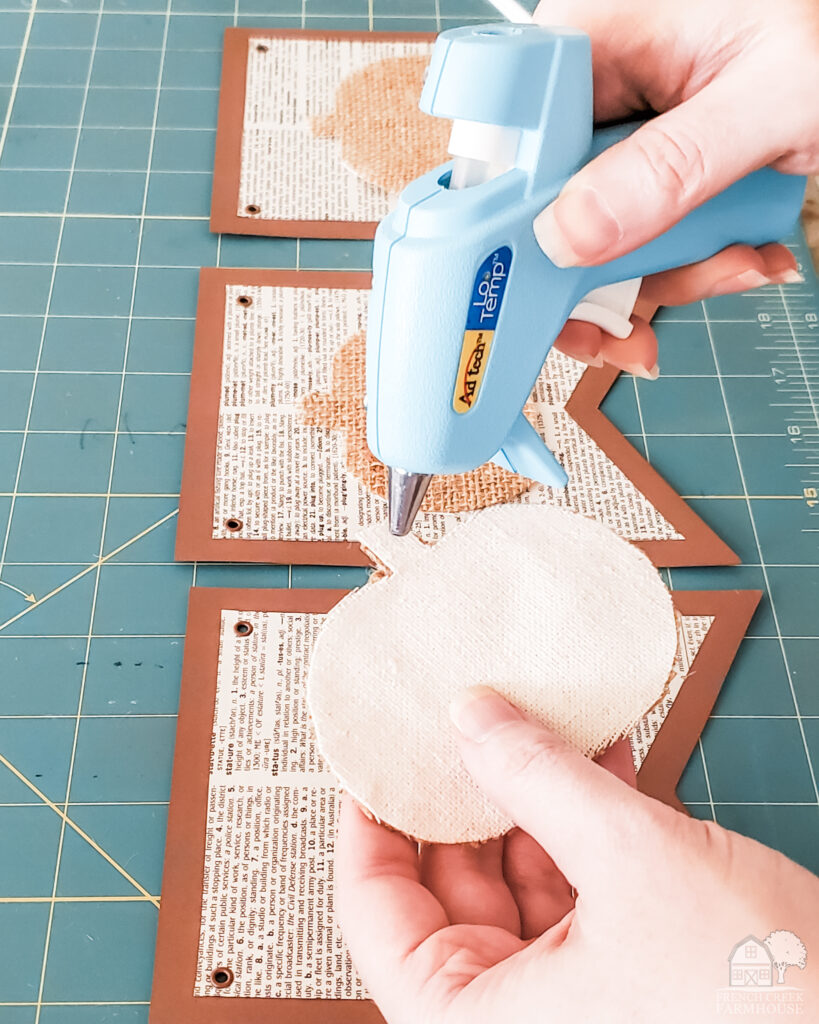
To add the burlap/canvas pumpkins to the pennants, use hot glue. This will ensure that they don’t pop off later.
7. String the pennants onto the jute twine.
Just like threading a needle, you’ll lace the twine through the eyelets to form the banner.
Tip: Make sure that the jute twine you’re using is a good fit for the size of your eyelets.
The nice thing about this method is that you can adjust the spacing between the pennants anytime you like. So, for example, if you’re hanging the autumn bunting banner in a small space, you might want the pennants close together.
But, if you have a wide fireplace mantel, you can spread them apart more to fill the entire space. Or, easily add/remove pennants, as well!
Now, you just need to decide where to hang your autumn bunting banner! These also make wonderful gifts for neighbors at Thanksgiving, or teachers’ gifts, too. It’s a great way to show someone you’re thinking about them this season!
If you enjoyed this project, be sure to sign up for my newsletter, and never miss another DIY! You’ll get access to all of my FREE printables, patterns, and lots more!
To find more of my past DIY projects, just click on any category:
Crafts | Sewing | Fixer Upper Farmhouse Renovations

Do you love hunting for vintage treasures as much as I do?
Get my free vintage & junk hunting journal
Let’s be email pen pals! Sign up to join our community, and get your free printable PDF Vintage Hunting Journal. This is so good!