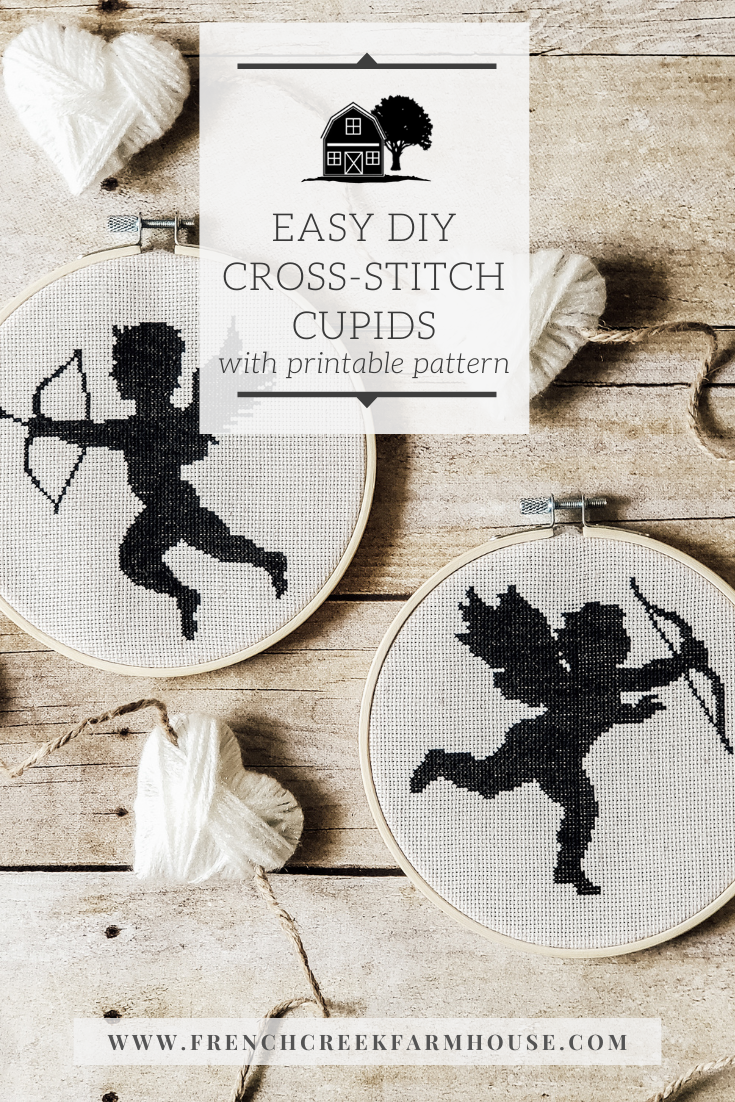
Vintage-Inspired Cross-Stitch Cupids
Getting your home ready for Valentine’s Day? These cross-stitch cupids are a DIY heritage craft that will add the perfect touch of vintage farmhouse charm!
When it comes to Valentine’s Day, it can be tough to find decor for a neutral palette. Reds and pinks often just don’t fit into a vintage farmhouse-style aesthetic. But the symbols of Valentine’s Day can be re-created to work with just about any style of decor you like.
Hearts, for example, are probably the ultimate symbol of love. Last week, I made this heart garland that’s perfect for a cozy mid-winter vibe and fits right into a neutral color palette. And one of my all-time favorite DIYs are these sweet and petite felt heart ornaments that you can seamlessly work into little vignettes all around your home.
{ Related: Styling a Valentine’s Day Tiered Tray }
This year, however, I wanted to take our Valentine’s Day decor to a different level of vintage charm. Since I’ve been really enjoying cross-stitching this winter, I decided to lean into this heritage craft a bit more and create something especially unique.
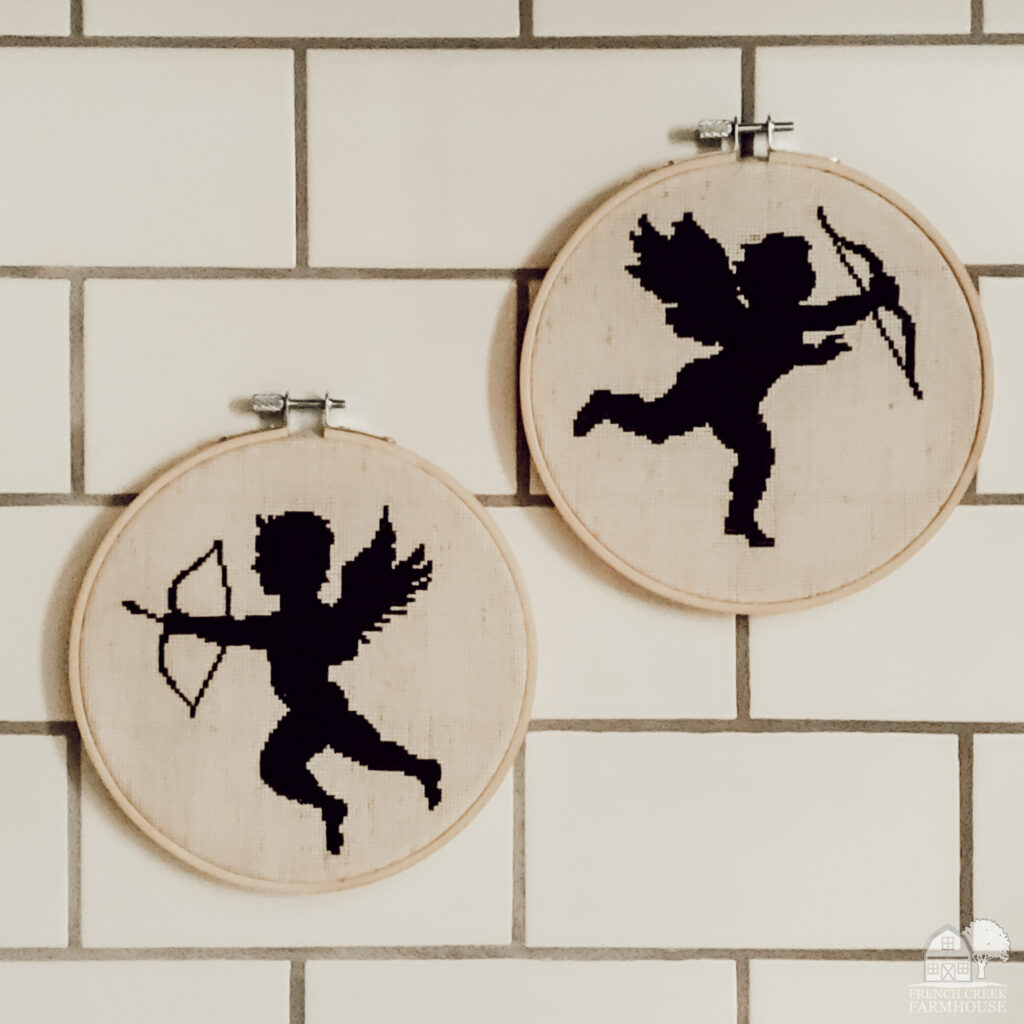
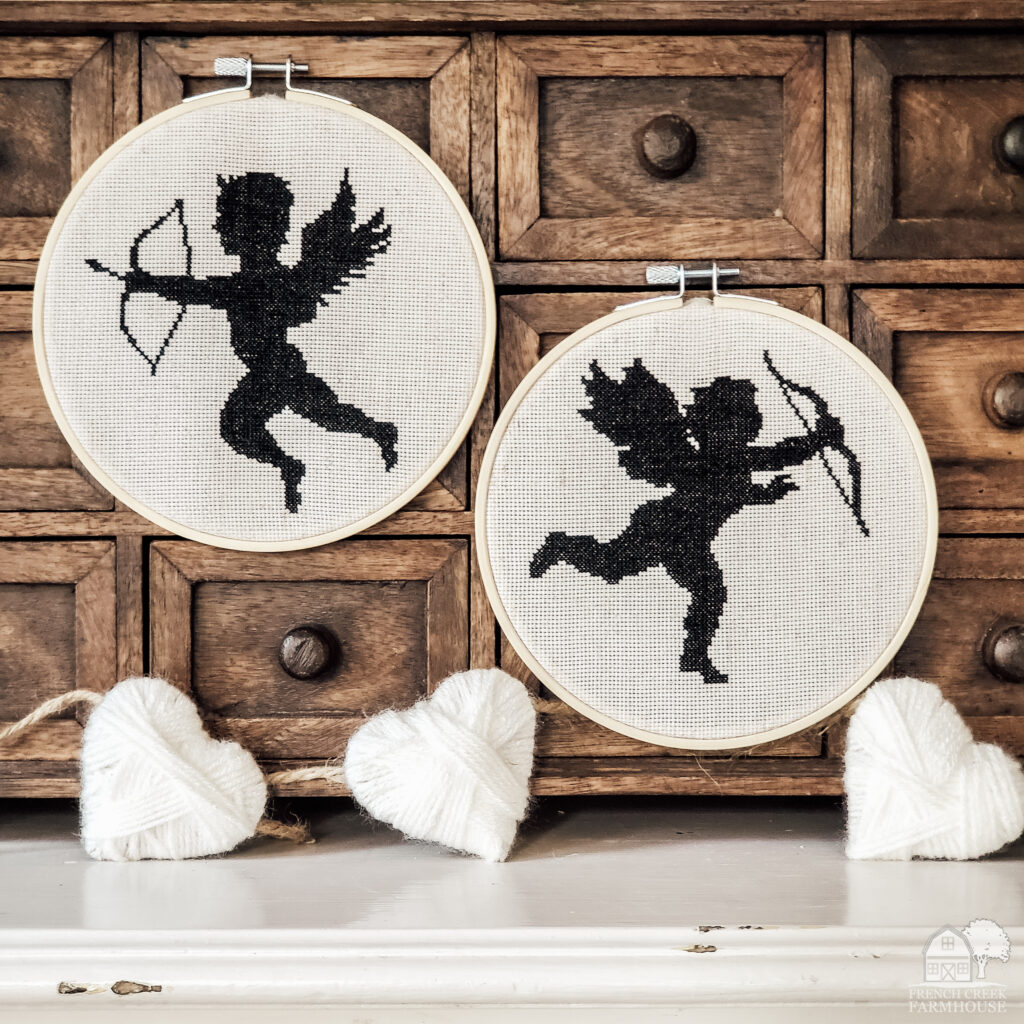
Cross-stitch cupids for heritage charm!
These cross-stitch cupids certainly honor the past with their subtle, yet elegant, winged silhouettes playfully reminding us that love is in the air!
Cross-stitch is such a simple hand-stitching technique that anyone can learn and enjoy. If you can count, you can cross-stitch!
Learn How to Cross-Stitch
a comprehensive guide with photos
In this article, I’ll teach you everything you need to know to get started cross-stitching. Photos of every step are included, so you can actually see each part of the crafting process!
If you’re brand new to needlework, be sure to read my How to Cross-Stitch guide to learn all of the fundamentals you need to get crafting. Then, get ready to create some truly beautiful art with my easy-to-follow patterns that are suitable for every skill level!
Be sure to pin this post for later so you can always find the pattern for these cross-stitch cupids when you need it!


Disclosure: This is not a sponsored post, and I have received no compensation for sharing anything that follows. Some links within this blog may be affiliate links, and I might earn a commission if you make a purchase through that link. This usually amounts to cents, not dollars, and helps to support the projects featured on this blog. I only recommend products from companies that I have found to be trustworthy. Read my full disclosure here.
You probably know by now that one of the reasons I love vintage decor and old things is the history. Understanding where we came from and why we go through life the way we do is so interesting to me, and the story of Cupid is no exception.
Cupid is a common symbol of Valentine’s Day, but what do we really know about him? Well, let me tell you…his history is fascinating!
A brief history of Cupid
The origin of Cupid first begins in Greek mythology. The Greeks had a number of primordial gods and goddesses, including Eros. Primordial deities are basically the “first generation” gods, and they represent the fundamental forces of the world. They don’t have any lineage because they are the basic elements of the world. Eros, for example, was the god of love, and he was a slender young adolescent boy with wings. Presumably, he was depicted as a boyish character because love was thought of as irrational, and he was winged because lovers were considered flighty and unpredictable.
During the Hellenistic period, however, is when we begin to see the Cupid that we know today, as well as the stories that have been passed down about him. The Hellenistic period was an approximately 300-year span of time between the death of Alexander the Great, and the rise of the Roman empire. It was the Romans who gave us our modern day Cupid, who is simply a Roman reinterpretation of the Greek god Eros.
During this time, Cupid/Eros went through a bit of a transformation. Instead of the slender young man he had been in Greek mythology, the Romans depicted him as a chubby little boy. Also, rather than being a primordial god, he was then known as the son of Venus (goddess of love) and Mars (god of war)…an interesting mix, right?
The Roman empire is responsible for the spread of much of the symbology that we still see and use today, and Cupid was just one of those symbols that persisted through time.
Cupid’s bow and arrows
Most often, the Cupid that we know today is depicted carrying a bow and arrow. Actually, as the story goes, Cupid has two arrows: one has a shiny gold-tipped point, and the other has a blunt end made of lead. If Cupid shoots his target with the golden arrow, they will be consumed with love/desire. But, if shot with the blunt arrow, the individual is subjected to aversion and only wants to get away from another’s unwanted advances. Cupid certainly has a lot of power in the romance department!
A mischievous fellow
The Romans also gave us the idea that Cupid was a bit mischievous. In stories, he is often getting into some kind of trouble, and there are even tales of his mother, Venus, giving him a spanking! This part of Cupid’s character is probably meant to remind devotee’s about the foolishness of love and the trouble it can cause.
It’s also a way that mythology could help to explain the concept of schadenfreude, or the psychology of deriving joy in learning of someone else’s experience of pain, failure, or humiliation. These ideas are commonly used to promote social order, and so Cupid’s stories were one way to teach lessons to the masses.
In one story, Cupid is trying to steal honey from a bee hive when he is stung by the bees and runs crying to his mother, Venus. Cupid whines and carries on to his mother that such a small creature should not be able to cause so much pain, and he complains about how unfair it all is. Venus, though, only laughs at her son and points out what a just punishment it is for him because he, too, is very little, yet can cause great pain with the sting of love.
I don’t know about you, but learning more about the history of things makes them so much more meaningful to me! Isn’t Cupid’s history intriguing?!
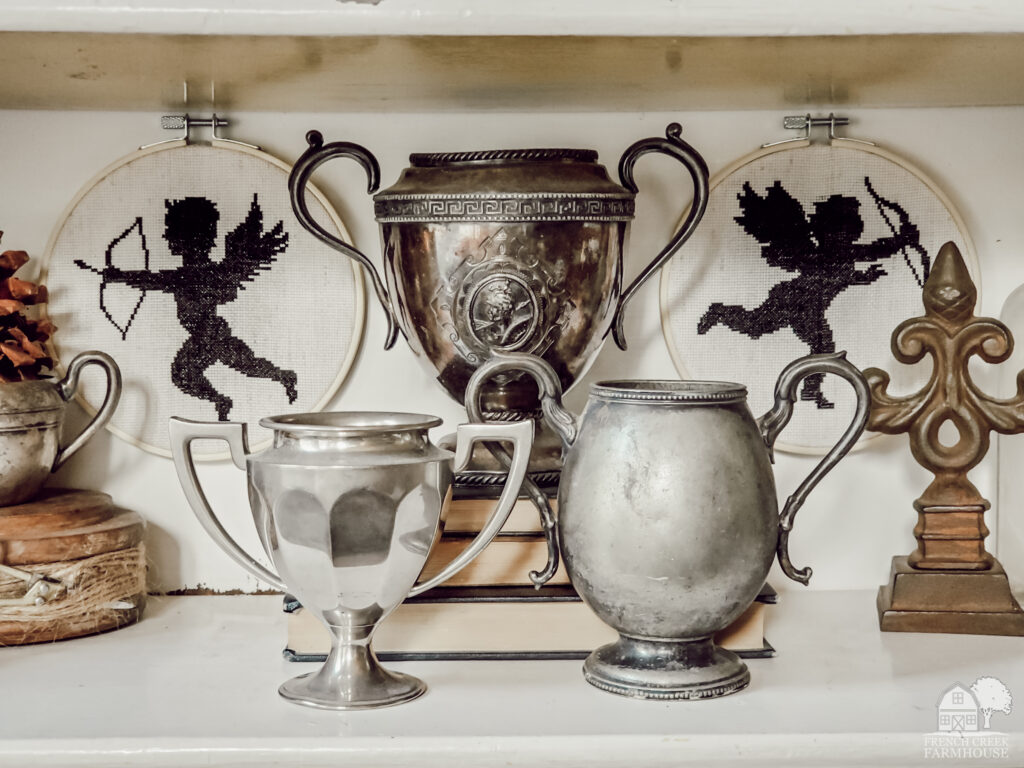
Now that we know a bit more about our winged friend, let’s honor him this Valentine’s Day with these cross-stitch Cupids that will fit perfectly into your vintage decor!
How to make cross-stitch Cupids

- Scissors
- Fabric Marking Pen
- Cross-Stitch Cupids Pattern (a free printable available HERE to my newsletter subscribers)
Love is in the air!
free cross-stitch cupid patterns
Let’s be email pen pals! Get 2 different cross-stitch Cupid patterns delivered right to your inbox, ready to print. So sweet!
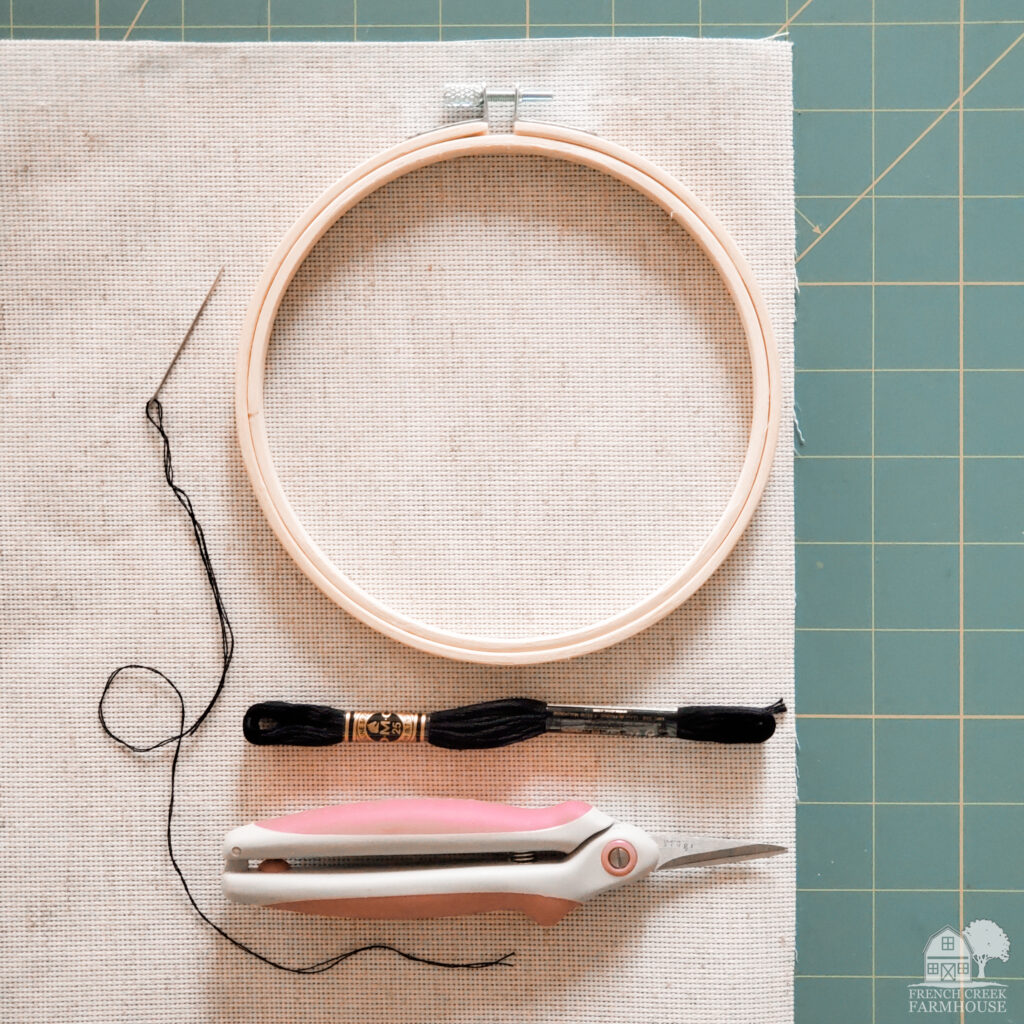
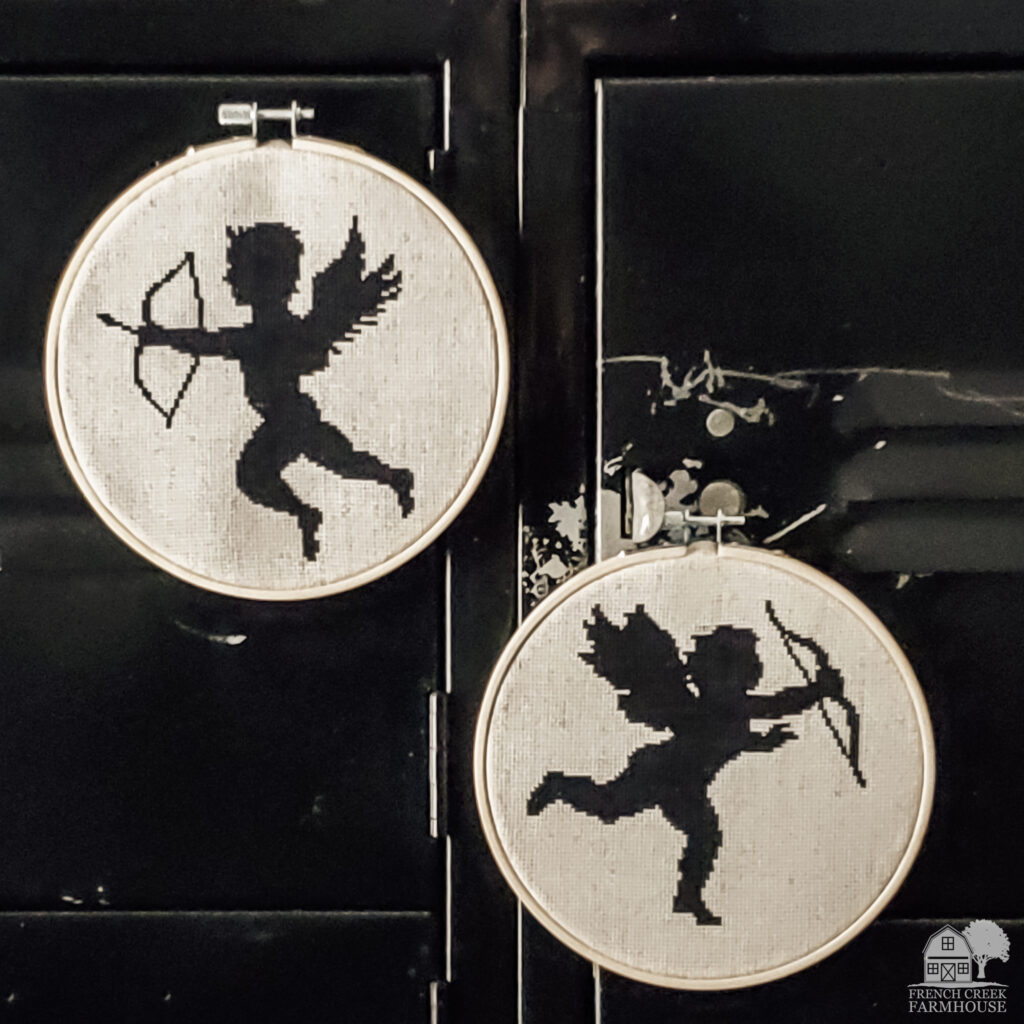
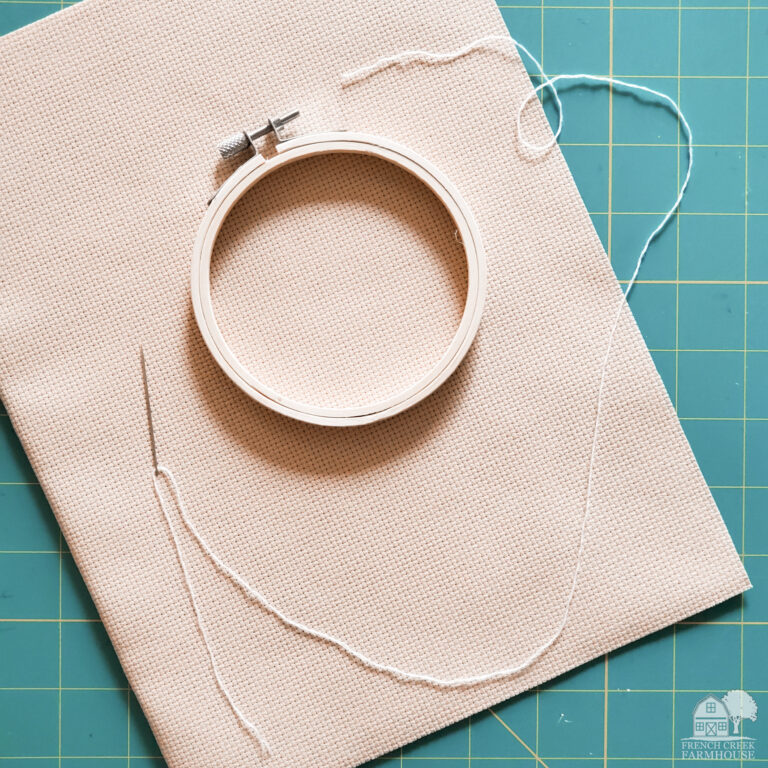
1. Begin by gathering your supplies, including the two free printable cross-stitch cupids patterns.
I’ve created two different cross-stitch cupids that you can download and print for free {HERE}. Each pattern is designed specifically to be used with 18-count Aida cloth and a 6″ embroidery hoop.
For this project, I wanted my cross-stitch Cupids to have a very definite vintage feel to them. For that reason, I used Fiddler’s cloth instead of regular Aida cloth. Fiddler’s cloth is a type of Aida cloth that has a more natural, homespun appearance to it. It’s a bit less stiff than Aida cloth, and there are slubs of linen fibers that give it a whole lot of heritage charm. I really love Fiddler’s cloth for any project where you’re going for a vintage vibe!
Regarding floss, you’ll be able to complete both of the cross-stitch Cupids in this pattern with two skeins of floss. I used about ¾ of a skein for each Cupid.
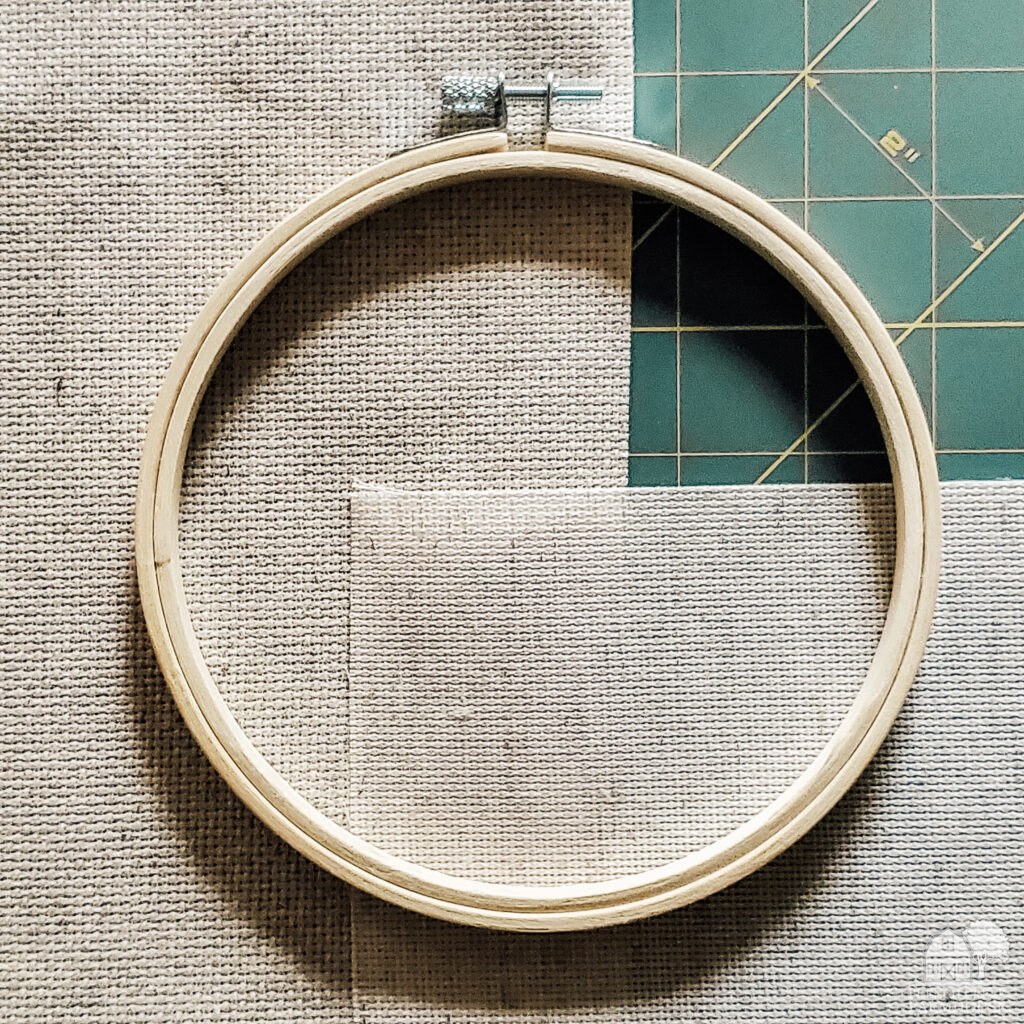
2. Prepare your canvas
When working with a larger design, I always grid my canvas. It makes the stitching go much faster, and it also helps to prevent mistakes that will require you to take out stitches later (what a headache that is!).
You can read more about gridding your cloth {HERE}, but just know that you’ll need a special type of fabric marking pen to do so. This pen is my absolute favorite for all types of fabric crafts, sewing, etc. Although it’s not specifically marketed for sewing, it is truly brilliant! I can’t imagine ever using a different pen again!
Also, like I mentioned previously, I’m using 18-count Fiddler’s cloth for this project. In most of my other patterns, I have you use 14-count cloth. But, I was going for a a different look with this project so you will need 18-count cloth. If you’re wondering about the difference, and why it matters to this pattern, you can read more in my How to Cross-Stitch tutorial {HERE}.
In the photo above, you can see the difference between 14-count Aida cloth (on the left) and 18-count Fiddler’s cloth (on the right). The Fiddler’s cloth is less rigid, and it has a more homespun, natural appearance.
Working with 18-count cloth, you might find it helpful to have a magnifying lamp. I have this one, and it helps the stitching go SO much faster! I love this lamp so much. It’s super affordable, can clip anywhere, and has a bright work light. Plus, it offers more magnification than other lamps at the same price point. I highly recommend it for any crafter!
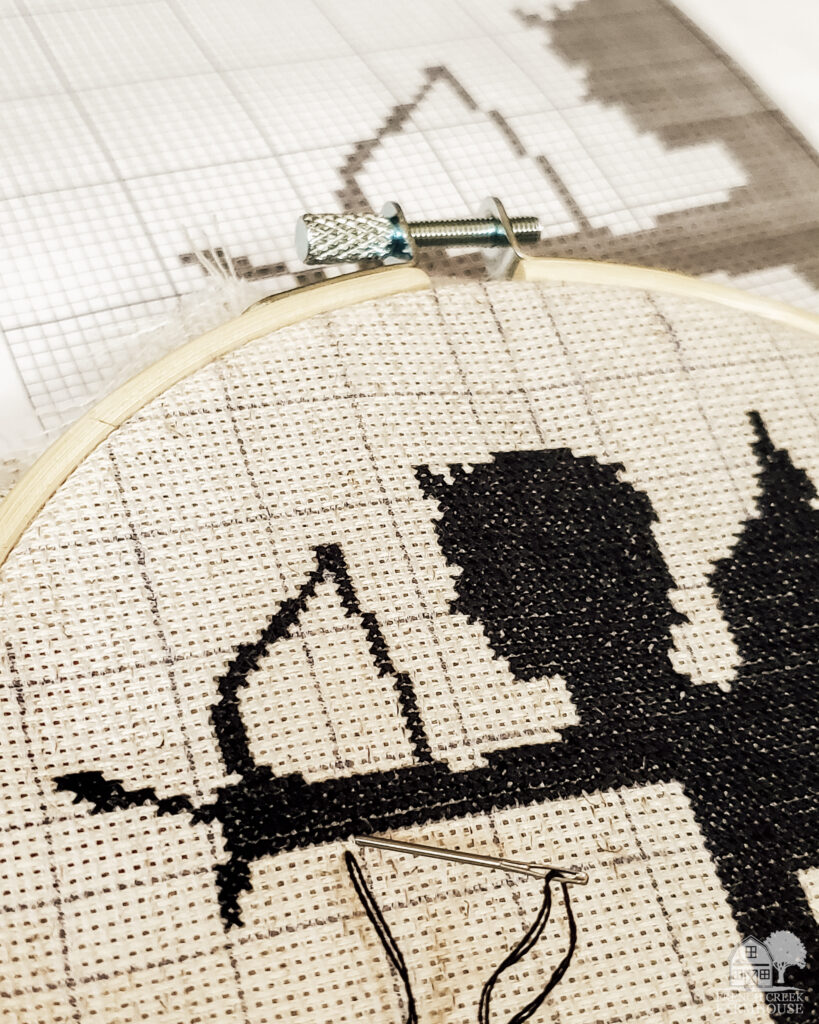
3. Follow the pattern and stitch!
If you’re new to cross-stitching, the easiest way to tackle a pattern is: top to bottom, and left to right. This is the natural way that the stitching flows, so it’s the simplest approach.
That said, there will be times you’ll probably want to work on a specific section separately. For me, Cupid’s bow was an area I worked on separately from the rest of the pattern. I stitched the bow, and the string of the bow, separate from the stitching of Cupid’s body. That way, I didn’t waste floss by trying to tackle the entire section at once. There’s a lot of “white space” in this particular area of the pattern.
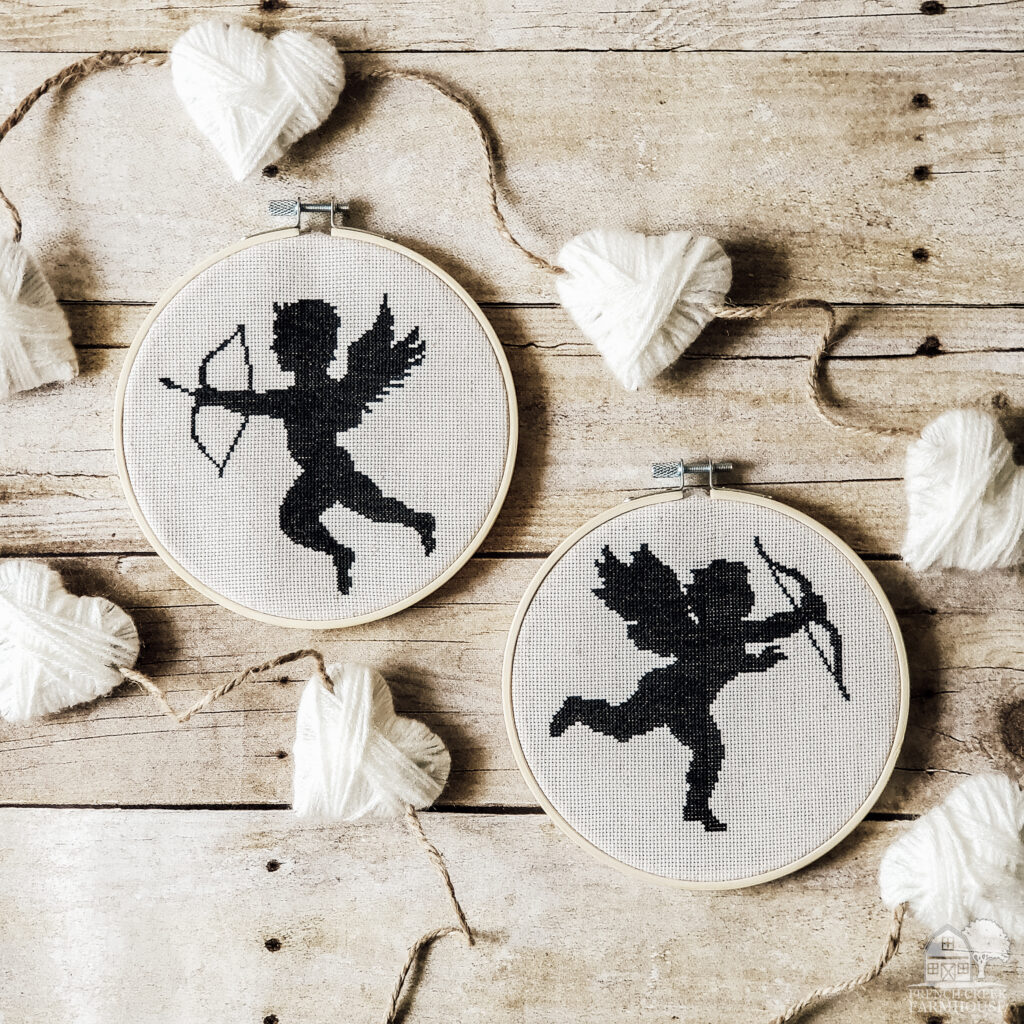
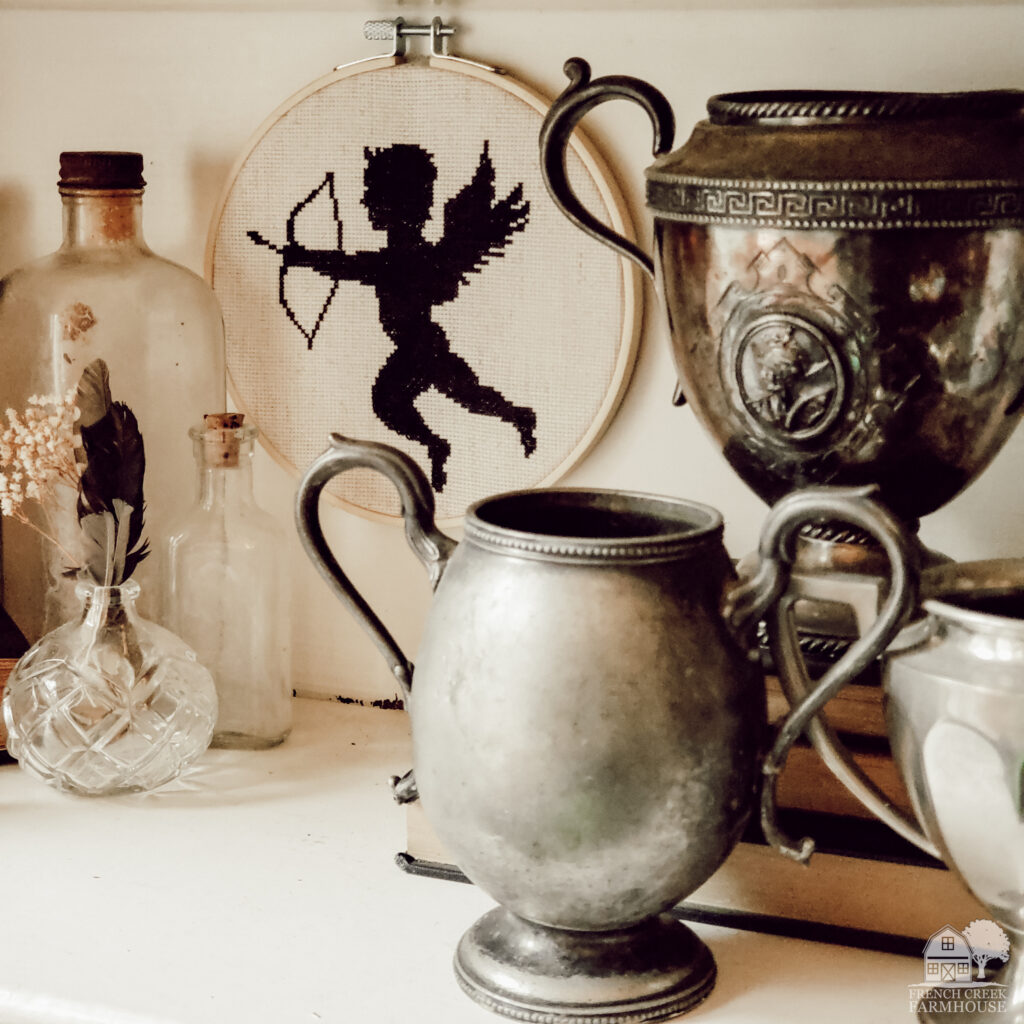
4. Finish and display your cross-stitch Cupids!
Once you’ve finished stitching, re-stretch your cloth tightly in the hoop (if you plan to display the needlework this way). Alternatively, you can re-frame your cupids in a more formal frame instead of the embroidery hoop.
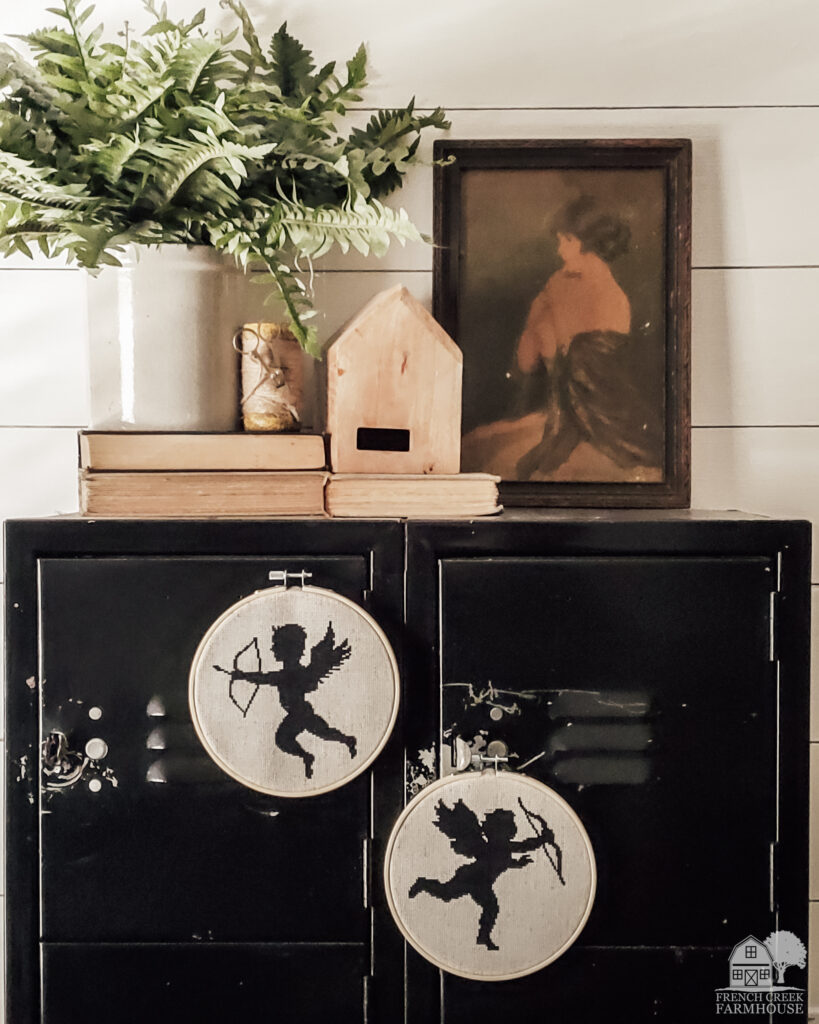
For now, I’m displaying my cross-stitch cupids in their hoops. However, if I find some cute vintage frames, I plan to switch them later! Another reason to go vintage hunting? Yes, please!
How will you display your needlework? I would love to see how you decorate with your cross-stitch cupids! Be sure to tag me on Instagram and Facebook with your projects!
If you enjoyed this project, be sure to sign up for my newsletter, and never miss another DIY! You’ll get access to all of my FREE printables, patterns, and lots more!
To find more of my past DIY projects, just click on any category:
Crafts | Sewing | Fixer Upper Farmhouse Renovations

Do you love hunting for vintage treasures as much as I do?
Get my free vintage & junk hunting journal
Let’s be email pen pals! Sign up to join our community, and get your free printable PDF Vintage Hunting Journal. This is so good!

How pretty! I love to do cross stitch. Thanks so much for linking up at A Themed Linkup 95 for All Things Love and Valentine’s Day. Pinned.
Thank you so much, Dee! I love how relaxing needlework can be…hope you have fun with the pattern! xo
CONGRATS Kristi! Your post is FEATURED at A Themed Linkup 96 for Handcrafted Jewelry from the previous linkup for All Things Love and Valentine’s Day.