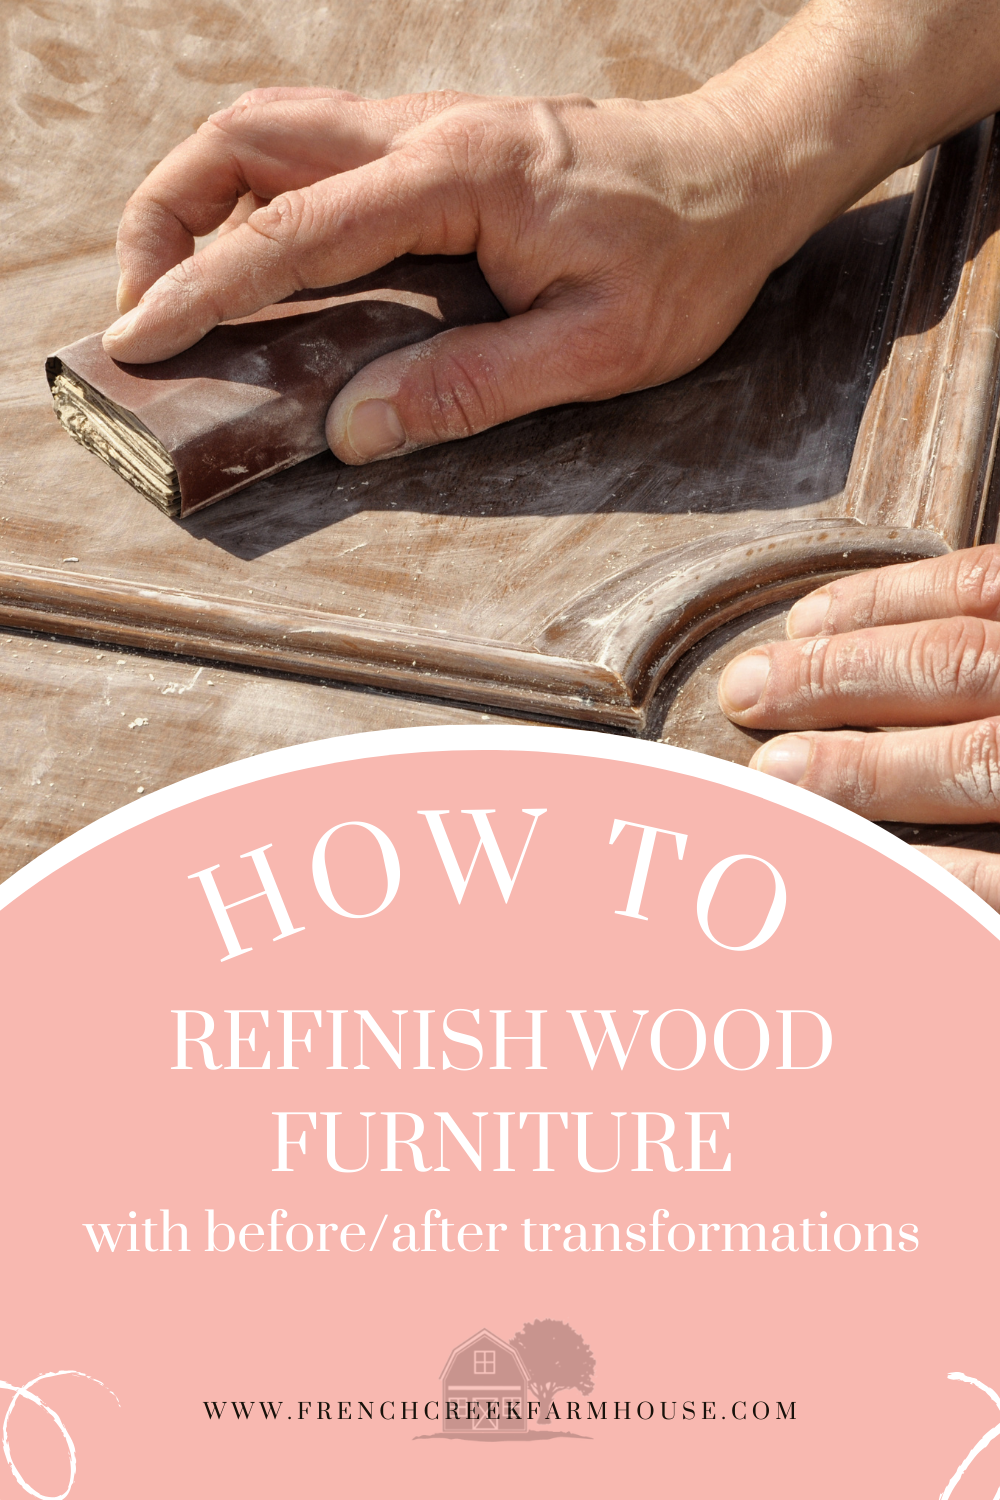
How to Refinish Wood Furniture: A Step-by-Step Guide
Refinishing wood furniture is a rewarding endeavor that may not only revive the beauty of the piece, but also has the potential to extend its lifespan. Restoring old or worn-out furniture can also be a cost-effective and environmentally-conscious alternative to buying new items. But, only if you know how to do it! In this comprehensive guide, I’ll walk you through exactly how to refinish wood furniture like a pro and show you some gorgeous transformations that will inspire your next project.
A Bit of Backstory…
I’ve been refinishing wood furniture for many years now. In fact, it’s one of the things that initially led me to starting this blog. I enjoyed the creative process of decorating our home, and it was fun to document the projects I worked on.
Then, I started to sell some of the pieces I had refinished. As much as I loved each one, I couldn’t redecorate and add new pieces without letting go of past projects. That was exactly how we got started and opened our shop!
We had a tiny little space in a vintage shop to start…just 64 square feet…but I was selling furniture pieces faster than I knew was possible! Within a few months, we’d expanded to two locations, and it turned into a full-time job for me that continued for several years.
In that time, I’ve also learned a whole lot about the process of refinishing furniture. Hundreds of pieces have passed through our life during the time we had our shop, and at our height, I was refinishing at least 10 pieces a week.
Refinishing Furniture Preserves Our History
What started as a little side project ultimately led me to meet some really incredible people and form amazing friendships along the way. For me, the community of friends I’ve made in this learning process is invaluable.
These are friends who not only appreciate the value of taking on projects, but they also love to preserve heritage and history. That’s an important value for me. I hate to see the stories of where we came from lost to the passing of time.
When we lose touch with our roots, we forget who we are and what it took to get us here. That’s not something to take for granted, and it certainly isn’t something we should forget. Preserving our history and the stories of our past honors the hard work and sacrifices of our ancestors and reminds us of the most meaningful parts of life.
I’m so glad you’ve decided to learn this hobby and become part of a community working to keep those stories alive. Every project you take on is a thread in the tapestry of our country’s history. It is truly meaningful work.
A Heritage Craft to Inspire Your Creativity
The guide that follows includes the step-by-step process for how to refinish wood furniture. Whether you’re just beginning or looking to improve your skills, this tutorial will give you practical advice from real life experience.
I’ve also featured a collection of 10 truly gorgeous before-and-after furniture transformations to inspire you in your next project! All of these featured projects have been provided by my dear friend Terri Llanes of Painted Pink Peony Co. Terri has an incredible eye for detail and can envision stunning transformations in pieces that others would overlook. If you want continued inspiration, or to purchase any of these pieces, be sure to give her a follow on Instagram.

Disclosure: This is not a sponsored post, and I have received no compensation for sharing anything that follows. Some links within this blog may be affiliate links, and I might earn a commission if you make a purchase through that link. This usually amounts to cents, not dollars, and helps to support the projects featured on this blog. I only recommend products from companies that I have found to be trustworthy. Read my full disclosure here.

Refinish vs Restore vs Refurbish: What does it all mean?
When we’re talking about how to refinish wood furniture, it’s important to understand the terminology. Although the terms are often used interchangeably, there is a difference between refinishing, restoration, and refurbishing.
Refinish
Refinishing furniture is the act of removing the existing finish, and then applying a new finish. It’s a fairly broad term because there are many ways this can be done. For example, you could strip a piece of furniture down to bare wood, sand it, then stain it. You could also paint the piece a new color. Generally speaking, refinishing doesn’t entail doing significant repairs–only working with the finishes.
Restore
Furniture restoration, on the other hand, involves returning a piece of furniture to its original state. This usually requires cleaning, and possibly some minor repairs if there is incidental damage to correct. Unlike refinishing which gives you the opportunity to reimagine a piece of furniture, restoration is more about renewal of the original piece.
Refurbish
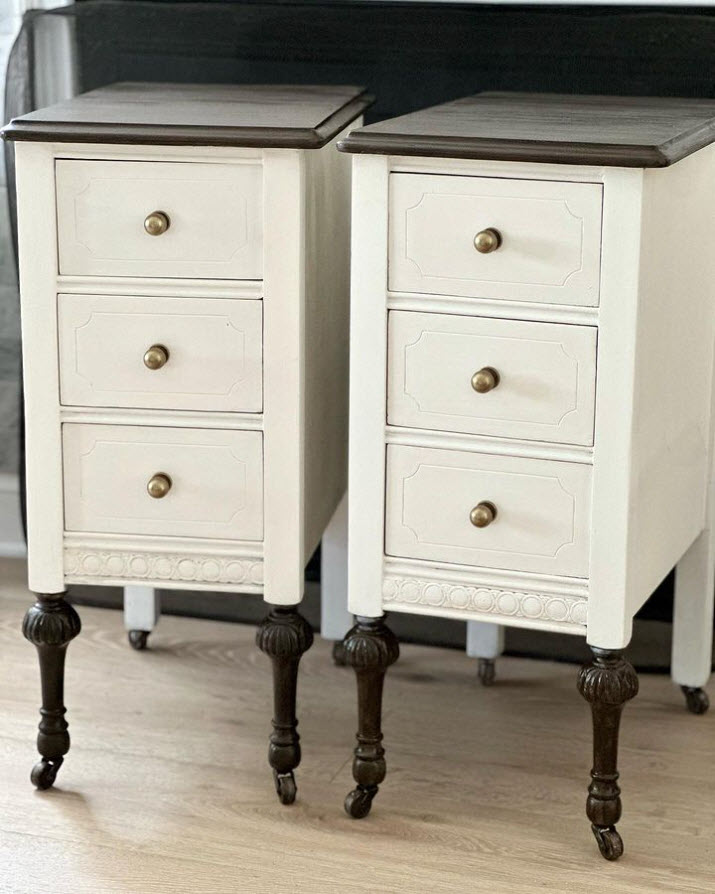
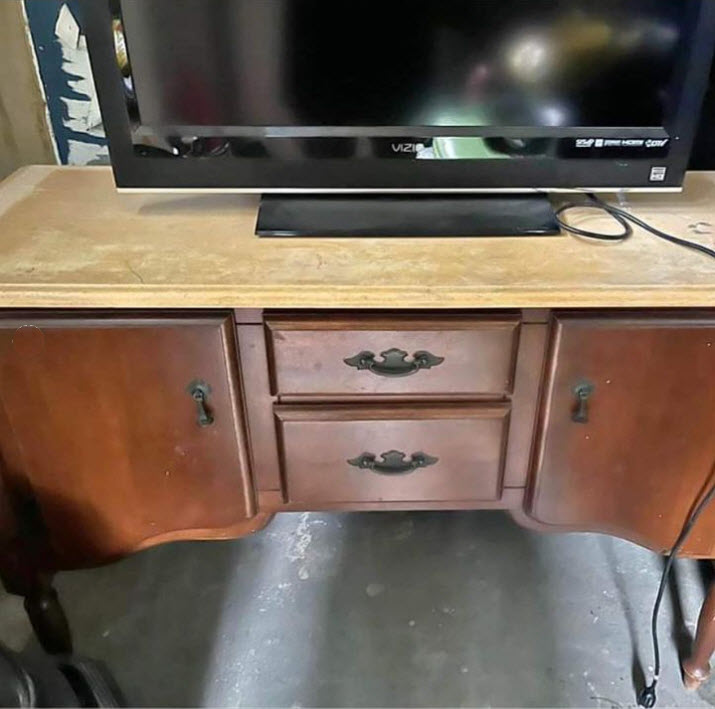
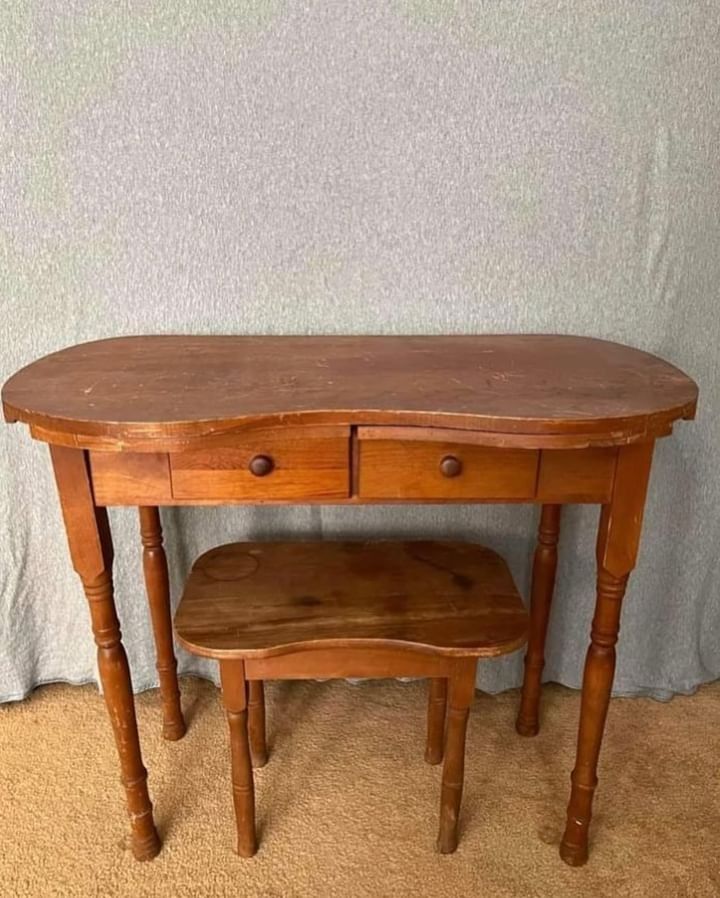
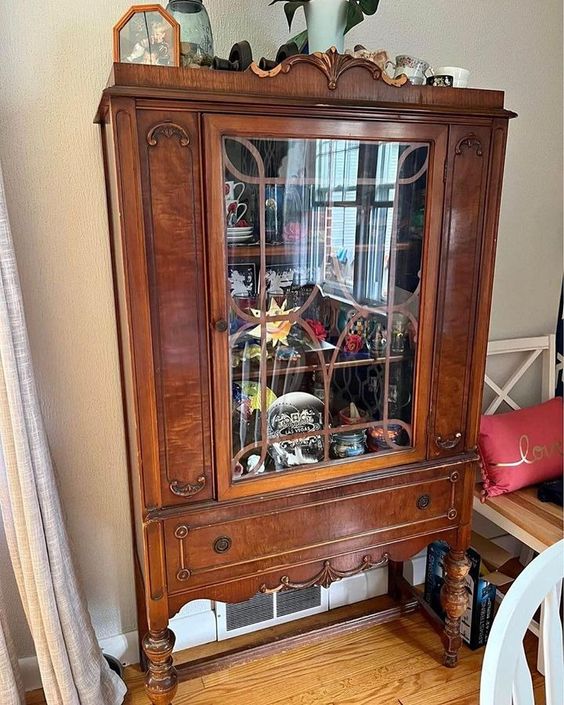
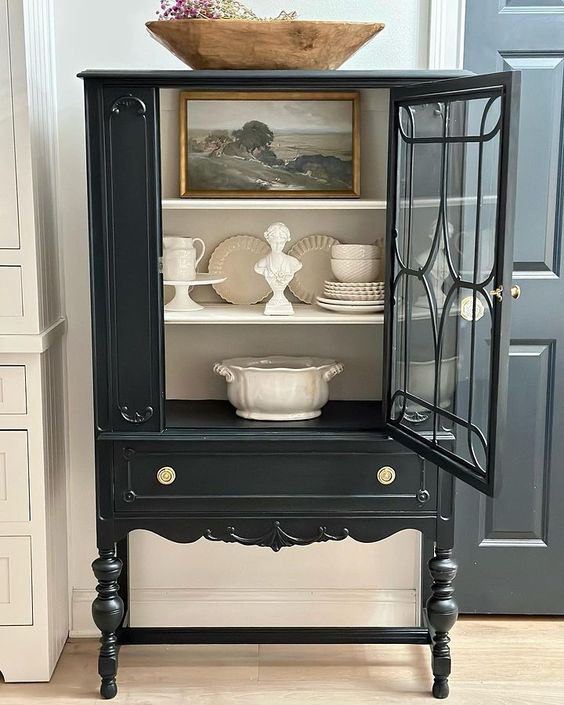
If there are more significant repairs needed or structural changes to be done, that’s when you will want to refurbish a piece of furniture. You might do this because there are parts that cannot be saved or restored, or you might be upcycling a piece into something completely different. A great example of refurbishing is shown in this pair of side tables, which were originally a larger vanity:
Before
After
Understanding the Steps of Refinishing Wood Furniture
Part 1: Gathering the Necessary Tools and Materials
Before embarking on your furniture refinishing journey, you’ll need to assemble the right tools and materials. Which items you’ll need will ultimately come down to:
- How much work is needed
- What type of refinishing you plan to do
- Your skill level
When you’re first starting out, I would recommend tackling easier projects that give you an opportunity to develop your skills using some of the tools you’ll need. Then, as your proficiency increases, you can try more complicated techniques and incorporate new tools to build new skills.
Learning how to refinish wood furniture will take time, and each project will help you build skills for the next.
Here’s a comprehensive list of tools and materials to get you started:
Tools:
- Sandpaper (various grits)
- Paintbrushes or sprayer
- Screwdrivers and pliers
- Putty knife
- Random orbital sander (optional)
- Heat gun (optional)
- Paint stripper or chemical stripper (optional)
- Respirator, gloves, and safety goggles
Materials
- Stain or paint
- Wood filler
- Clean rags or tack cloth
- Drop cloths or plastic sheeting
- Varnish or sealant
- New or replacement hardware
Each tool and material serves a specific purpose in the refinishing process, and helps to ensure that you achieve the best results. Again, though, some of these are more advanced than others, so the best idea is to take on a manageable project while you’re developing your skills.
For example, sandpaper is essential for smoothing surfaces, while a random orbital sander can expedite the process on larger pieces. However, a sander does require some skill, and it isn’t necessarily needed for an entry-level project.
Similarly, a heat gun is useful for removing stubborn finishes, and chemical strippers are effective for intricate details. But you may not need both of these when you’re first starting out.
And finally, a paint sprayer is a must-have for advanced refinishers who are working with pieces on a regular basis. It is absolutely a game changer! But when you’re just getting started learning how to refinish wood furniture, you don’t need to make such a big investment. Make sure you really love the hobby before you put that kind of money into more expensive tools.
Before
After
Part 2: Preparing the Workspace
A well-organized workspace is the foundation of a successful refinishing project. This is the step that most people skip because they’re so excited to dive into their project. However, it’s also the key difference between how to refinish wood furniture as a truly enjoyable experience, versus finding yourself with a headache, mess, and partially finished project that you store in your garage and never complete!
Take the time to prepare for your project, and you’ll be so much happier in the long-run.
Consider the following tips for creating an ideal environment:
A. Ventilation
Choose a well-ventilated area, ideally outdoors, to minimize exposure to fumes from paint, stain, or chemical strippers. If working indoors, open windows and doors for proper airflow.
However, I only work indoors on rare occasions. Between the fumes and the possibility of drips or damage to the interior of your home, it’s really just not worth it. Not to mention dust from sanding!
I will often use our covered front porch to provide protection from the sun (in the middle of summer) and the rain (pretty much all the time here in the PNW).
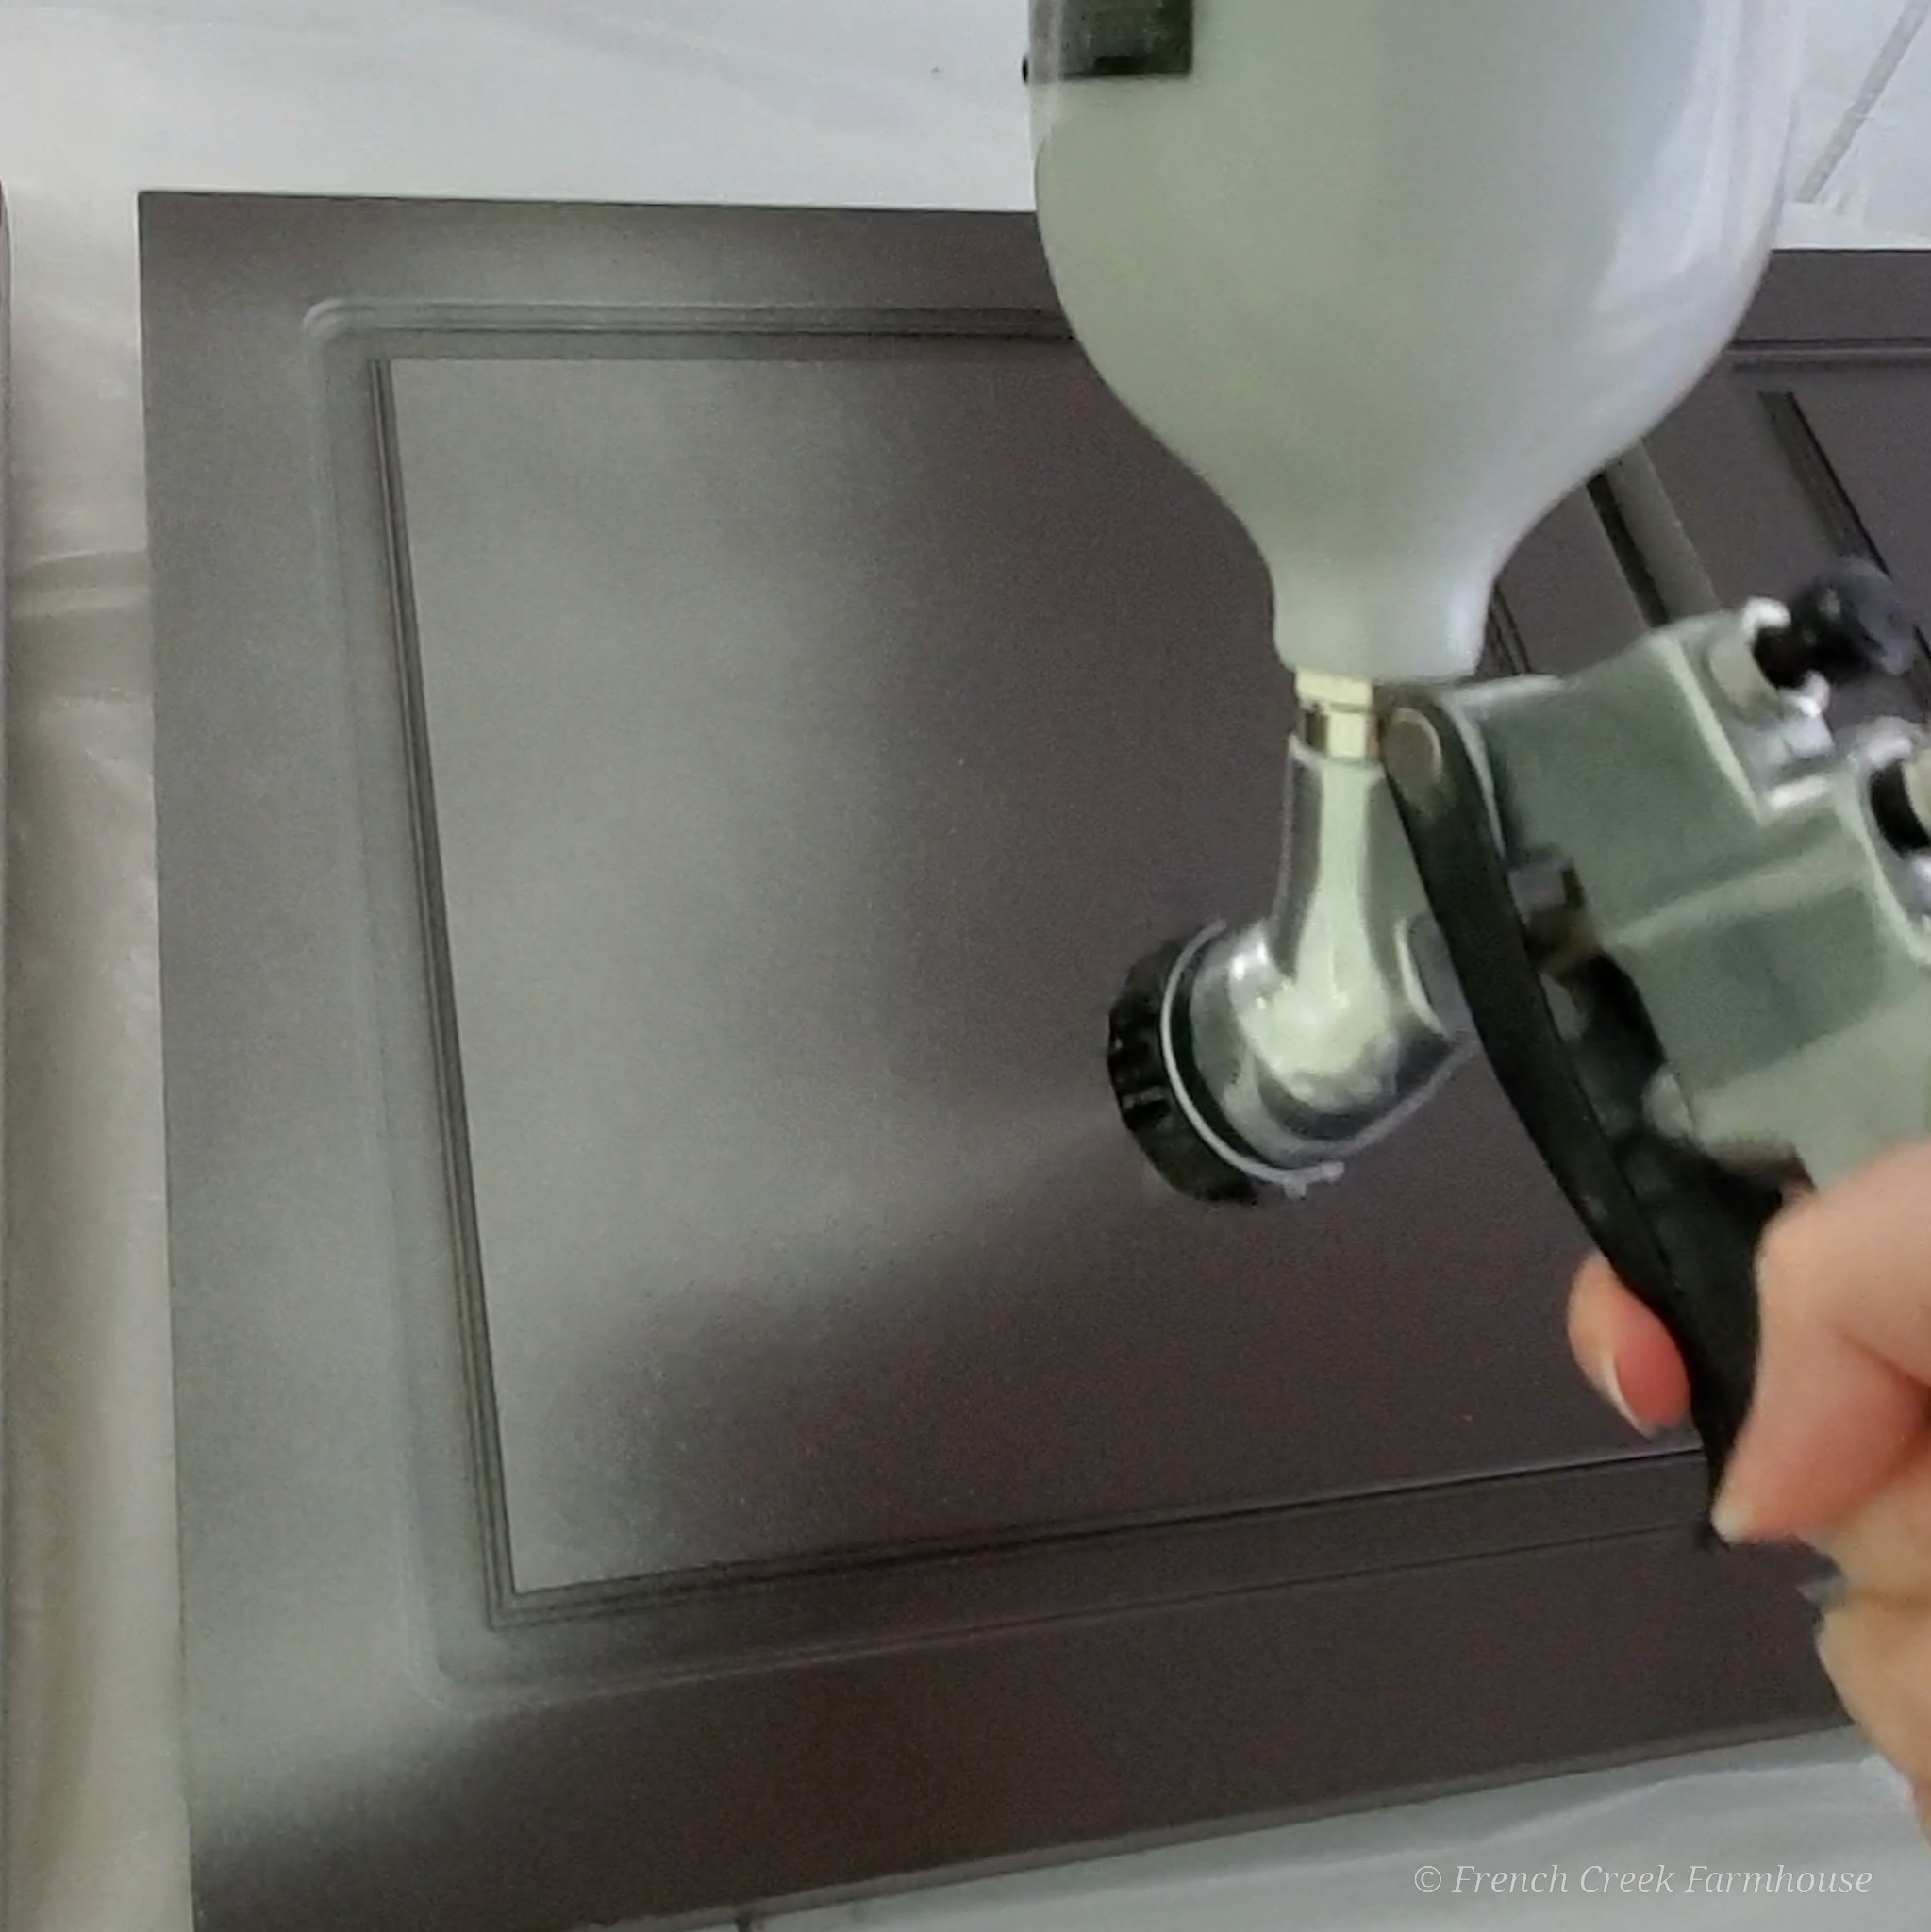
When I’m using our HVLP paint sprayer (like I did for this project), I set up a paint booth in our driveway. I use a 10×10 pop-up canopy, then line the walls and floor with drop cloths to prevent over-spray from discoloring the concrete or going anywhere unintended. It’s a great way to keep dust and debris out of your furniture surfaces while refinishing, too.
B. Lighting
Adequate lighting is crucial for a detailed and thorough job. Natural light or bright artificial lighting will help you spot imperfections during the refinishing process.
This is another reason why working outdoors is so helpful–there’s nothing like the light of the sun to point out imperfections or spots you might have overlooked.
However, if that’s just not an option for you, invest in high-quality work lights with bright LED bulbs.
C. Surface Protection
Cover the work area with drop cloths or plastic sheeting to prevent spills and stains. And don’t forget to protect your workbench or floor from potential damage, too.
While plastic sheeting is cheap, convenient, and disposable, there are some downsides, too. For starters, the light weight nature of the plastic means that it will often shift or billow with the slightest breeze, and can end up unintentionally getting stuck against the refinished surface.
Sadly, I know this from countless experiences with this problem. And let me tell you, having that plastic mar a newly painted or stained part of your project is quite a headache.
For this reason, I really, really, really prefer using canvas drop cloths now. True, they do cost a bit more upfront. However, you can reuse them over and over. I have some that I’ve been using for nearly 10 years!
And, they aren’t ridiculously expensive either, especially when you consider 1) how much use you’ll get out of them, and 2) how thankful you’ll be not to deal with that shifty plastic!
Before
After

Part 3: Assessing the Furniture
Now that you have your tools ready and your workspace prepped, I know you’re going to feel like you’re chomping at the bit to get started! But the difference between a shoddy refinish and one that you’ll be proud of later is taking some time to assess the condition of your furniture.
I’d wager to guess that a lot of people reading this blog post are even scrolling past this section right now. And those are the people who are soon going to end up with half-finished projects and a garage full of disappointment.
But you don’t have to accept that fate! That doesn’t have to be you!
Before you take on a single project of refinishing wood furniture, this is the advice you really need to hear from someone who has made all the mistakes and lived to tell about them. Learning how to refinish wood furniture doesn’t need to be painful when you can take in advice from others who’ve already made the big mistakes.
So, without further ado, here are two major areas that I think you really must consider before you begin working:

1. Damages and Scratches
Inspect the piece for any damages, scratches, or imperfections. Note areas that may require special attention during the refinishing process.
Now, I’m certainly not saying that you shouldn’t refinish furniture that’s damaged. I’ve done it many, many times (like this project).
But, I also have loads of battle stories about projects that were sooooo not worth the effort once I got started. Had I taken the time to really assess the level of work that would be needed beforehand, I could have saved myself a lot of hassle.
Sometimes we’ll find an amazing deal and think “it only needs X, Y, or Z to be beautiful”. But you need to think about the cost of doing X, Y, and Z…both the financial cost, as well as your time and energy.
If the piece is going to take so much effort that the project becomes practically painful for you, I don’t think it’s worth it–no matter how good of a deal you have found.
This is a common rookie mistake though, and early on, I acquired too many projects like this. They were such hassles that they would take up space in my garage (and later, storage unit!), and I wouldn’t ever get to them because I didn’t want to deal with the headache.
What might seem like a good deal can become quite a burden, so really think it over before you begin.
If you notice damage and decide to take it on anyway, you know what you’re getting into and what it’s going to take to complete the project right from the get-go.
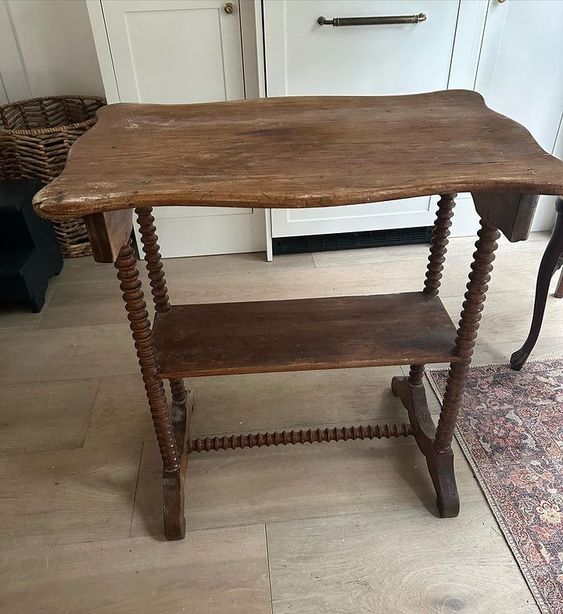
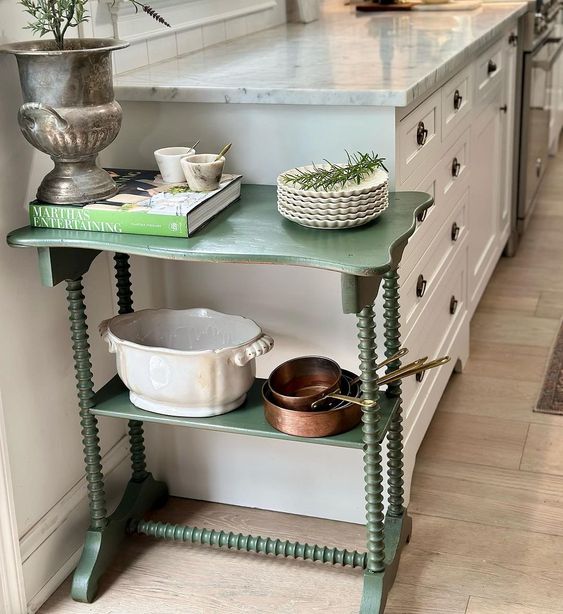
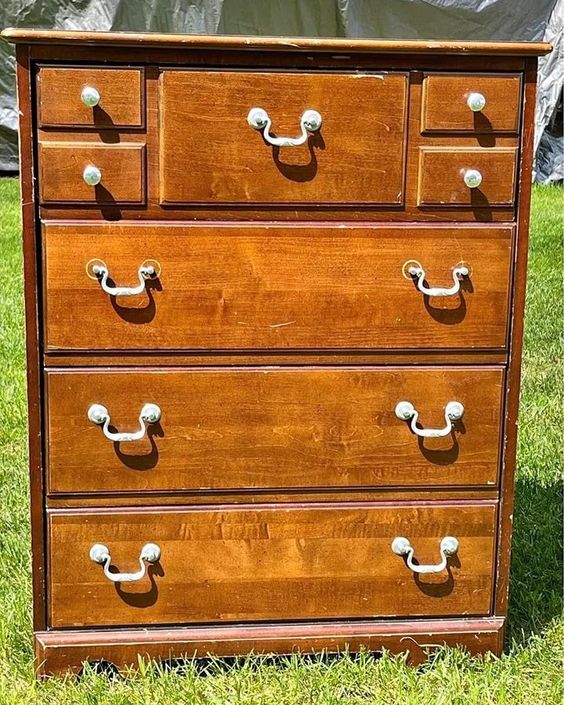
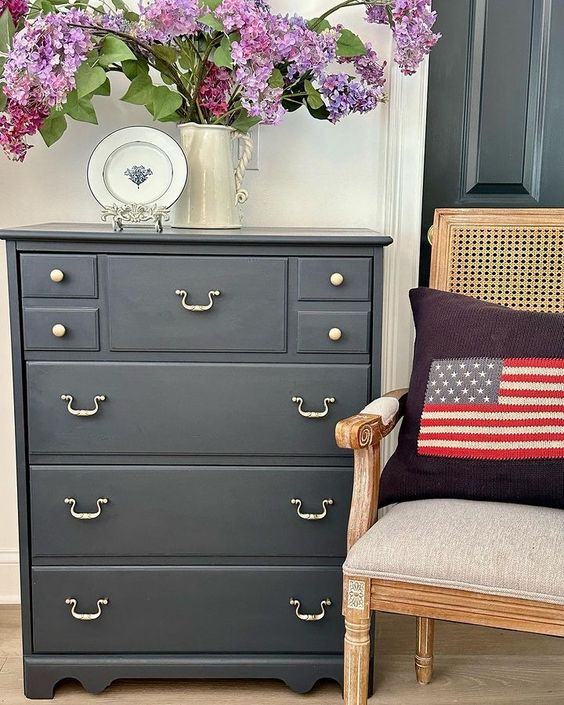
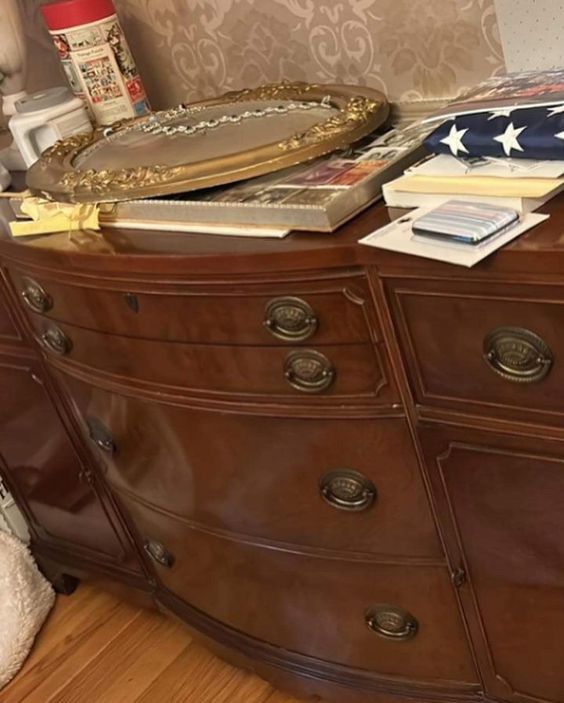
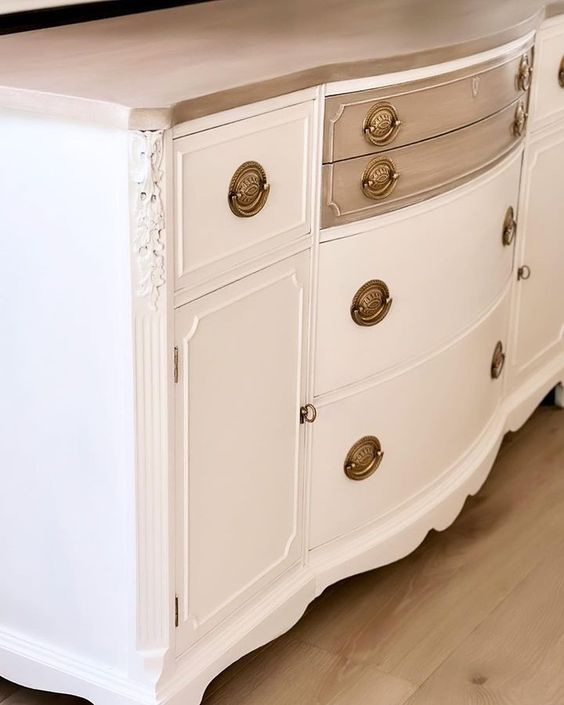
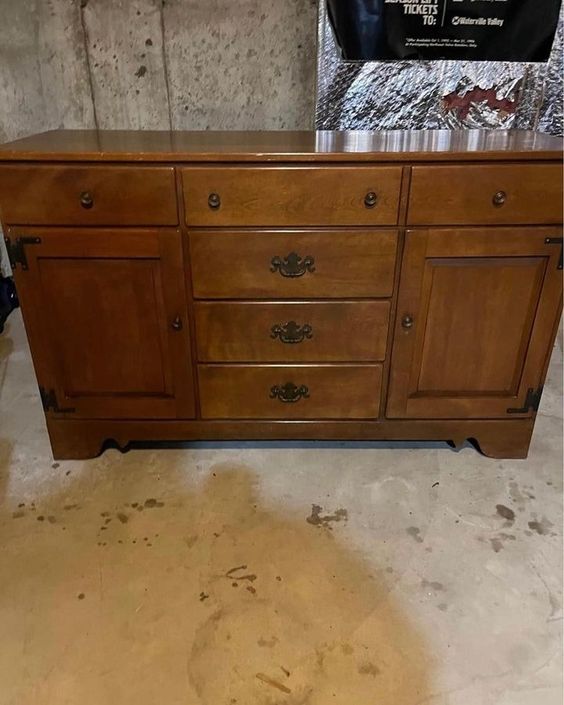
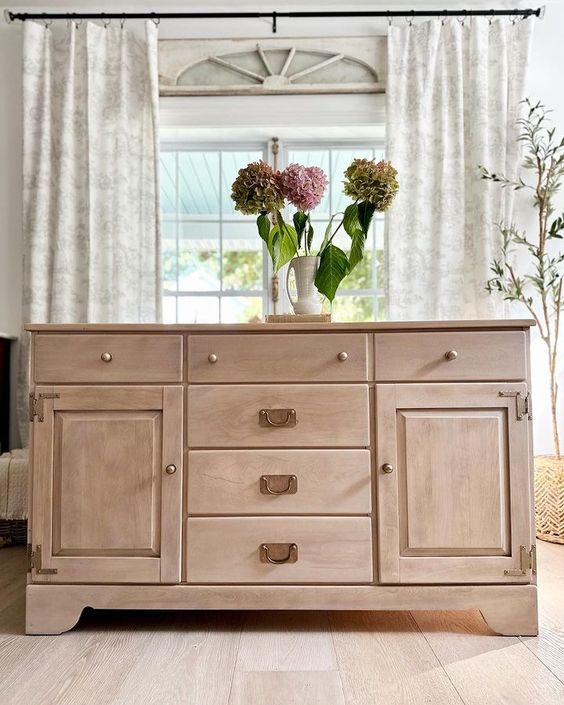
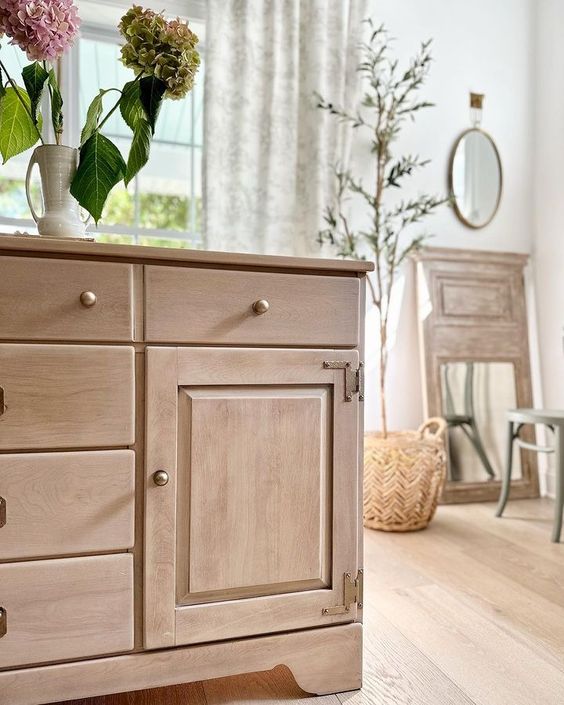
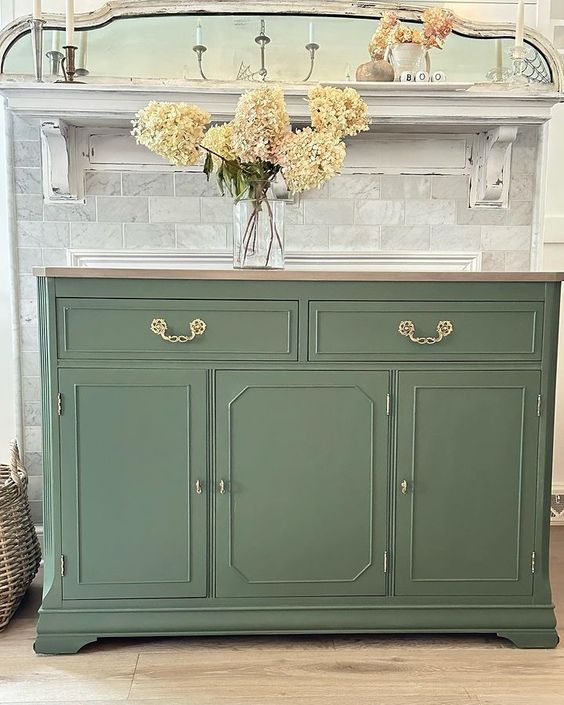
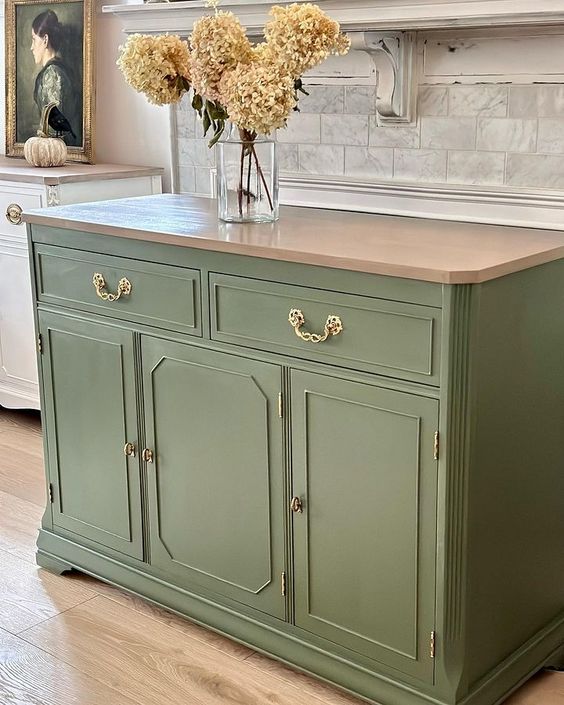
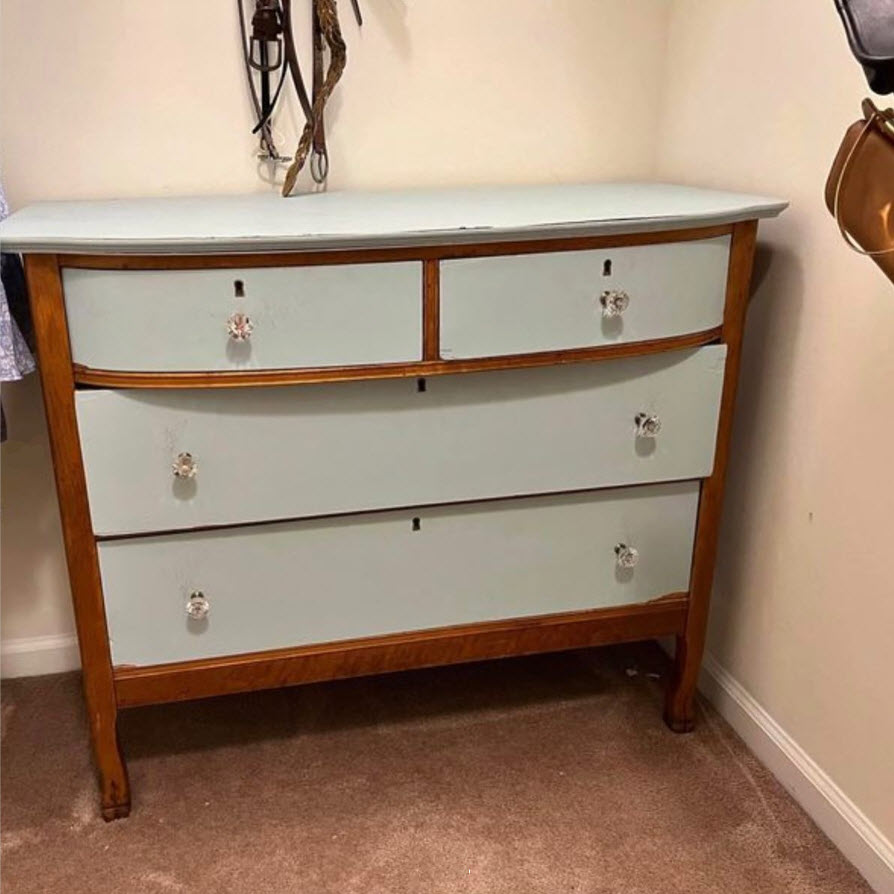
Before
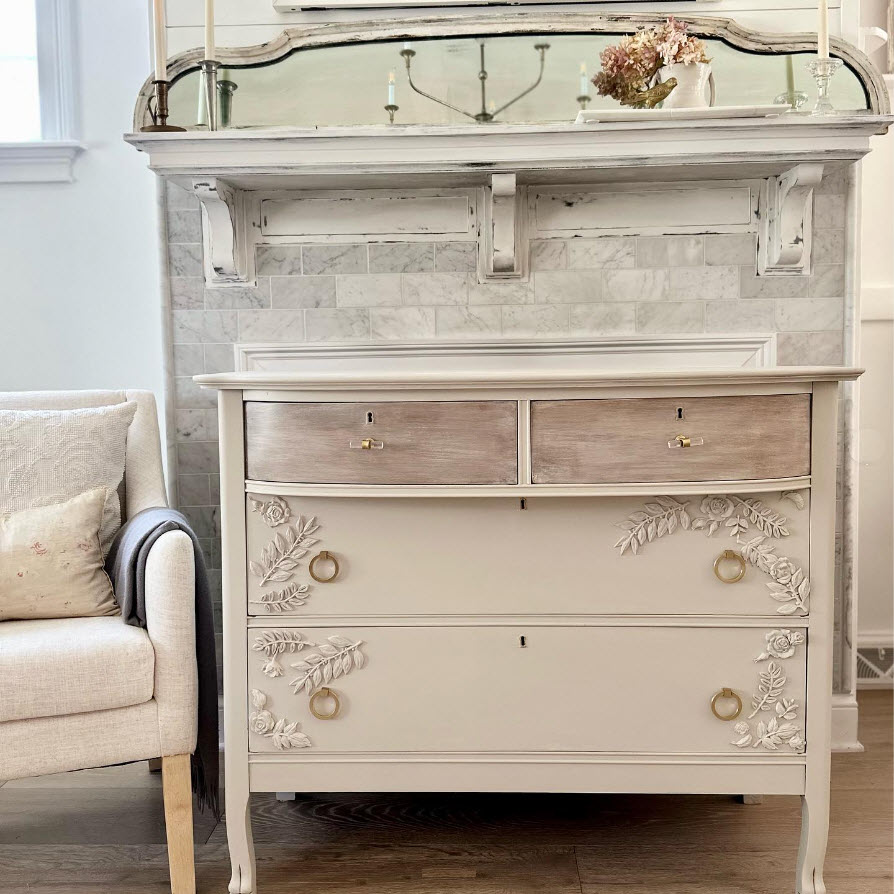
After

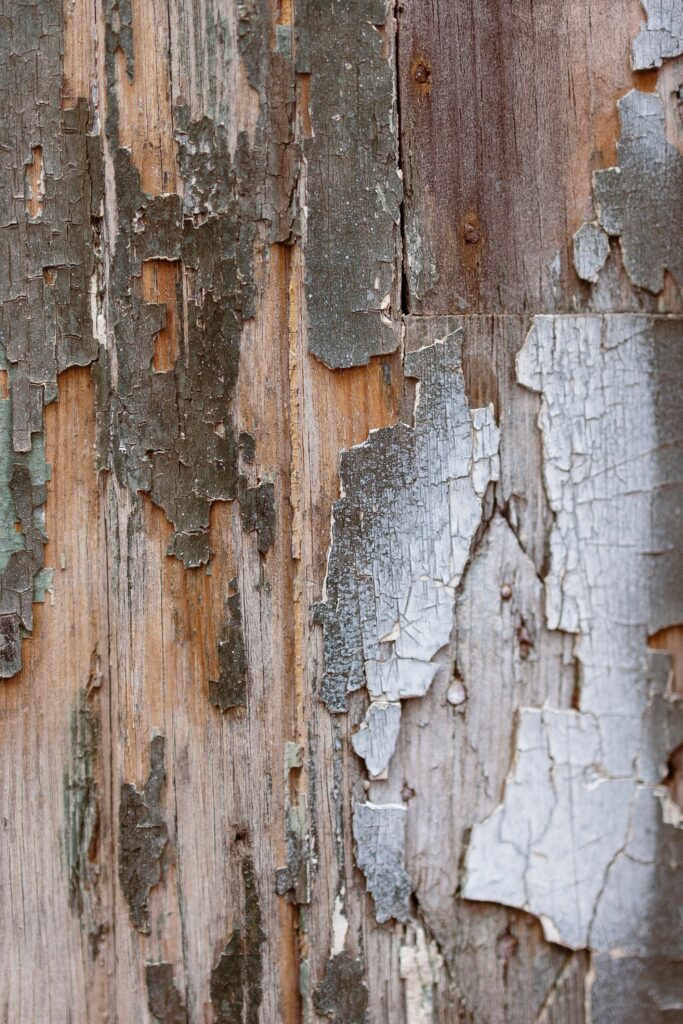
2. Wood Type and Current Finish
Identify the type of wood used and the existing finish. Different wood species may require different treatments, and knowing the current finish will help you choose the appropriate stripping and refinishing methods.
The big one for new furniture refinishers is confusing real wood with veneer. I have seen so many people make the mistake of buying a piece of wood veneered furniture at the thrift store and thinking they can sand it down to refinish it, only to destroy the piece of furniture in the process.
Can you refinish wood veneer furniture? Absolutely! But the process is different from working with solid wood furniture, and you need to understand those differences going into the project.
Veneer is a super thin sheet of wood that’s glued to another (less expensive) piece of wood (often plywood, or even pressboard).
So, if your goal is to take a dark stained or painted piece of wood veneer furniture, and then strip and sand it down to the natural wood like what’s currently quite trendy, you are setting yourself up for some disappointment, my friend. You need to find a piece of solid wood furniture for a project like that.
Be sure to take the time to investigate what you’re working with first. Then, you’ll know what your options are for refinishing, and you won’t end up in despair when you sand right through a piece of veneer and leave a big hole!
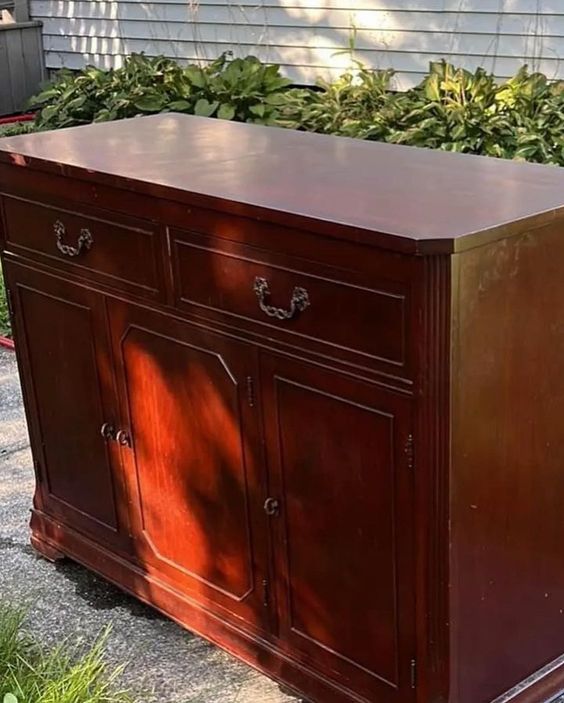
Before
After
Part 4: Stripping the Old Finish
The whole point of refinishing wood furniture is that you want to change or improve something about the existing finish. This begins with removing, or stripping, the old finish. And there are several methods you can use to do this:
A. Sanding
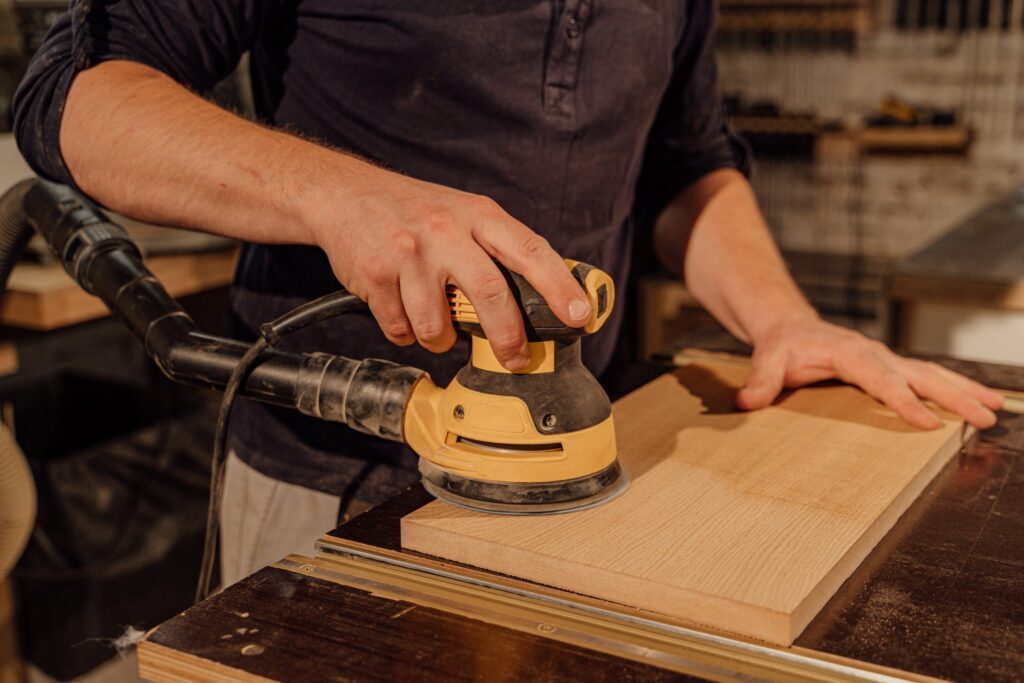
Sanding is a common method that involves using sandpaper to remove the old finish. Always start with coarse grit sandpaper, and gradually move to finer grits to achieve a smooth surface.
The grit of sandpaper is denoted by a number. The bigger the number, the finer the grit. So 60-grit sandpaper is very coarse, while 220-grit sandpaper is very fine for finishing.
You can either sand by hand, with a sanding block, or you can use an electric sander. As I mentioned earlier, an electric sander takes some skill to use properly. However, ultimately, it’ll increase the speed at which you can complete these tasks, making it incredibly useful.
No matter whether you’re sanding by hand or with an electric sander, you need a proper respirator to protect your lungs, as well as safety glasses to protect your eyes. Remember, lead paint is common on vintage furniture. I use these respirators, which also protect against vapors in addition to particulate matter, with this facepiece.
Before
After
B. Chemical Strippers
Chemical strippers are effective for removing old paint or varnish. All you need to do is apply the stripper, wait for it to loosen the finish, and then scrape it off with a putty knife.
However, it’s a pretty messy process. And, you might not like the idea of using hazardous chemicals that could burn your skin or cause other damage.
When I need to use a paint stripper, I prefer to use a citrus-based product that’s less harmful (like this one). Now, this product can still cause burns and needs to be used with caution, however, it doesn’t contain methylene chloride which is damaging to your eyes and internal organs. So that’s at least somewhat better.
Generally, though, I tend to avoid projects where chemical stripping is needed.
C. Heat Guns
Heat guns can be used to soften and loosen the old finish, making it easier to scrape off. But do be cautious when using heat guns, and follow safety guidelines.
This would not be a great option for any piece that includes any veneered surfaces because the heat will also soften the underlying glue and cause buckling of the veneer.
Also, the last thing you want to do is overheat a piece of furniture and leave a burn mark on the wood. The key to using a heat gun is to keep it moving. Don’t linger in one spot for too long.
This does take some practice and skill, so it might not be a desirable first choice when you’re beginning.
Part 5: Sanding and Smoothing
Yes, we just talked about sanding as one of the options for stripping the original finish. But additionally, sanding is a critical step to achieving a smooth, pristine surface after the original finish is removed (by whatever method you chose) and before you apply the new finish.
Here’s how to do it effectively:
- Select the Right Grit: Begin with a coarse grit sandpaper to remove the old finish or imperfections, and then progress to finer grits for a smoother surface.
- Techniques: Use long, even strokes going with the grain of the wood. Be patient and thorough to avoid uneven or patchy results.
- Smooth Corners and Edges: For corners and edges that are difficult to reach with regular sandpaper, consider using sanding sponges or detail sanders.
Be sure to wipe down the sanded surfaces of dust frequently, and especially before you move to the next step of applying the new finish. Use a slightly damp cloth, and wipe repeatedly until there are no bits left to collect.
Before
After
Part 6: Staining or Painting
Deciding between staining or painting a piece of wood furniture is going to come down to personal choice. But I know this is a hotly debated topic.
Staining enhances the natural beauty of wood, allowing the grain to show through. It’s a great choice if you want to preserve the wood’s character.
With antique pieces, there may have also been inlays or other details accentuated by the choice of a particular cut of wood that you wouldn’t want to hide beneath paint.
{ Related: How to Use Gel Stain }
Painting, on the other hand, allows for more creativity and customization. You can choose any color that complements your decor, and it can be quite an artistic endeavor.
Paint can completely change the look of a piece and refresh it beyond what you thought was possible. It can also help to salvage a piece of wood furniture that was damaged, giving it new life.
One alternative and compromise, as is shown in the transformation above, is to use a paint-wash technique. This is essentially a heavily diluted paint that allows the natural grain of the wood to show through.
Whichever choice you make, always follow these guidelines:
- Clean the surface to remove dust and debris. Be thorough.
- Apply the stain or paint evenly using a brush or sprayer, following the product’s instructions. Work slowly and methodically.
- Allow adequate drying time between coats. Do not rush the process!
- Remember that multiple thin coats will always create a better finish than fewer thick ones. Patience definitely pays off!
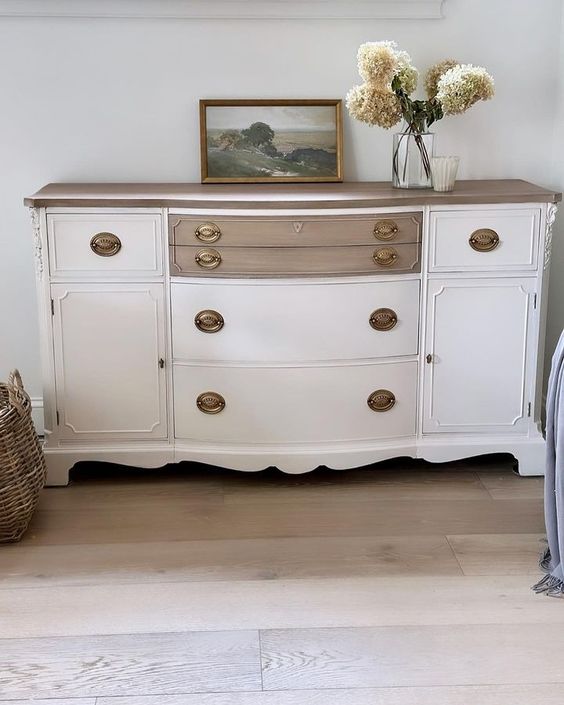
Before
After
Part 7: Sealing and Finishing
After staining or painting, it’s essential to protect your hard work with some type of sealant. This step ensures the durability and longevity of your refinished furniture.
A sealer or varnish acts as a protective barrier, preventing moisture, stains, and damage to the furniture’s surface. You have a number of options depending upon the look you desire and the finish you selected:
- Lacquer
- Shellac
- Oil
- Wax
- Polyurethane
- Varnish
My two preferred choices are wax and polyurethane, depending upon the look I’m trying to achieve. But, whatever you choose, always be certain to follow the product’s instructions carefully, and once again, don’t rush the process!
Part 8: Reassembling and Final Touches
Now that your furniture is now beautifully refinished, it’s time to put the finishing touches on it.
Reassembly
If you disassembled any parts of the furniture, reassemble them carefully, ensuring everything fits correctly.
If, for example, you refinished a dresser, you would have removed all of the drawers. You’ll want to now make sure that you put those drawers back into the same openings where they started.
With older furniture, things aren’t usually precise, so a drawer might only fit into its own spot and isn’t interchangeable with another drawer.
This is another lesson from the trenches, so do trust me on this point!
When you disassemble furniture, use masking tape to label and number the pieces. Use your phone to take photos that you can refer back to later. You will thank yourself when you get to the point of reassembly!
Before
After
Personalization
Consider adding personal touches, such as new hardware, decorative elements, or even a fresh coat of paint on drawer interiors.
You can see an example of personalization in the utility sink and cabinet makeover I did in our laundry/mudroom.
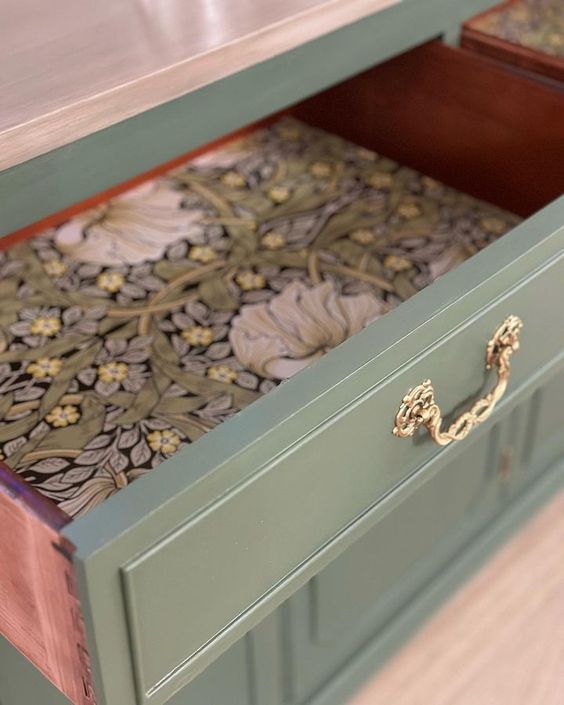
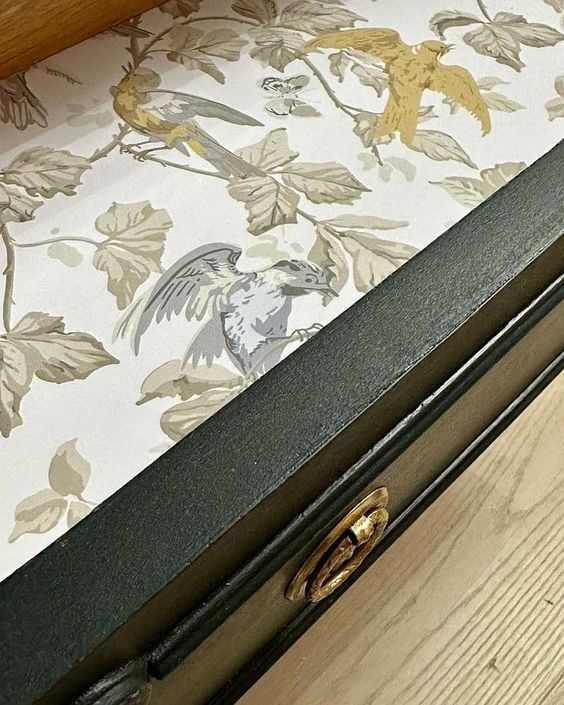
I also love to use wallpaper or fancy contact paper inside of the drawers. It’s an extra touch that most people don’t think about, but that makes such a tremendous difference in the finished product.
If you do decide to change the hardware, either because you don’t like what was there or maybe some of the pieces were missing, make sure to choose something that matches the period and style of the piece. If not, it will stand out sharply and make your piece look amateurish.
A great place to go for replacement hardware of vintage pieces is Hardware Tree. I’ve been able to repair older pieces with their replacement parts numerous times.
Before
After
Thoughts From a Habitual Furniture Refinisher…
If you’ve read this entire step-by-step guide for how to refinish wood furniture, you may have noticed a common theme nestled into the advice I’ve outlined: Patience.
Refinishing furniture isn’t necessarily quick or cheap. That’s not the point of the activity though, either.
When you’ve decided to refinish or restore a piece of furniture, you are investing a piece of yourself into the project. And why would you want to do that in a way that’s disparaging to the value you bring to the work?
Cheap things are cheaply made. But when you decide to refinish a piece of wood furniture, you are intending to increase its value and create something beautiful in the process.
That takes valuable effort, and it also takes time to do it well. Both of these qualities require patience and discipline to do the work the right way.
Could you slap a coat of paint on something and call it “refinished”? I suppose so. But what value is there in that?
Whenever we’re giving something of ourselves to a task, I think we should give our best. And, if you’re just beginning, your best will get better with time and experience. But only if you have the patience to see it through.
You won’t learn how to refinish wood furniture just by reading tutorials, and you won’t become an expert after your first project either. It’s going to take time and cumulative experience to develop your skills.
But, here’s the thing…the time is going to pass anyway. If this is a creative endeavor you want to learn, start now and have the patience to stick with it as each project becomes a chapter in your story.

P.S. Deep gratitude and a big hug to my dear friend Terri for her permission to feature her incredible talent in furniture refinishing. For more of Terri’s inspiration, or to purchase her work, be sure to follow her on Instagram!
Do you love hunting for vintage treasures as much as I do?
Get my free vintage & junk hunting journal
Let’s be email pen pals! Sign up to join our community, and get your free printable PDF Vintage Hunting Journal. This is so good!


Great article, indeed. Thank you for sharing the steps you make! I am happy to learn more!
So glad you enjoyed it! 🥰
Do you use a primer before the paint-wash technique?
Hi Meghan,
Paint washing (aka color washing) is a technique that gives a less than opaque hint of color to your wood surface. Primer, on the other hand, is fully opaque, so you wouldn’t want to prime a piece if you wanted to be able to see the wood grain through the washed finish. That said, you would still want to do surface prep (strip, sand, make repairs, clean, etc) before the paint wash so that you get the best finished results and paint adhesion. Best of luck with your project!
Kristi,
I truly appreciate your article, experience, and knowledge. I’ve been longing to rehab an antique hutch that belonged to my great grandmother. To my husband, it is outdated and an eyesore. I hope to blow him away with the transformation I have dreamed of. I love your advice of patience. I will not rush this project. I want to pass this down to my granddaughter. I hope to make it a beautiful piece that she will cherish and want to pass down to her children. Thank you, God bless you
I am sure you’re going to make that hutch gorgeous, Nyla! So wonderful that your granddaughter will have an heirloom treasure like that to cherish and enjoy for years to come. ❤️
Thank you so much for taking the time to share your expertise. Your article is very well organized for newbies like me.
So delighted that this was helpful for you, Steve!
Questions for you:
> I regularly see the instruction to clean the wood. How do you do that?
> I used the citrus stripper and it took off a lot of the stain, but now there is stripper residue. Does this need to be cleaned before I use an electric sander? If so, refer to the question above😉
> My piece has some old iron hardware. What is the best way to clean that?
Thank you,
This a great article! So inspiring. I hope one day start this journey too
Really helpful article. Thank you.
I really appreciated your article which is very helpful
Great article. Very well written, well organized, friendly, and encouraging.
Have you written about why you prefer wax or polyurethane for the finishing stage? I was curious how they differ and why you like each one.
Thank you for this great blog. I am going to refinish an extendable American cherry dining table. May I ask, can you wax finish rather than stain or paint? I would like a finish that is true to the colour of the timber rather than add any colour and I would prefer a Matt finish. I look forward to hearing from you.
Wendy
Black Rock
Australia
Lovely post, very thorough and clear – and strangely calming! I wanted to ask about repairs prior to refinishing. At what stage would you use wood filler, before or after the initial preparation sanding?
I’m refinishing a baby cot in natural pine which I am planning on painting white for a nice clean look, but there are quite a few brad nails holes, missing knots, etc which will need filler. Do I sand first, then apply filler and sand again? Or fill first then sand the whole piece once prior to painting?
Also, in this case I would only sand with a 180-220 grit paper to ready the surface for painting right? No need to use a coarser grit if I’ve already cleaned the surface with Simple Green?
I love your work and wanted to ask if there was any way to send you an email so that you can look at a piece of furniture that I have. It was used as a vanity at one point with an exterior mirror just placed on top of it however I don’t think that’s what it is. I wanted to find out what it is and I also wanted to restore the piece of furniture and add some shelves. Thank you