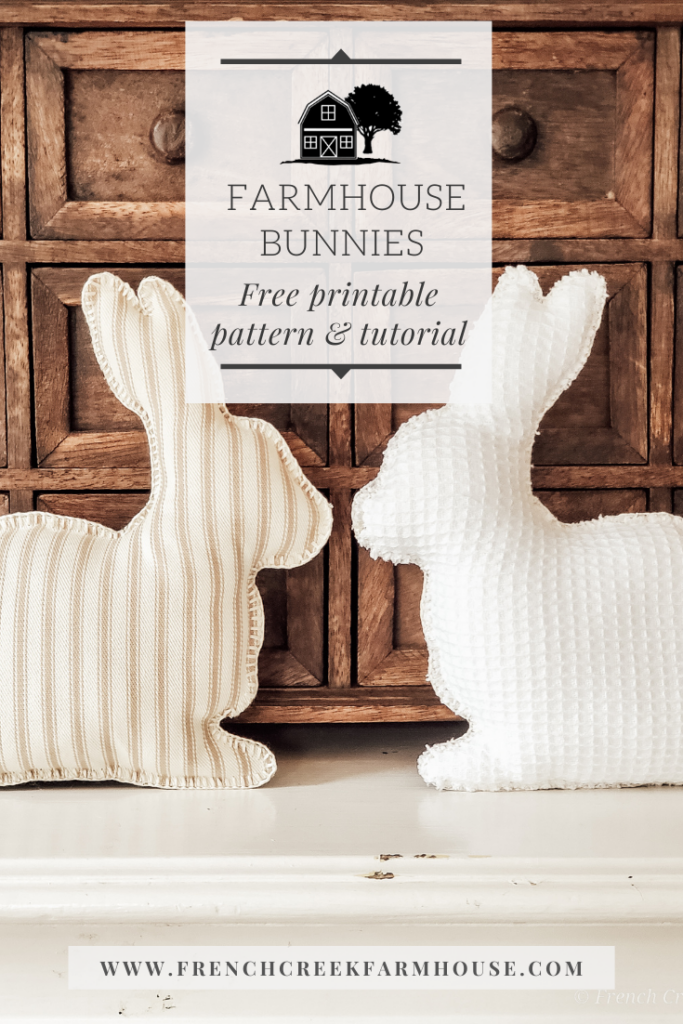
DIY Farmhouse Bunnies
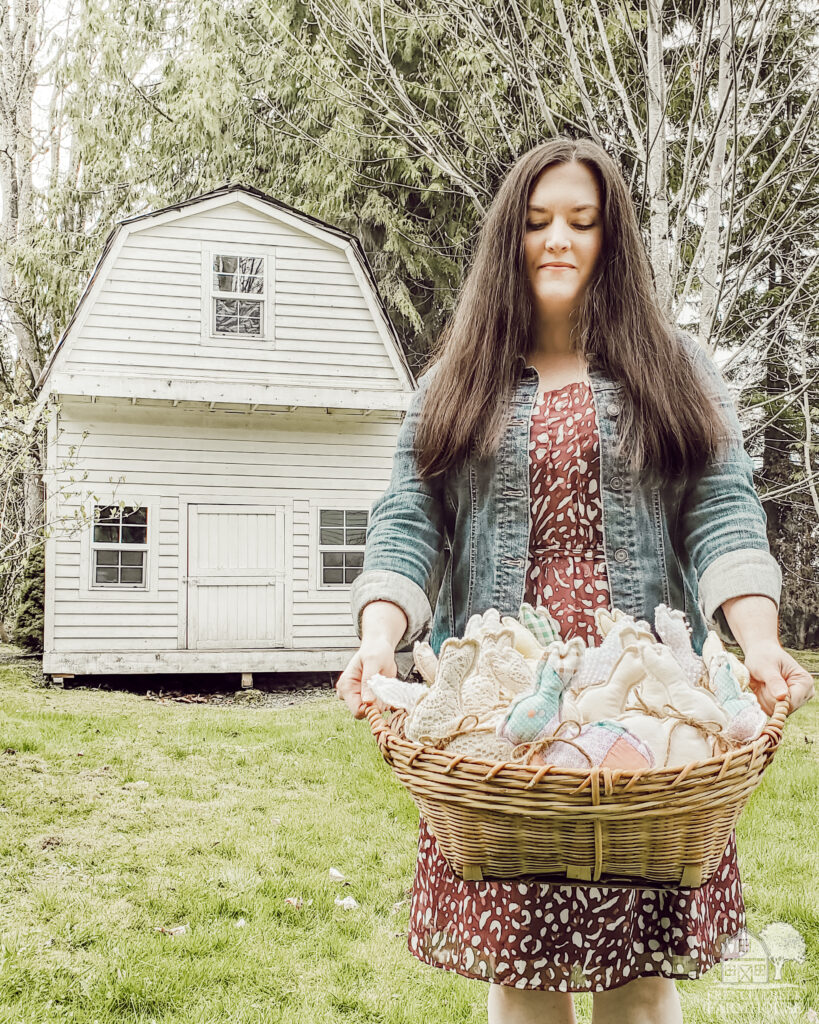
When it comes to springtime and Easter decorating, there’s nothing more perfect than bunnies! Today, I’m going to teach you how to make these adorable farmhouse fabric bunnies–no sewing machine required–using my free printable bunny pattern.
A while back, I started creating patterns and fabric crafts that didn’t require the use of a sewing machine. However, that’s certainly not because I don’t love to sew! In fact, I cherish my sewing machine, and I’ve been sewing since I was just a young girl.
My sister and I both learned how to make our own clothes when we were young, and I can recall many long hours pouring over the pattern books at the fabric store dreaming of the next thing I wanted to make. As I got older, crafting and quilting became big passions of mine as well.
For a good 25 years, I used a hand-me-down sewing machine that had belonged to my grandmother. Then, sadly, it stopped working a few years ago, and the sewing machine repair shop said they could no longer get the parts to fix it.
I actually cried that day as we left the shop, and Rob had to drive us home. That might sound silly, but my sewing machine had become such a familiar friend to me over the years, that the thought of losing “her” was heartbreaking.
Sewing had given me a creative outlet to soothe my soul during hard times in my life, and it had also given me the joy of expressing myself creatively by making gifts for people I love. That machine had been with me through thick and thin. And, today, I actually still have it stashed away in my craft room because I can’t bear to part with it, even though Rob bought me a new one a few weeks later.
I also realize, though, that not everyone has a machine or learned this skill along the way. But that doesn’t mean you can’t still make super cute fabric projects! I think everyone should get to have that creative connection with making fabric crafts–no matter what tools you have at your disposal.
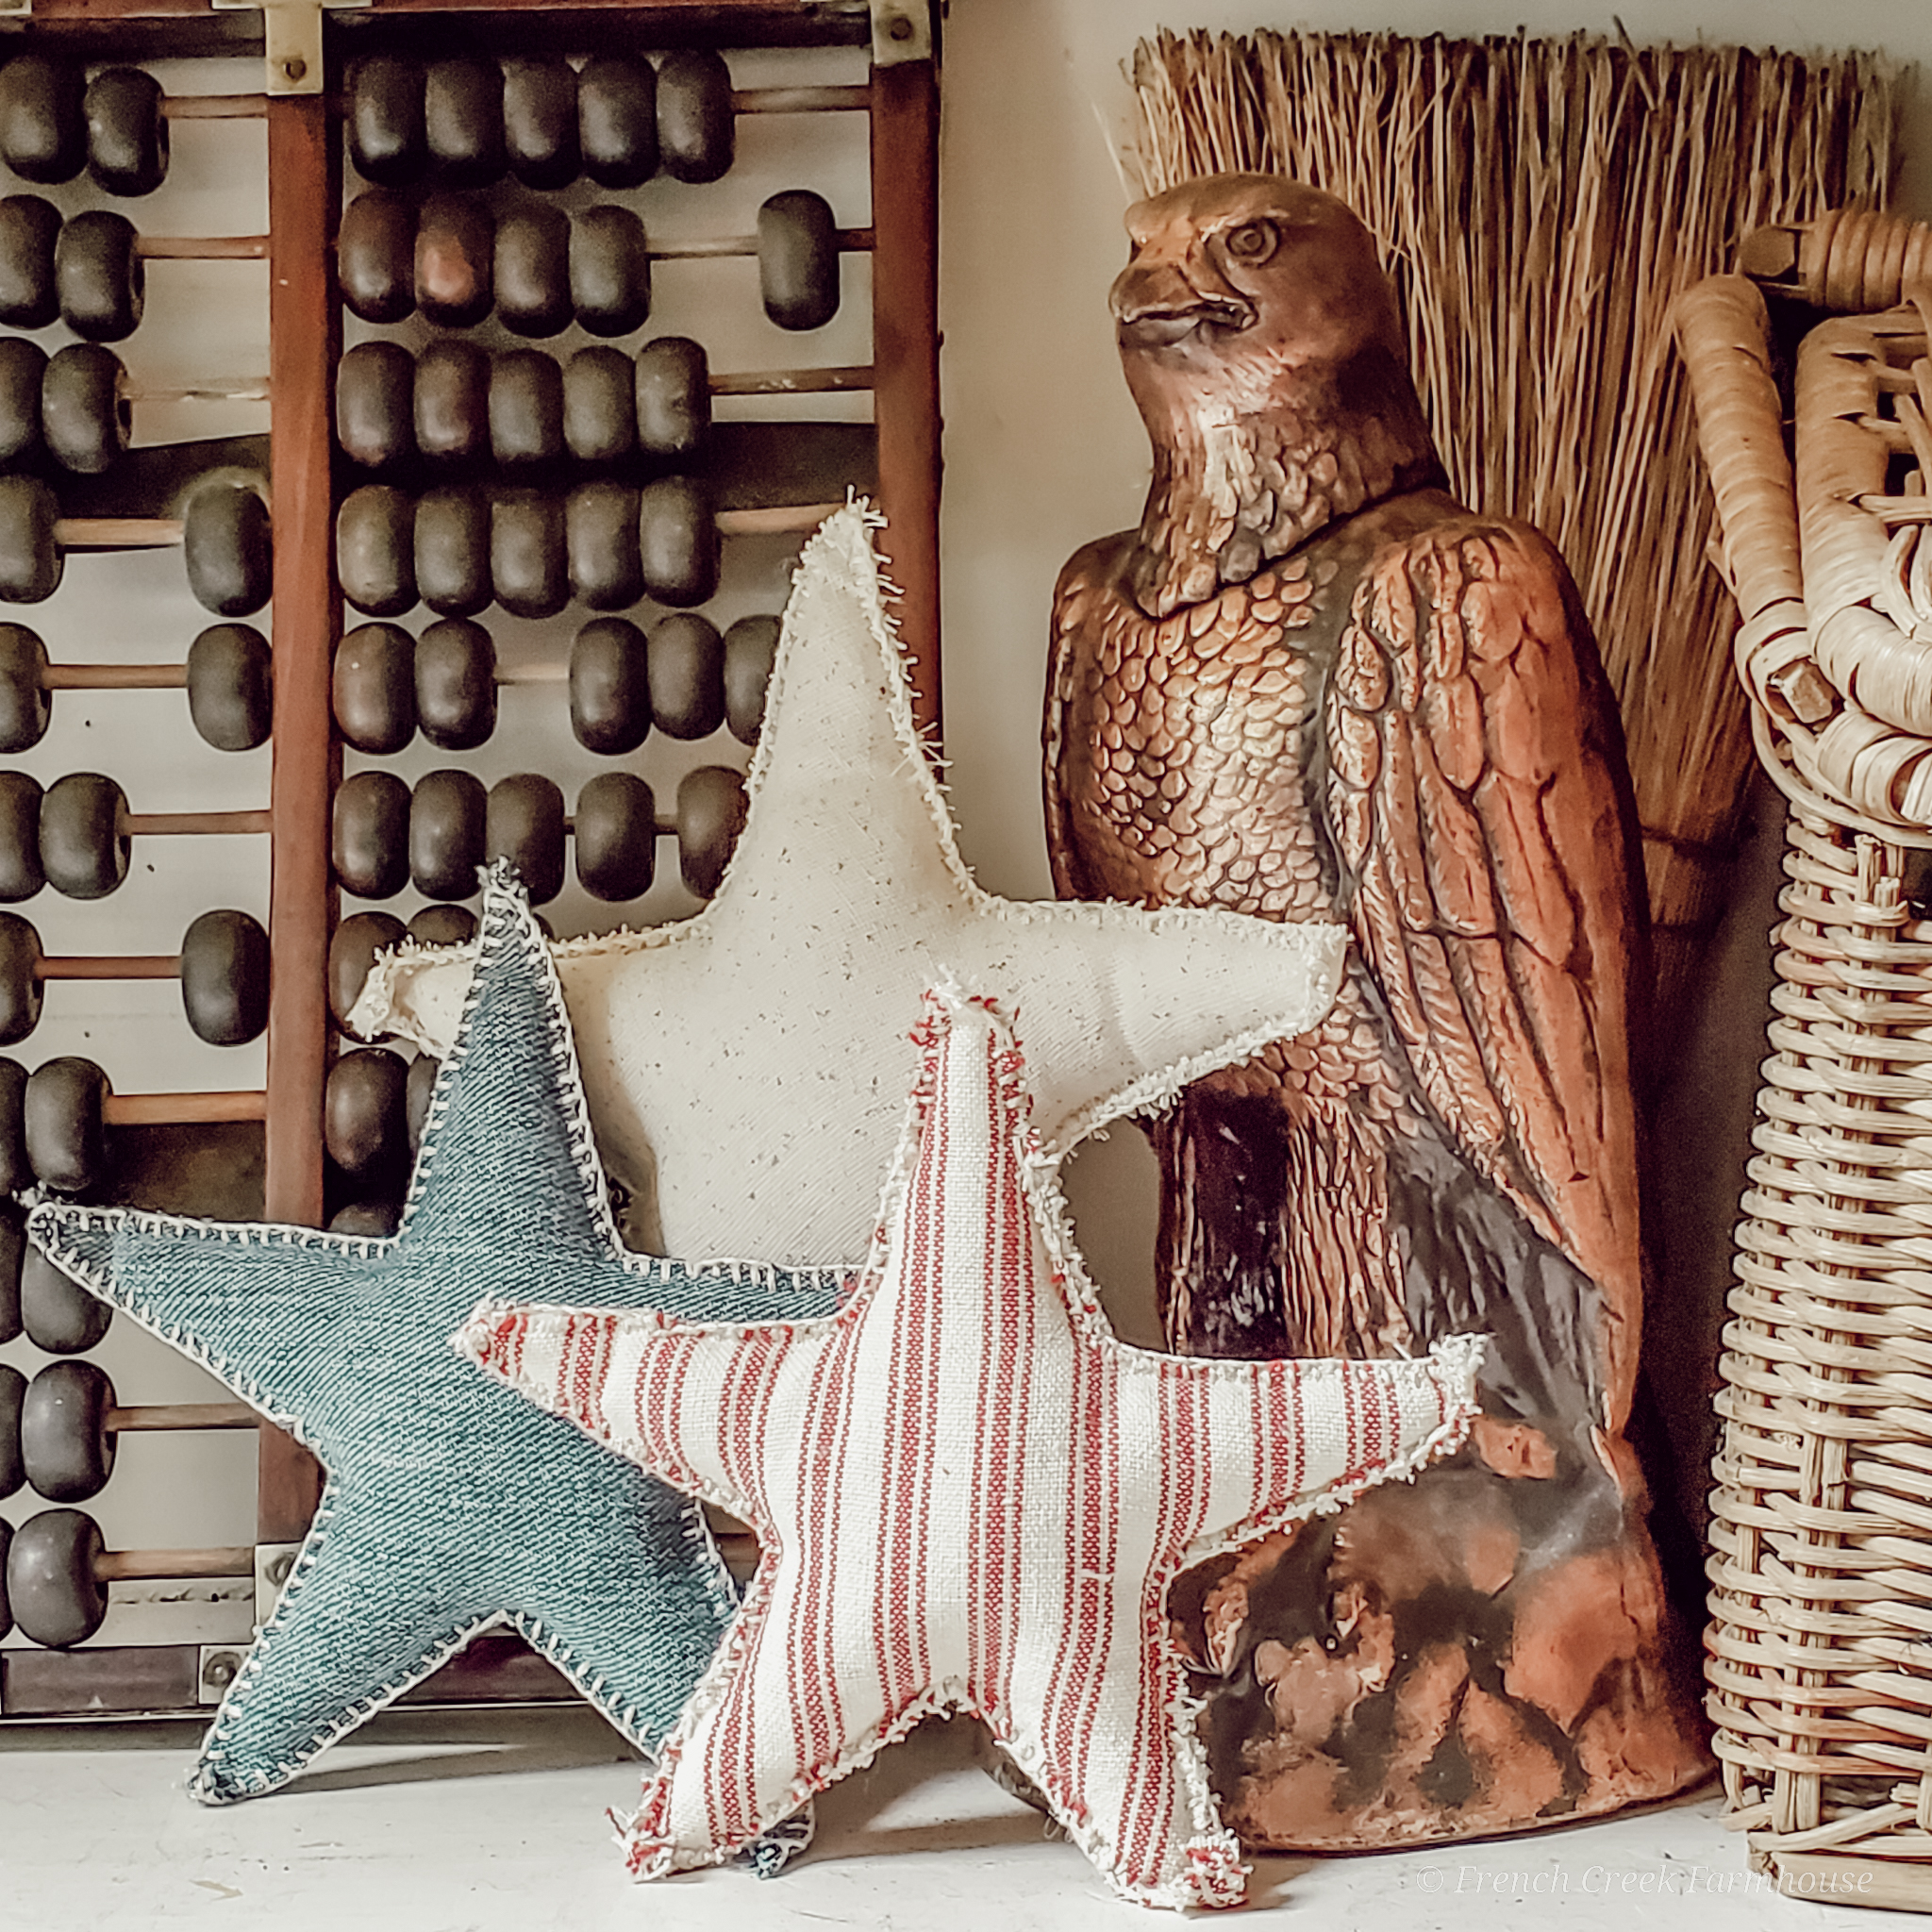
So, I started by creating a detailed tutorial on one of my favorite hand-sewing techniques called the blanket stitch. The reason I love this stitch so much is that it gives a very authentic farmhouse look to your fabric projects that’s really charming.
It’s also a very simple stitch, requiring only a needle and thread, that can be used on almost any type of fabric from felt to knits, and it’s so easy that you can even teach your young kiddos how to sew this stitch. Imagine how much fun they’ll have crafting their own stuffed friends with this printable bunny pattern, too!
If you don’t already know how to to sew with the blanket stitch, definitely start by reading this guide–it’s loaded full of step-by-step pictures and simple directions to get you started.
Learn How to Sew the Blanket Stitch
a comprehensive guide with photos
In this article, I’ll teach you everything you need to know to get started hand-stitching with the versatile blanket stitch. Photos of every step are included, so you can actually see each part of the crafting process!
When you’re ready, I have more free printable patterns that all use this stitch (and I have even more in the works–make sure to signup for my newsletter so you don’t miss them!). Check out these past projects for more blanket stitch sewing crafts:
Now, let’s add some cute farmhouse bunnies to the blanket stitch projects list! Don’t forget to pin this post so you can come back to it again later, too!

Disclosure: This is not a sponsored post, and I have received no compensation for sharing anything that follows. Some links within this blog may be affiliate links, and I might earn a commission if you make a purchase through that link. This usually amounts to cents, not dollars, and helps to support the projects featured on this blog. I only recommend products from companies that I have found to be trustworthy. Read my full disclosure here.
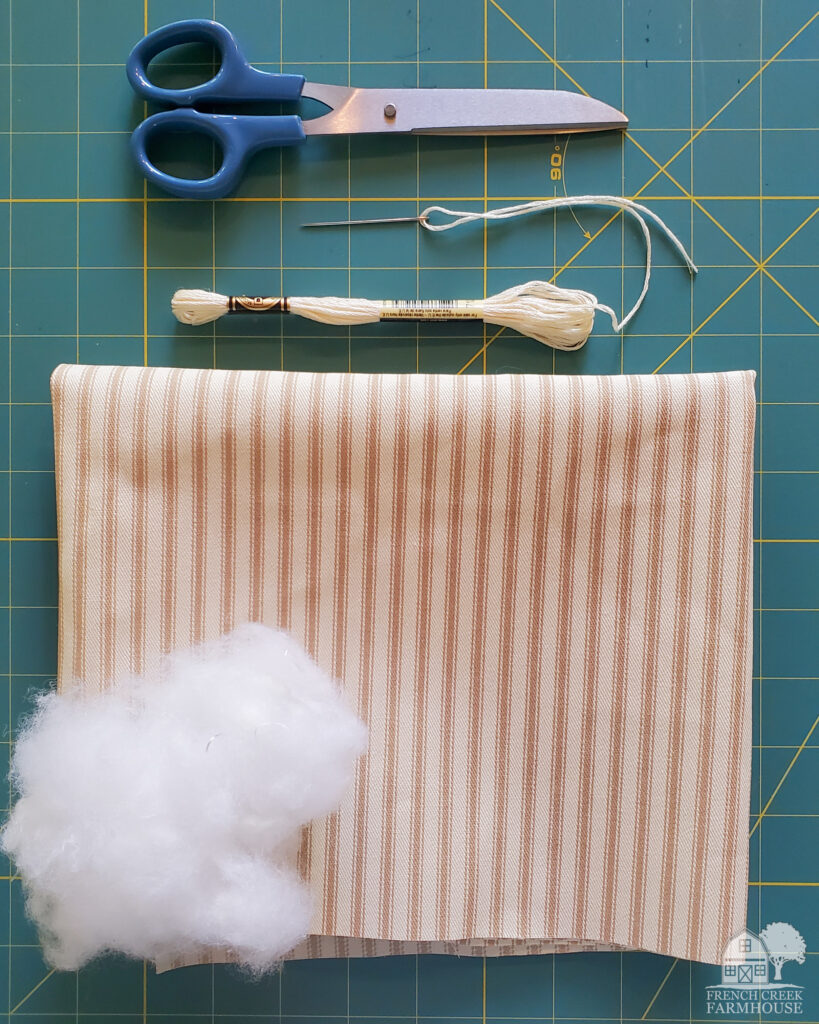
- Fabric of your choice (this is a great one)
- Embroidery floss (For most projects, I prefer floss that’s the same color as my fabric)
- Embroidery needle (This is different from a regular sewing needle because it has a longer eye for threading larger materials)
- Poly-fil
- Scissors
- Fabric Marking Pen
- Bunny Template (free printable bunny pattern you can download here)
- Laminator (optional, but I highly encourage it)
Hippity hoppity, spring is on the way!
free Bunny pattern
Craft your own spring and Easter decor with this easy-to-use printable pattern! Exclusively available to my email pen pals!
1. Gather all of your supplies, including the printable bunny pattern (here). Two important notes about supplies…
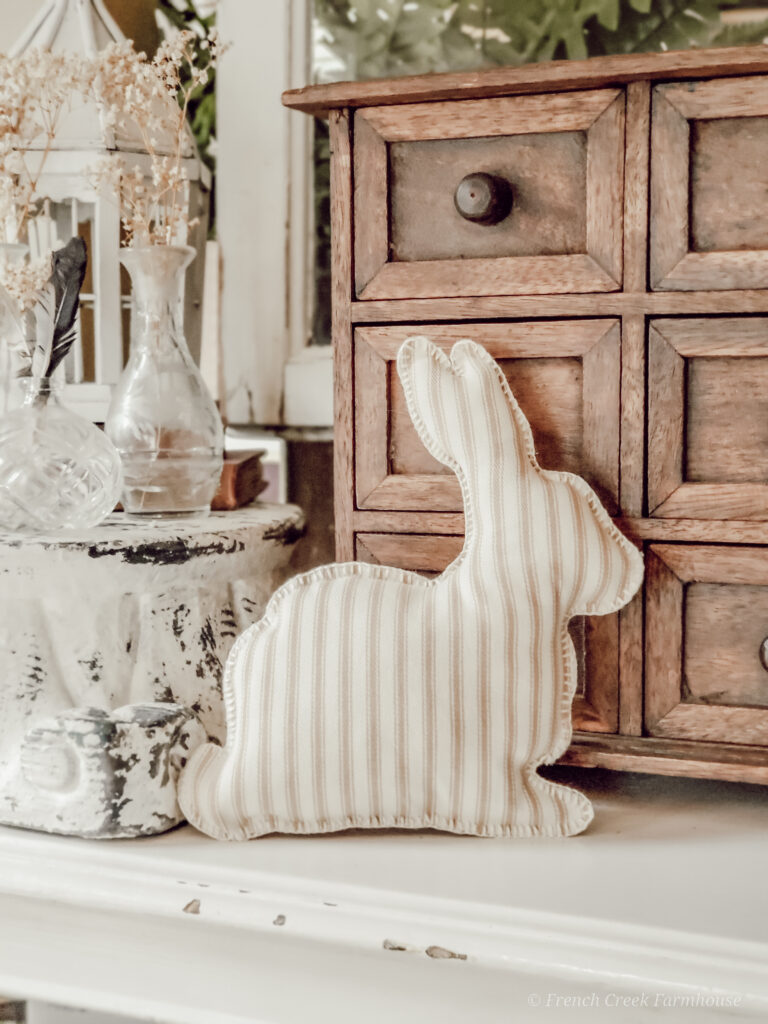
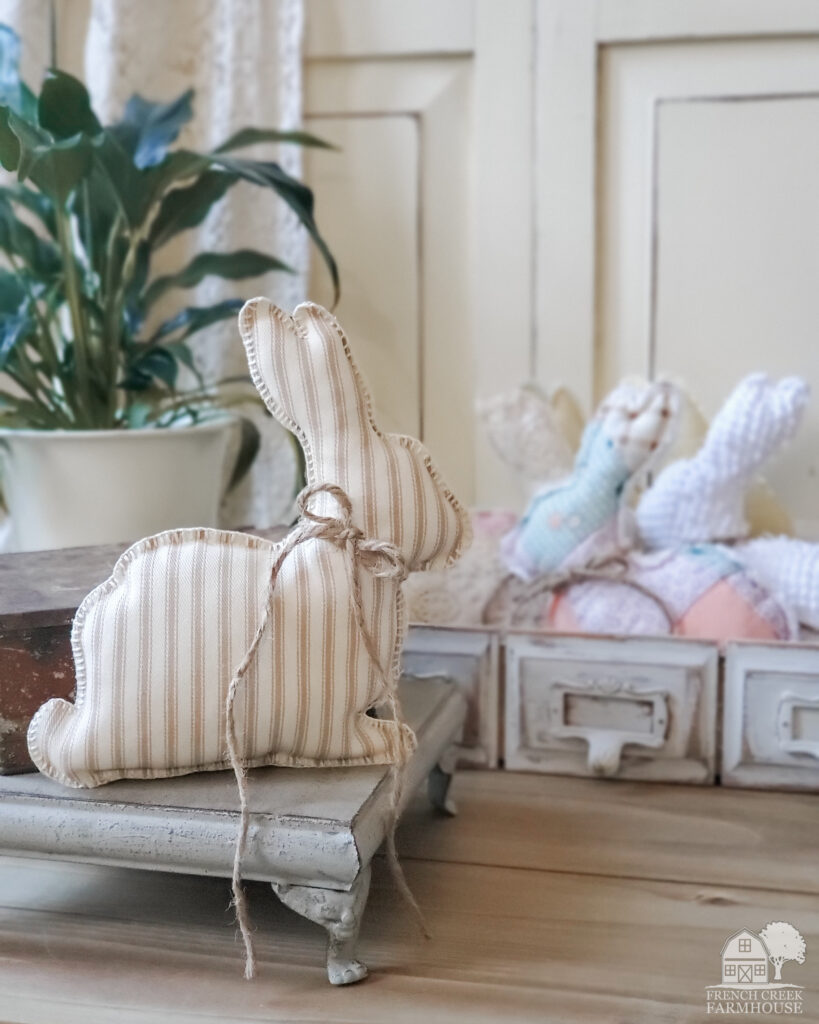
First, you can use any type of fabric you like for these bunnies. Since our home is decorated with a vintage farmhouse aesthetic and a neutral color pattern, I chose to use a beige ticking stripe fabric (like this) as well as some leftover scraps from a vintage chenille waffle weave blanket. Both fit into our decor perfectly!
You can find lots of vintage fabrics for your sewing projects here.
Second, I highly recommend laminating your printable bunny pattern. Here’s why. Even if you print them out on heavy cardstock, the patterns are still going to be prone to creasing and tearing. By laminating the entire sheet before you cut out the pattern, you add extra strength so that you can reuse these printable patterns over and over again.
I have a folder in my craft room where I stash all my patterns so that I can easily find them again for future projects.
The other benefit of laminating your printable patterns is that when you use them to trace designs, you won’t have to worry about getting pencil or pen marks onto your template. Those marks will just wipe right off when they’re laminated!
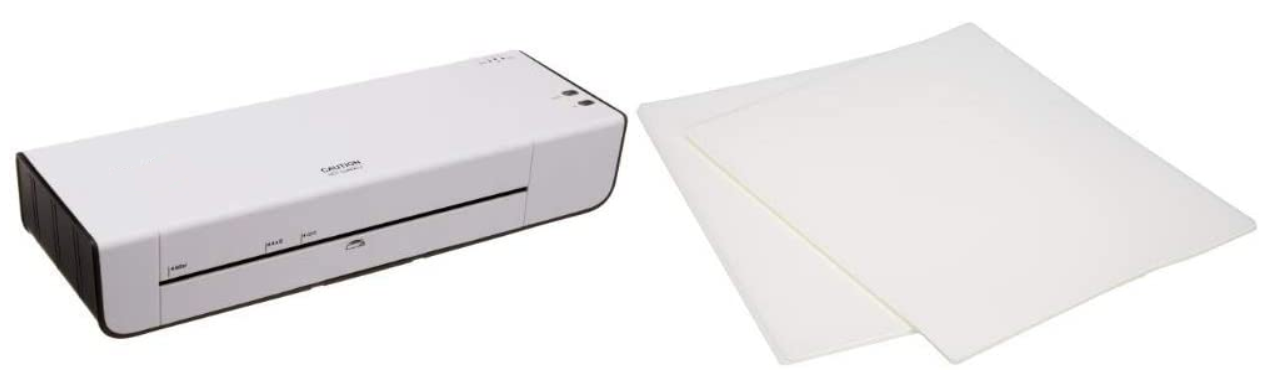
This is the exact laminator I own, and we use it ALL the time. I know there are much more expensive models out there, but this one is super affordable and very reliable. I’m a thrifty kind of gal. Why spend more for no reason?!
We’ve had our laminator for seven years without a single problem, and it even comes with a starter pack of 50 laminating sheets to get you going. You would be shocked how useful it is once you own one–you’ll find so many things to laminate in no time!
Okay, now back to crafting our bunnies!
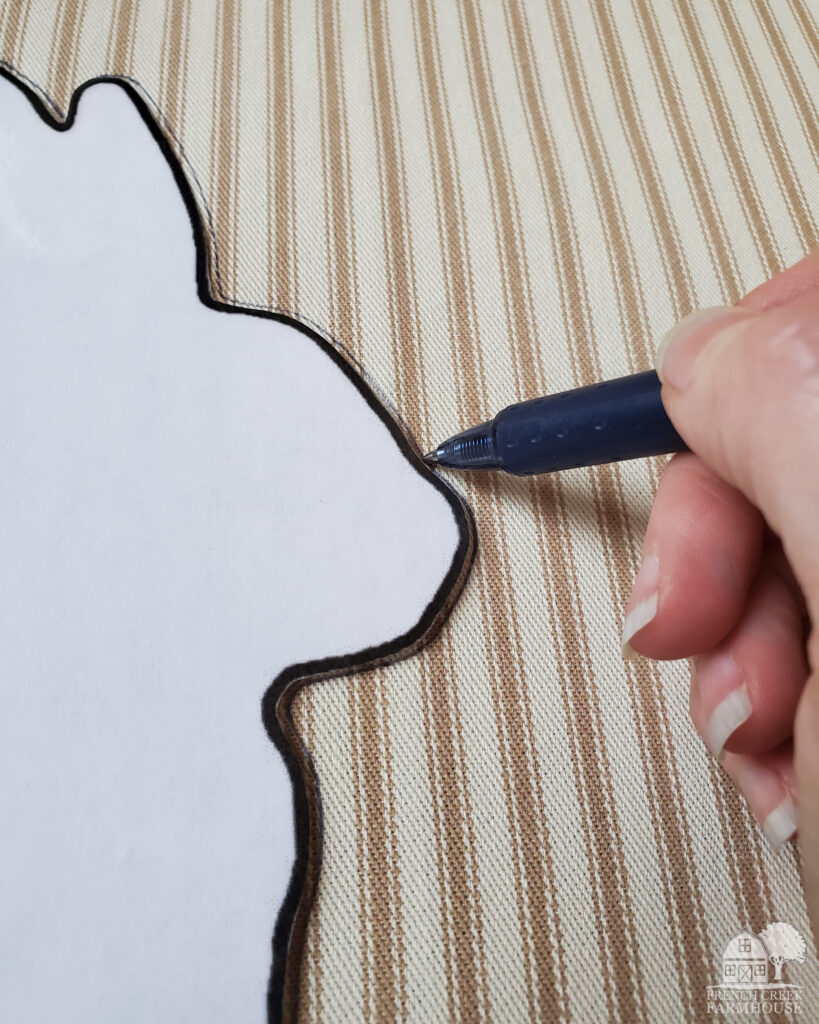
2. Trace the bunny pattern onto your fabric. If you’ve chosen fabric that’s one-sided (meaning, the pattern is only printed/textured on one side and looks different when you turn it over), then make sure you flip the pattern over and make the two bunnies as mirror images of each other.
3. Cut out your bunnies.
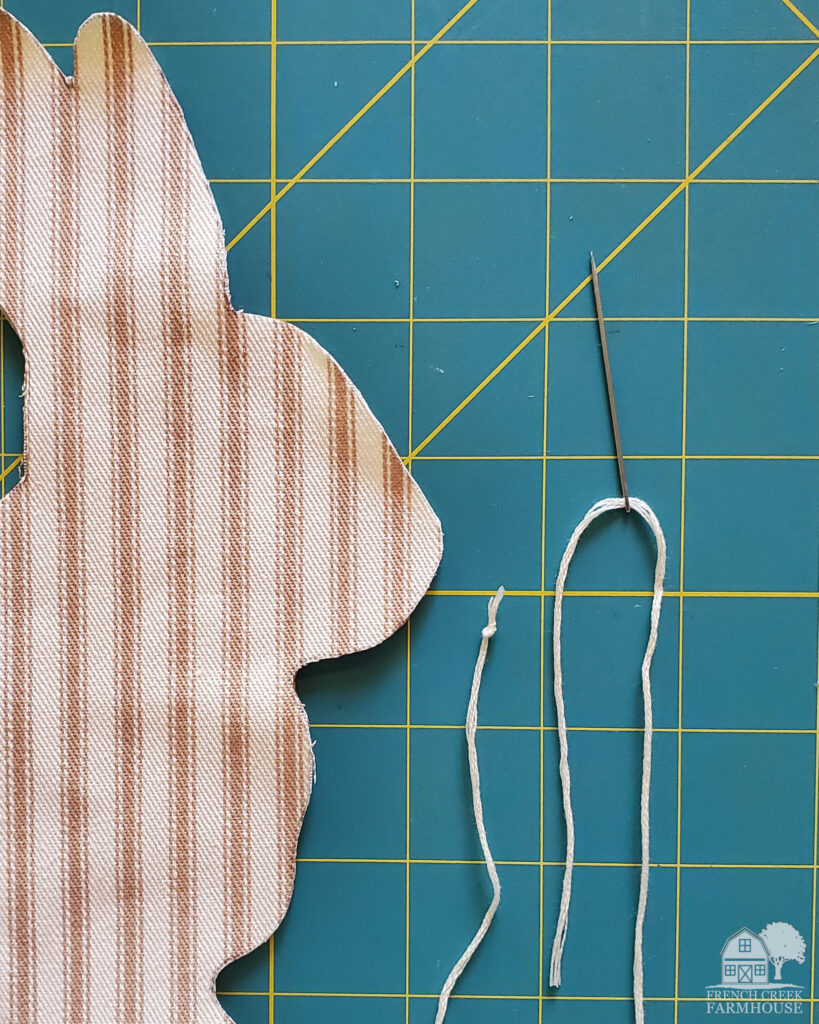
4. Thread your needle with the embroidery floss, then knot one end. Make sure not to use too much thread because you’ll find it unmanageable as you’re stitching. I go over this in the blanket stitch tutorial, here.
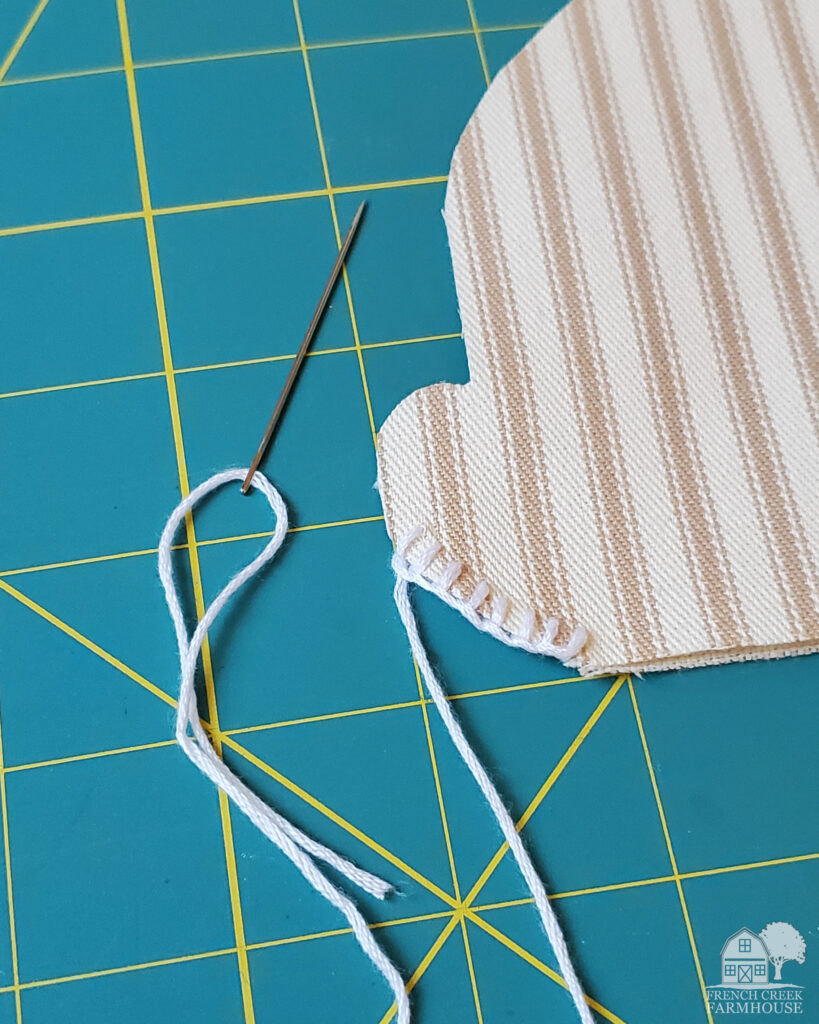
5. Technically, you can start stitching anywhere you like. However, I’m going to recommend that you start just under the tail, as I have in this photo.
Two reasons why–first, this keeps the start/finish stitches on the bottom of the bunny where they’re less likely to be seen. And second, I would never suggest that you start stitching on a curve if it’s avoidable, because once the project is stuffed, it’s harder to match up curves to stitch closed compared to straight lines.
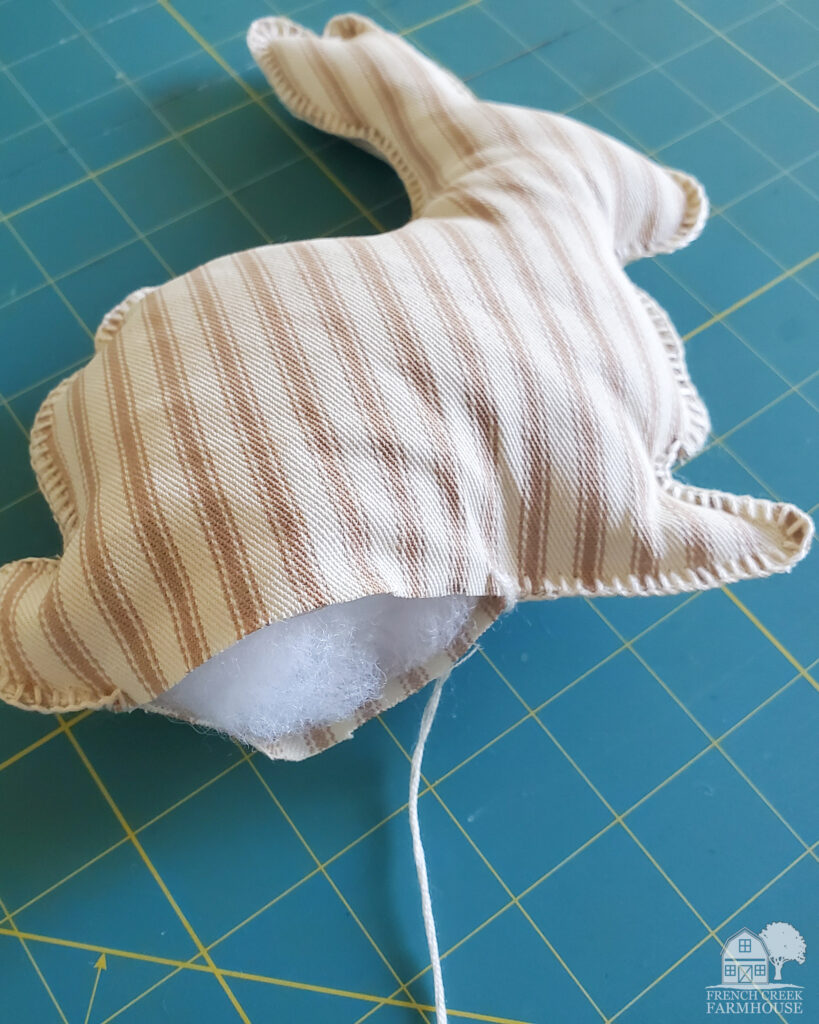
6. Using the blanket stitch, work your way all the way around the bunny. When you have about 2-3 inches remaining, stuff your bunny with the poly-fil. You might find it useful to push the stuffing up into the bunny’s ears with a pencil or crochet hook–but don’t push too hard and tear out your stitching.
I like my plush projects to be pretty stuffed and plump. I think they look so much cuter when they’re filled up, but this is totally up to your taste!
7. After your bunny is stuffed to your liking, complete the stitching to the end, and knot off your thread. Then, stand back and admire your handiwork while enjoying all the compliments showered upon you by friends and family!
Other Ways to Use Your Printable Bunny Pattern
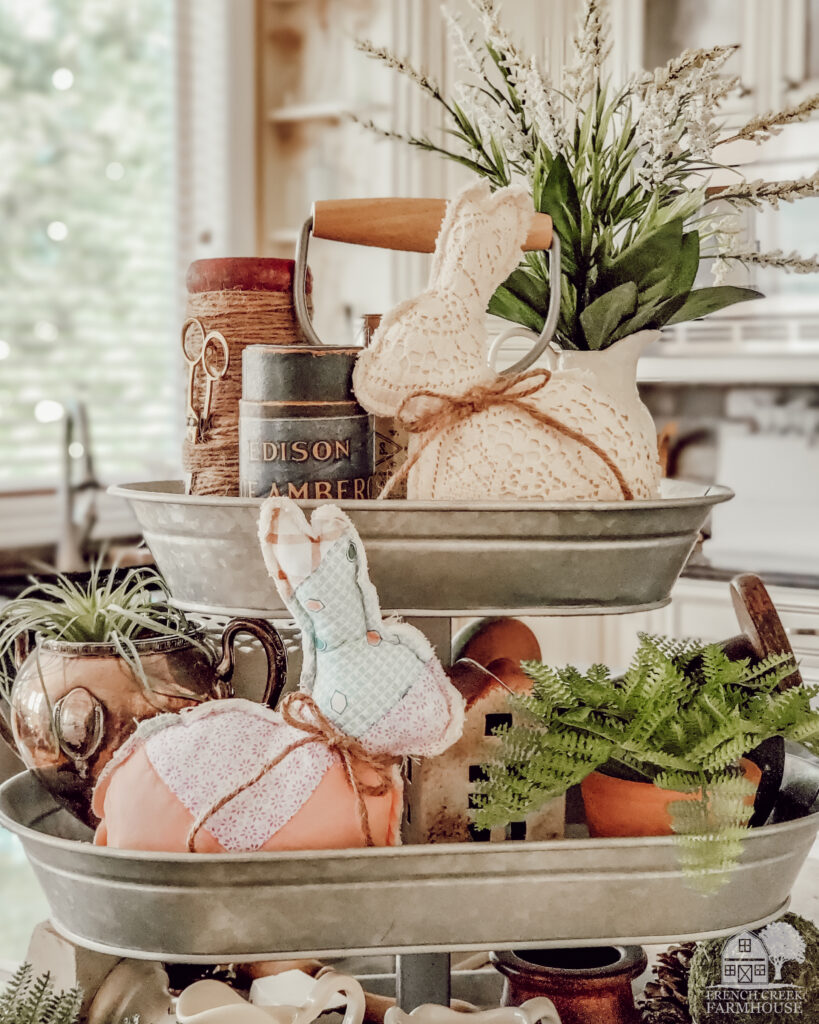
Of course, you could keep crafting more and more farmhouse bunnies in lots of different fabrics. After all, multiplying is one thing bunnies do well! Haha!
But, if you’re looking for more project ideas for using your printable bunny pattern, try some of these:
- Trace the bunny pattern onto a piece of stained wood, an old fence board, or a farmhouse-style sign blank, and then paint the inside of the bunny outline using chalk paint. Here are some of my favorite craft signs for farmhouse projects:
- After laminating the entire printable bunny page, cut the bunny out of the template page using a craft knife, while taking care to keep the rest of the laminated sheet intact. Basically, you should end up with a bunny shaped hole in the middle of the page. Then, use the template as a stencil with a paint dauber. Pounce the dauber onto a plain linen pillow cover, and let the paint dry. I recommend using a high quality fabric paint for this. Add button eyes and a pouf for the cottontail to embellish.
- You can change the scale of the printable bunny pattern if you want to make it bigger or smaller. Then, trace the bunny pattern of your preferred size onto craft paper, burlap flags, or even old book pages to make a fun spring banner. You can attach the banner to your fireplace mantel or anywhere you want to add some bunny love!
Beyond making these farmhouse chic bunnies, I hope that I’ve given you lots of ideas for how you can craft up some sweet decor using my free printable bunny pattern!
I would love to see what you create. Don’t forget to tag me on Facebook or Instagram with your projects, and I’ll make sure to re-share them in my stories!
If you enjoyed this project, be sure to sign up for my newsletter, and never miss another DIY! You’ll get access to all of my FREE printables, patterns, and lots more!
To find more of my past DIY projects, just click on any category:
Crafts | Sewing | Fixer Upper Farmhouse Renovations

Do you love hunting for vintage treasures as much as I do?
Get my free vintage & junk hunting journal
Let’s be email pen pals! Sign up to join our community, and get your free printable PDF Vintage Hunting Journal. This is so good!
I love your story of your grandma's sewing machine. I inherited my mum's old machine when she upgraded and it served me well for many years! Your bunnies are just lovely. They'll be a feature at the next Handmade Monday 🙂
I love your bunny project and the blanket stitch tutorial. I can so appreciate your sewing machine story. My dad bought me my first sewing machine in collage, a Sears Kenmore. I loved it and it lasted for decades until it couldn't be fixed. I bought a new one the same day, but it doesn't have the meaning of the first one.
The sewing machine stories… When I moved from my parent’s home into an apartment, I had to purchase many things. Sometimes new things in the kitchen and especially Christmas ornaments felt so impersonal; they lacked history! My sister still jas a Pfaff sewing machine my mom bought, I think used, around 1950, before so much fancy and electronic stuff. She has been able to replace the belt when needed. It was in a cabinet that closed and a chair with a handle on the back slid in so it was very compact. Good memories of Mom sewing!
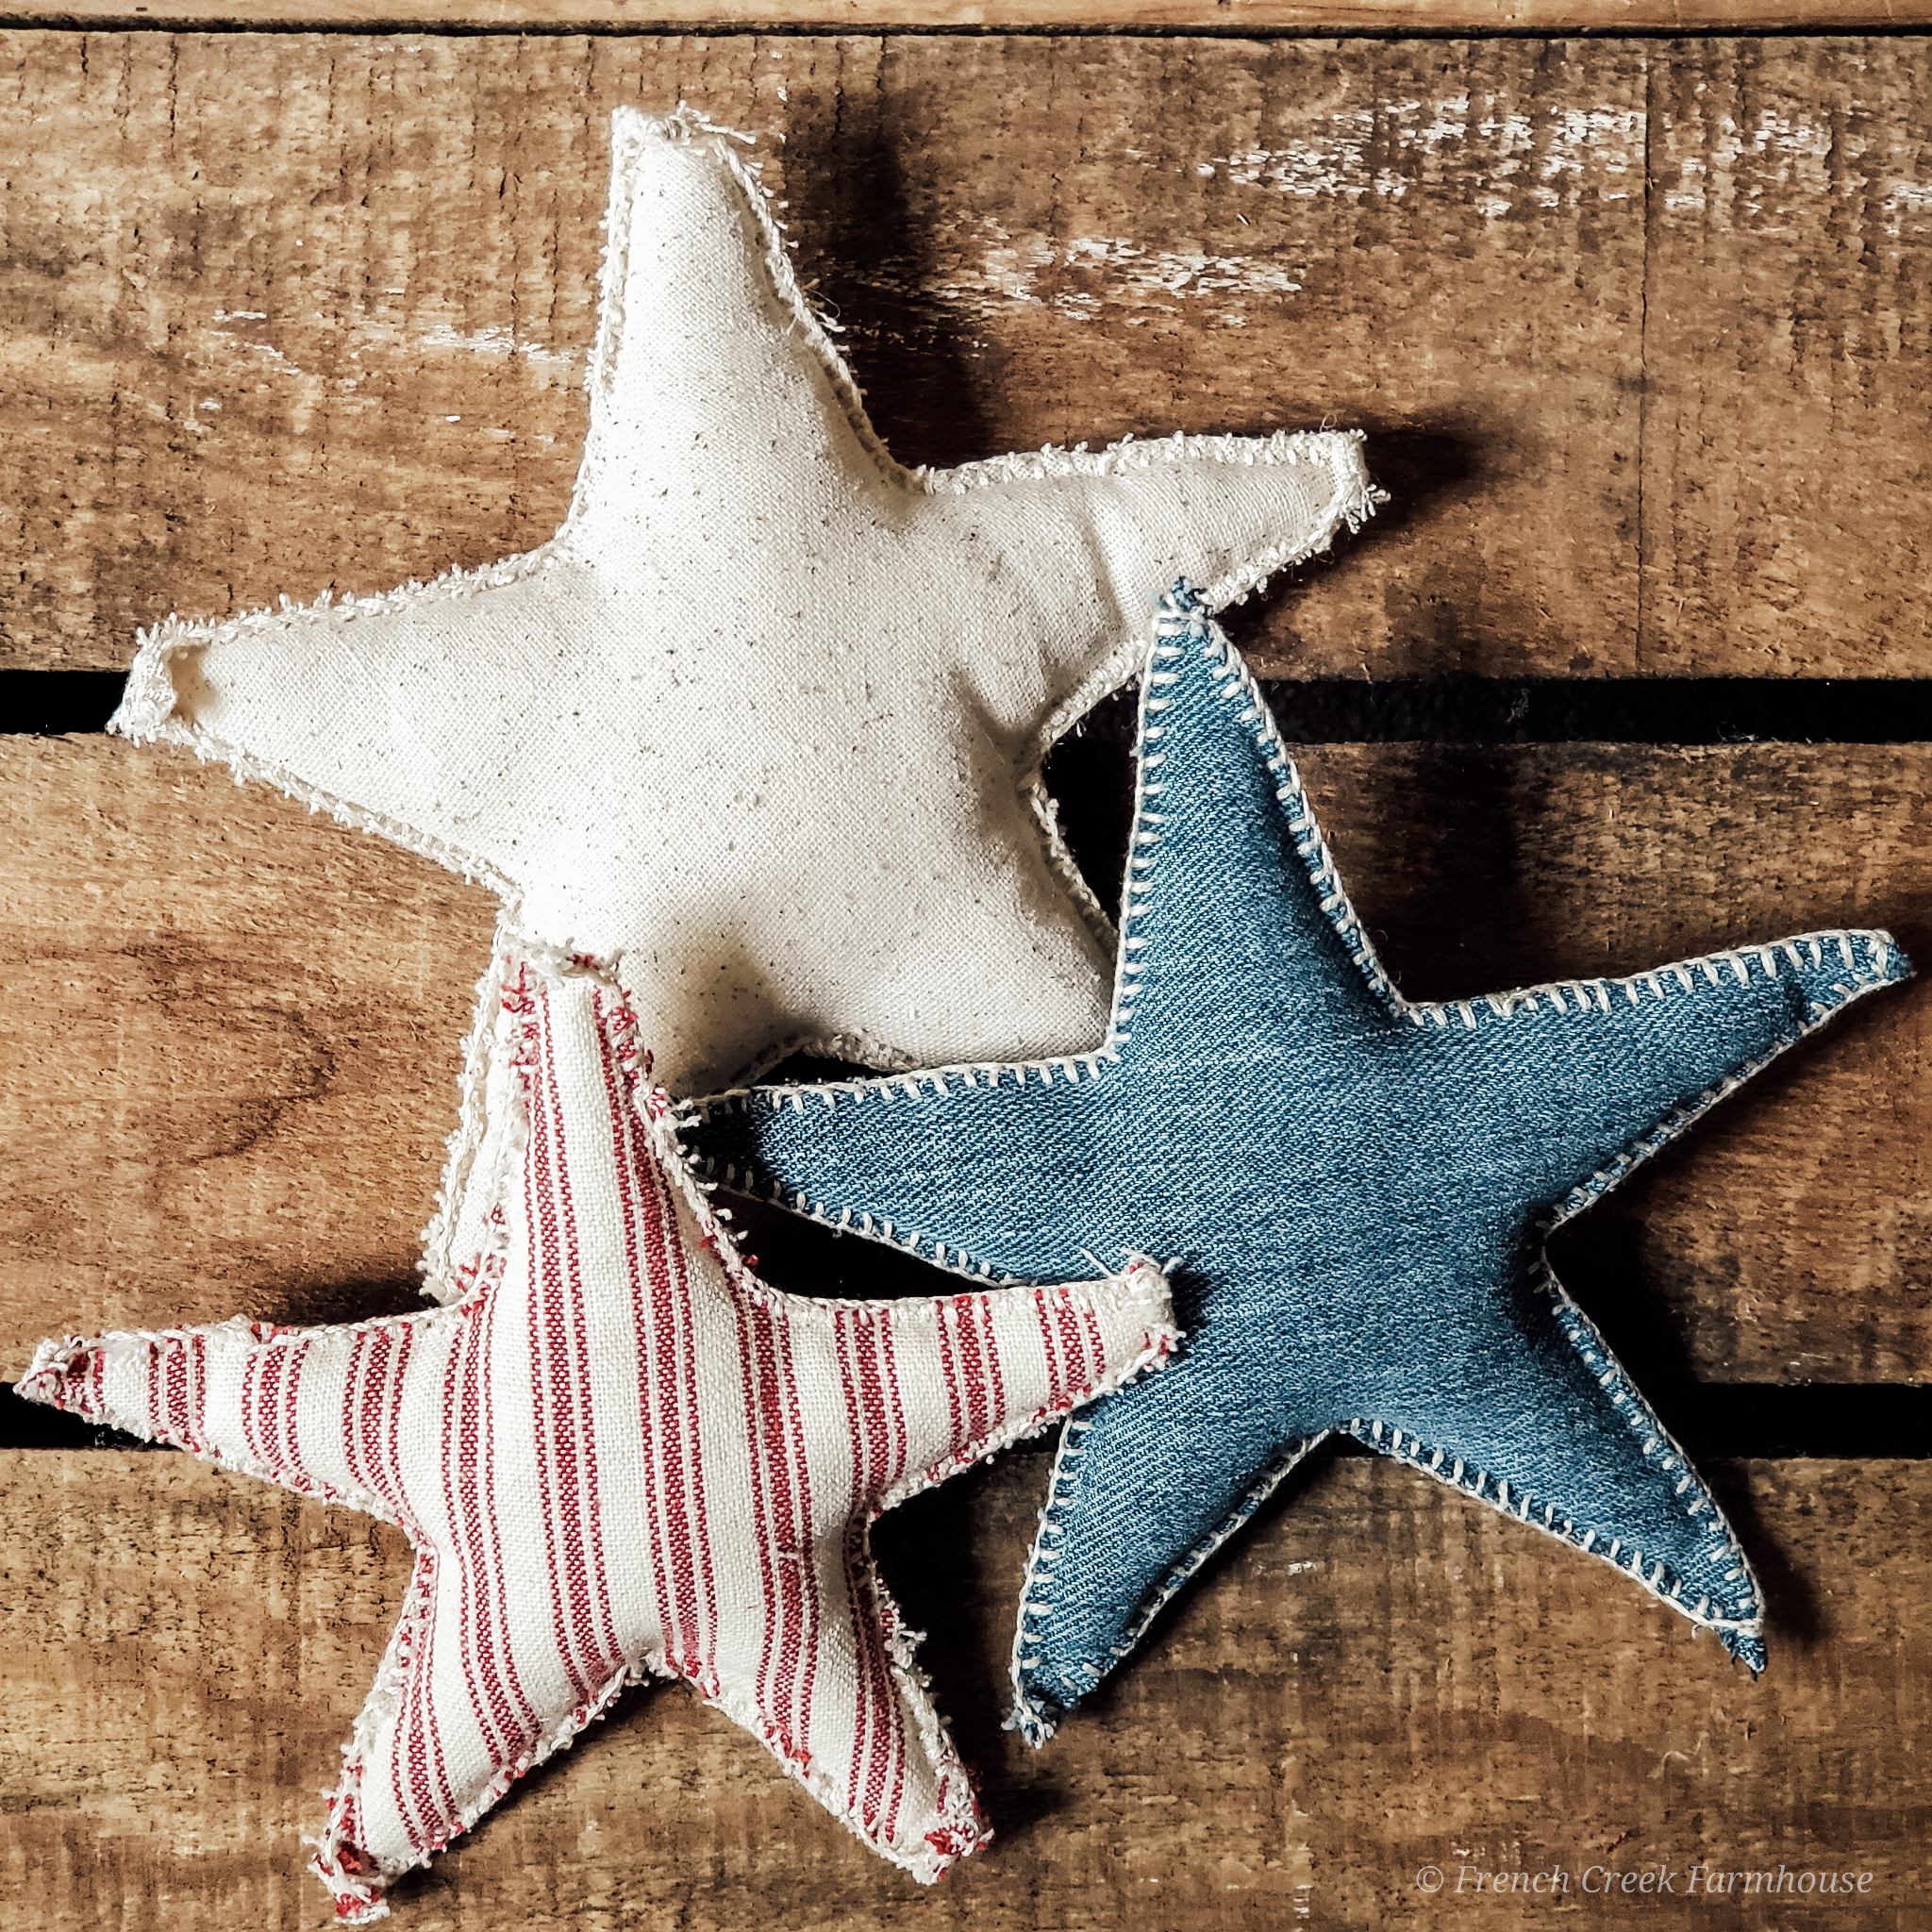
Thanks Kristi for the bunny and star patterns! My daughter and her family became foster parents for babies and we both love to sew. She also makes her own blankets for the babies. We both made burp cloths out of cloth diapers, so always trying something new! Thanks again!
You’re very welcome, Cheryl! That makes my heart so happy to hear! ❤️ I hope you’ll share some photos of your completed projects on Facebook or Instagram–I would love to see them! xo, Kristi
Thank you for the bunny pattern. I have a three-year old great-granddaughter that is going to love her new bunnies! I think I might also cut out a couple from some scrap wood to put in my garden.
No matter what I do, I cannot get the bunny pattern from you. I have entered my email twice now, I have checked every place I can check and I am not receiving anything from you. 😩
Thank you for the Bunny pattern, it’s so cute, and just what I have been looking for. I plan to make a few as gifts, and one for my coffee table too, loved your story too! Thanks again!
I can’t find where I can get the template. I clicked on the page and it doesn’t give me anything.
It says to put your email in but there is no place to put it.
Thanks Kristi for this adorable pattern. Plan to make a bunch of these for gifts. One question: do you use 6 strands of embroidery floss when doing the blanket stitch?
Hi… How large did you make your template? Thanks!
merci pour ce joli lapin.
De rien! Je suis tellement contente que tu l’aimes! ❤️